
Originally published at: https://www.ronenbekerman.com/making-of-douro-valley/
For the first making-of feature of 2020, I’m very happy to present eleven’s “Douro Valley” project behind the scenes! eleven is a young London based studio founded by Aneta Gesiorska and Joana Maduro, and this is their studio’s inception work. Lots of good stuff in this one, which also serves as a field guide! Enjoy.
About eleven visualization
Eleven is a young London based visualization studio with their primary focus on architecture, interior and furniture design, and interest in the newest of AR and VR solutions.
We are both very excited about the opportunity to share with the community a project that proved to be truly important to us. We’ve been following Ronen’s blog for as long as we remember, and having our work featured here is a big stepping stone for us.
We hope that anyone who reads through our Douro Valley story will find a spark of motivation here. And for the times you will find yourselves asking:
“Do I comfortably stay where I am, or do I take a leap of faith and try something new, exciting, and slightly scary.”
You’ll eventually find this extra push that we found when working on this project.
Introduction to the “Douro Valley” Project
The project in Douro Valley will always stay in our minds as something very sentimental and groundbreaking at that time. Not because of the outcome but because of our journey throughout the whole process.
The thought of working on a personal project together had been on our mind for quite a while. We were only waiting for something special to come up. When the initial meeting with OODA architects happened in Portugal, we did not doubt that this is going to be it.
The landscape was breathtaking, designed effortless, and with open-minded architects.
We couldn’t ask for more!
We knew this could be our ticket to start managing our work as a standalone studio.
Was it worth to pause our lives for two months and focus on something that we found genuinely inspiring? We were about to find out!
The most amazing part of doing this job was that we had the freedom to do whatever we want; however, we want.
Every artist out there knows that nothing feels better than the lack of constraints. So we decided to do it all. Stills, Cinemagraphs, Animations, and Drone Tracking.
Did we know how to do at least half of it? Not really, but that’s why we needed to try.
The goal was to use this opportunity to create material for a thoughtful online portfolio of who we are and what we aspire to as artists and eventually as ‘eleven.’
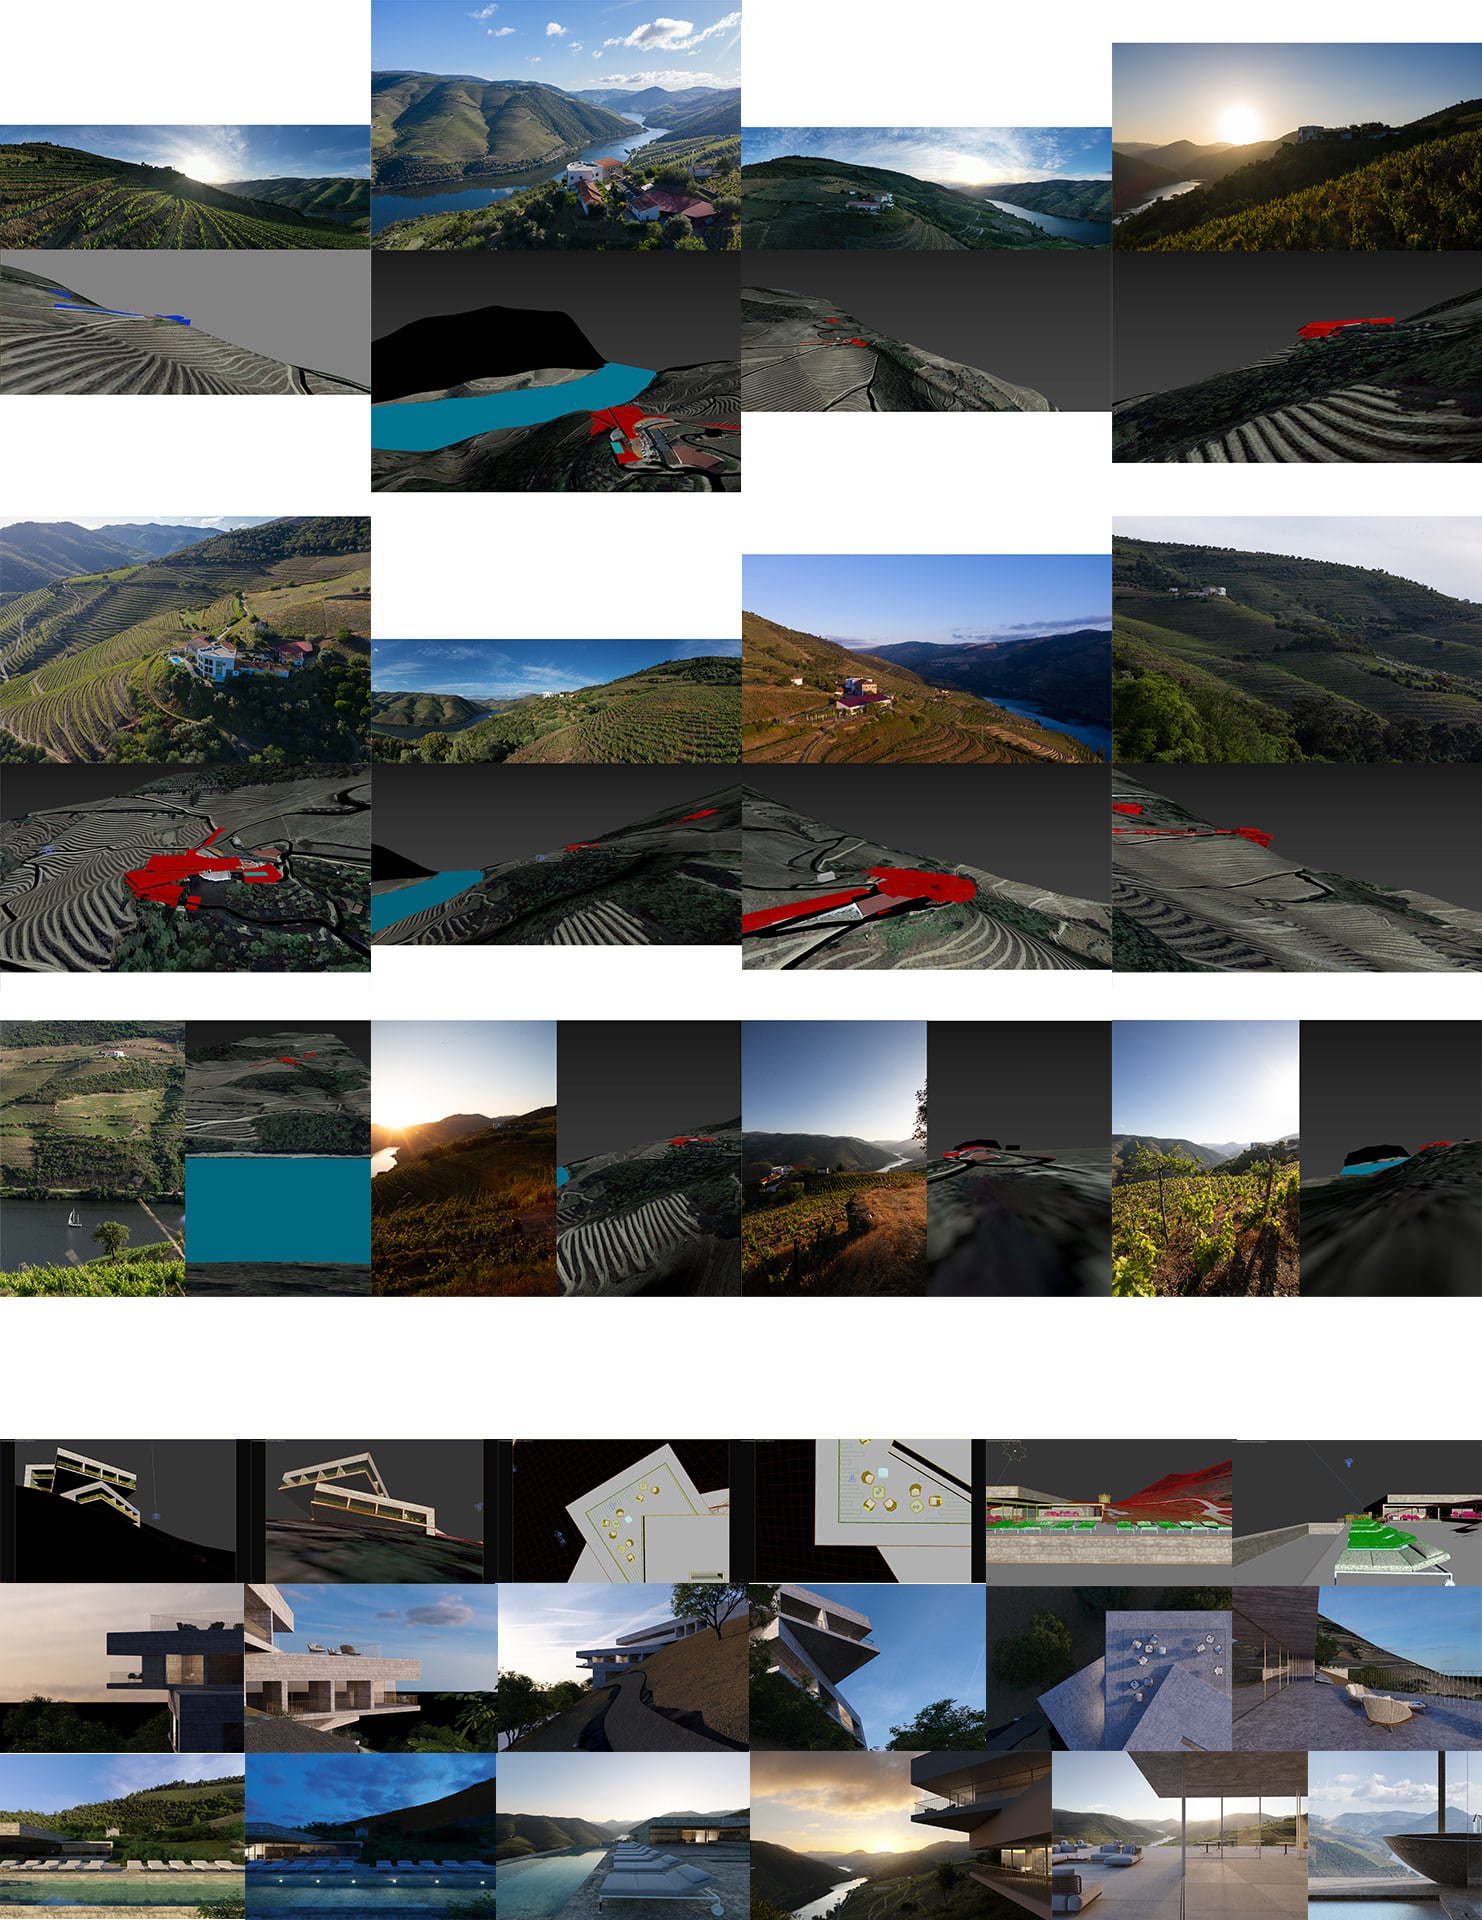
[av_masonry_gallery ids=’125882,125881,125880,125879,125878,125877,125876,125875,125874,125873,125872,125871,125870,125869′ items=’-1′ columns=’flexible’ paginate=’pagination’ size=’flex’ gap=’large’ overlay_fx=” container_links=’active’ id=” caption_elements=’none’ caption_styling=” caption_display=’always’ color=” custom_bg=”]The Design of Hotel and Winey on Douro Valley
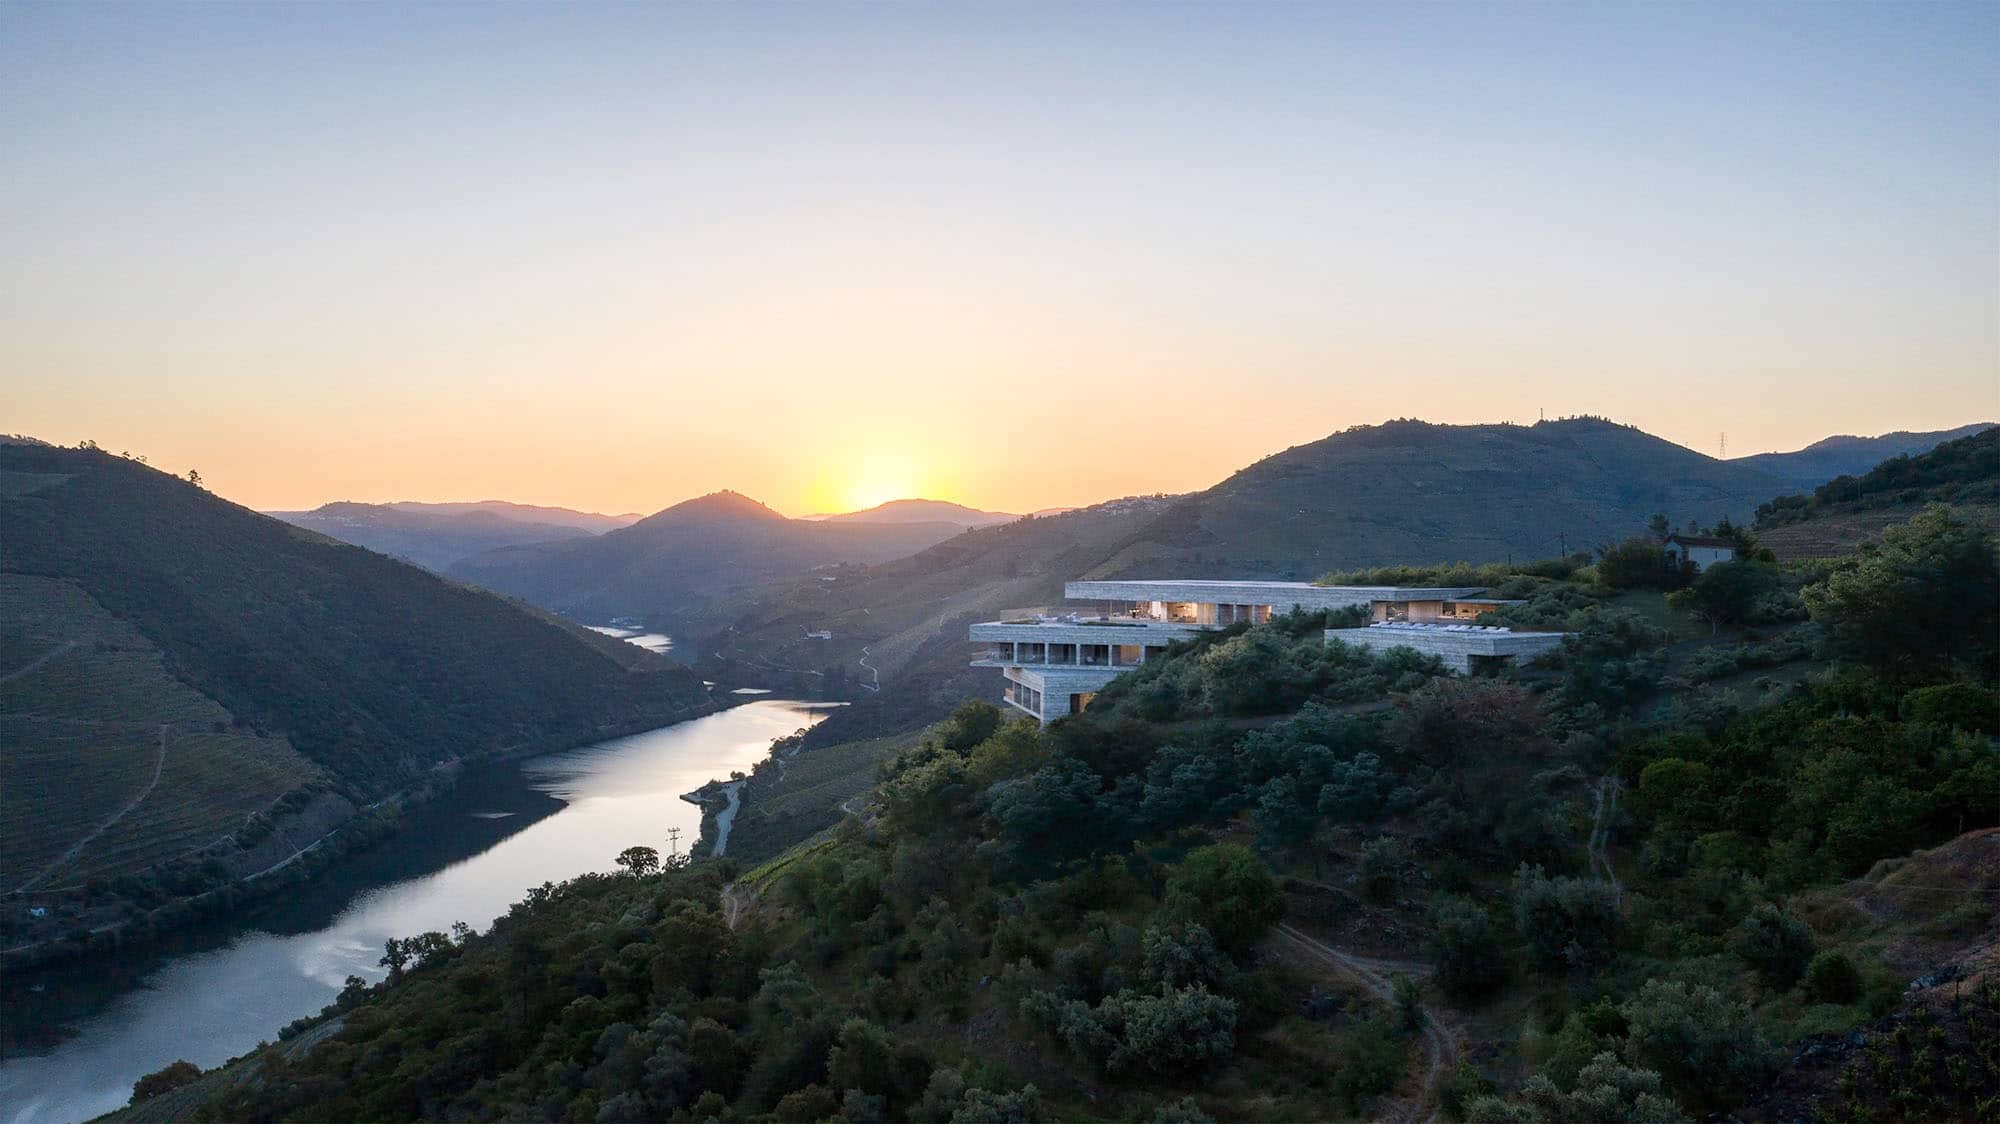
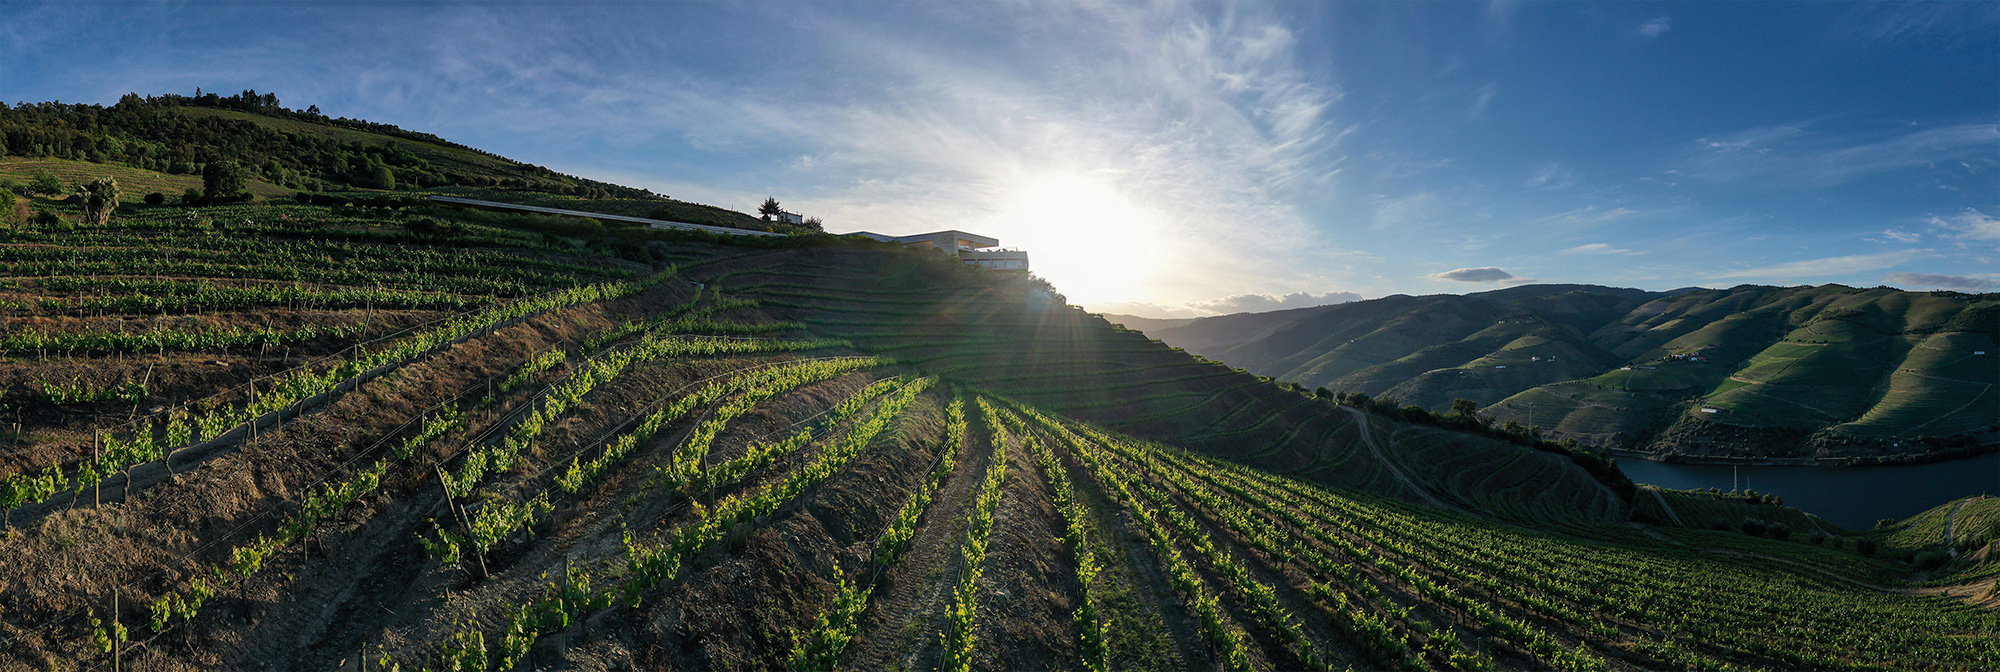
The architecture that needed to be portrayed was one of OODA’s design proposals to a ‘Hotel and Winery on Douro Valley’ competition.
For those not familiar with the region, Douro Valley is a UNESCO-listed site in central-northern Portugal, best known for its picturesque hilly landscape and for being one of the oldest wine regions in the world (the white port here is to die for!). The new complex was meant to be located at the site of an existing hotel in Quinta de Santo Antonio with the proposed design to replace the old structure.
The design is inspired by the local landscape and clean, geometric architecture of early modernism, featuring overlapping concrete volumes that seem to mimic the form of sloping vineyards.
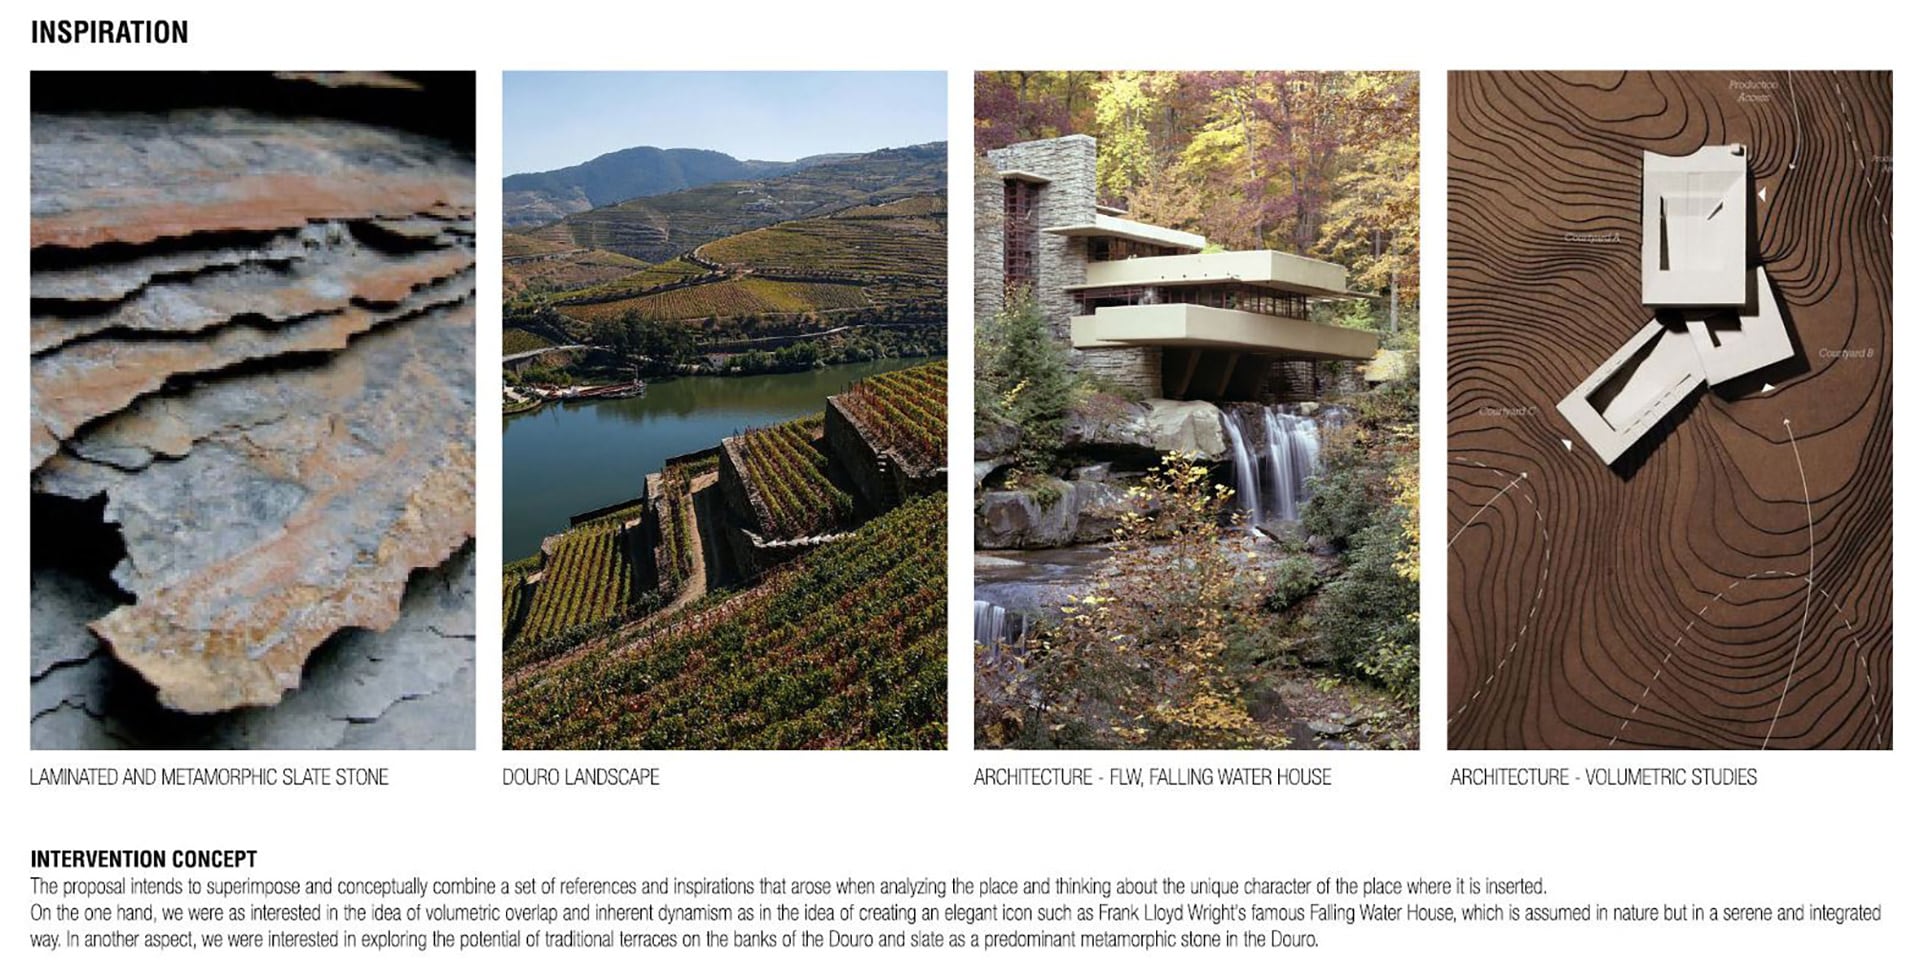
Inspiration board from OODA architects
Project Setup and Art Direction
It’s probably worth mentioning that when we decided to take on this project, we were far from being a well equipped and well-organized team.
It all started in our shared apartment at a tiny IKEA desk under which we somehow managed to squeeze two workstations (no space for such luxuries as double screens at this point). It’s been months now since we’ve rented proper office space, but looking back at those photos from apartment 11 always brings back good memories.
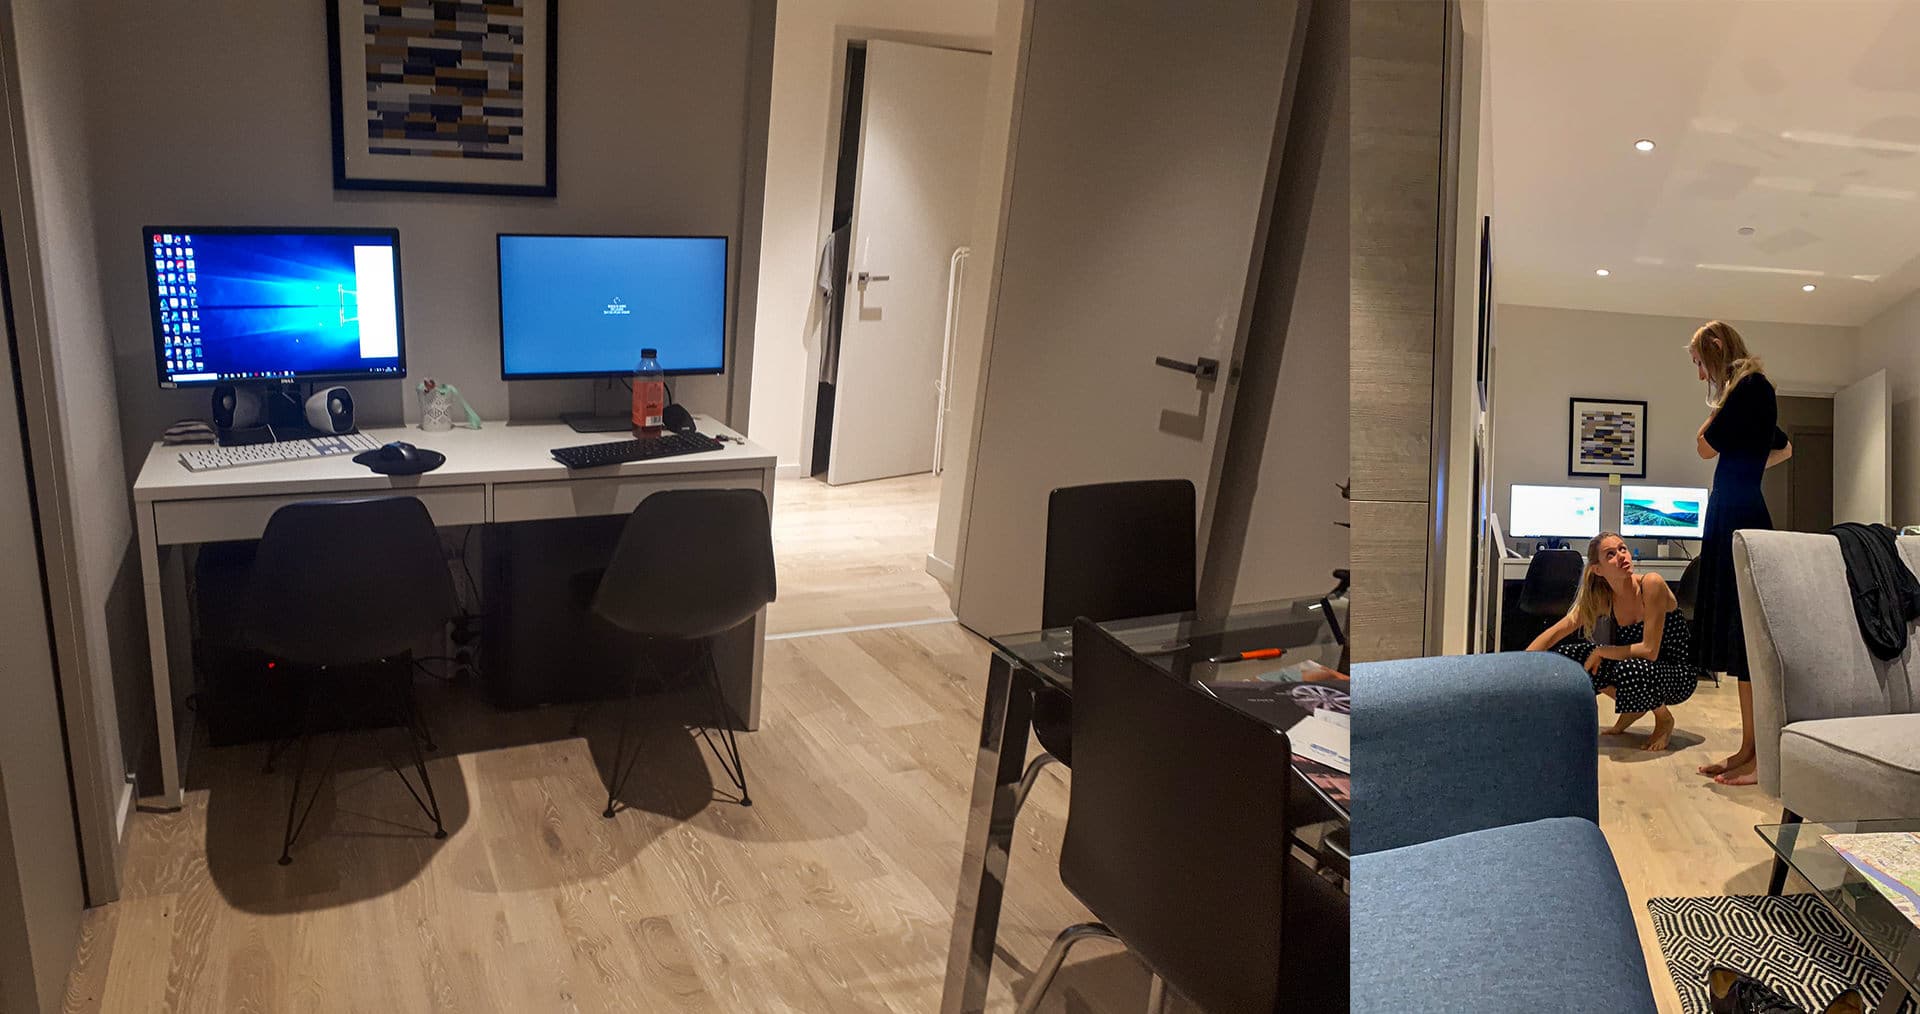
Our first setup and never-ending discussions over project mood board.
When preparing the initial art direction and finding inspiration, we could rely on three sources here:
- Recreating the mountain slope in 3D and exploring the possible views from there. For the terrain of the model, we recommend either Google Earth + Reality Capture combination or the Google Maps plugin in Sketchup.
- Exploring visual references:
- For the composition – with the Portuguese nature of the project in mind, we found some of Fernando Guerra’s photos genuinely inspiring for this particular project (especially one of his top-down shots of pool space, that we wanted to recreate).
- For interior design and accessories, as the client didn’t specify these, we’ve decided to use this as an opportunity to reach out to some furniture brands whose design we enjoy. Some of the furniture selection came up from the partnership with Zeitraum furniture and Parachilna lamps.
- Going to the site and fully indulge ourselves in the Douro Valley landscape. What we’ve learned from our experience so far is that you can do all the 3D preparation and research in the world, but nothing can open your creative mind better than experiencing the space in the flesh.

A part of our moodboard for this project
Some of our early composition process.
Douro Valley Site Visit
As our photoshoot equipment was pretty scarce, being able to rent a camera, lenses, and a drone on fatllama.com was invaluable. We went for Canon 5D Mark III with Canon 24-105mm and Canon 70-200mm plus a DJI Mavic 2 Pro. The option to automatically stitch panoramas with the DJI app was particularly useful when creating material for 3D reflections.
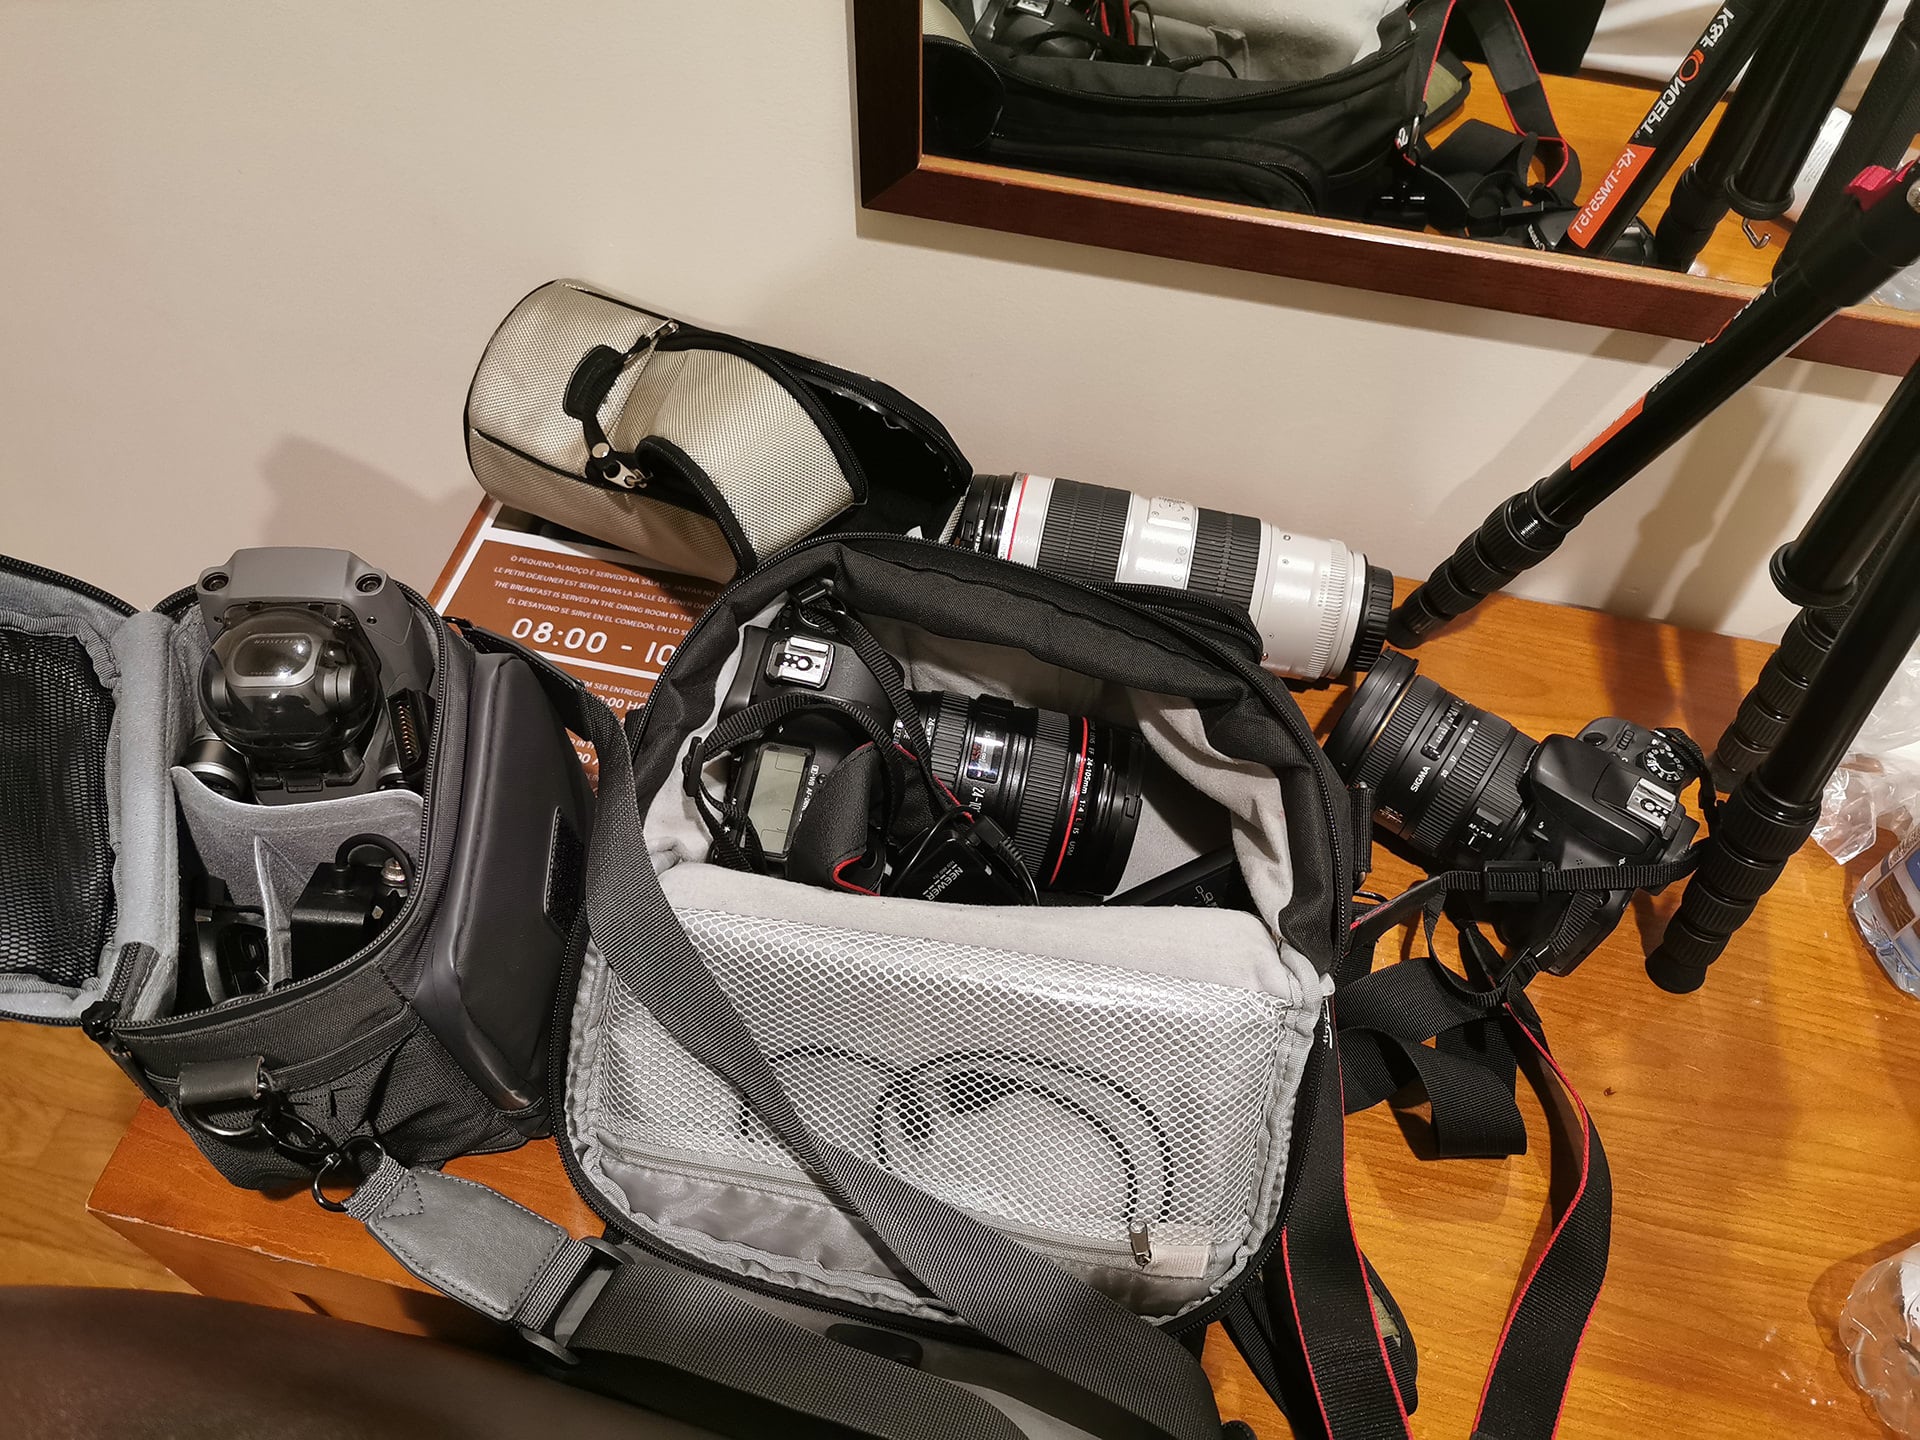
Rented equipment
Having all our gear ready, we started our 2-day marathon of driving to Douro Valley at 2 am (and those steep slopes are not easy to operate at night), having a few hours of sleep just to wake up before dawn and rush to the project’s site.
What we had to face was:
- The fact that we had no idea what the actual site around the hotel looks like and having to jump around the vines trees in a cold dark morning.
- A giant German Shepherd-looking dog that was not pleased by the fact we invaded his territory.
- We had almost no experience in flying a Mavic and desperately trying not to hang it on an olive tree or sink in the Douro Valley river.
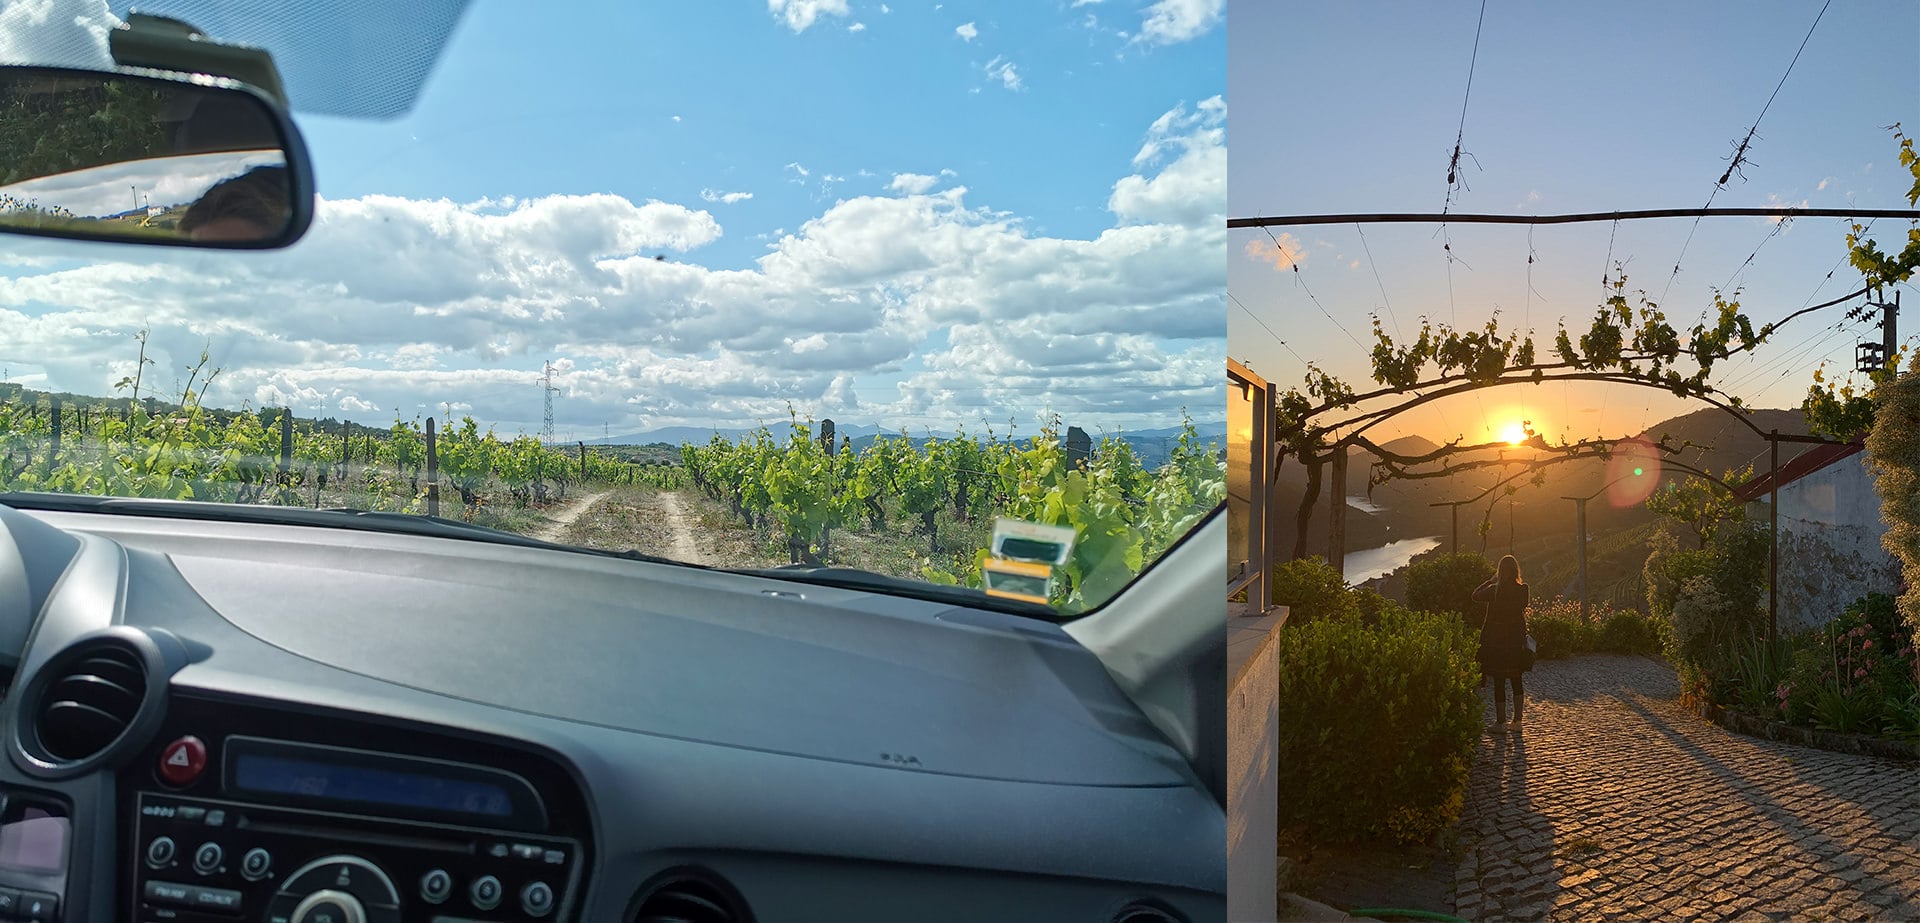
Road to Douro and first rays of morning sunshine.
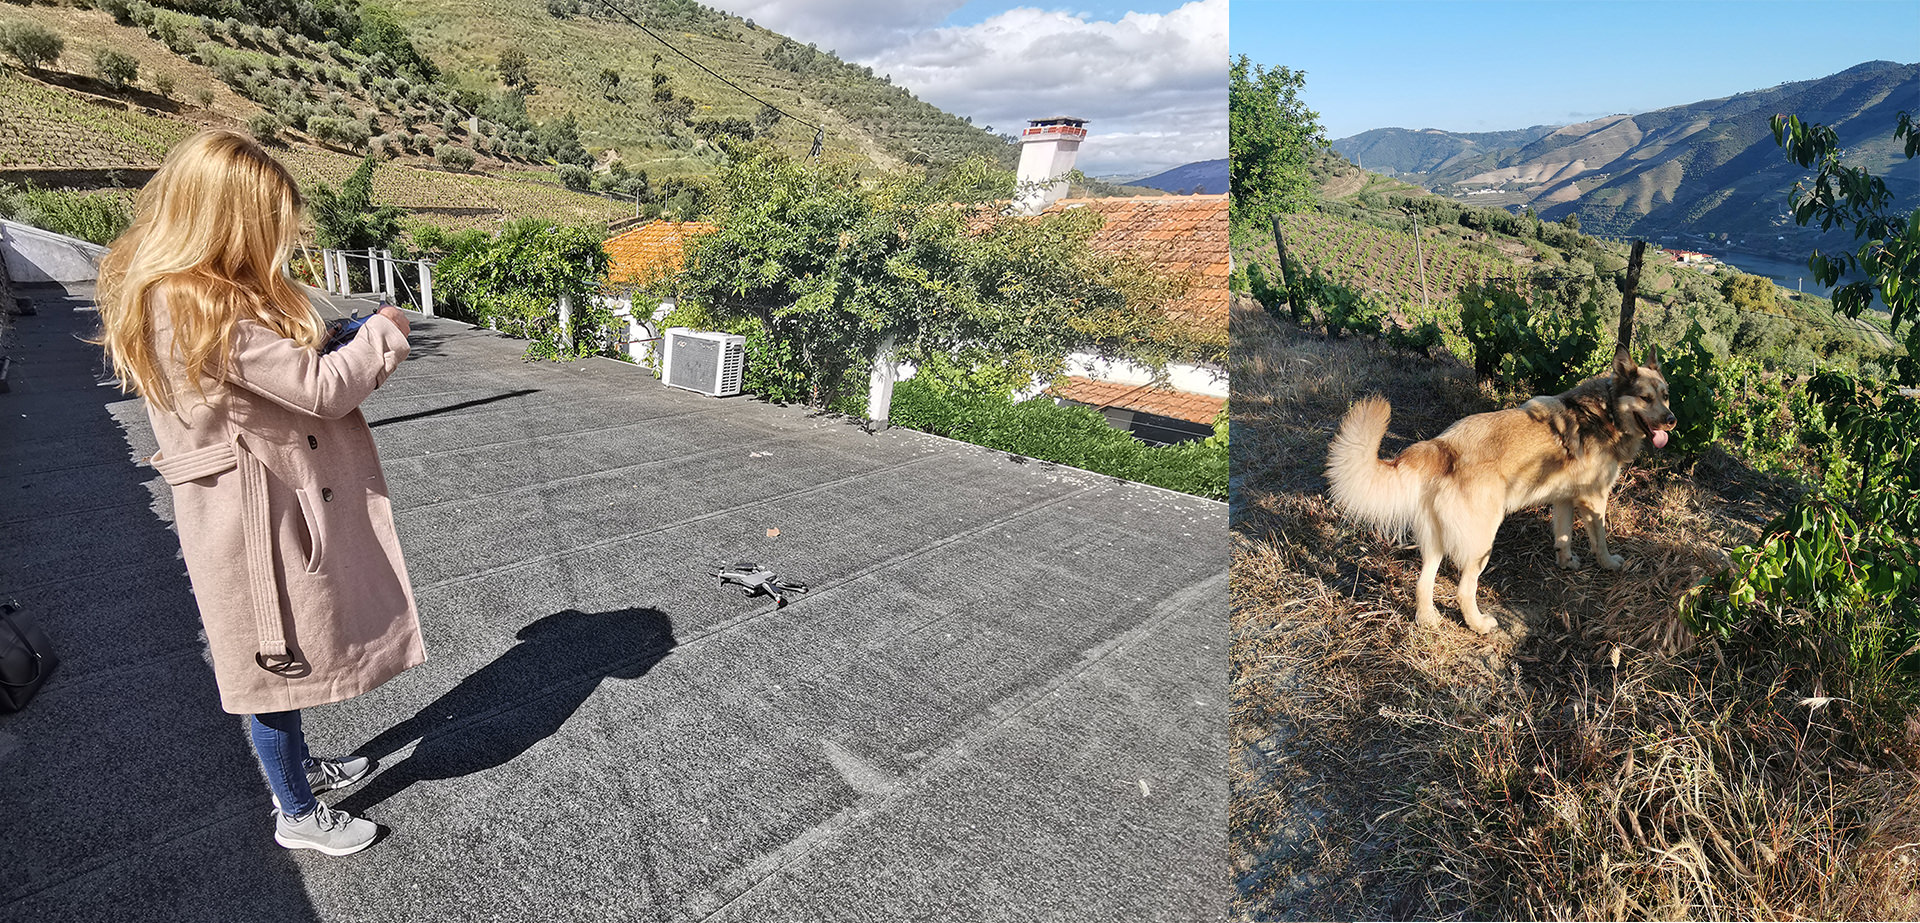
First attempt of flying Mavic and Gaspar, our best Portuguese companion (he didn’t look this friendly at 5am).
Once the sun started rising, we realized we made the right call. The views were absolutely breathtaking. Joana somehow managed not to crash the drone (although it was close), and Gaspar, the dog, became our best companion. We befriended the owners of the hotel on-site, and they offered for us to stay the night at theirs. This is some of the material that we collected during those two amazing, hectic days:
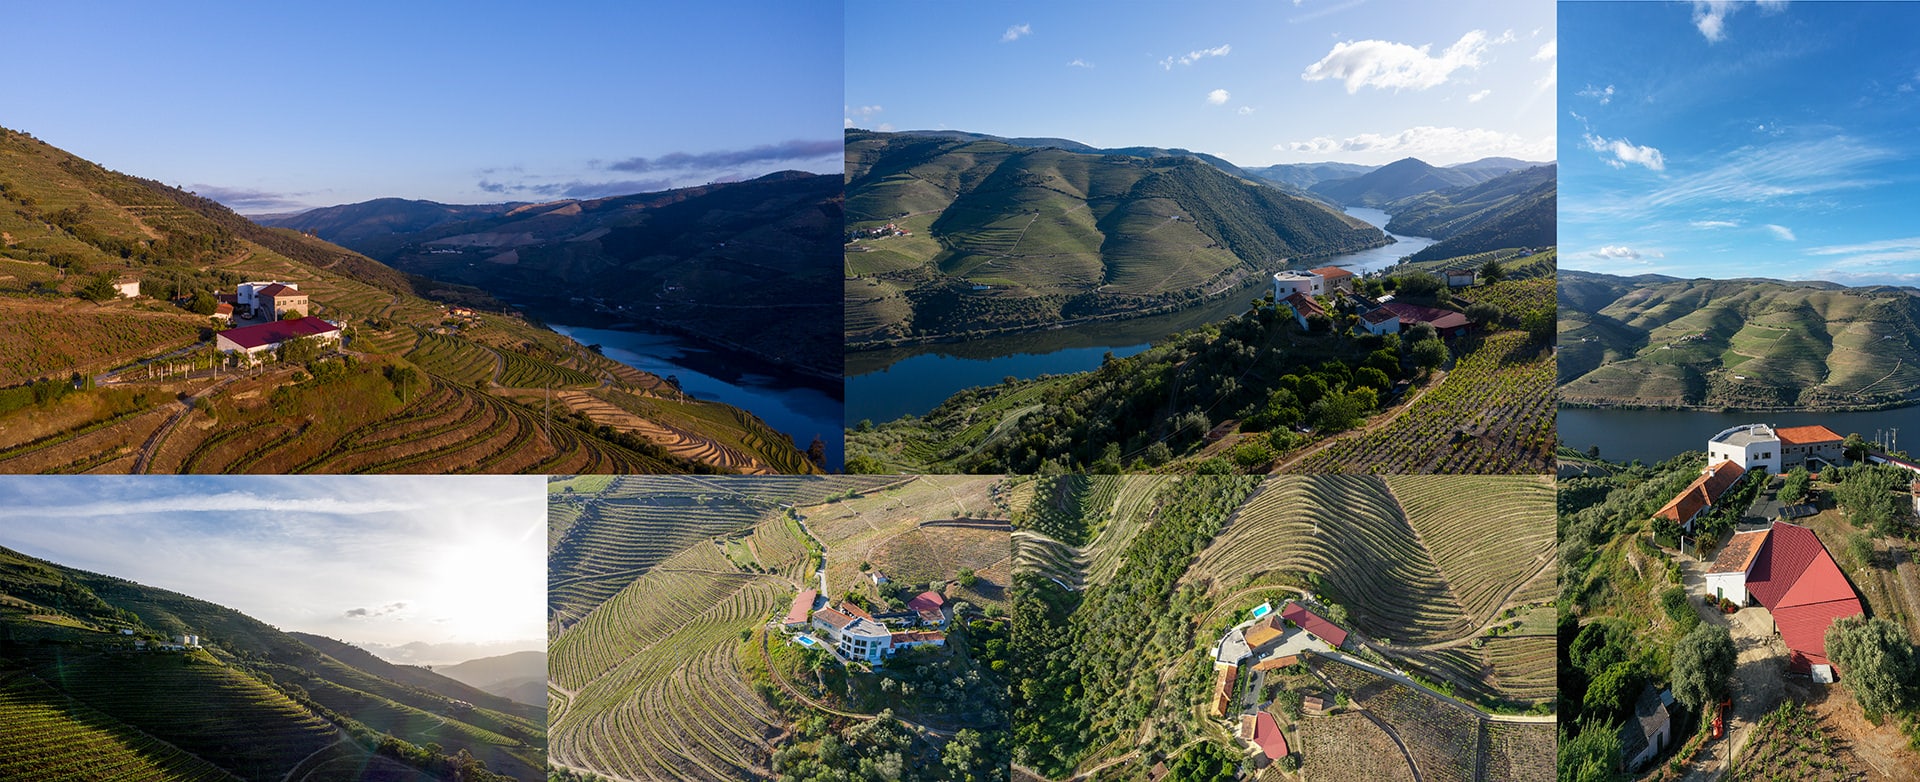
Site photography, Mavic 2 Pro
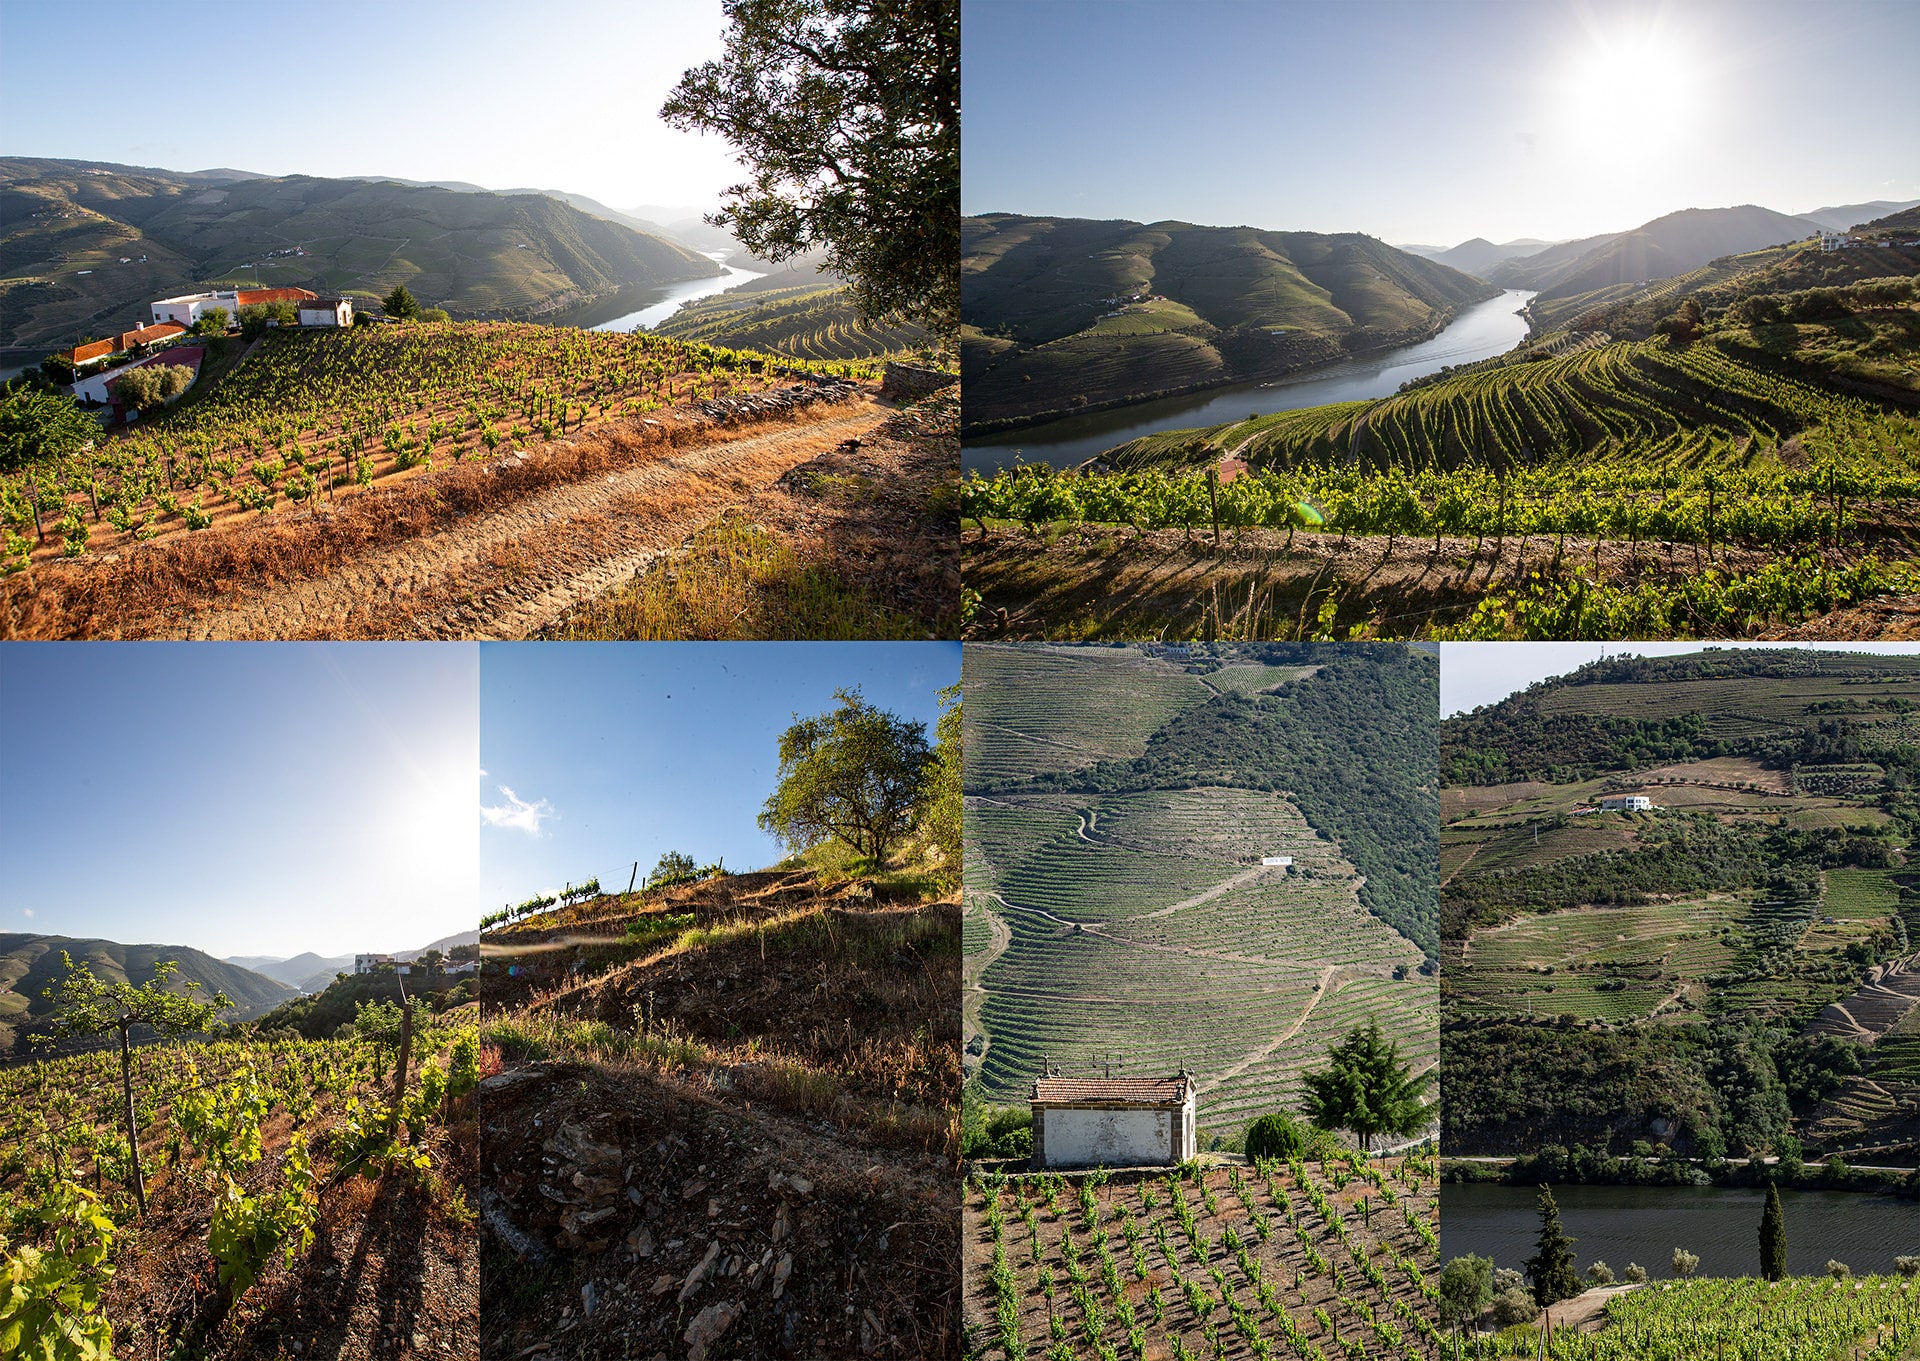
Site photography, Canon 5D
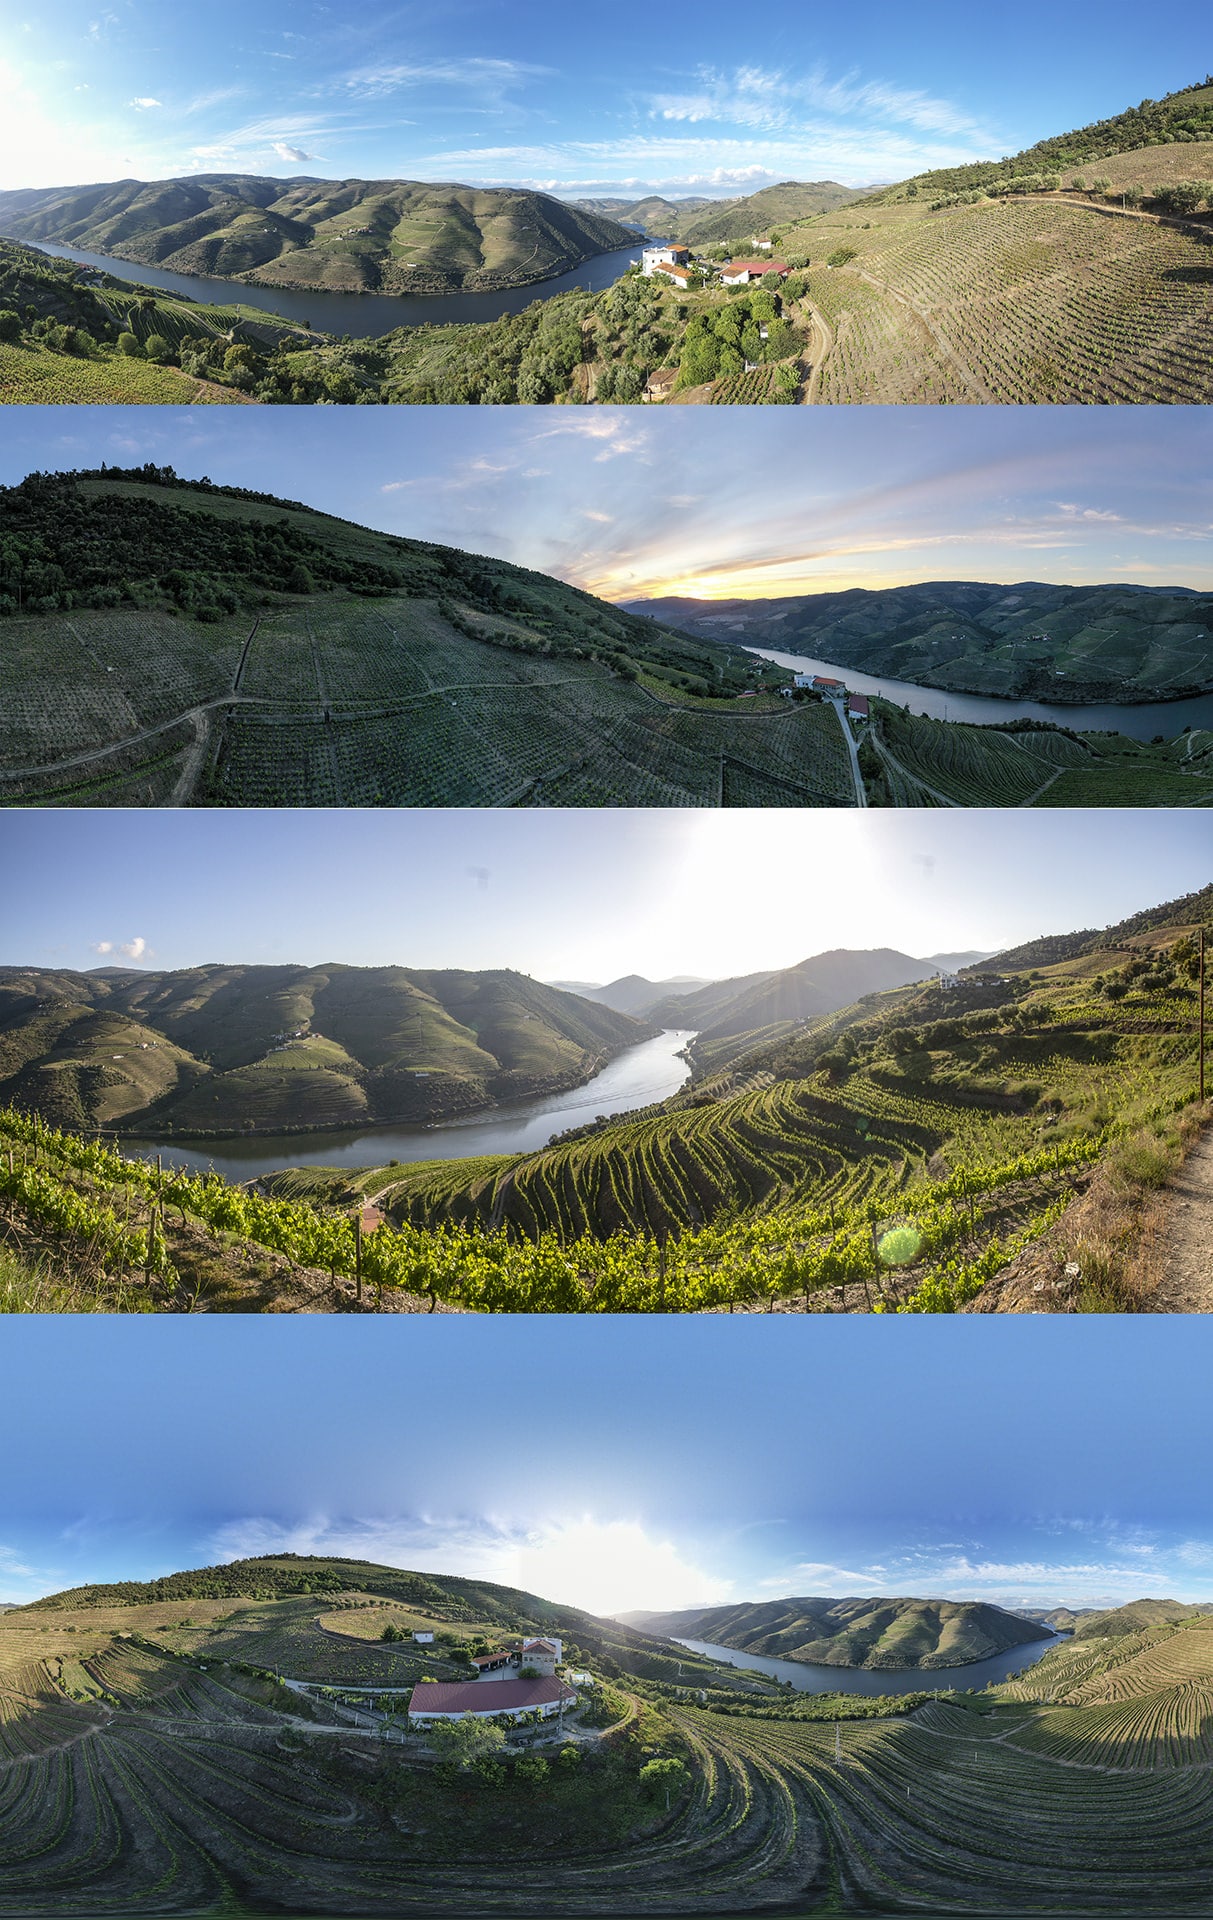
Panoramas for the backplates and reflection spheres – stitched with DJI app and Kolor Autopano.
As Douro Valley is famous for being a wine region, we couldn’t stop in one of the local wineries. Quinta do Portal with its building designed by Alvaro Siza is an absolute must go, not just because of the outstanding white Port but also mind-blowing kitchen.
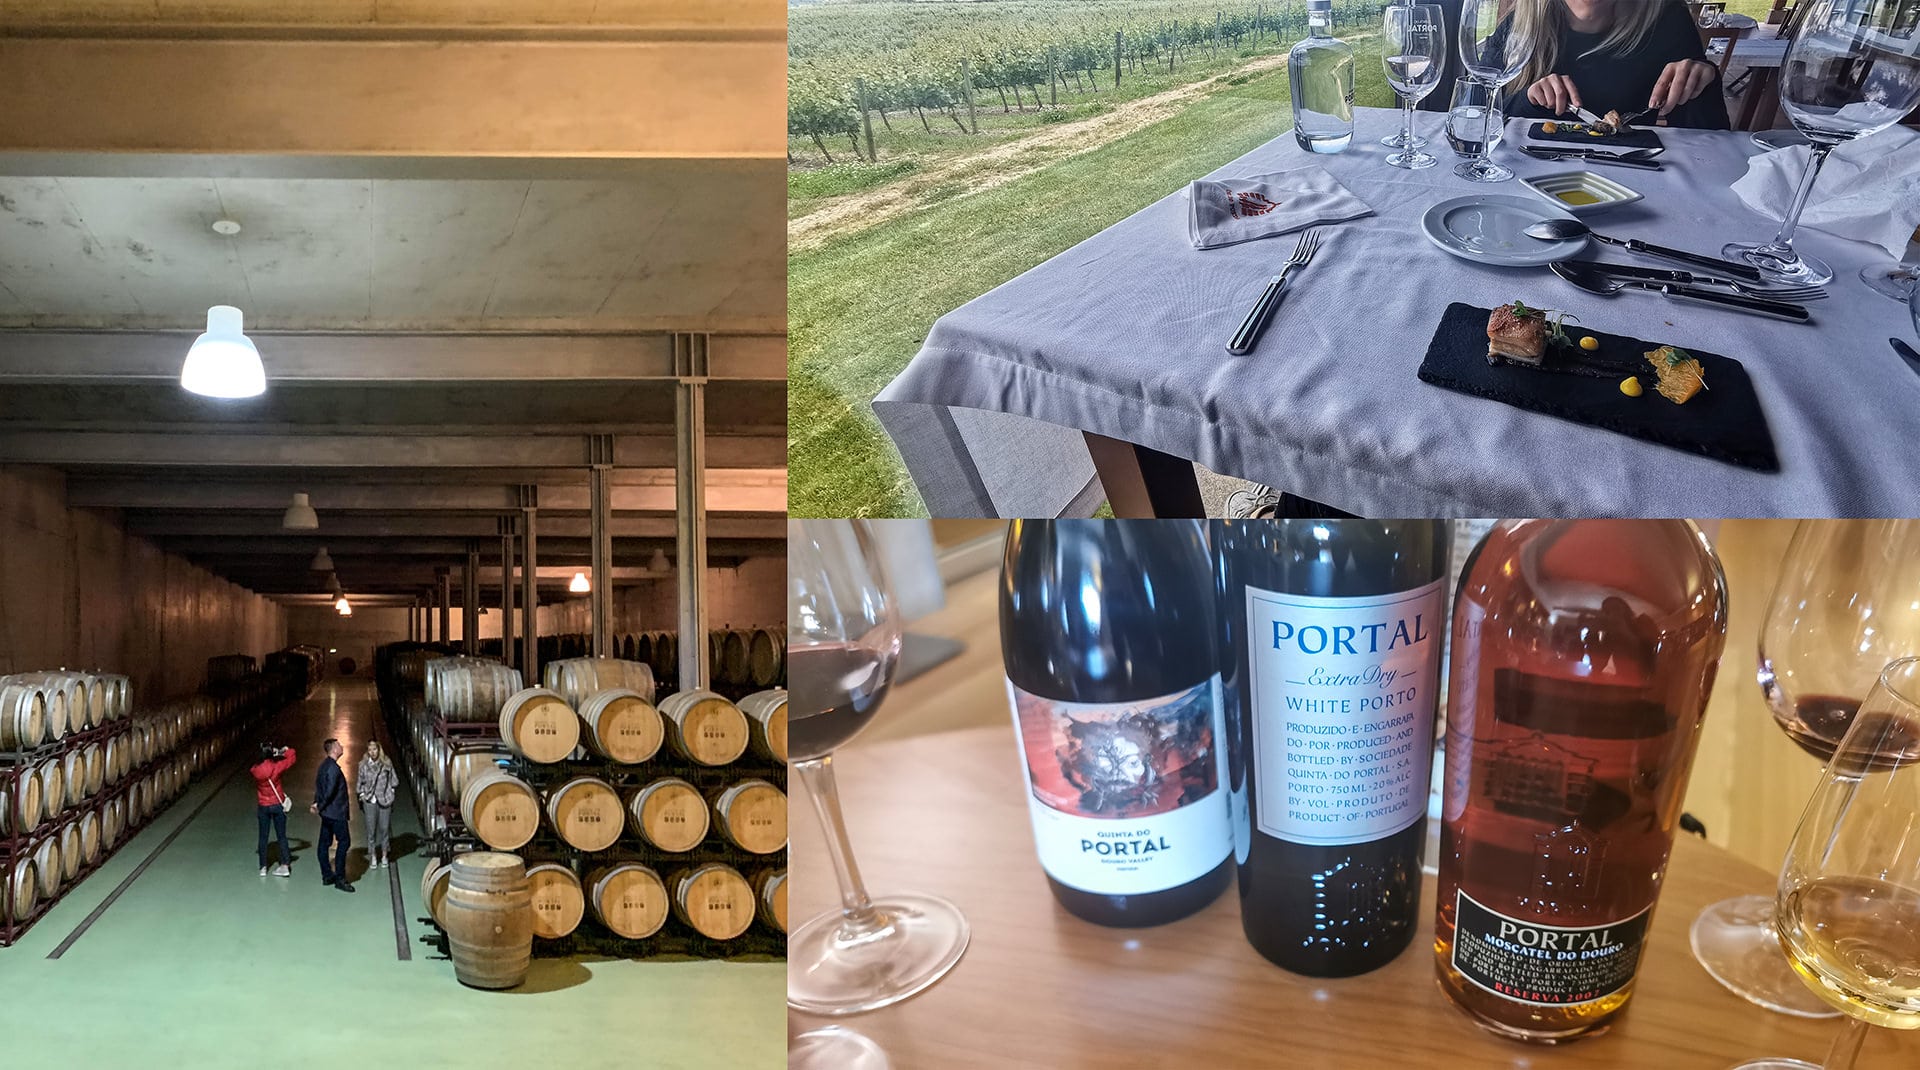
Quinta do Portal
The Production Stage
Software used in the project:
- Autodesk 3ds Max
- Corona Renderer
- GrowFX
- SiNi
- Reality Capture
- ZBrush
- Knald
- PFTrack
- Marvelous Designer
- Megascans Bridge
- Quixel Mixer
- Kolor Autopano
- Adobe Photoshop
- Adobe After Effects
- Drone Tracking
Not having much experience in footage tracking before this project, we felt particularly excited about exploring this process. Thankfully the drone movements used in architectural photography are rather simple and not particularly difficult to recreate in a 3D environment.
For tracking the movement of the camera, we used PFTrack. Quite a few free tutorials are explaining how to use it. The ones we found the most useful were these two Youtube tutorials by TunnelvizionTV.
The process itself involves:
- Loading our footage into the program.
- Identifying key areas that are clearly visible in most of the frames and setting the software to track the movement of these.
- Letting the software compute a network of additional points for a more precise calculation of the movement.
- Creating the camera based on the calculated movement.
- Adjusting the scale of the scene and placing 3D marks in the points that we want to be able to identify later in 3ds Max environment.
- Importing the camera and 3D marks to 3ds Max and placing the camera in the right position according to our geometry.
- As we used Corona on this project, Corona Renderer’s camera was placed to follow the movement of the camera imported from PFTrack.
- The rest is matching the lights and atmosphere of the footage (circular panorama used for world reflections), rendering, and compositing in After Effects.
A video of the whole process can be found below:
Photogrammetry (Indoor and outdoor)
We couldn’t have worked on this project without using this fantastic and highly addictive technique. Below you can find an explanation of our technical approach for some of the objects we’ve created and seen how different the workflow can be depending on the nature of the object, materiality, and weather conditions. We hope that some of these guidelines will inspire you to have some fun photo-scanning the world!
The Olive Tree (Outdoor photo-scanning)
Outdoor photo-scanning is probably the first step most people take when starting to explore this technique as a camera is the only piece of equipment needed.
Although there were plenty of olive trees on site we could have photographed, the fantastic weather that Portugal is known for doesn’t help – the sunlight provides uneven lighting around the objects and casts hard shadows. For once, the cloudy, gloomy weather in England was good for something! Fortunately, there’s an olive tree nursery garden in South London that is open to the public and turns out nobody will question you even when spent one hour maniacally photographing a single tree like this:
It might look easy at first sight, but there are some aspects we have to consider when being outdoor at the mercy of the weather and Nature:
Our priority was to maintain the same light conditions in all photos from all different angles. You can imagine that being fast and having a steady hand is crucial but also helps set our camera to manual mode, which allows us to keep the same exposure and small aperture size to avoid as much depth of field as possible.
Knowing how difficult it is to get things right at first, we did a few different photo sessions with the camera further and closer to the object. That directly affects the quality and level of detail that can be seen later in the mesh. It’s no surprise that we got better results when at least 75% of the frame was filled with the tree trunk, avoiding wasting pixels on the surrounding environment.
For the alignment job, we’ve used Reality Capture, which is famous for being one of the most efficient software for photo-scanning objects out there.
After loading the images into the software, they’re all aligned and inspected (using the Inspect tool). The tool helps us identify how good the photo overlap is and whether there is any part of the object missing.
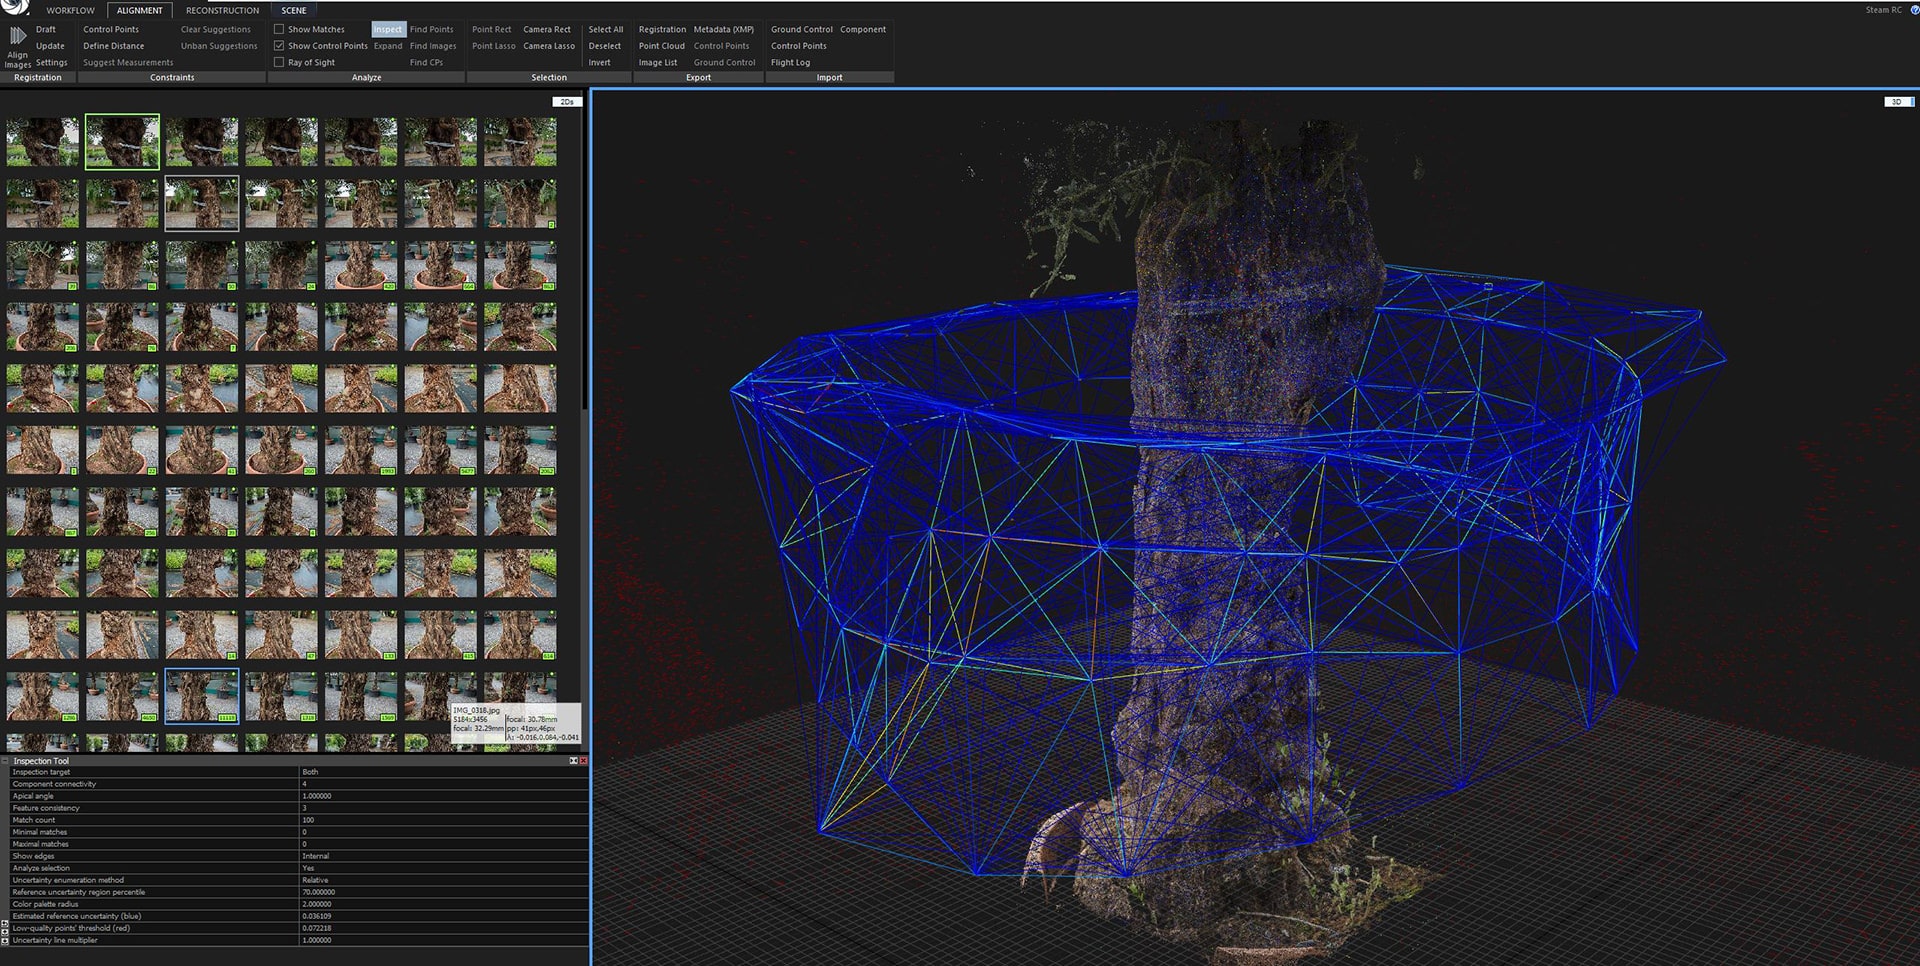
As you can see, a single object was generated from the alignment process with all 139 images successfully identified.

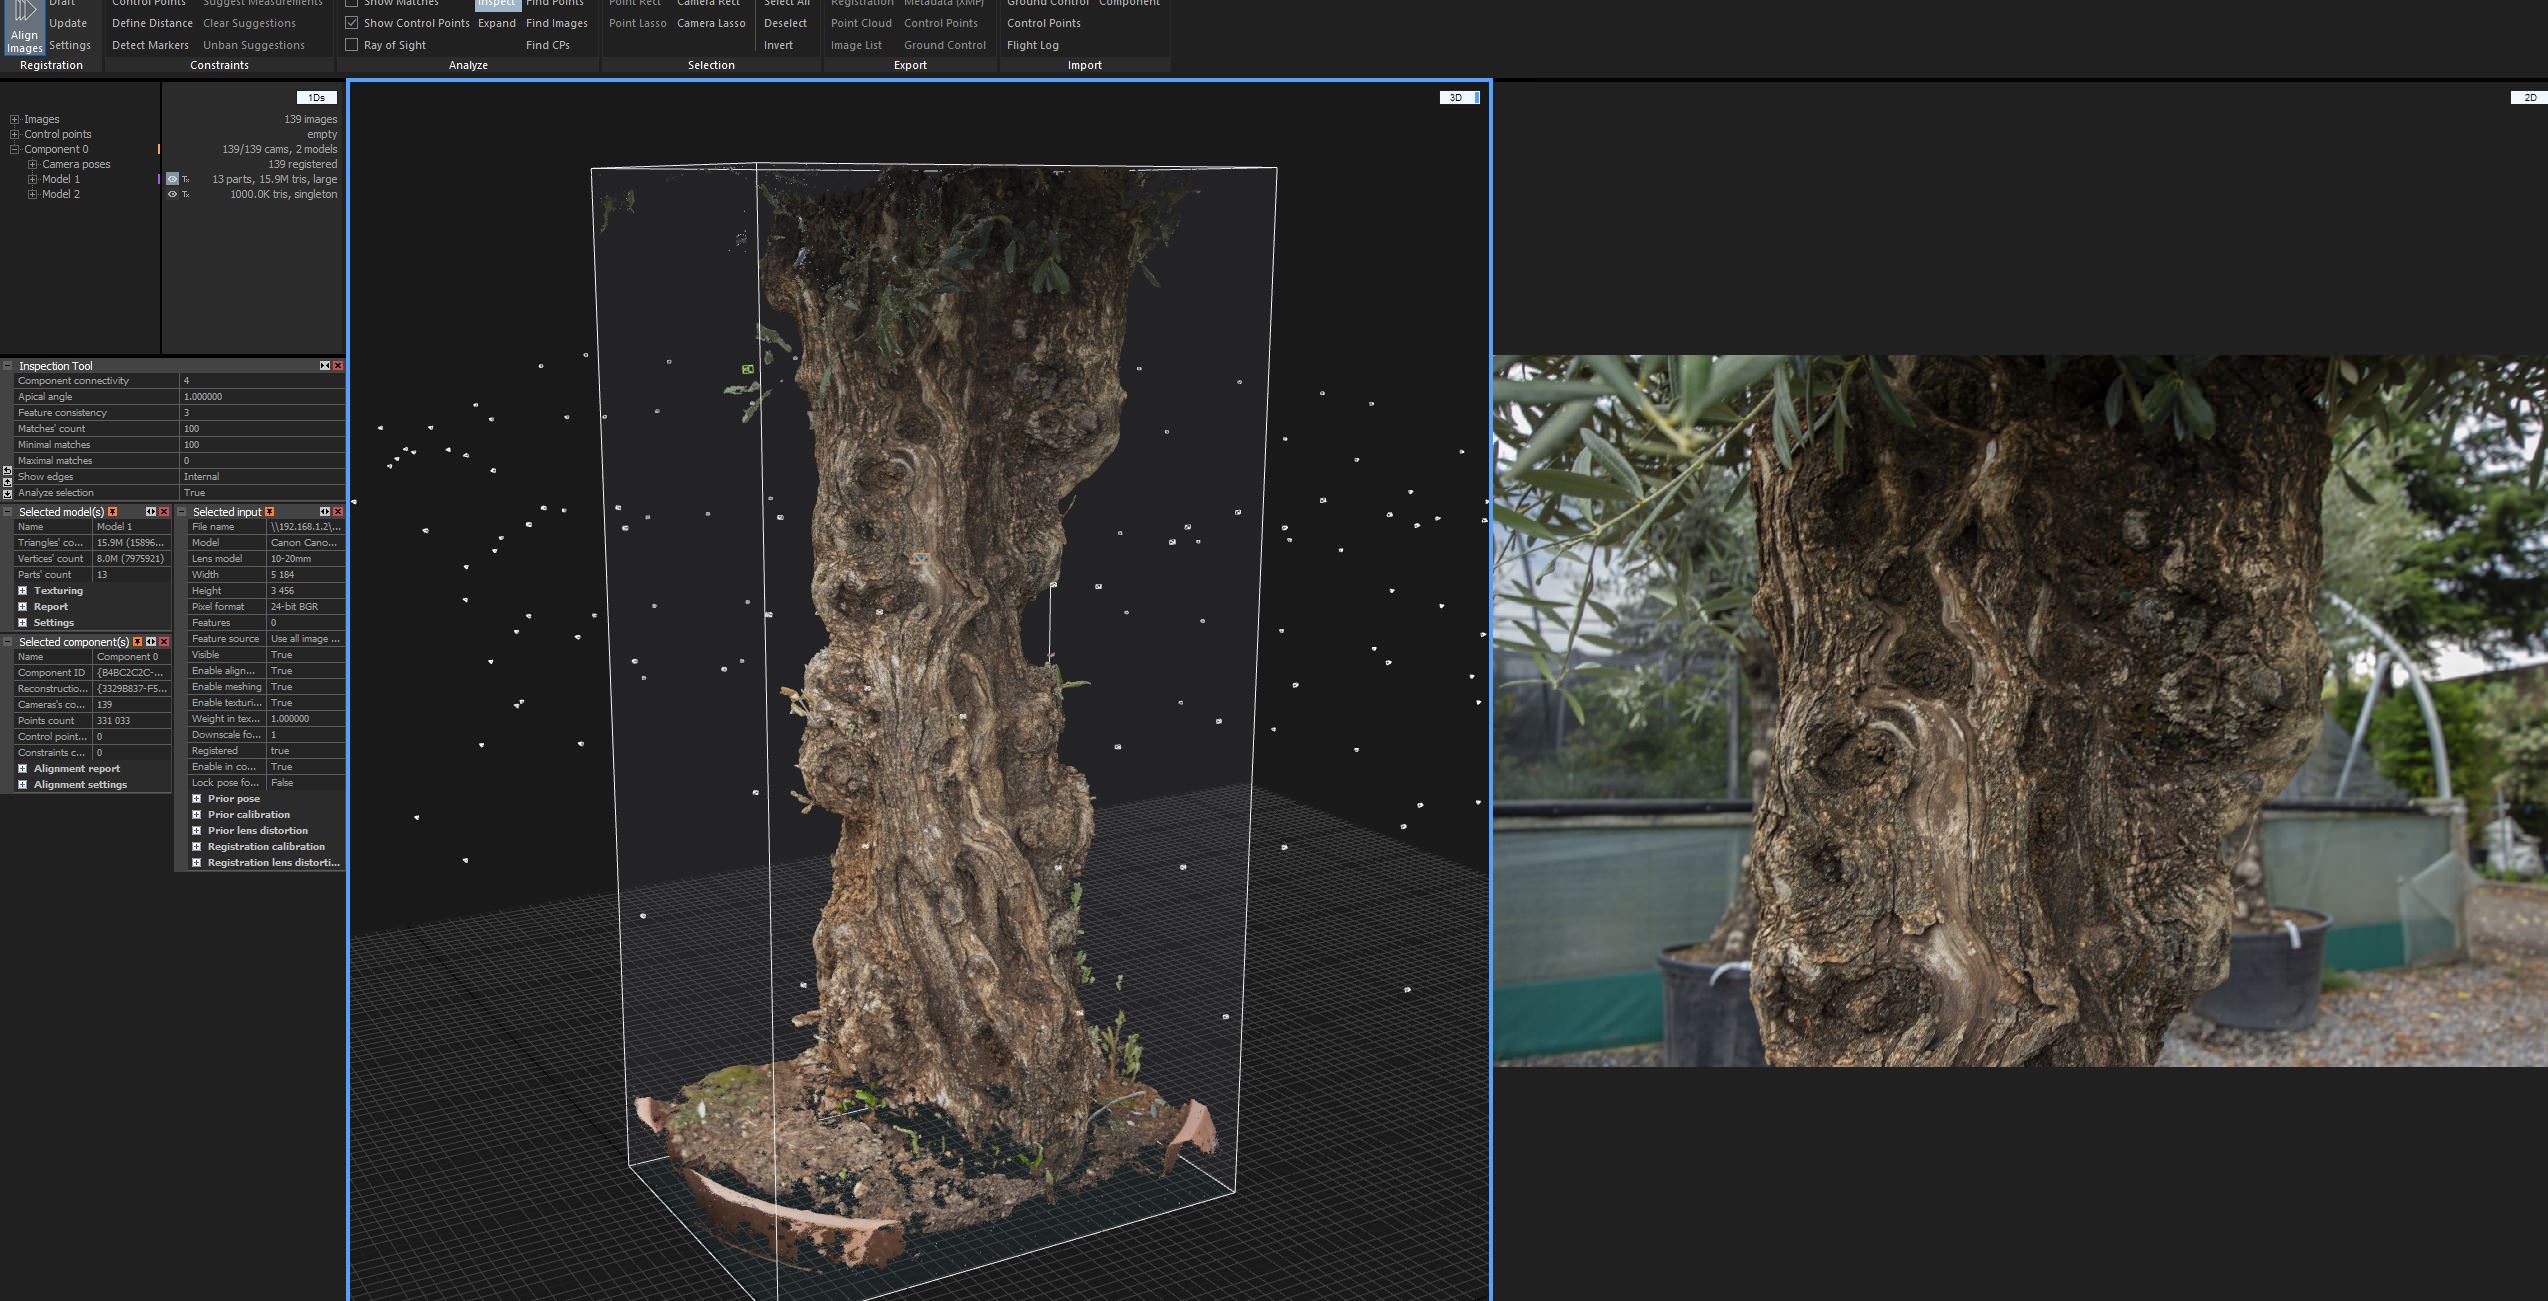
Some of our following steps are described below:
- Normal detail tool is enabled to convert the point cloud into a mesh.
- Check topology and simplify tool are used to reduce the poly count.
- The run texture tool generated the texture color.
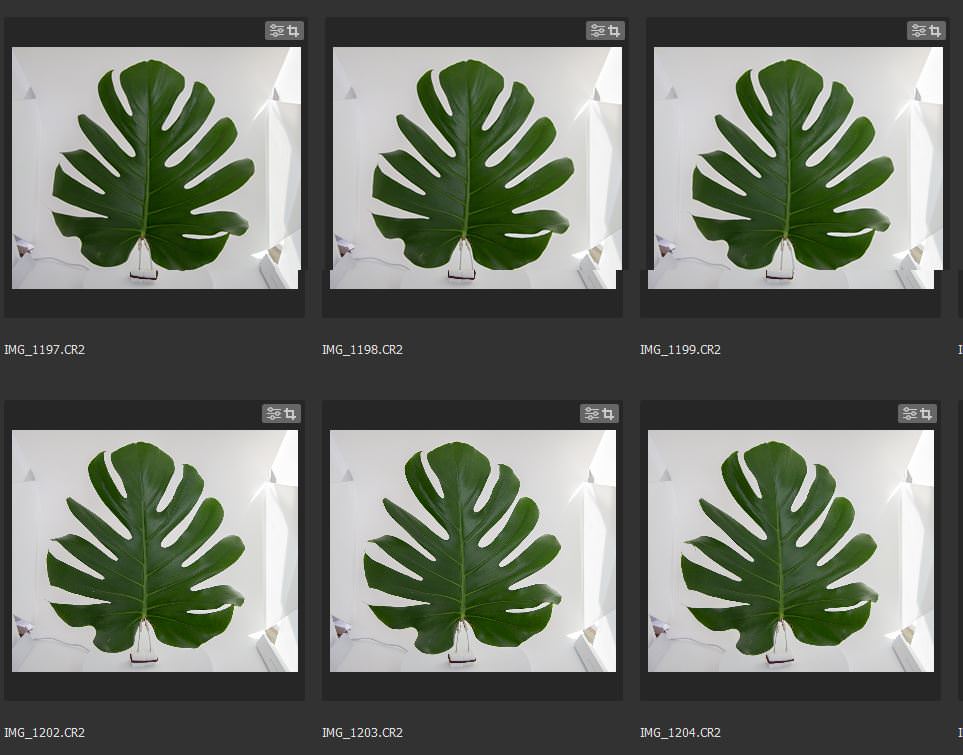
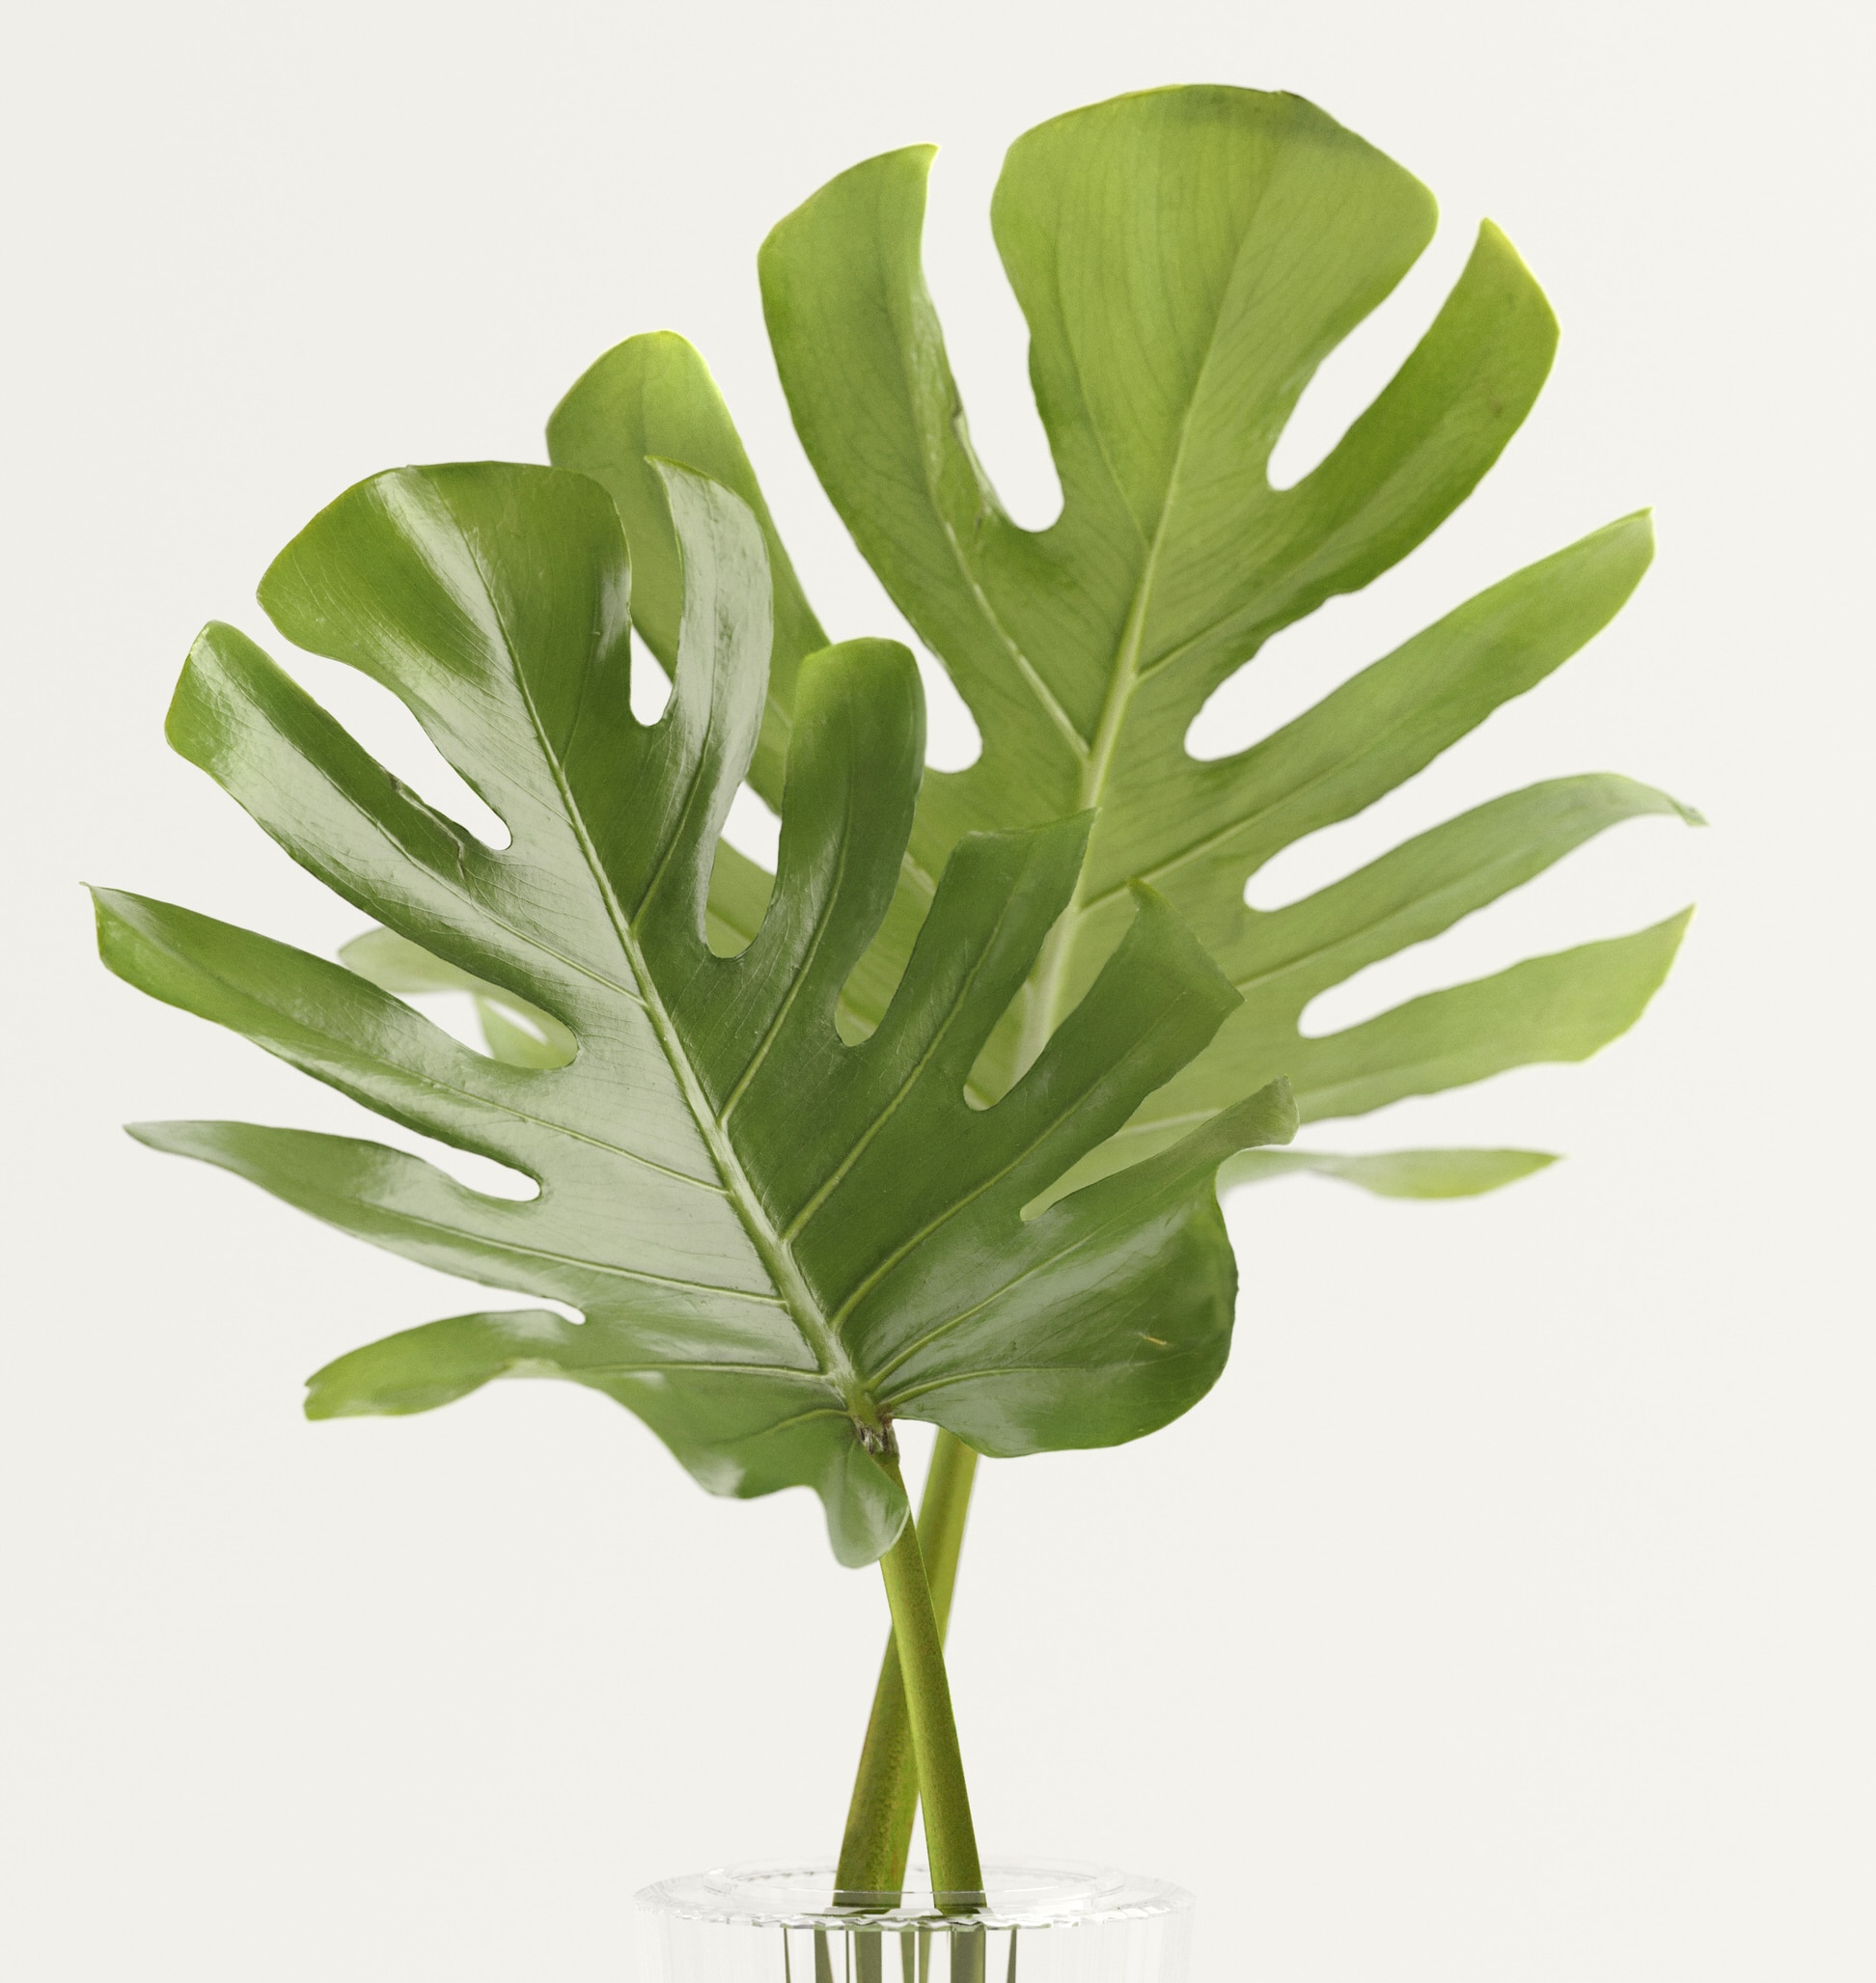
The Monstera Leaf (Indoor photo-scanning)
We came up with an idea of scanning a Monstera deliciosa leaf purely out of curiosity to see how well Reality Capture can handle the thickness and translucency of the thin leaf.
It turned out to be, as expected, very challenging. We actually never got a complete scan of the leaf and ended up using the least damaged mesh that was later corrected in Zbrush. Most of the issues were caused by the specular nature of the leaf. Even though the leaf was covered in a few coats of transparent acrylic matte spray, some highlights still showed up and were translated into holes in the mesh.
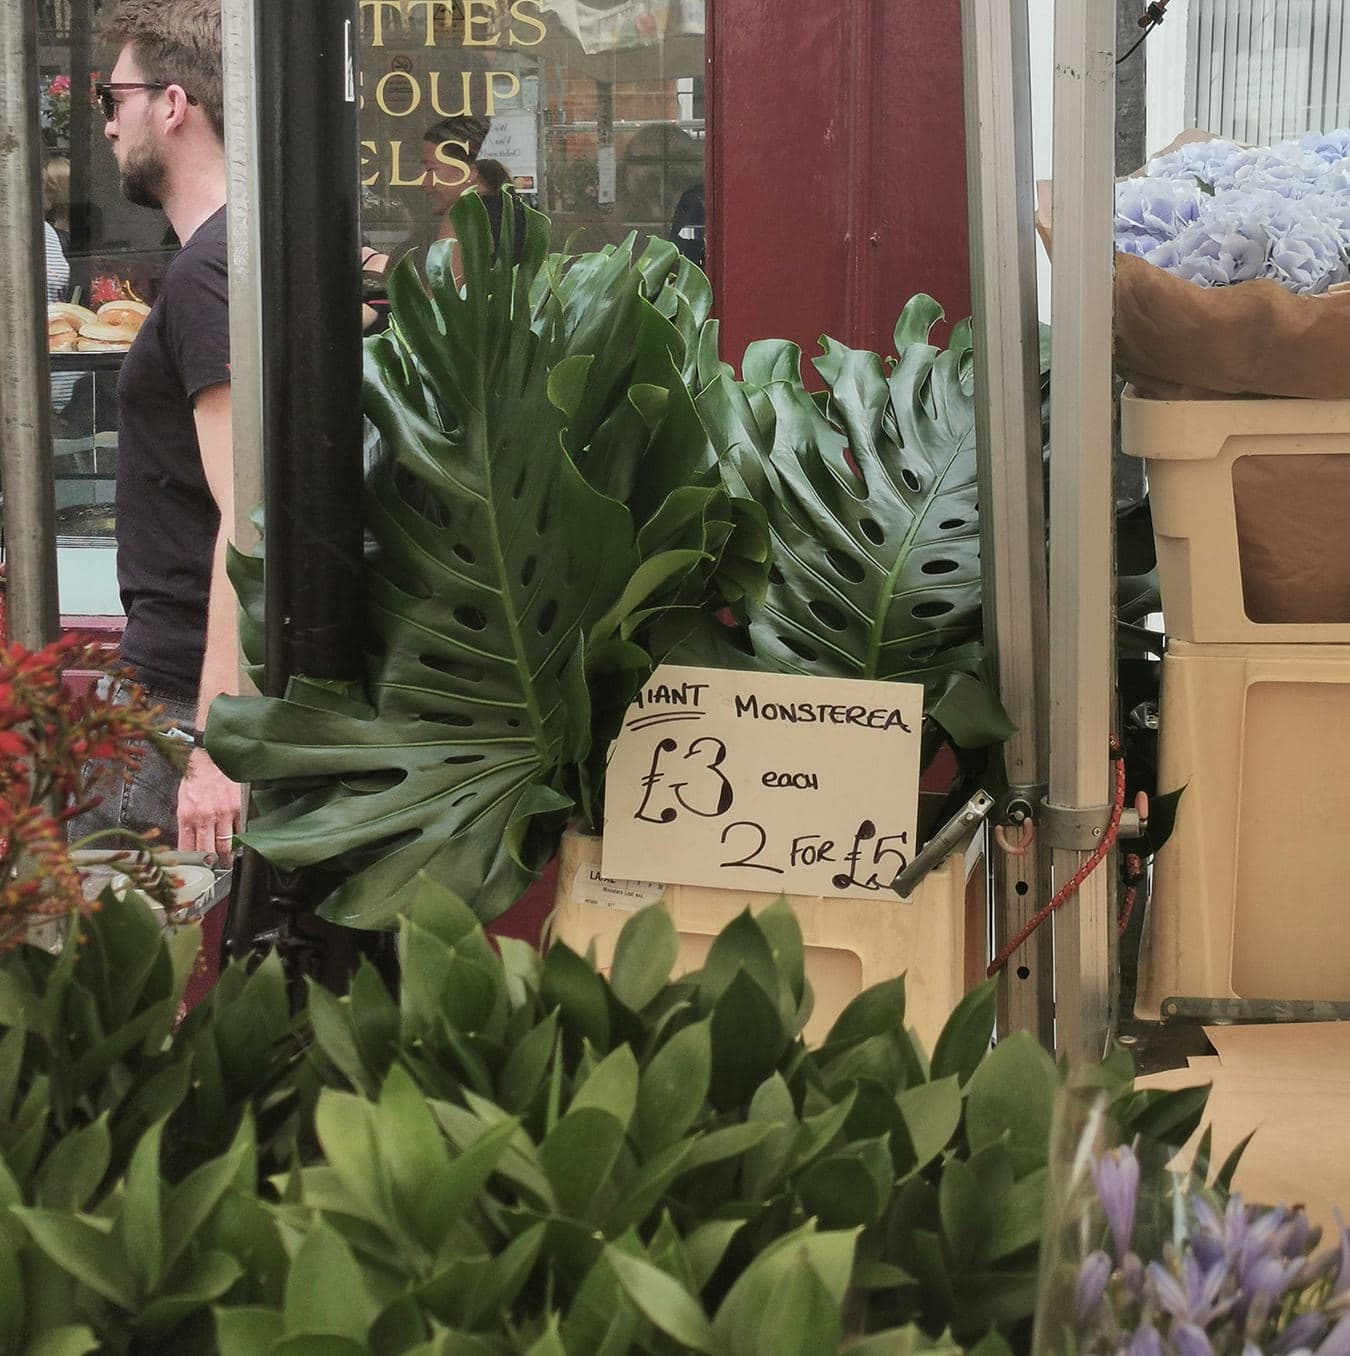
2 for £5 at the Columbia Road Flower Market, bargain!
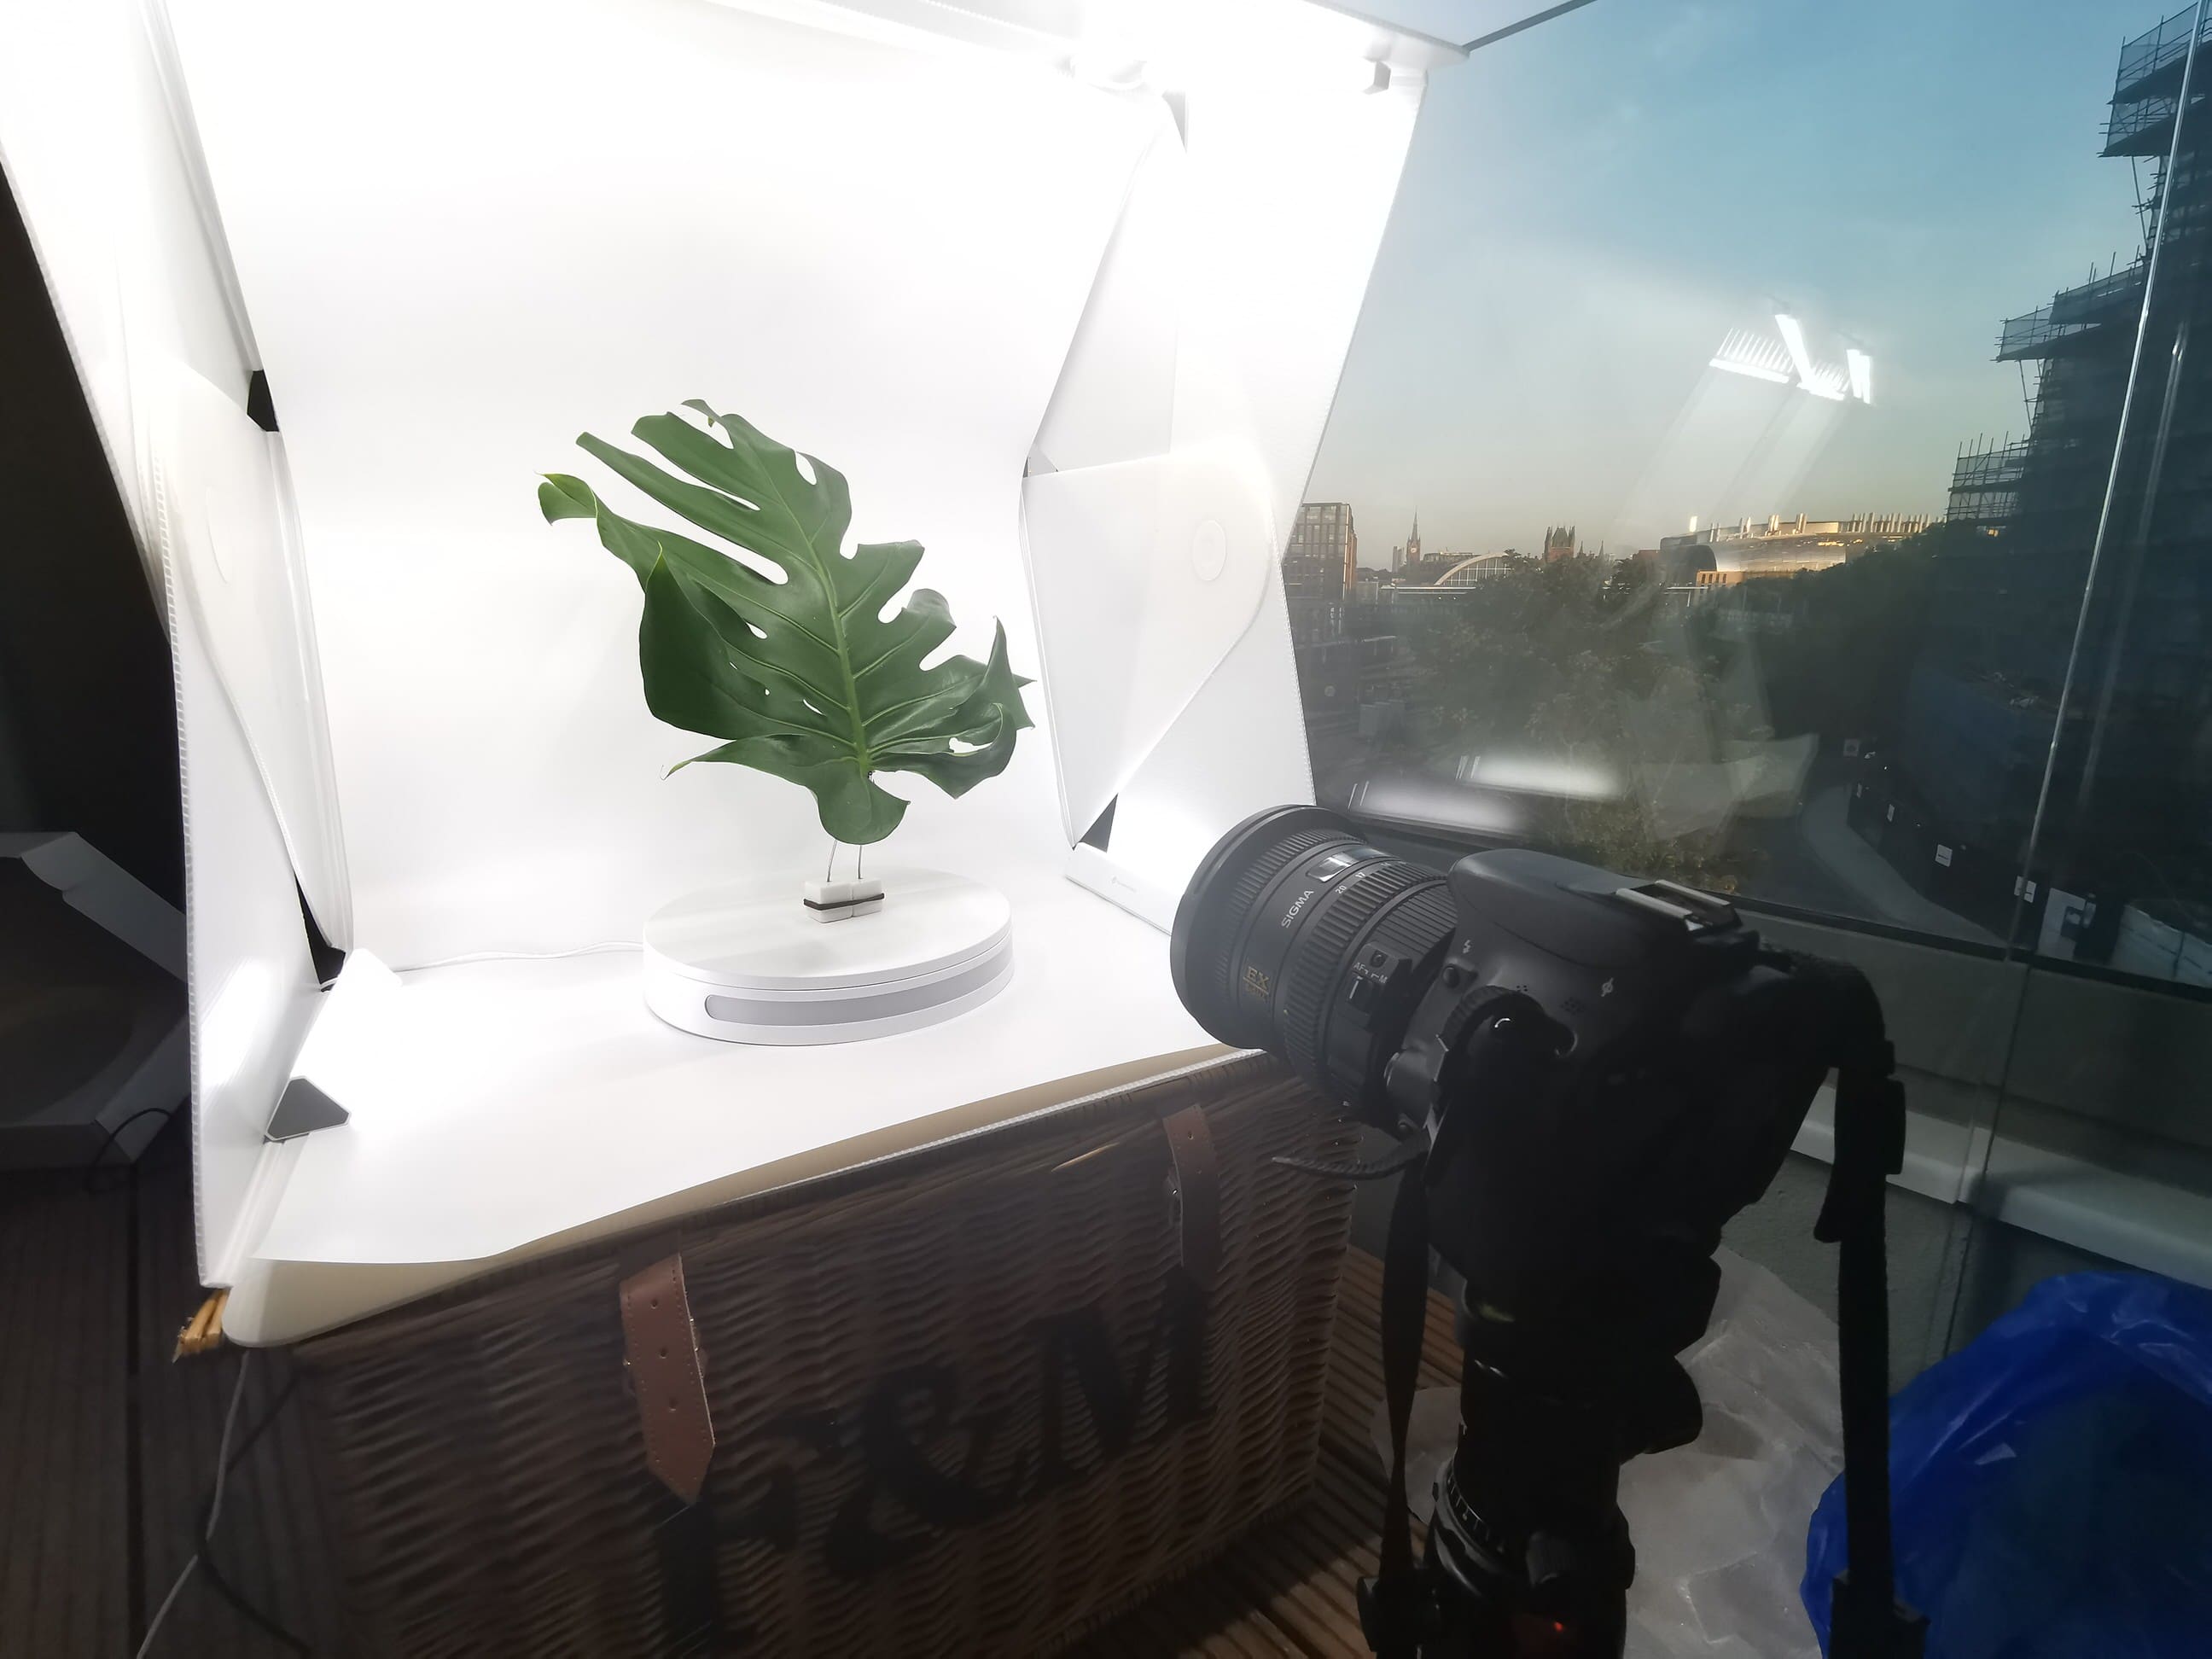
At this time, we were using our balcony/winter garden as a set and Foldio 360 by Oragnemonkie for the scanning tent and rotating table (works perfectly with their smartphone app).
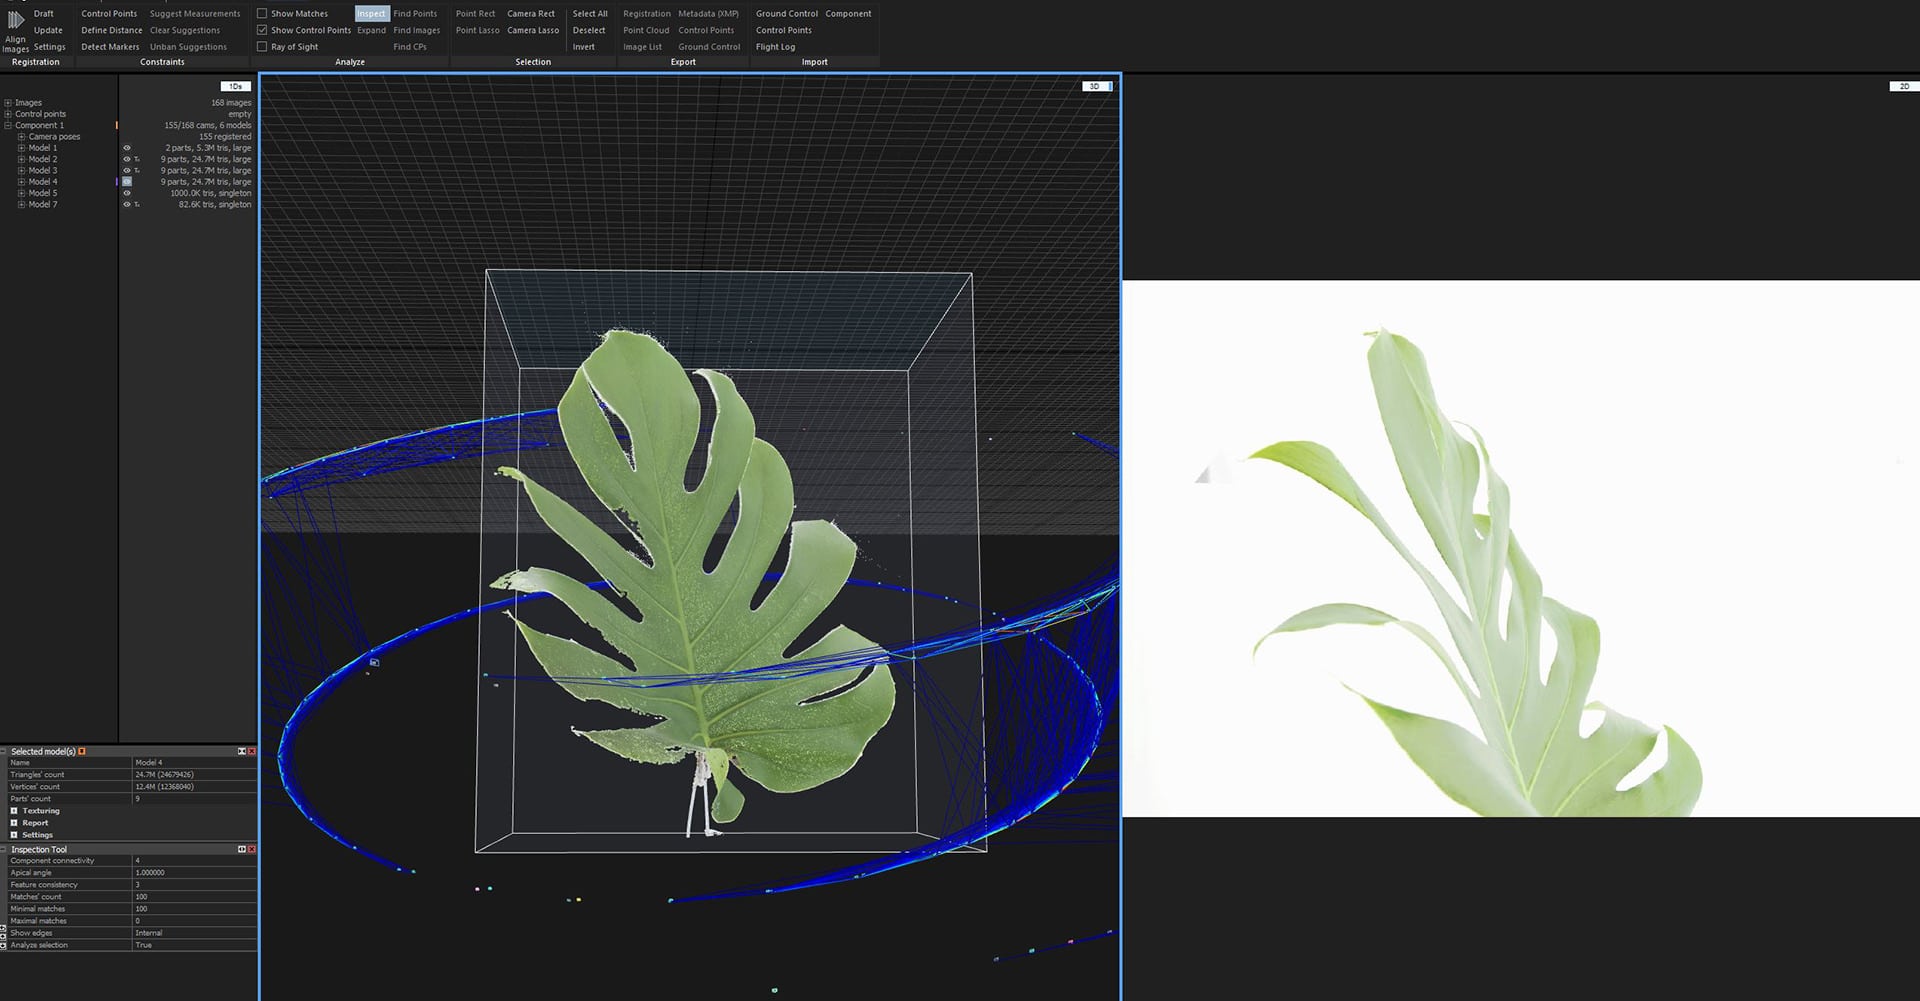
Inspect tool showing irregularities on the alignment. A few photos couldn’t be aligned properly due to the thickness of the leaf.
Unlike the tree photo-scanning workflow, where the original mesh is maintained, in this case, the mesh is retopologised, and so we will approach this object slightly differently.
As the mesh from Reality Capture had some holes in it, we imported it into Zbrush, where it was Zremeshed and sculpted to give our Monstera a healthier topology.
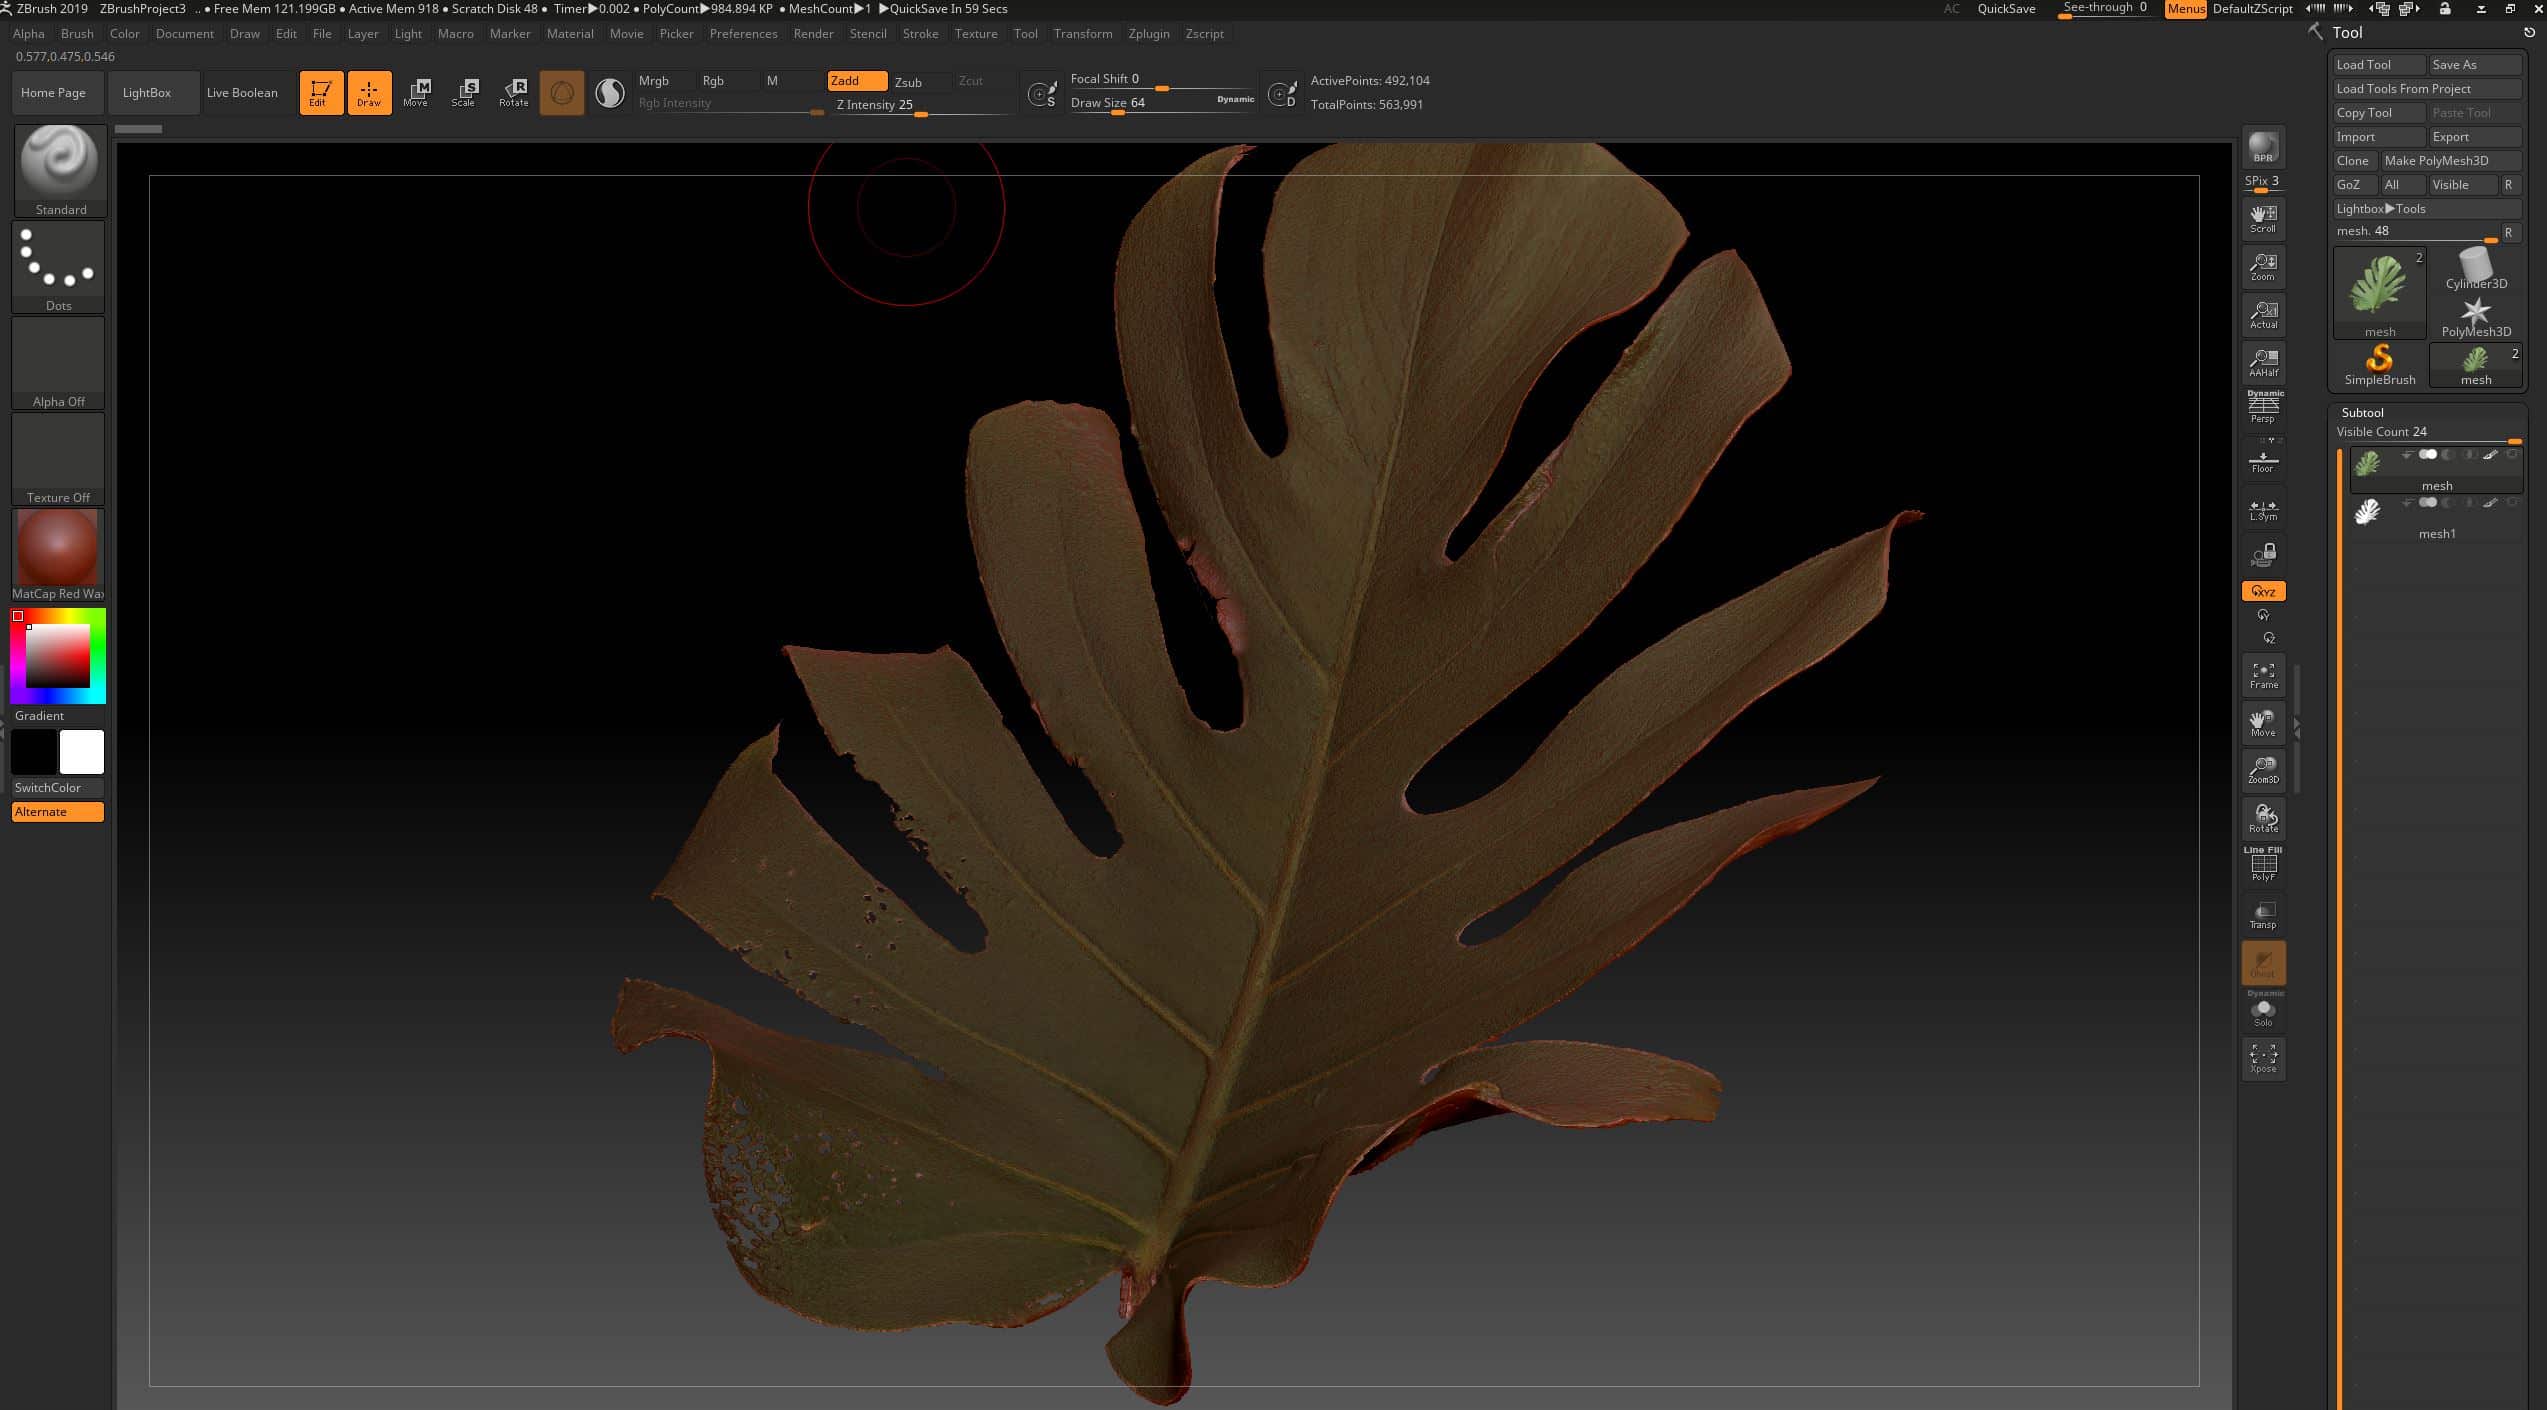
An imported object from Reality Capture
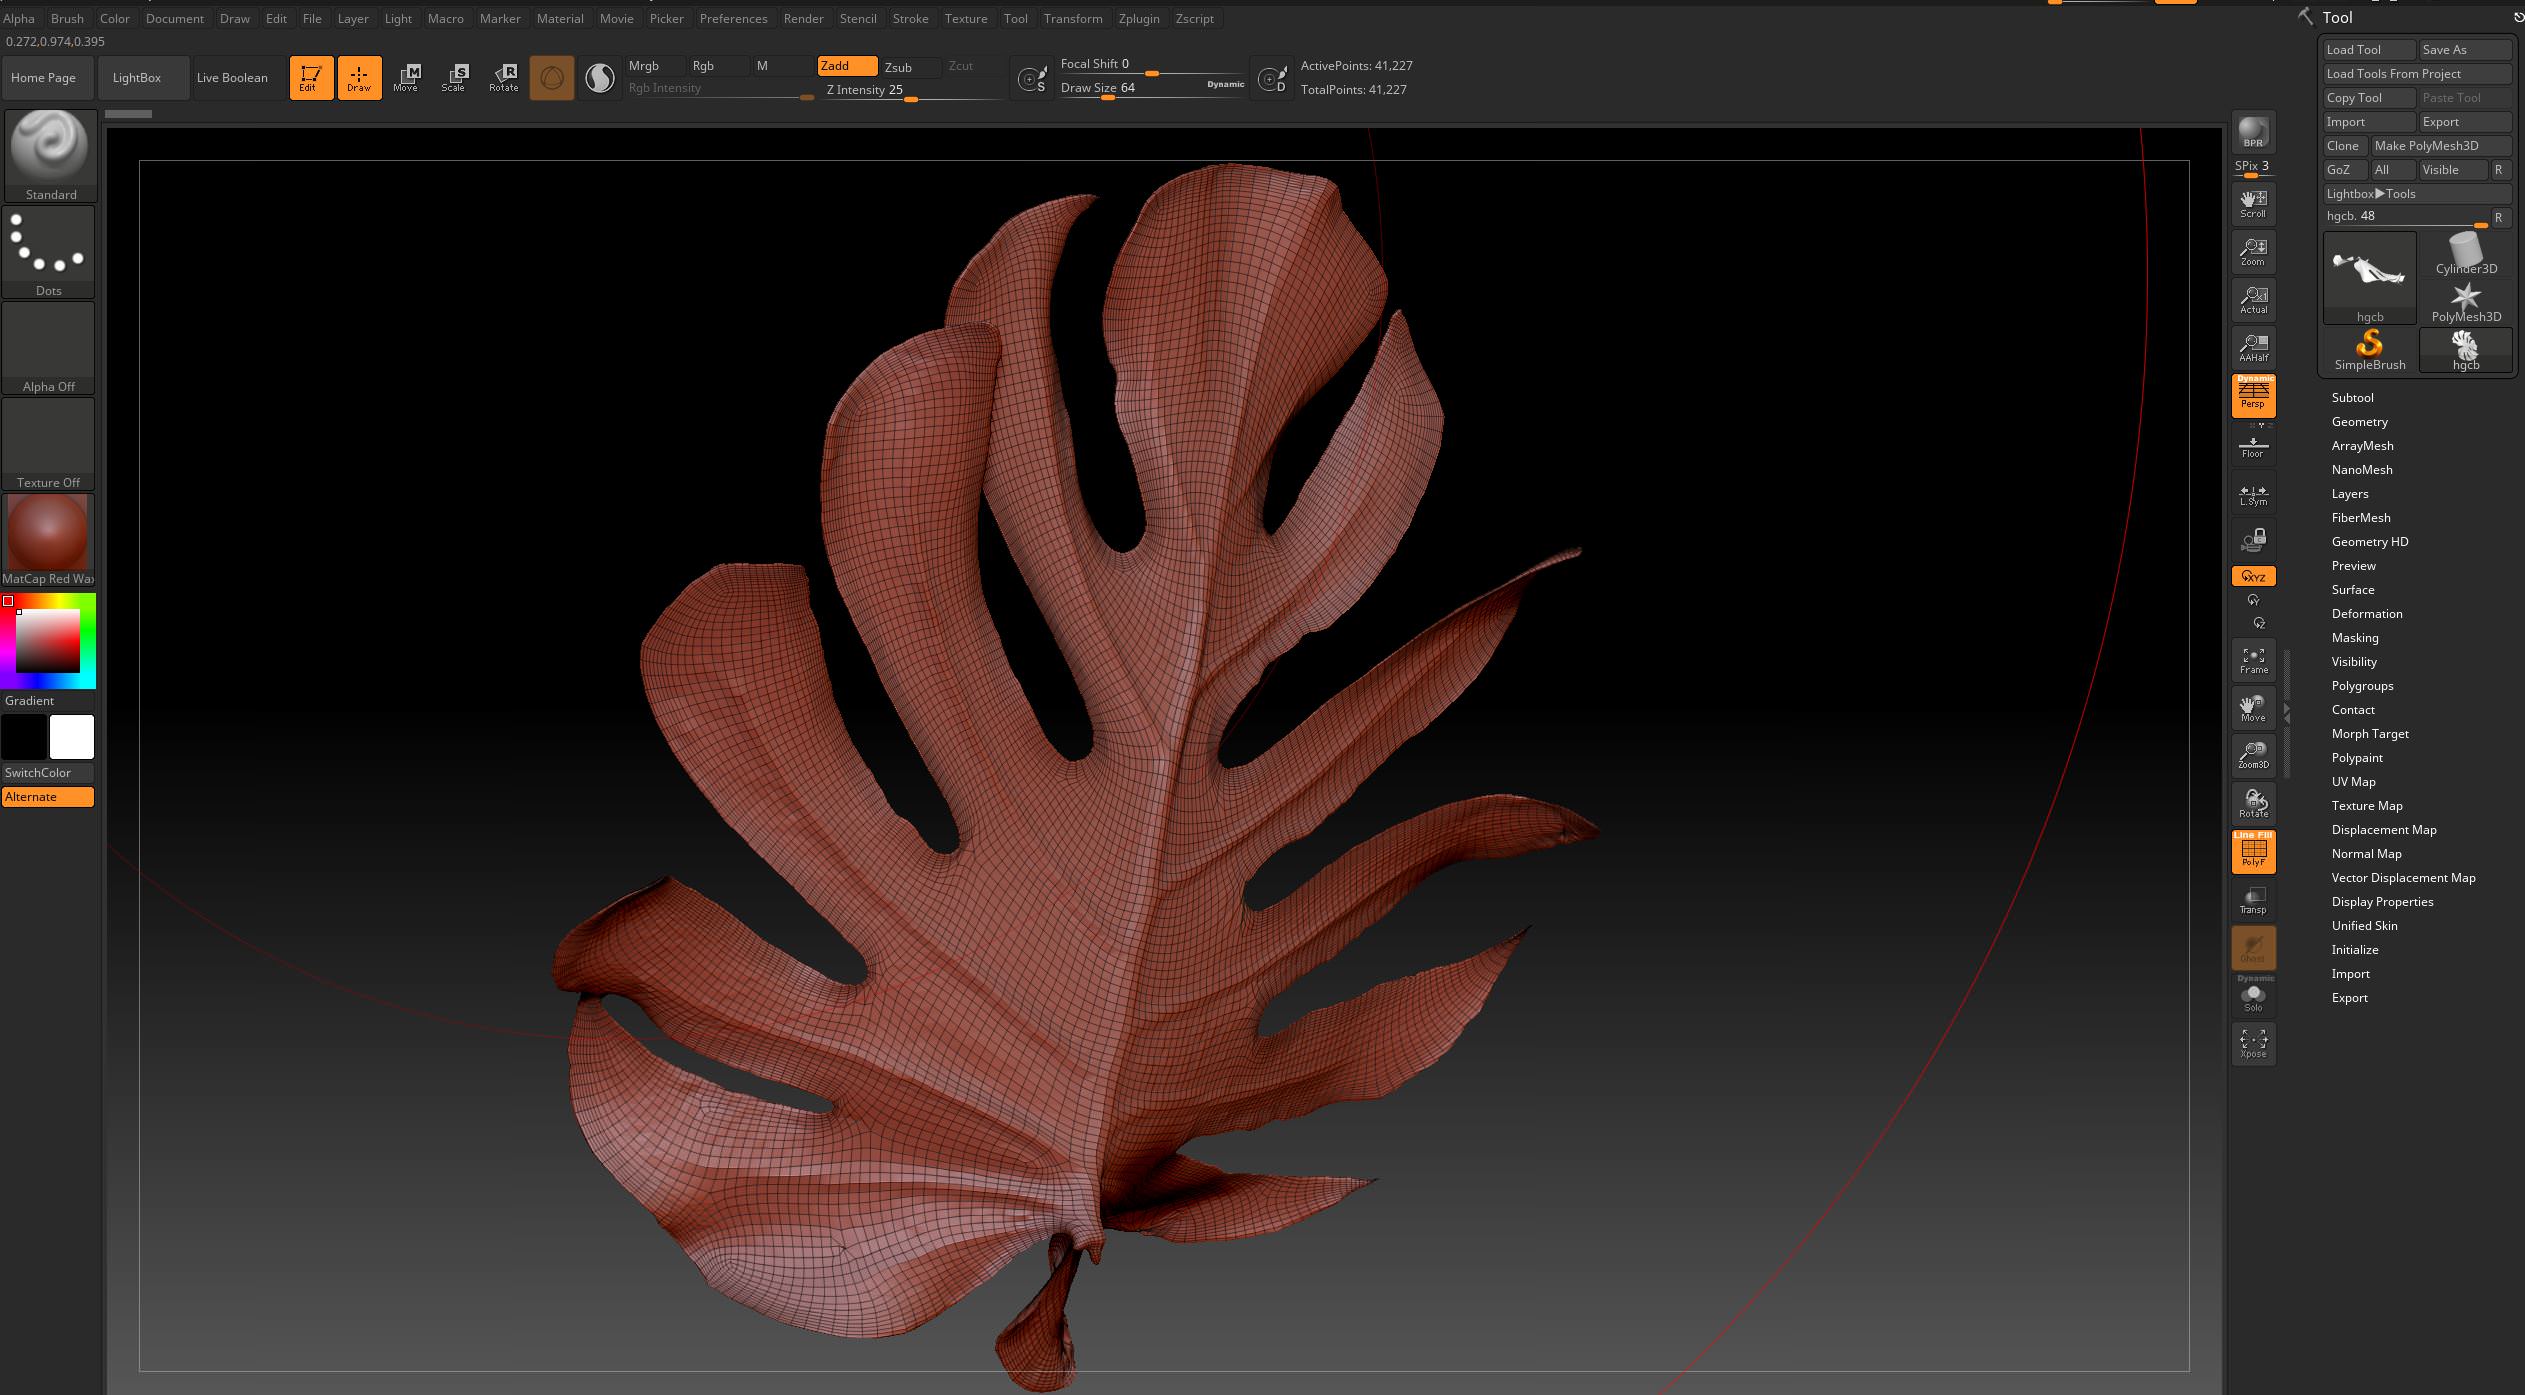
Cleaned up 3D model
We would typically use UV Master to generate UV coordinates; however, as the mesh was too complicated, we reimported it to Reality Capture, where the texture was reprojected, and UVs generated.
The texture is now ready to be taken to Photoshop and cleaned.
There are two typical workflows that we use for generating normal and displacement maps. Generate and extract these maps from Zbrush by projecting high detail mesh onto the lower poly mesh, or using Knald to create the maps based on the diffuse channel. We used Knald in this case as the original mesh was too damaged for the first method.
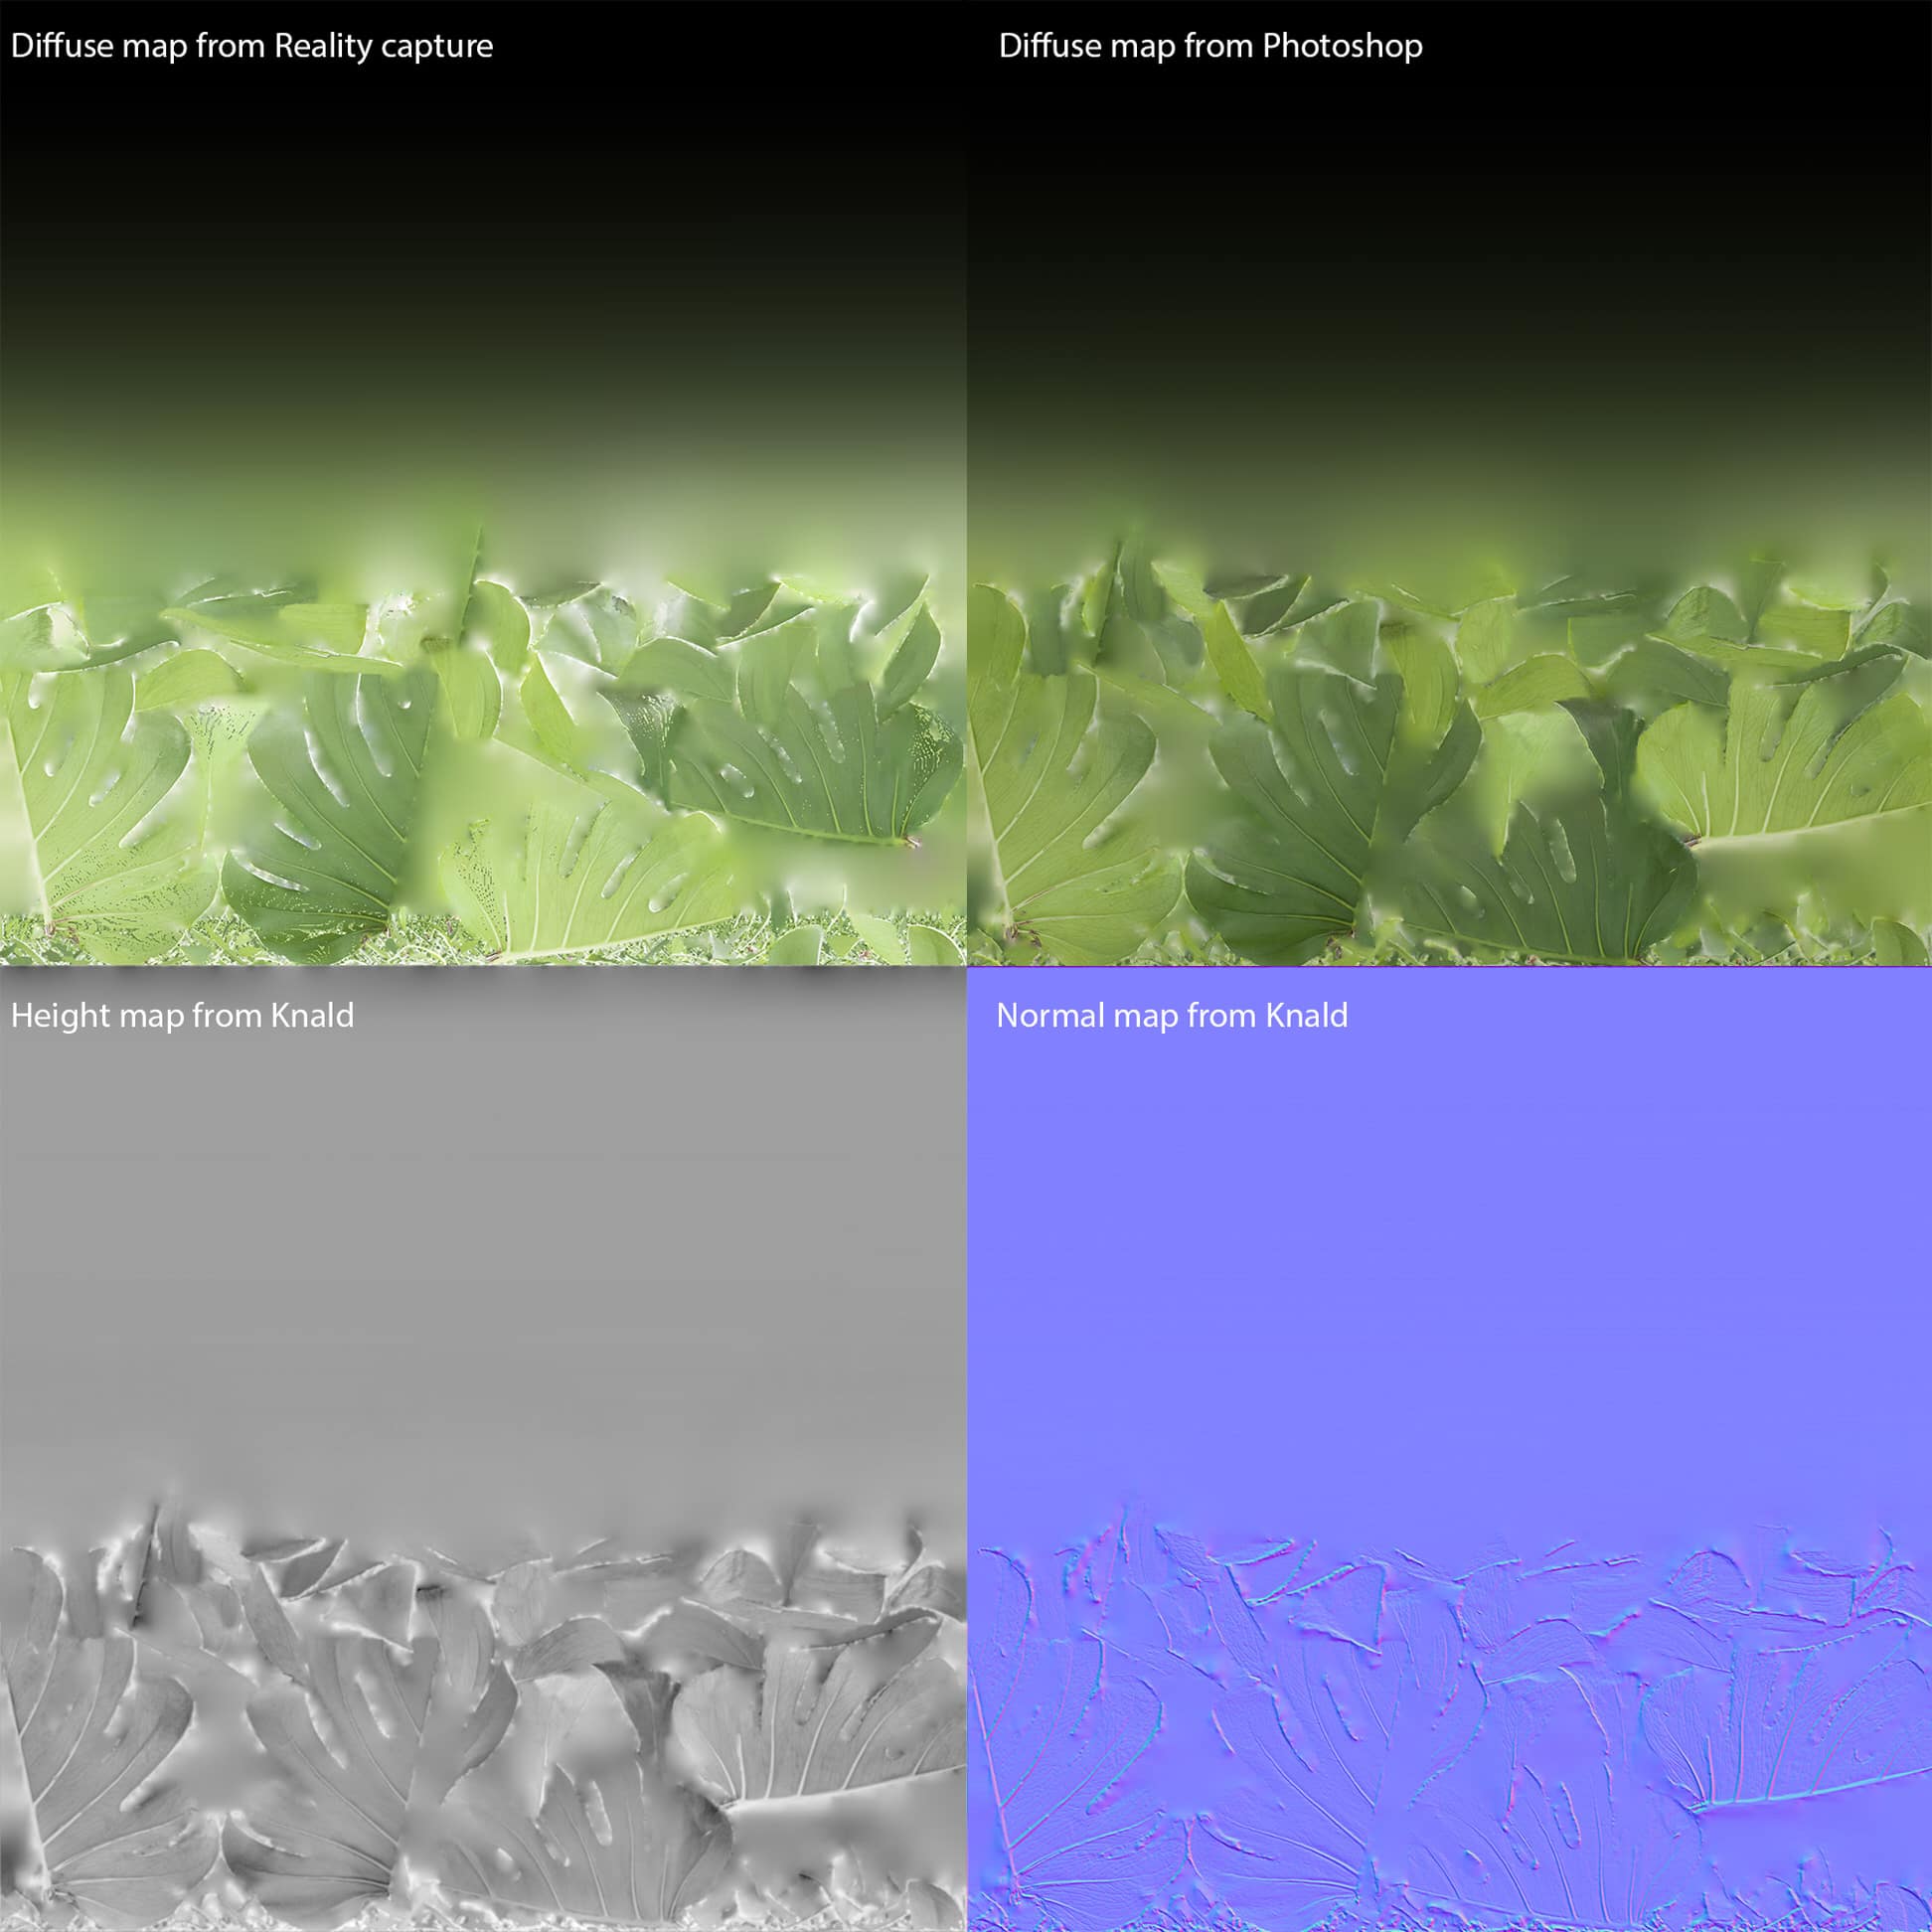
3D model of the photoscanned monstera
Other photo scanned objects…

Photo scanning of a sea sponge for our bathroom shot

3D models of photoscanned macaroons
Animation
Until recently, specializing in the architectural visualization industry meant minimal access to animation tools. With rendering engines getting faster and animation software easier, a whole new world of additional techniques began to unravel to us. For this project, it was mostly GrowFX and Marvelous Designer that we ended up using, but further exploration of tyFlow and Phoenix FD is on our list.
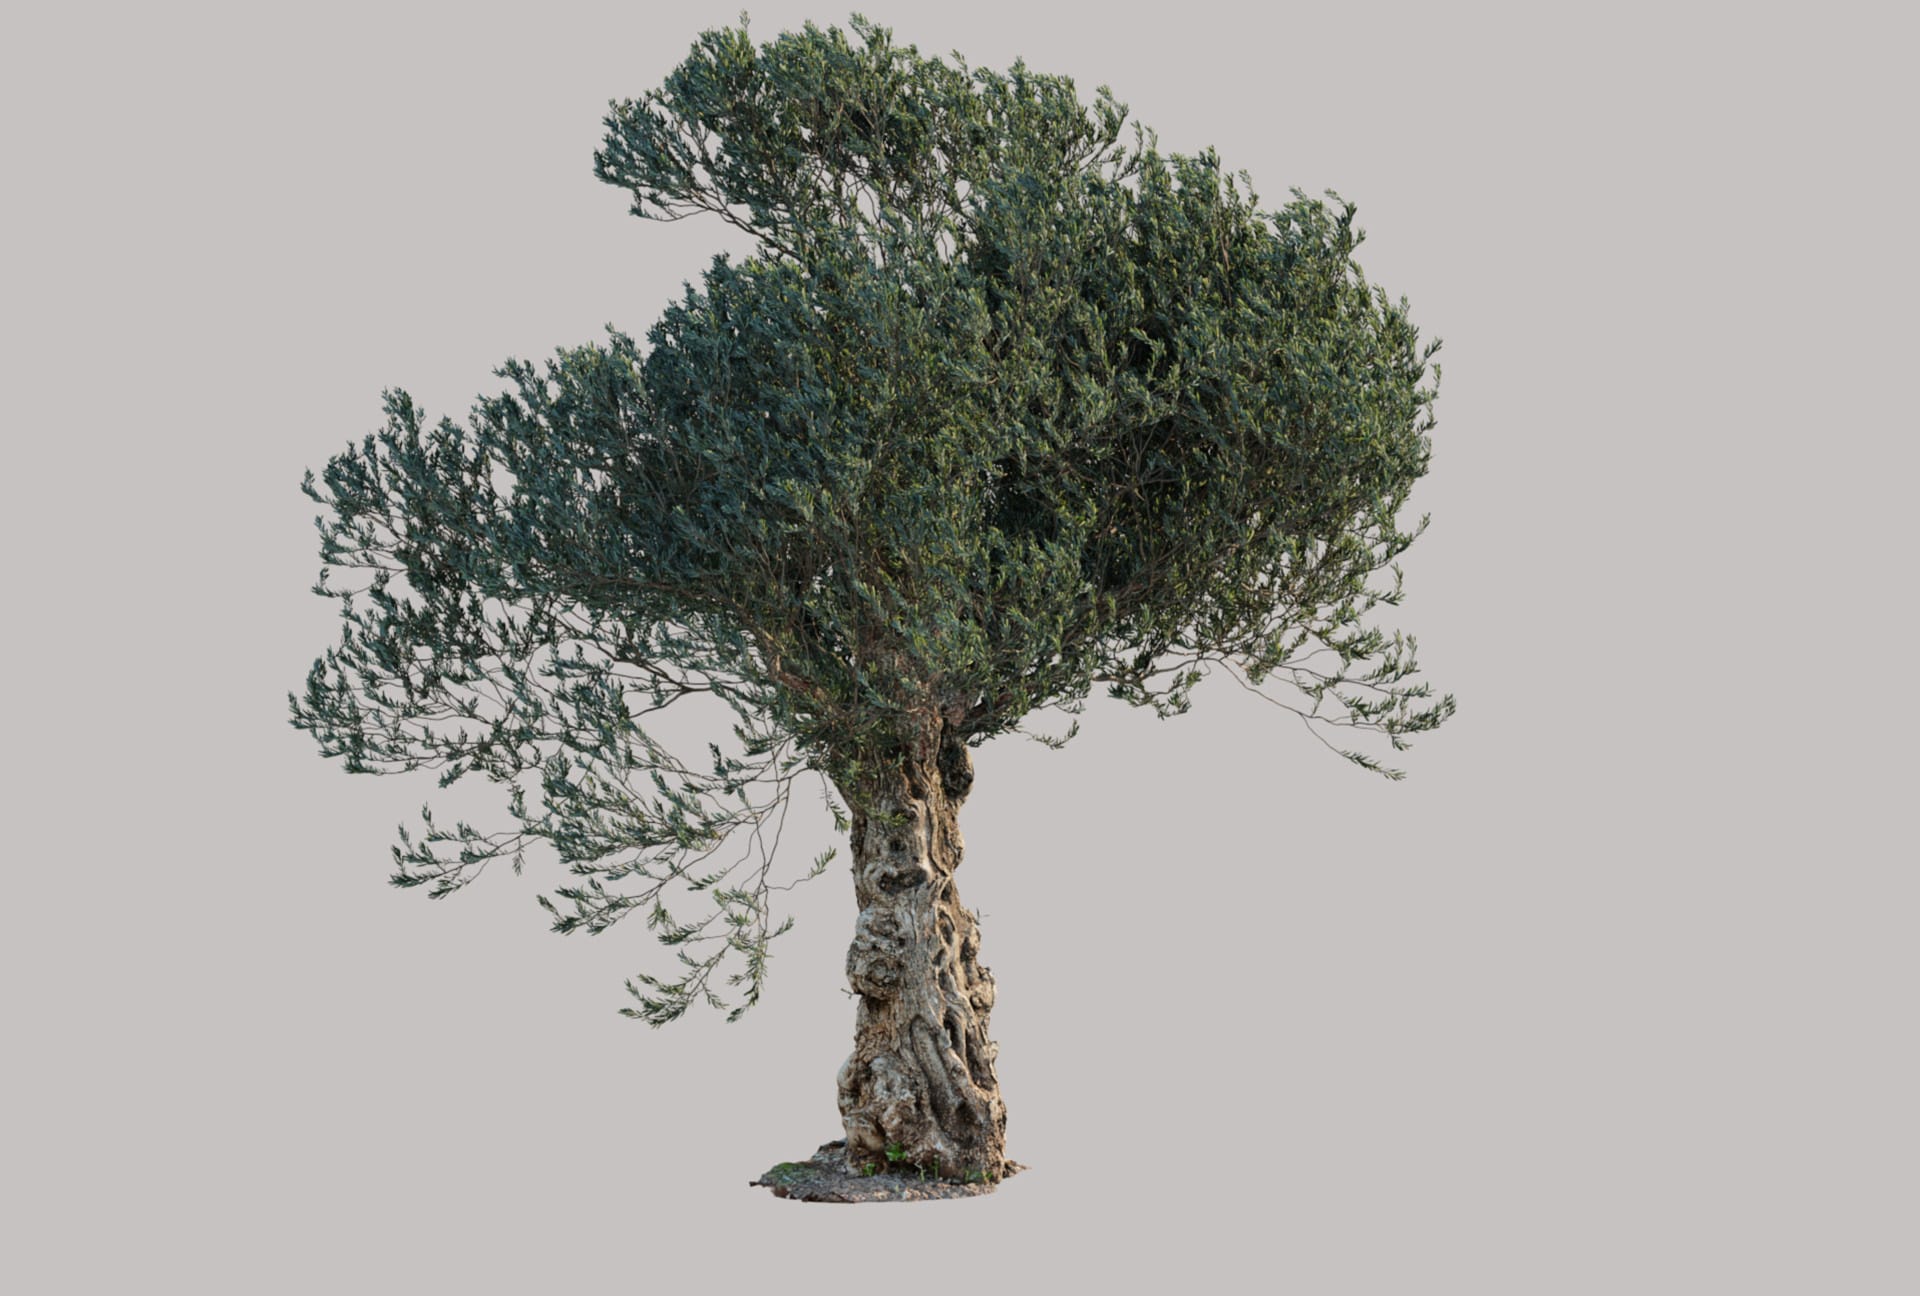
3d Vegetation – GrowFX
For the landscape animation, our choice of software is GrowFX plugin for 3ds Max (very excited about their recent release of a node-based version). As 3d modeling plants from the very scratch is a long process, we tend to use a MaxTree model of similar properties as a base and modify to match our needs. For creating branches and leaves of the olive tree to match the photo scanned trunk, I used an oak model and progressively turned into the desired shape. The trunk was hidden, the position of branches and width adjusted to match the photo-scanned base, and the leaves changed.
For creating vines, a similar process was used, but Megascans assets used as a base and for leaves materials.
Once the still model is finished, we used an after mesh wind modifier to add movement. There are a few options here that we need to take into account when making loopable models:
The number of frames in the loop needs to be decided in the beginning and copied in the wind modifier of each level.
The wind needs to be constant (sadly, the random speed and direction modifiers don’t seem to work with the loops yet).
Make sure the ‘live update’ and ‘animation’ is ticked when exporting to a proxy.
Bear in mind that having multiple trees moving in the exact same timing won’t look too convincing. Coping a few versions of the proxy and changing the playing offset can be helpful here.
Below you can see some screenshots of the process and a clay test of the wind animation.
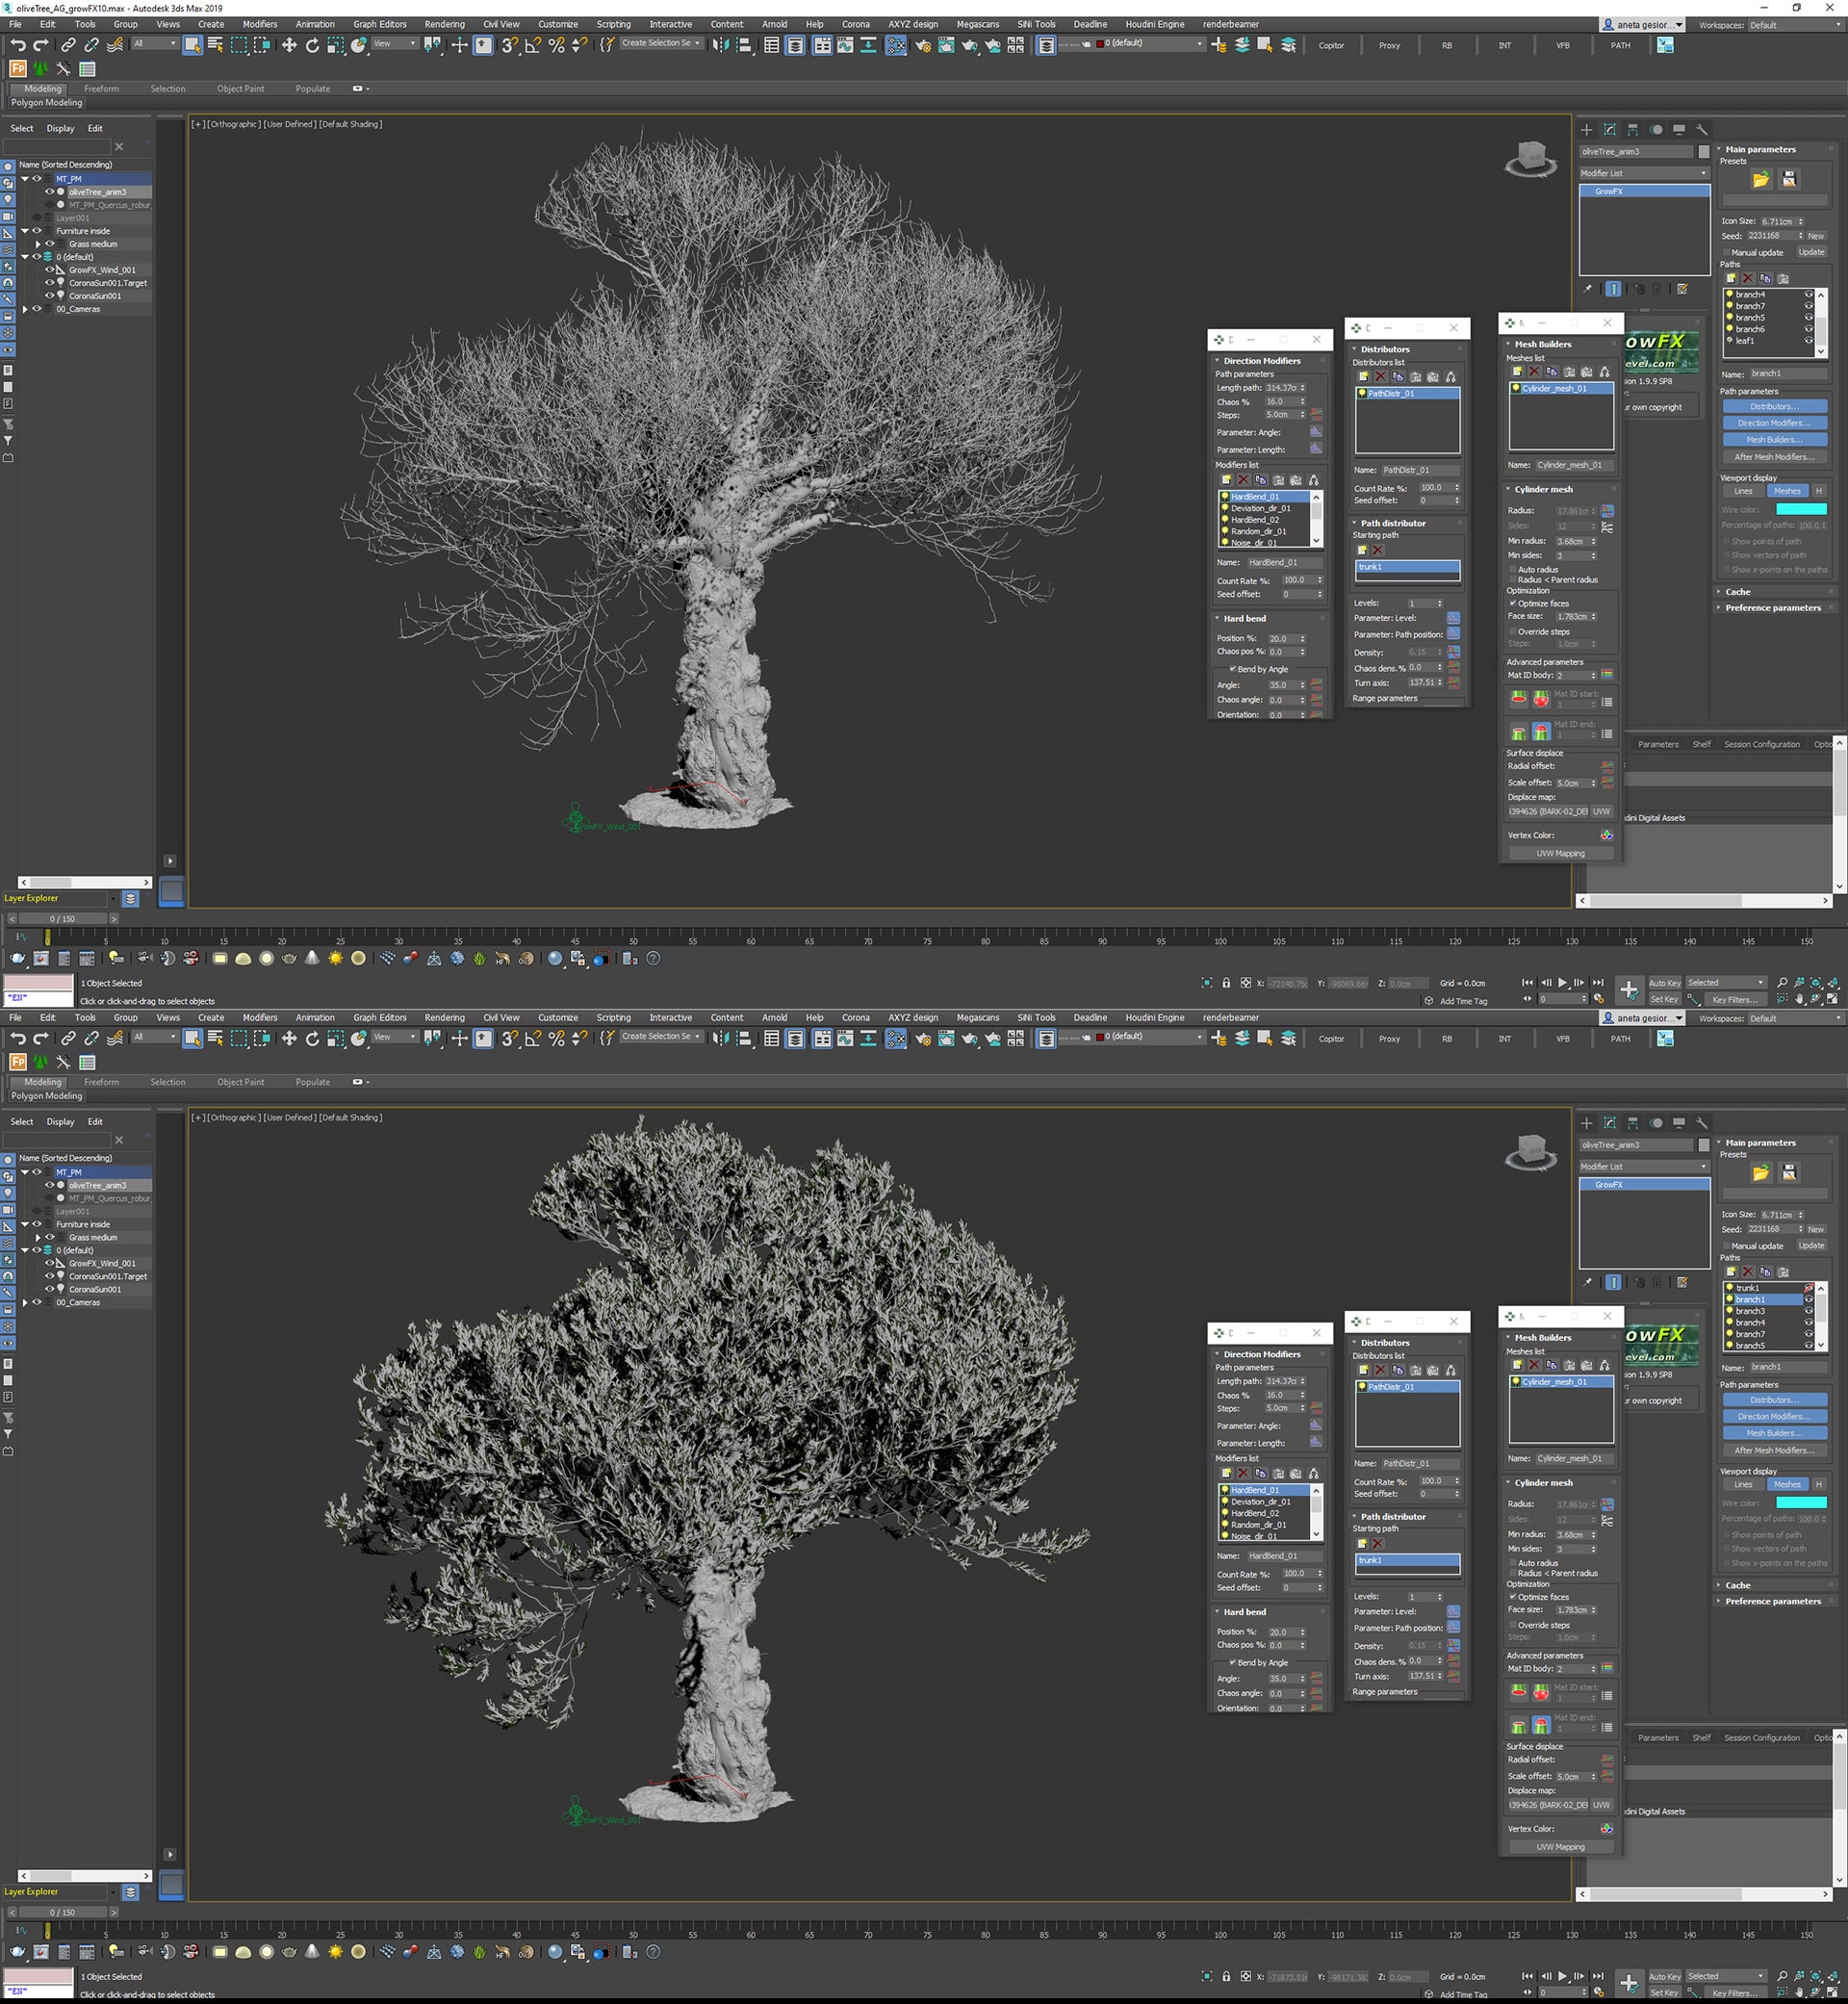
Olive Tree_progression of GrowFX model.
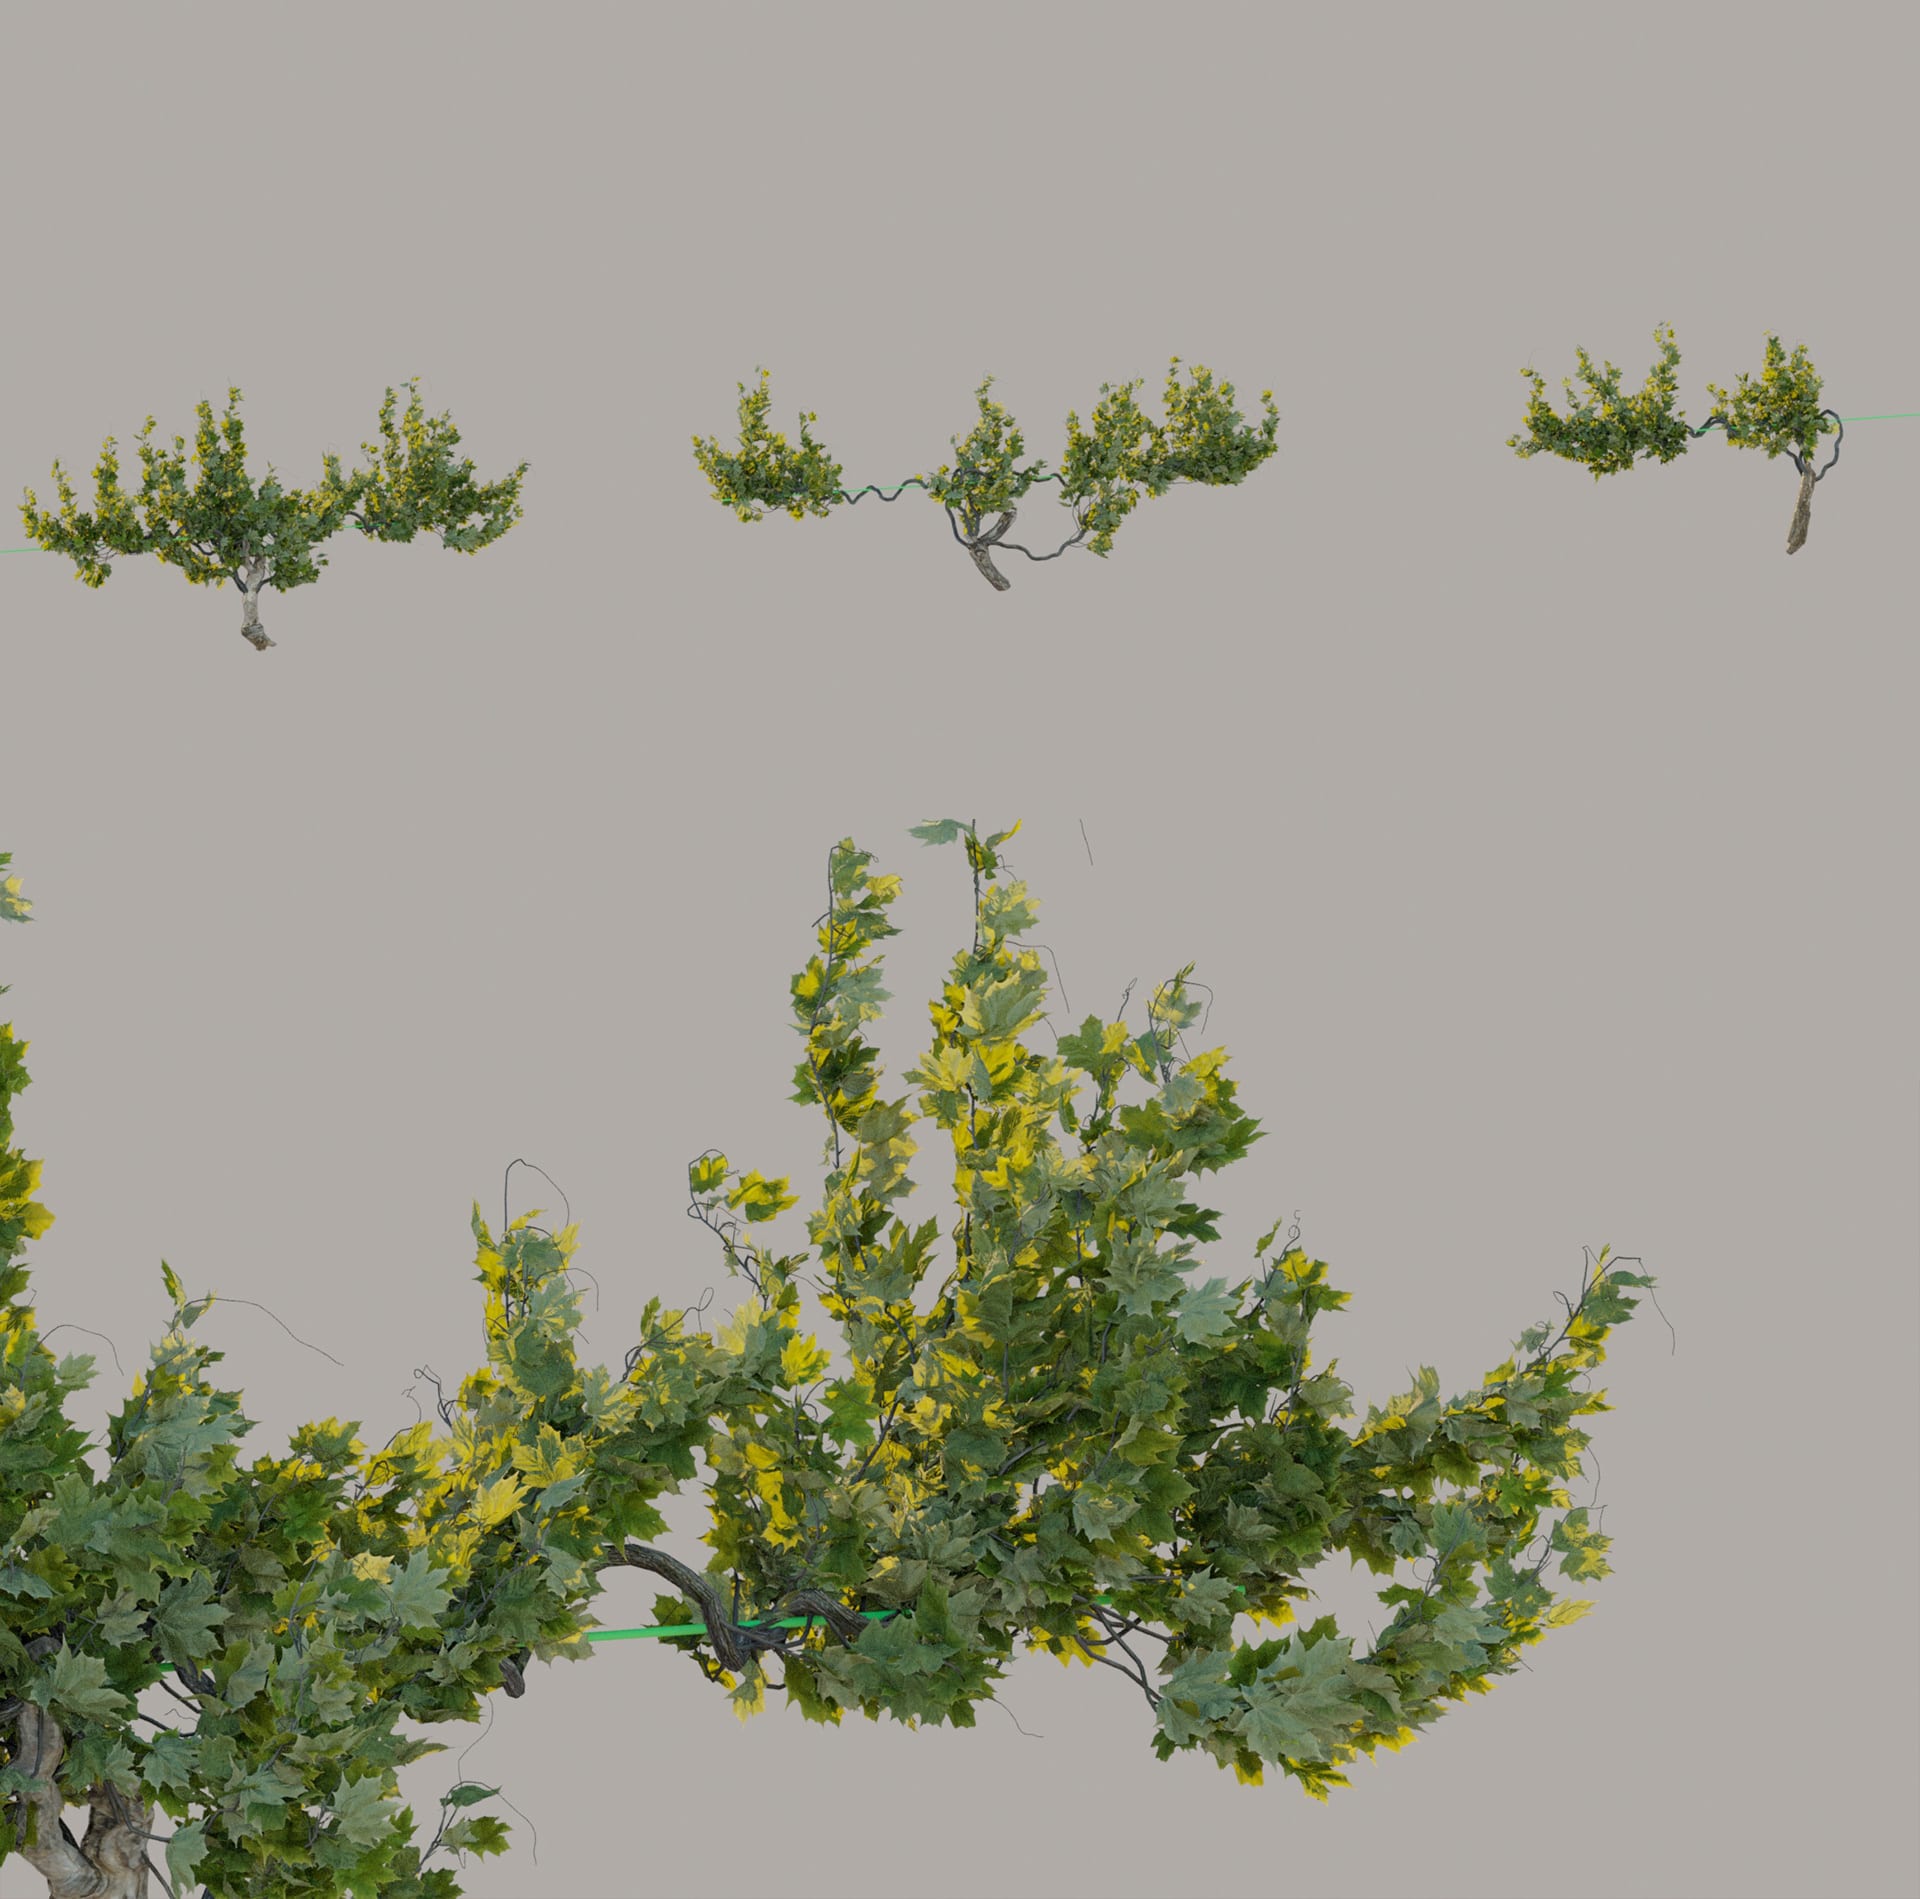
Custom vine bush model – leaves texture from Megascans.
Marvelous Designer
Scarf animation
Not many tasks in 3D we found as relaxing as fabric simulation in Marvelous Designer.
When creating the flapping scarf in our pool scene, a similar process as for the curtain animations was used:
- In Marvelous Designer, a basic model of the scarf was made using the pattern view.
- A simulation was enabled and a scarf wrapped around the imported avatar.
- The wind was turned on, speed determined, and falloff enabled.
- The animation was recorded using the animation panel.
- The model is exported as .obj, movement as point-cache 2.
- The .obj is imported to 3ds Max, point-cash added as a modifier.
Sadly we haven’t found a way yet to make the Marvelous simulation perfectly loopable, so there’s a lot of blending to be done later in postproduction.
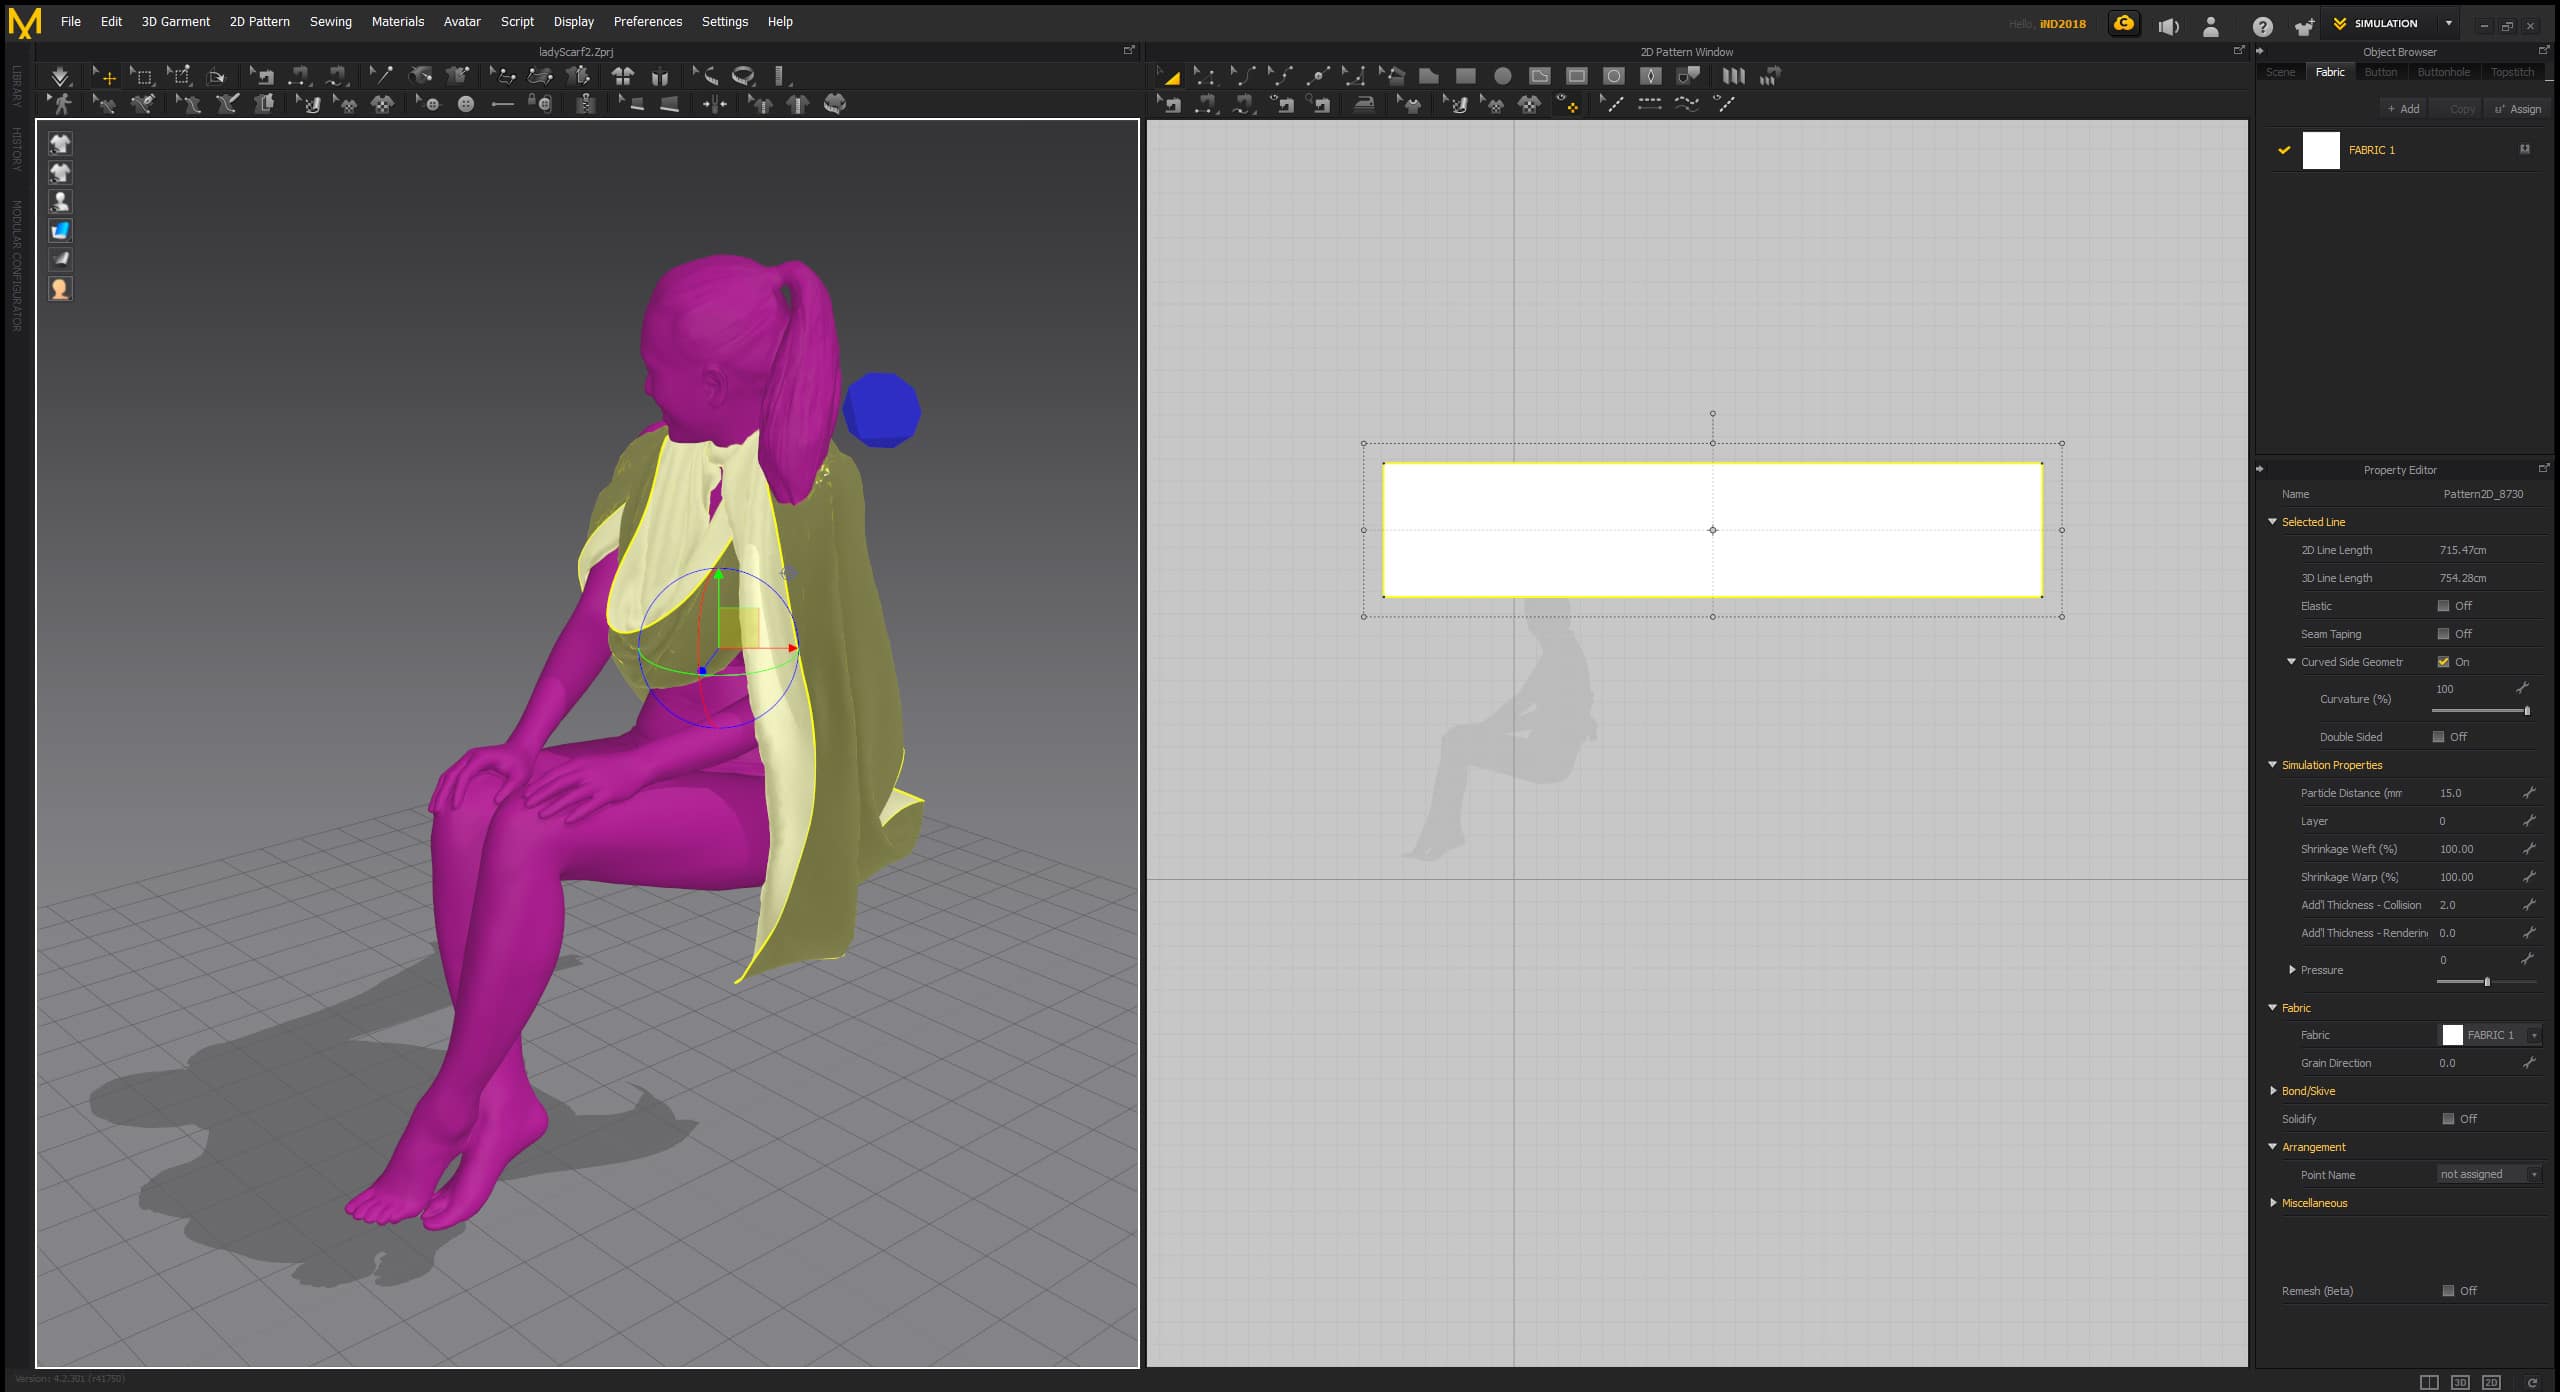
Simple scene in Marvelous Designer.
Book Animation
The magazine flipping page animation was one of our biggest challenges as we weren’t quite sure if designed for fabric simulation. Marvelous was the right choice of software here.
We tried to recreate the same effect as visible in the reference, although we ended up slowing it down as we aimed for a more subtle movement.
The main steps we followed were:
- Import magazine as our main avatar and the page as our garment ( It will import the page in the original location, and it will be considered for simulation).
- Use a pin tool to freeze the page in contact with the book.
- The wind was turned on, speed determined, and falloff enabled.
- Tweaking pressure, physical, and simulation properties to give the page less of a fabric look.
- The animation was recorded using the animation panel.
- The model is exported as .obj, movement as point-cache 2.
- The .obj is imported to 3ds Max, point-cash added as a modifier.
Materials
The abundance of scanned 3d materials that can be found online makes an artist so much more prone to experiment and try out different creative visions. Our favorite ones out there are:
- Real Displacement Textures
- Friendly Shade
- Quixel Megascans (now free for Unreal Engine users!)
- Poliigon
- Textures.com
When in search for insane detail, definitely go for TextureSupply
Unfortunately, the architecture of the building was designed with the use of rammed concrete, and that was nowhere to be found online. We were determined to the point of considering to plan a trip to Germany to scan one of Peter Zumthor’s buildings (for material scanning we recommend Substance Designer and Dabarti Capture).
The time wasn’t in our favor, though. In the end, we settled with creating something using Quixel Mixer. That was our first time using this software, and we were positively surprised by how easy it is to navigate. The idea is to create a material similar to how we use layers in Photoshop but using multiple different textures and maps at the same time.
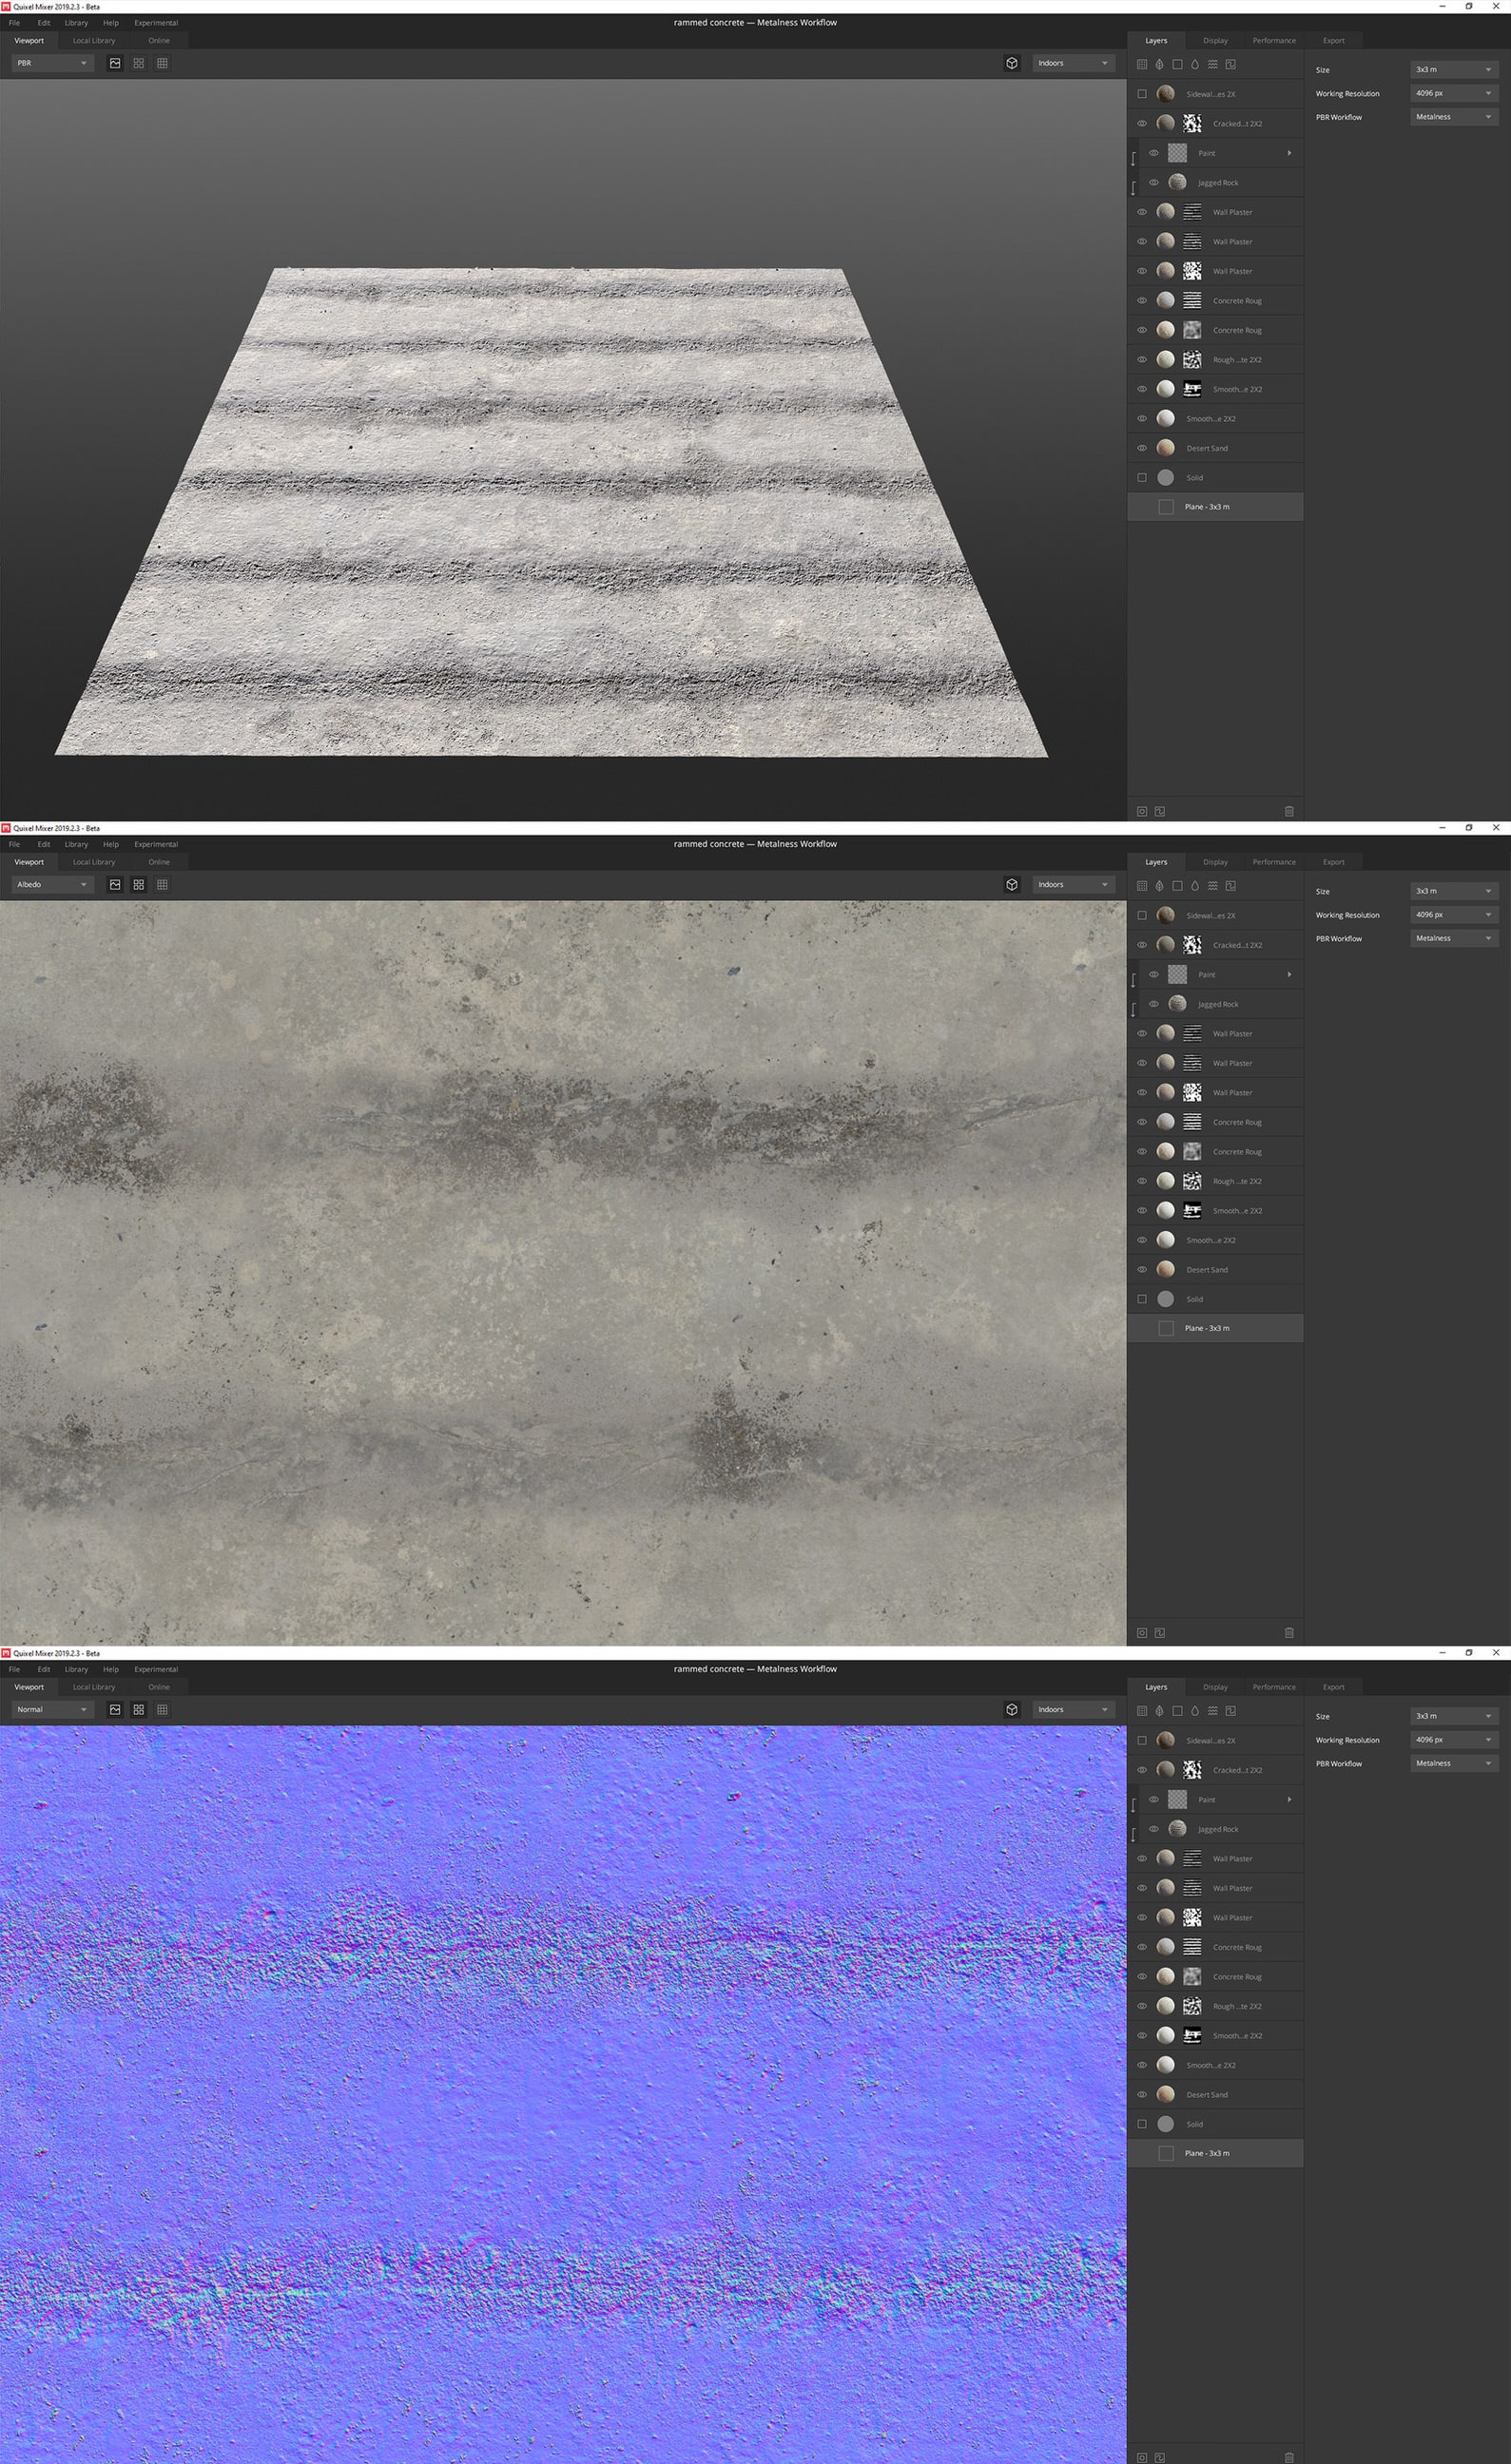
The first attempt of using Quixel Mixer (assets:Megascans).
A closer look to some of our materials.
Post-Production
When a limited time frame and rendering power stops you from producing motion-blurred and noise-less renders, there are a few little plugins that can be of help when moving to the postproduction stage.
Denoiser from Neat Video proved to be the best of us when it comes to getting rid of render noise (also works pretty well with slowing down hectic water movement and flickering lights).
ReelSmart Motion Blur from RE Vision Effects is an excellent little plugin for After Effects that analyze the pixel movement within the footage and adds a subtle motion blur effect to the frames.
When mentioning RE Vision Effect, their Twixtor is absolutely amazing when it comes to slowing down video speed. For color correction, Red Giant’s Magic Bullet is always reasonably easy and fun to use. We also gave a try to their optical lens flare plugin when trying to replicate some of the Sun flares in one of the drone footage.
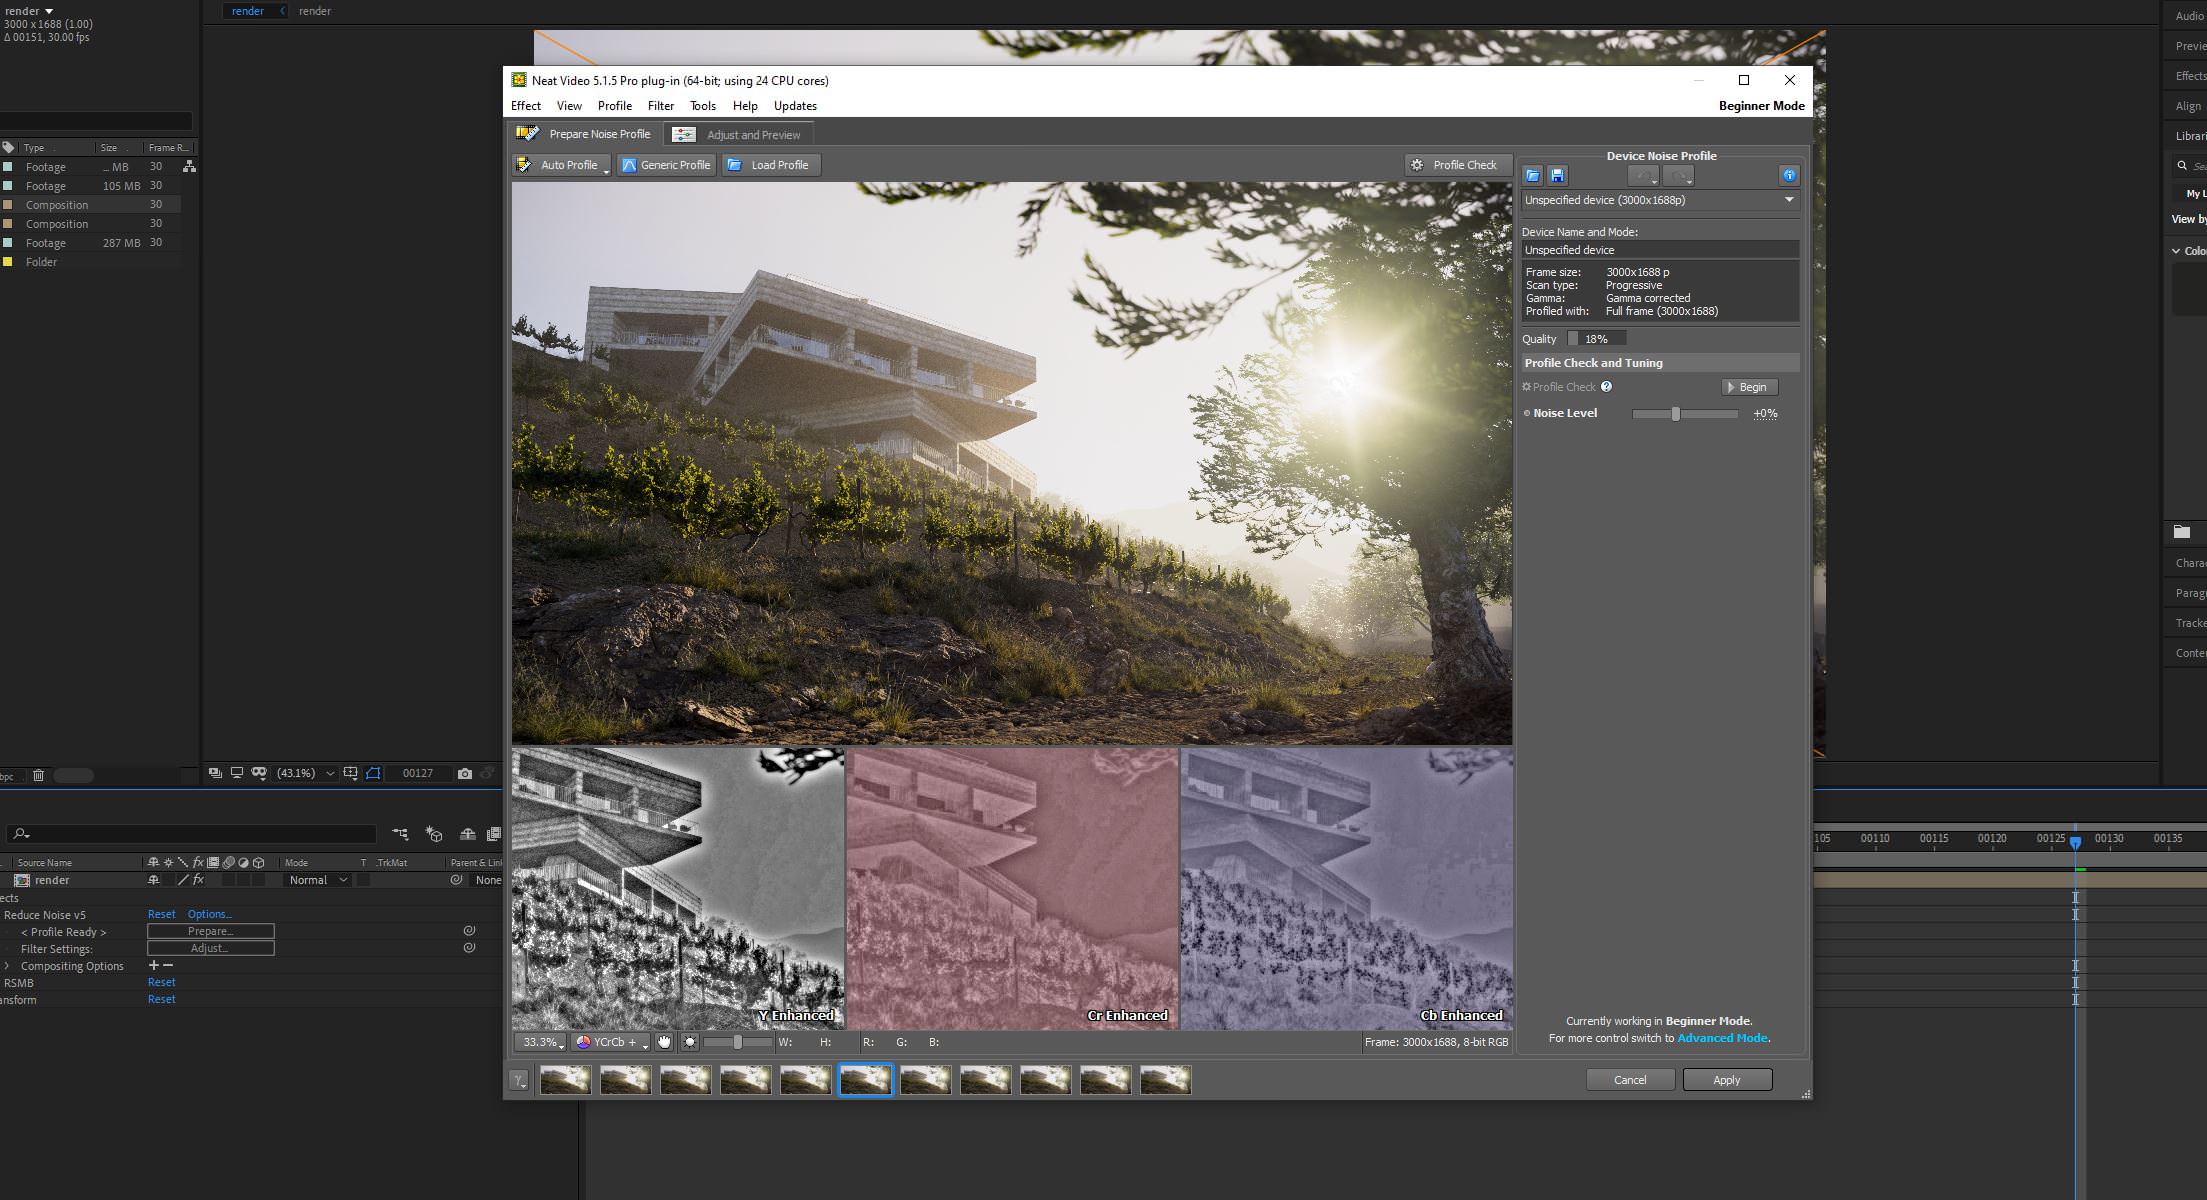
Neat video denoiser
Summary
When stuck in a reality of an artist’s everyday life – Tight deadlines, demanding clients, endless iterations of one image, 12 options for one rug; sometimes, it’s easy to forget why we got ourselves into all of this madness.
For us, being able to step outside of our stressed minds once in a while and search for something that allows us to grow a bit more, is what saves us from going insane in the end.
This particular project made us step out of our comfort zone, look for new solutions, reach out to advice, and what’s the most important – it was just loads of fun. Even though we realize, doing a 2-month pro bono jobs is not a fixed solution for anyone, our intention is to keep pushing ourselves to continue finding those bits of passion and joy in all (or at least some) of our upcoming projects.