
Originally published at: https://www.ronenbekerman.com/making-of-hangzhou-normal-university/
Shared this week on the blog showcase by Angelo Ferretti and immediately captured my attention. This is one of the most photographic renders I’ve seen in a long time! Big thanks to Angelo & Silvia for arranging this making-of so fast so we can all enjoy their process.
About Lucydreams
Lucydreams is an ArchViz company based in Italy, founded by Angelo Ferretti 7 years ago. Together with a team of great passionate artists, they work in the visualization and training fields for local and foreign clients. The goal of the company is to provide realistic, artistic driven, and heartfelt computer-generated images.
[av_masonry_gallery ids=’123637,123638,123639,123640,123641′ items=’-1′ columns=’flexible’ paginate=’pagination’ size=’flex’ gap=’large’ overlay_fx=” container_links=” id=” caption_elements=’none’ caption_styling=” caption_display=’always’ color=” custom_bg=”]Introduction to the Making of Hangzhou Normal University Renderings
First of all, let us say that it’s a pleasure to share our workflow on Ronen’s blog! We hope you could find something inspiring and useful in reading this article. If you have any questions feel free to ask and we’ll happily reply in the comments.
The Project
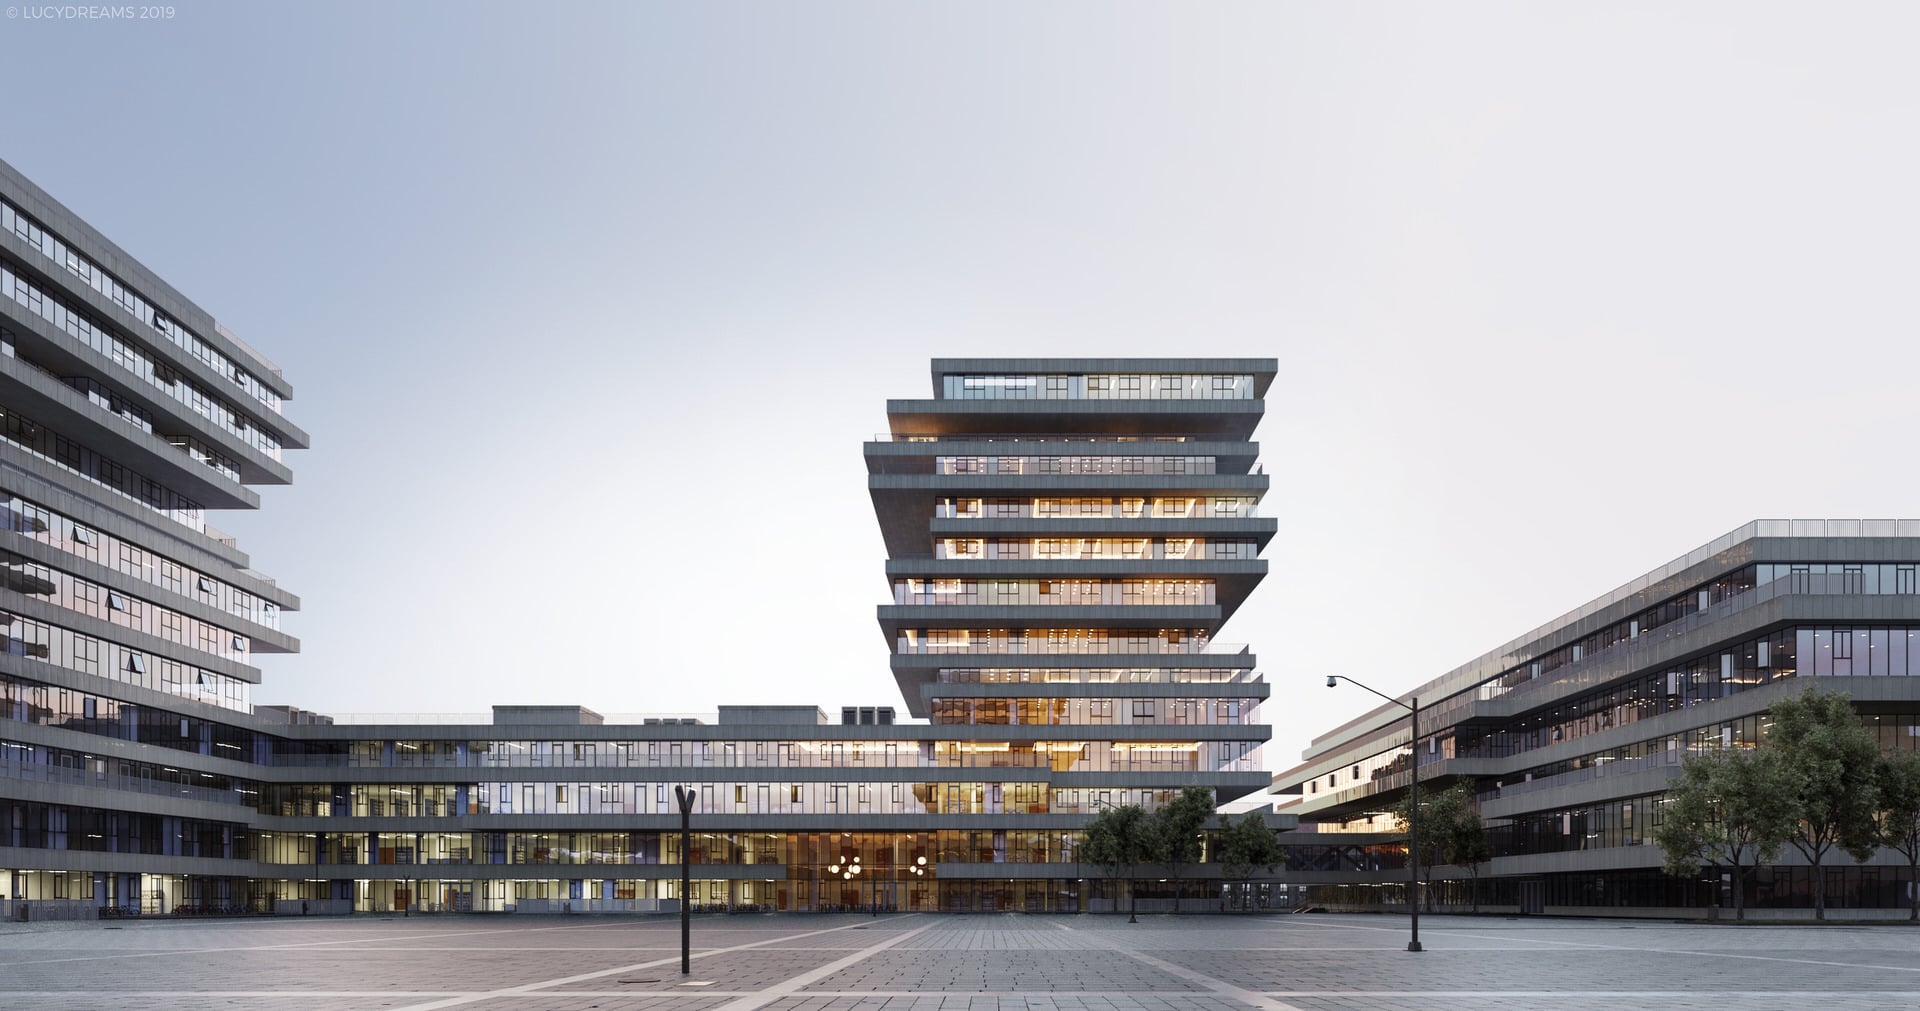
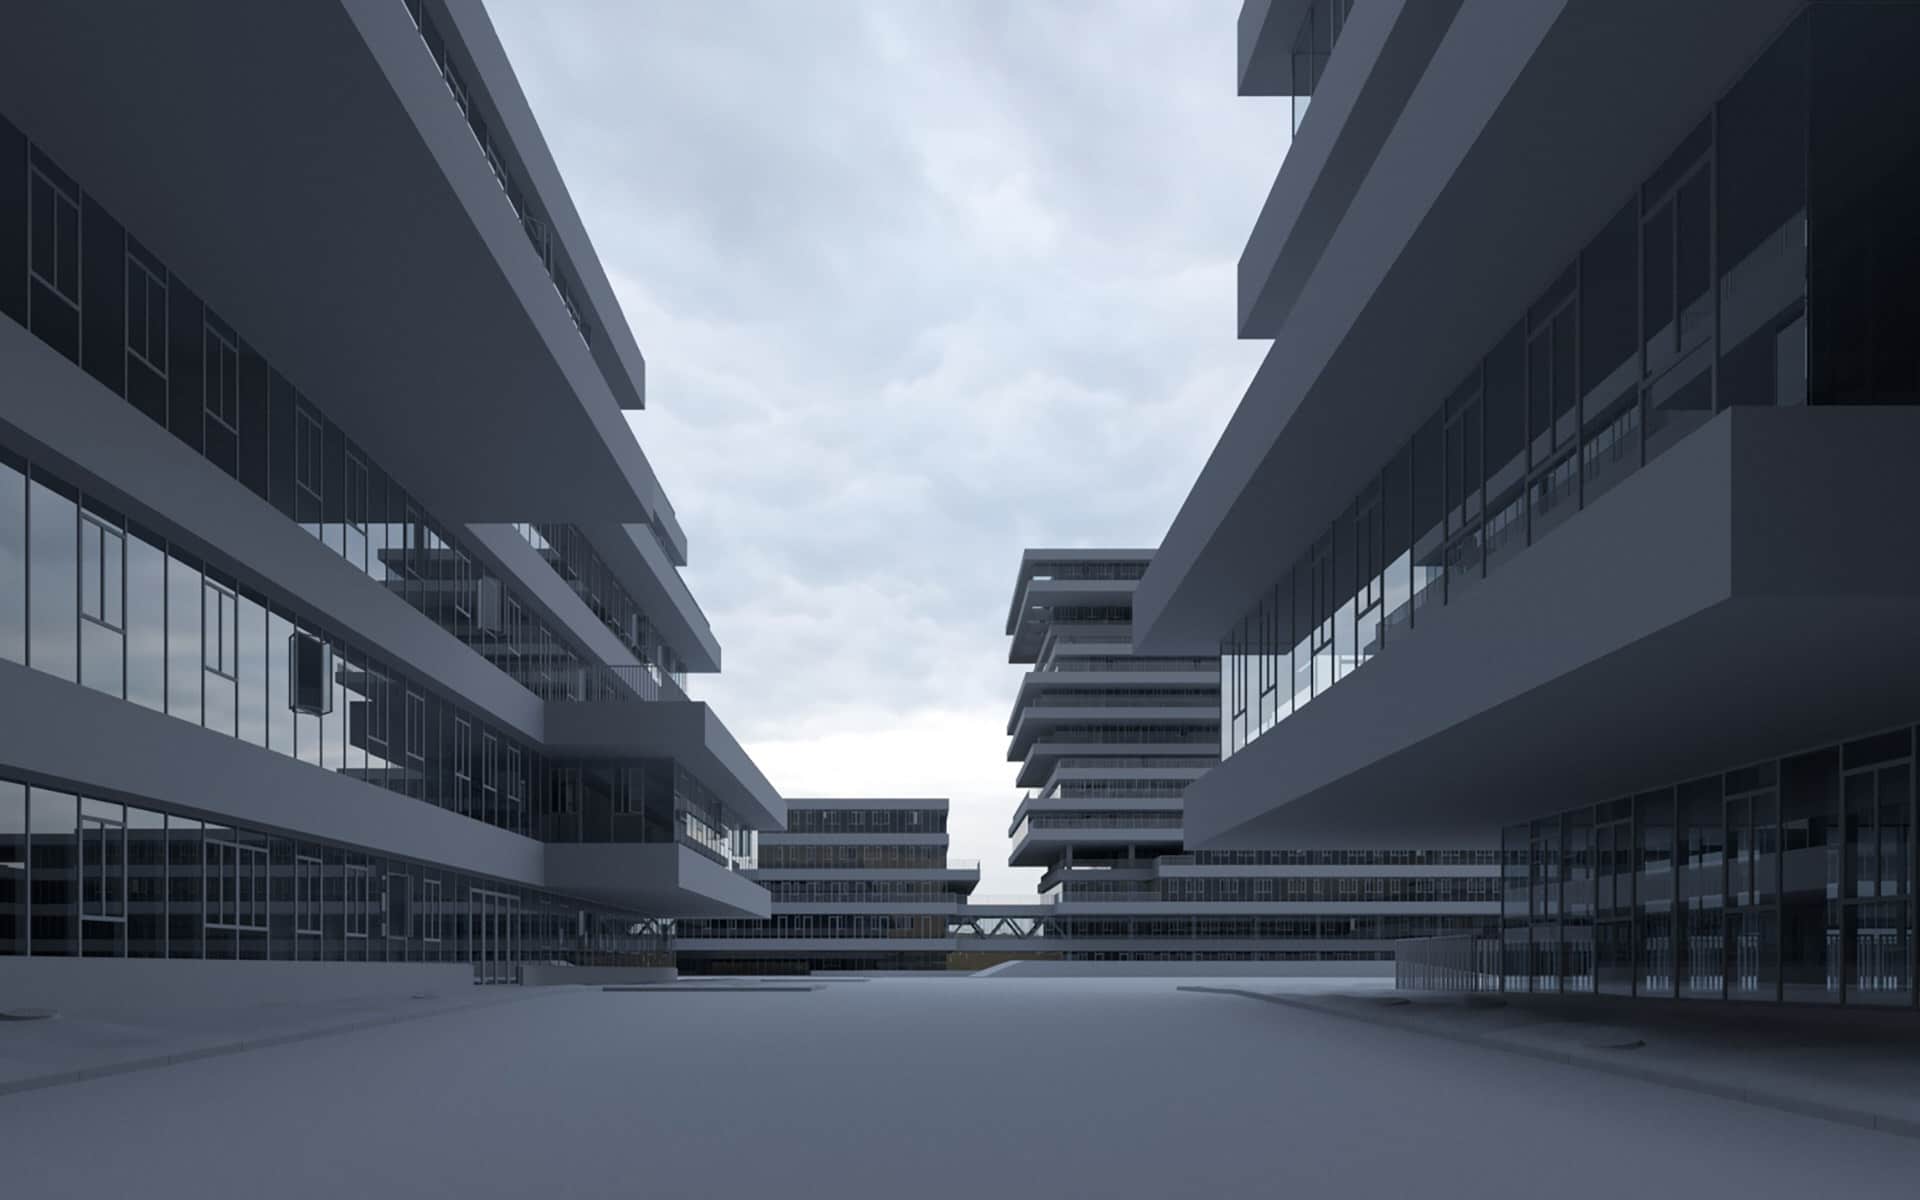
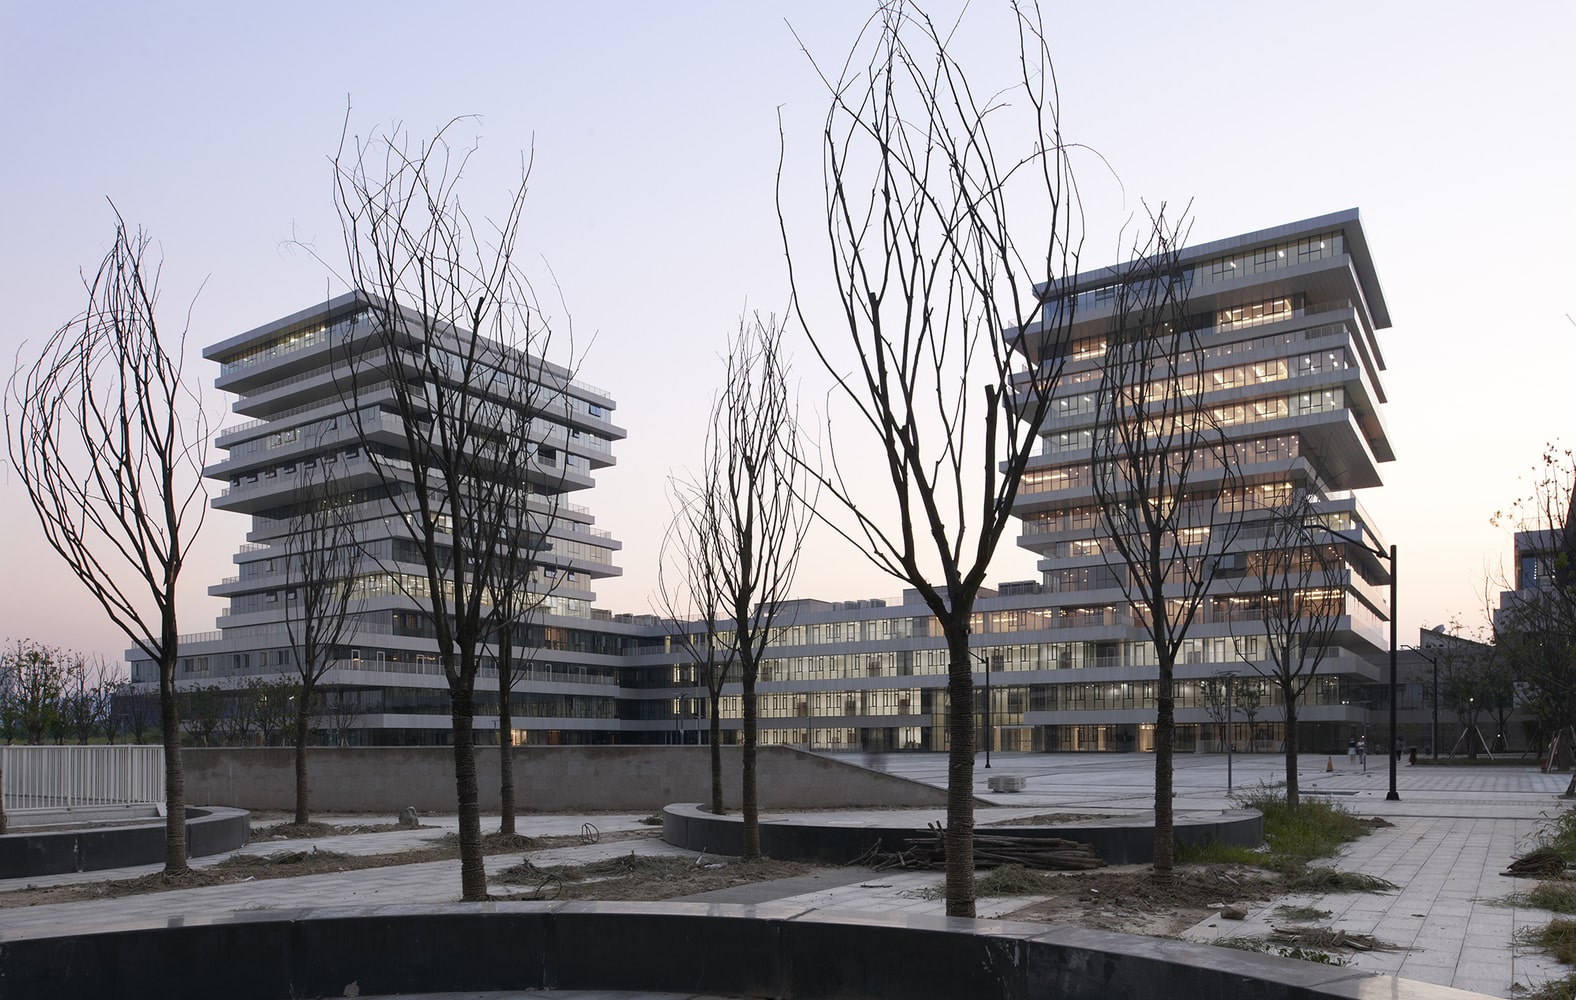
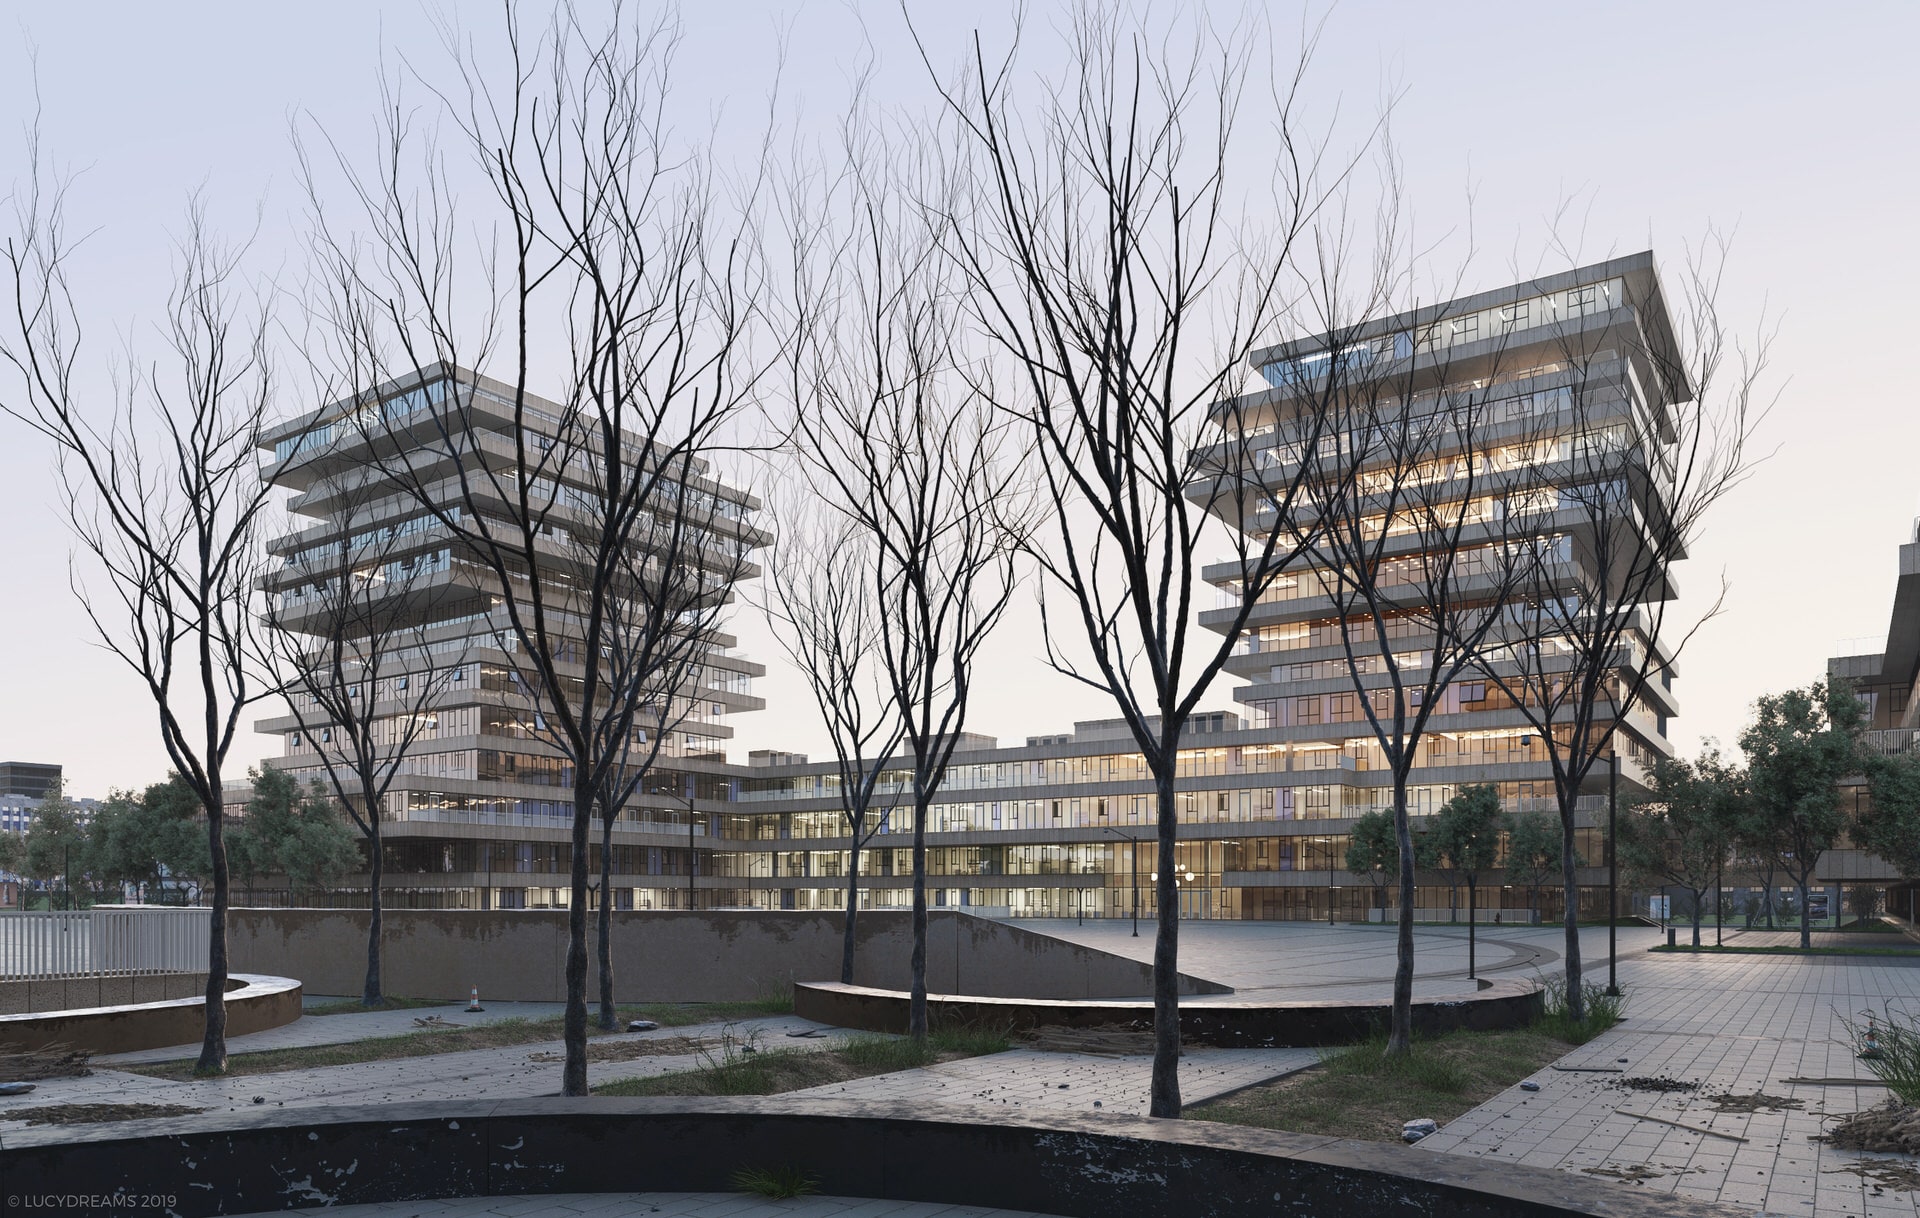
The goal of our latest rendering was to portray the existing reborn of Chinese Century-old Hangzhou Normal University in this new campus that consists of more than a dozen colleges forming a vibrant puzzle. In the center of this puzzle, a vast site hosts a core area complex, with several blocks and fully open space for pedestrians.
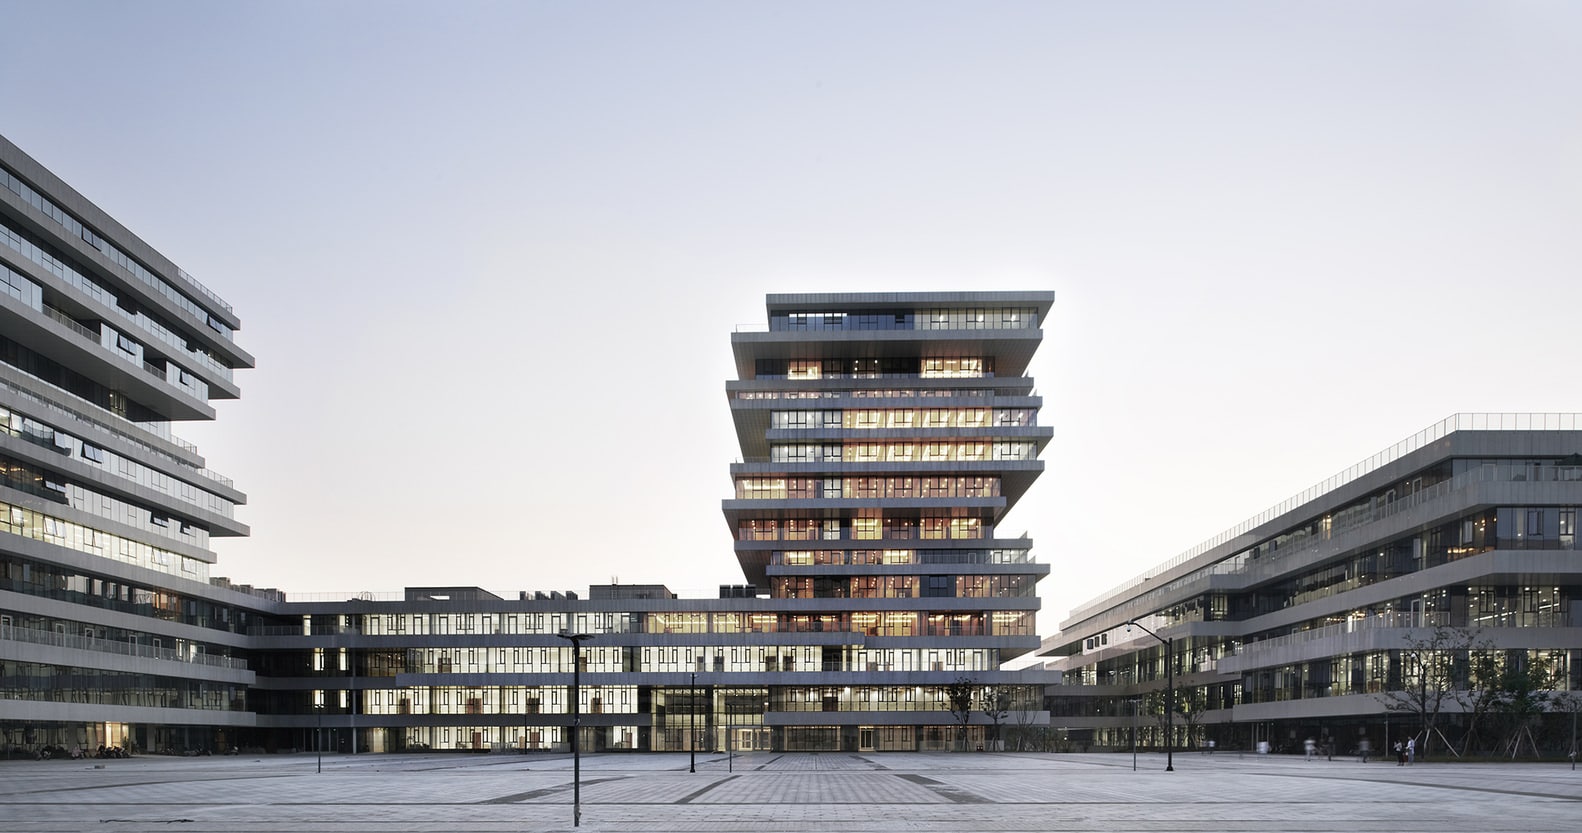
We can say that we are quite happy with the result, especially looking at the match between the final renderings and the real photos, which was our main target as well as the most challenging part of this project.
We made everything you see in the final images with Cinema 4D, Corona Renderer, SpeedTree, Forester, and Photoshop.
What we liked most about this project was the size of the whole complex and the atmosphere of the rainy shots. A potentially “simple” shaped building but made very interesting by the randomly protruding floors that create a nice contrast between solids and voids.
The most useful things in creating these renderings were, of course, the photos taken by the photographers Ruijing and Hui Zhang, that you can see below.
We also found a few drawings to speed up the modeling process and catch the right proportions of the buildings.
[av_masonry_gallery ids=’123644,123645,123646,123647,123648,123649,123650,123651′ items=’-1′ columns=’flexible’ paginate=’pagination’ size=’flex’ gap=’large’ overlay_fx=” container_links=’active’ id=” caption_elements=’none’ caption_styling=” caption_display=’always’ color=” custom_bg=”]Some parts of the model came out a bit different from the real one, but we didn’t want to lose too much time to replicate the shape of the structure obsessively. We wanted to focus on the overall look instead.
3D Modeling of Hangzhou Normal University
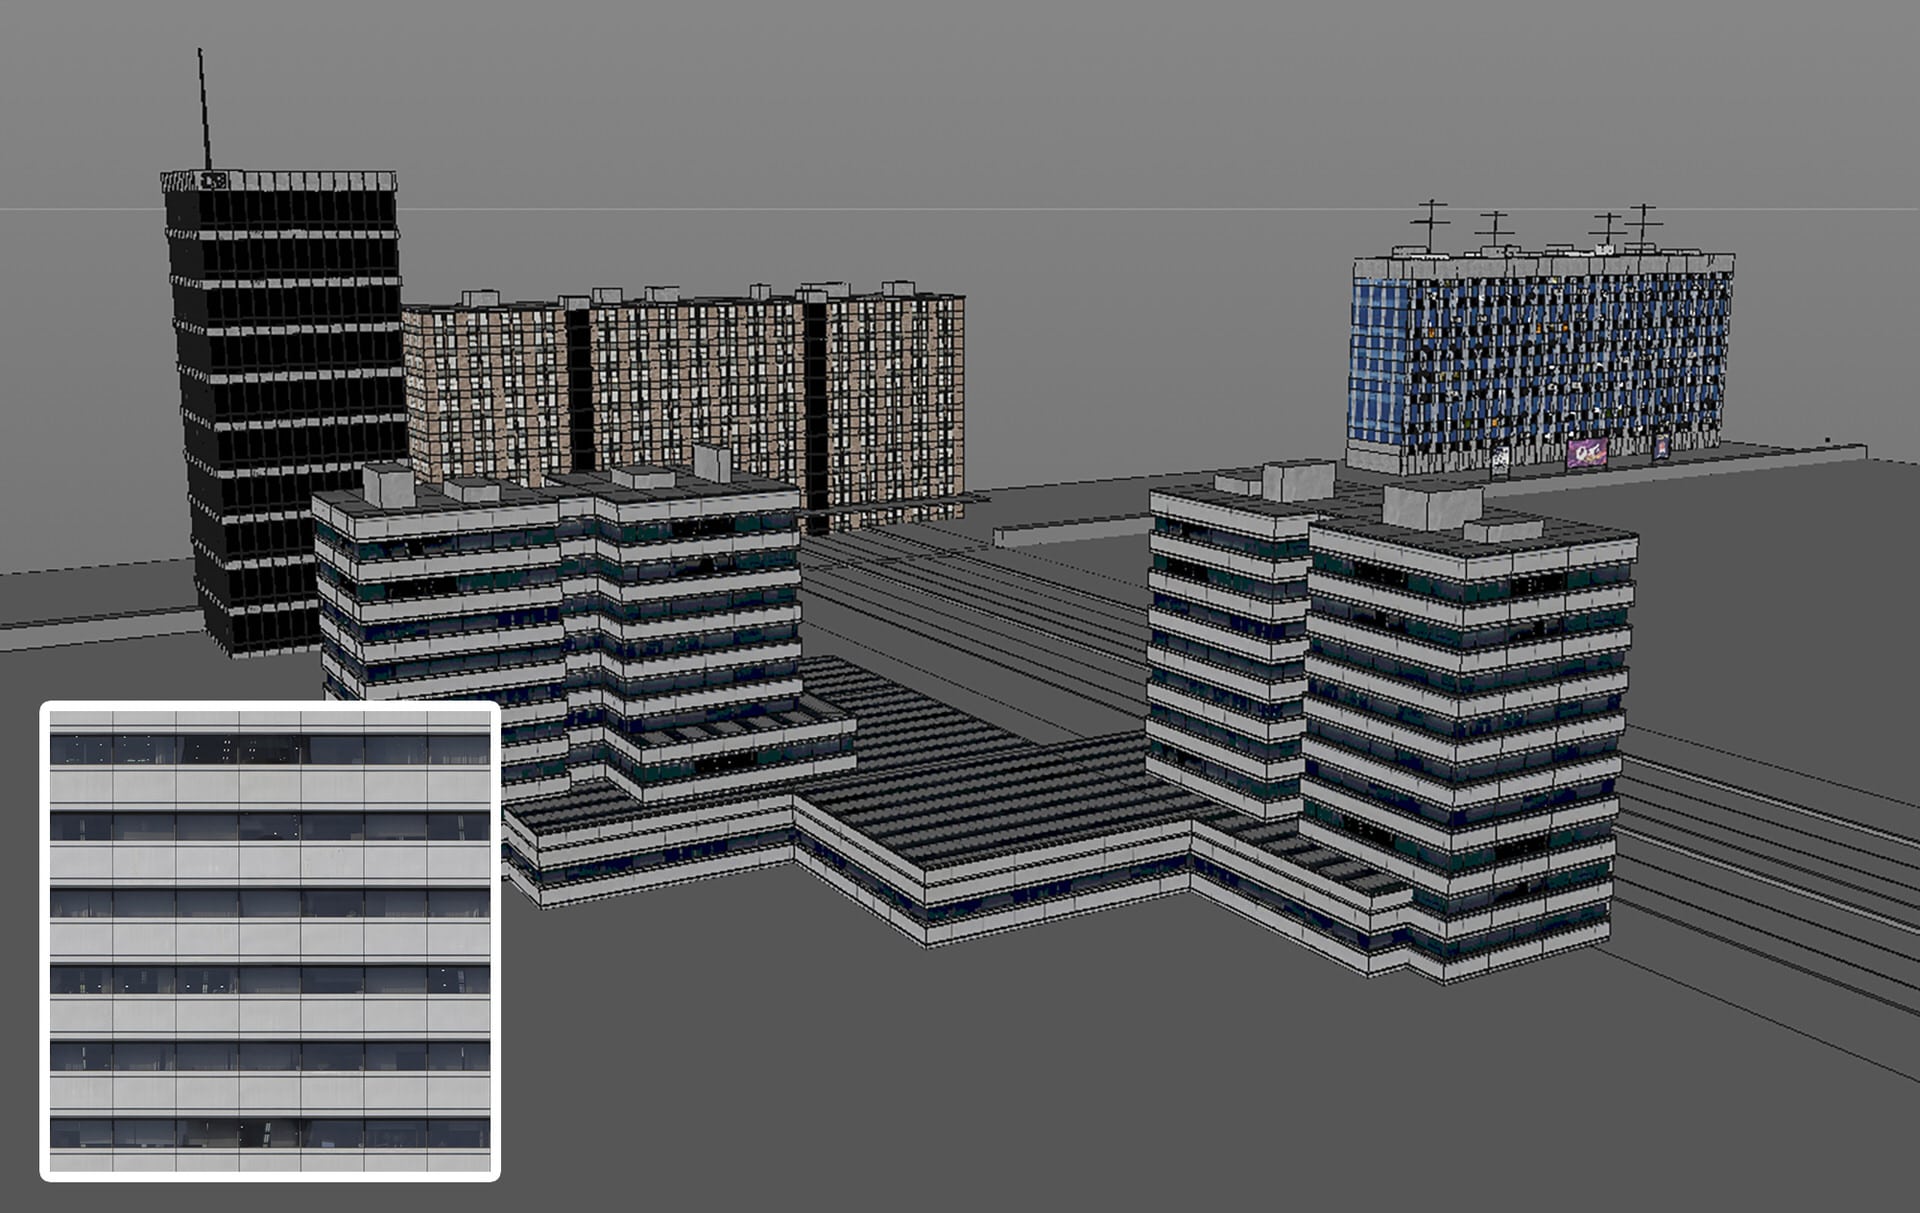
After all, the building was not very difficult to model: it’s quite square, made of an alternation of large and thick floors with modular windows. The tricky part was to work without many drawings!
We didn’t have all the plans or facades, so we started by blocking the proportions of the main volumes, following the few drawings we found and the photos.
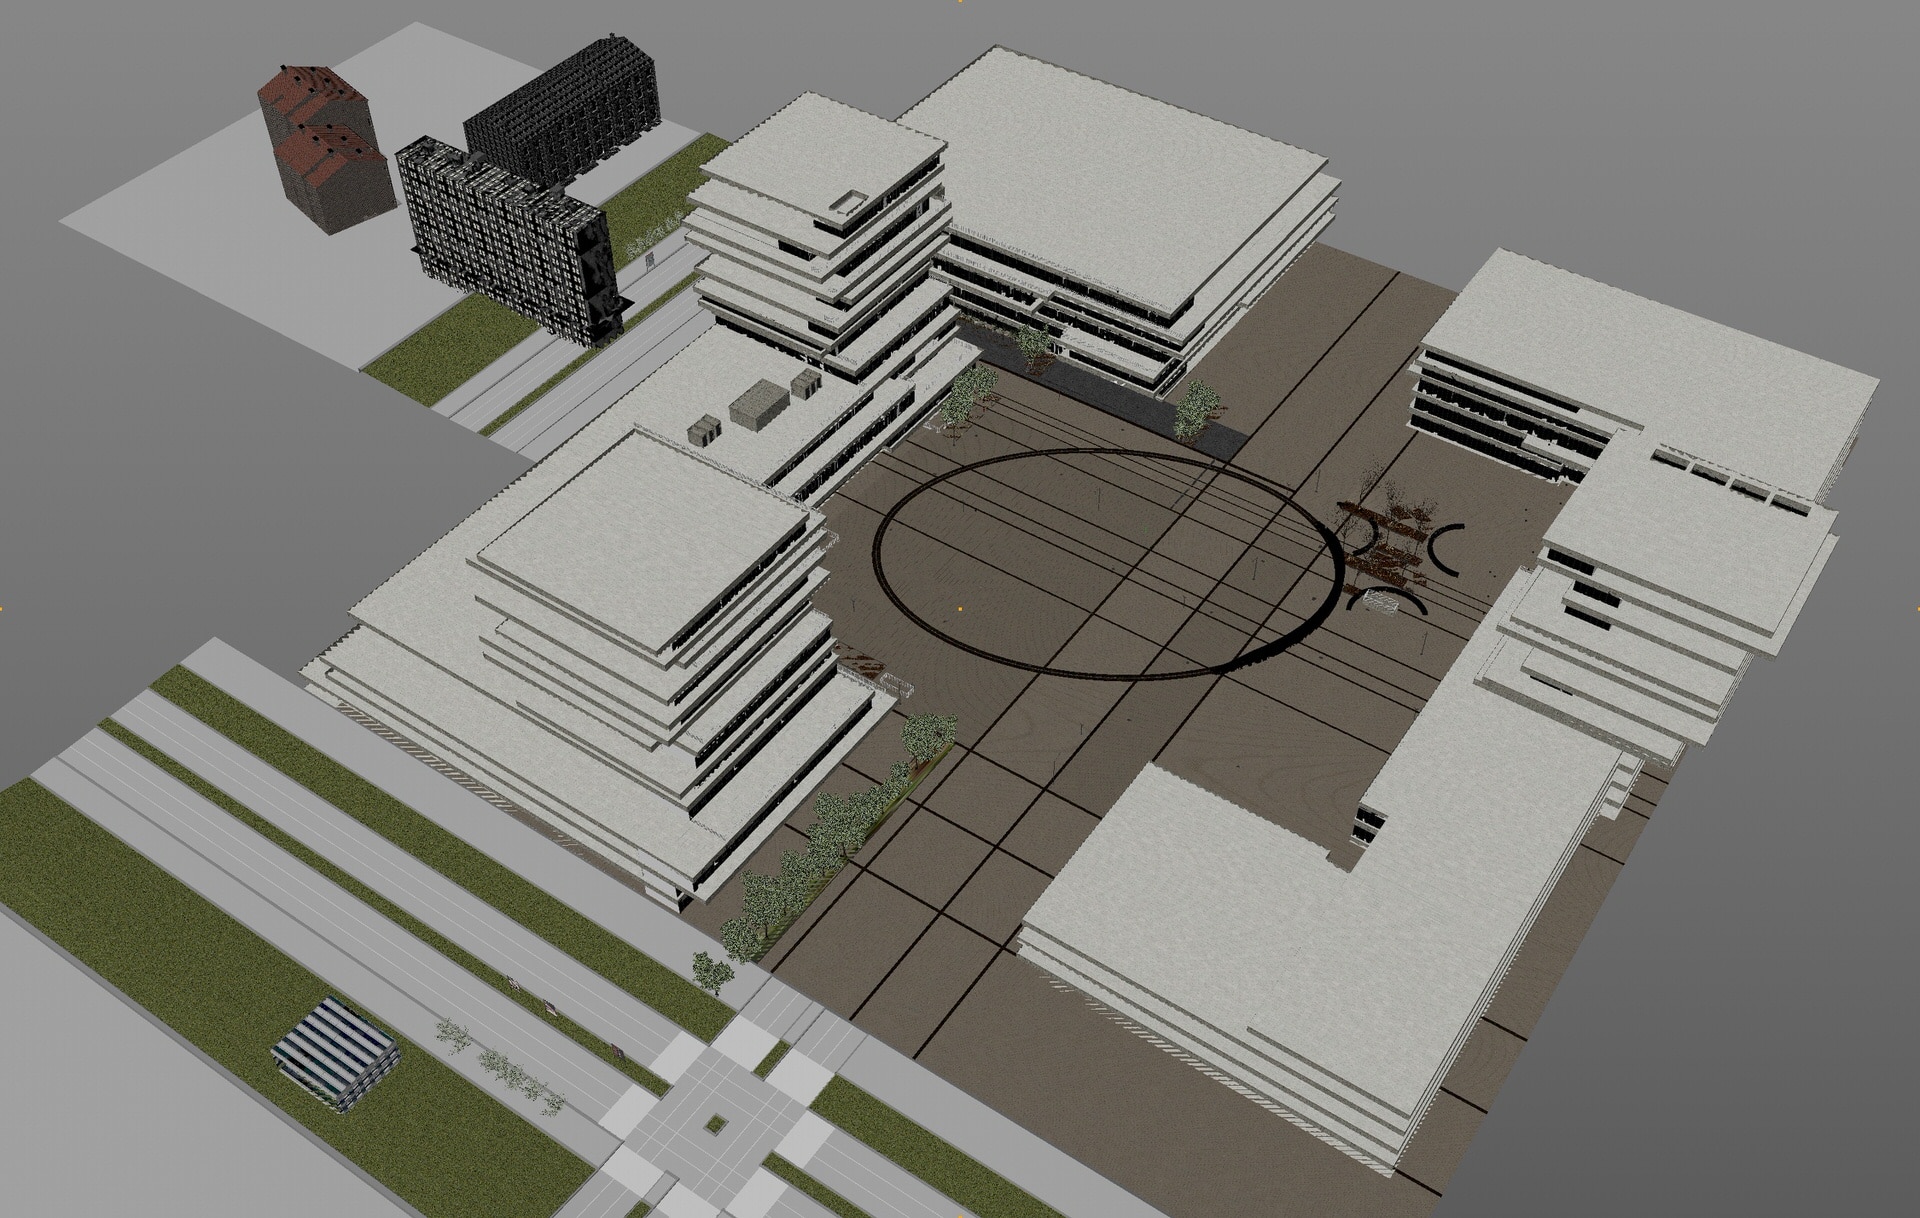
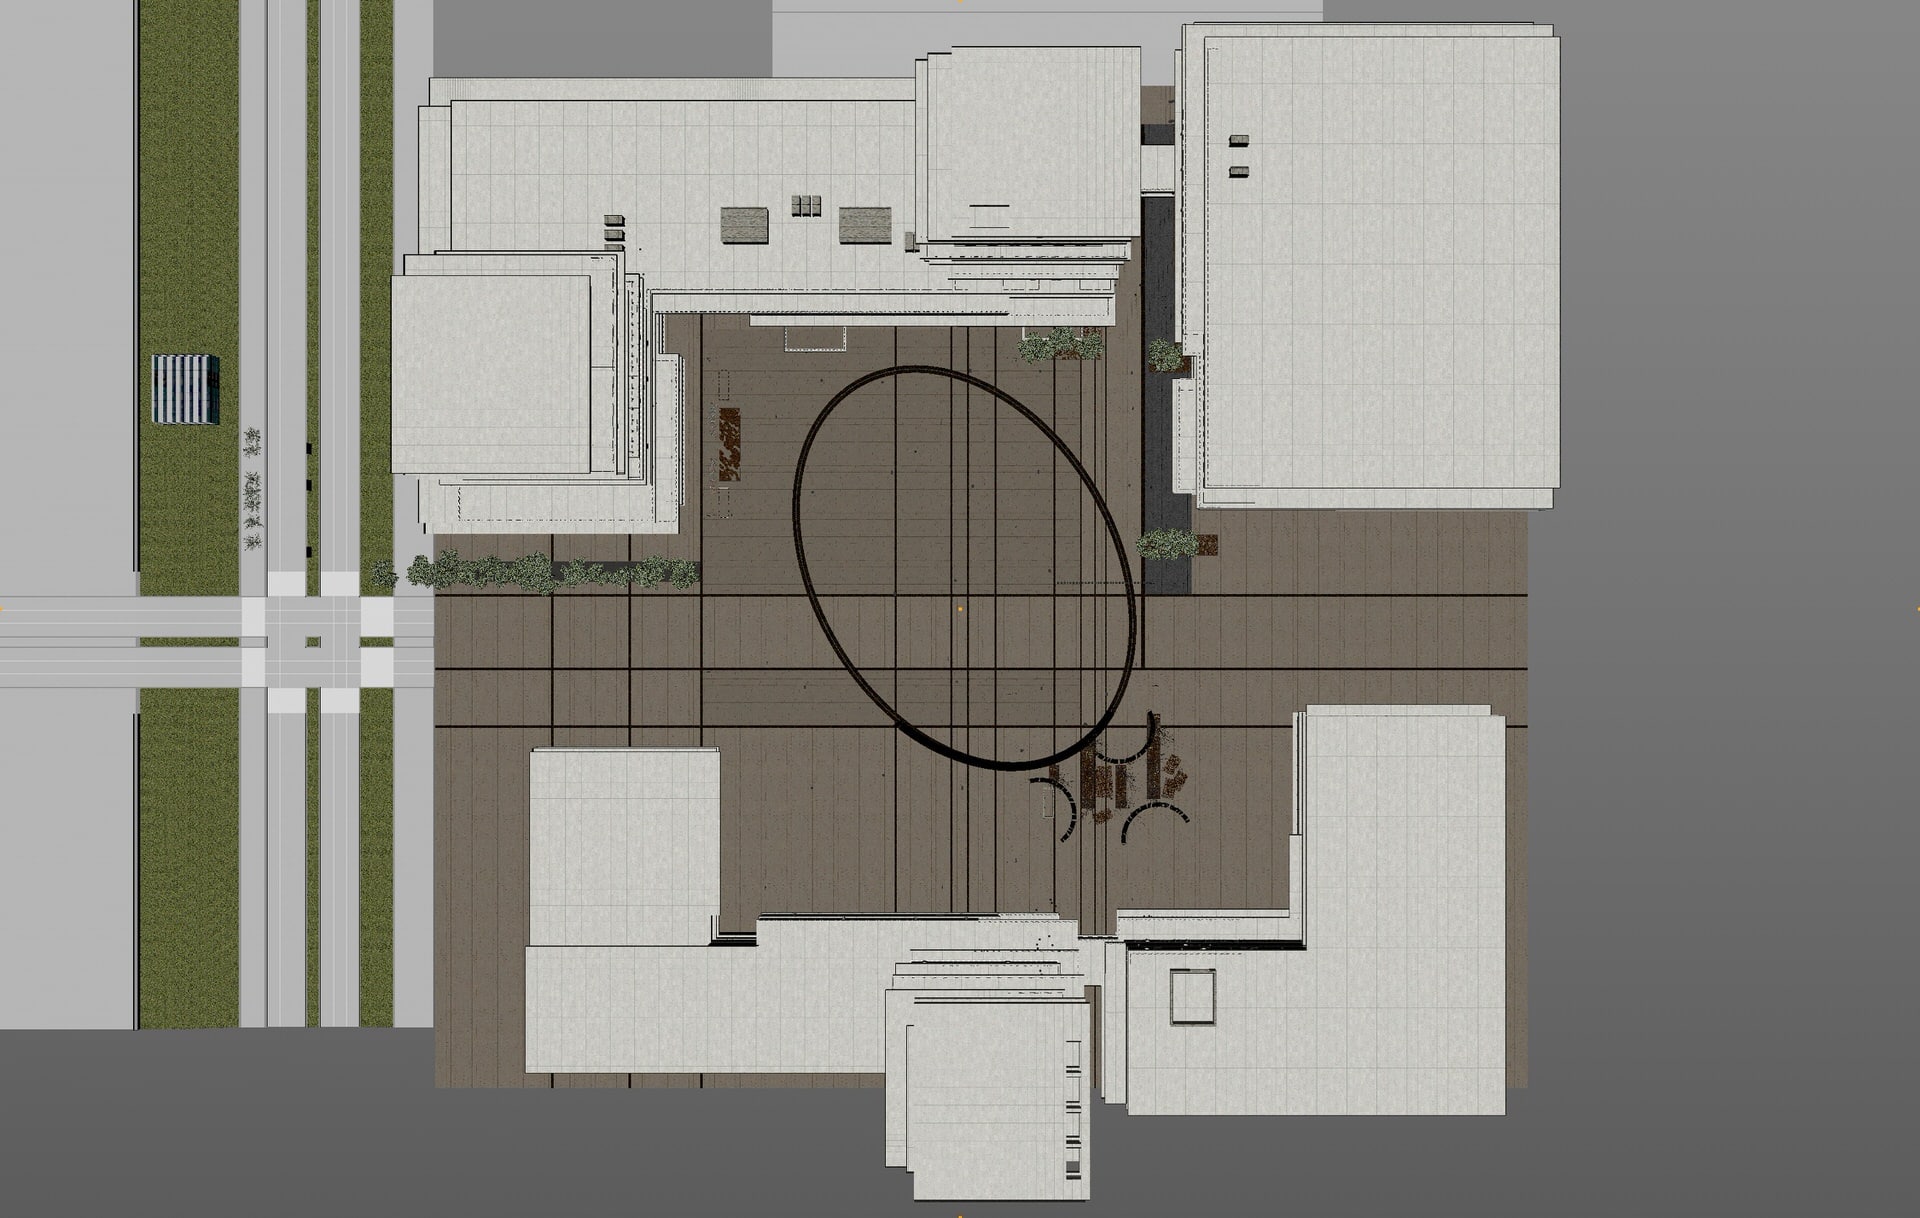
The first model is always very rough, but it helps us out to focus on proportions between solids and voids and shows us if we are moving in the right direction. The first materials are also very quick: a pure white and a simple reflective glass (more or less a mirror).
[av_masonry_gallery ids=’123654,123655,123656,123657,123658,123659′ items=’-1′ columns=’flexible’ paginate=’pagination’ size=’flex’ gap=’large’ overlay_fx=” container_links=’active’ id=” caption_elements=’none’ caption_styling=” caption_display=’always’ color=” custom_bg=”]Once we checked the first step, we moved on facing the modular windows with MoGraph tools, which allows us to edit many clones with a single click.
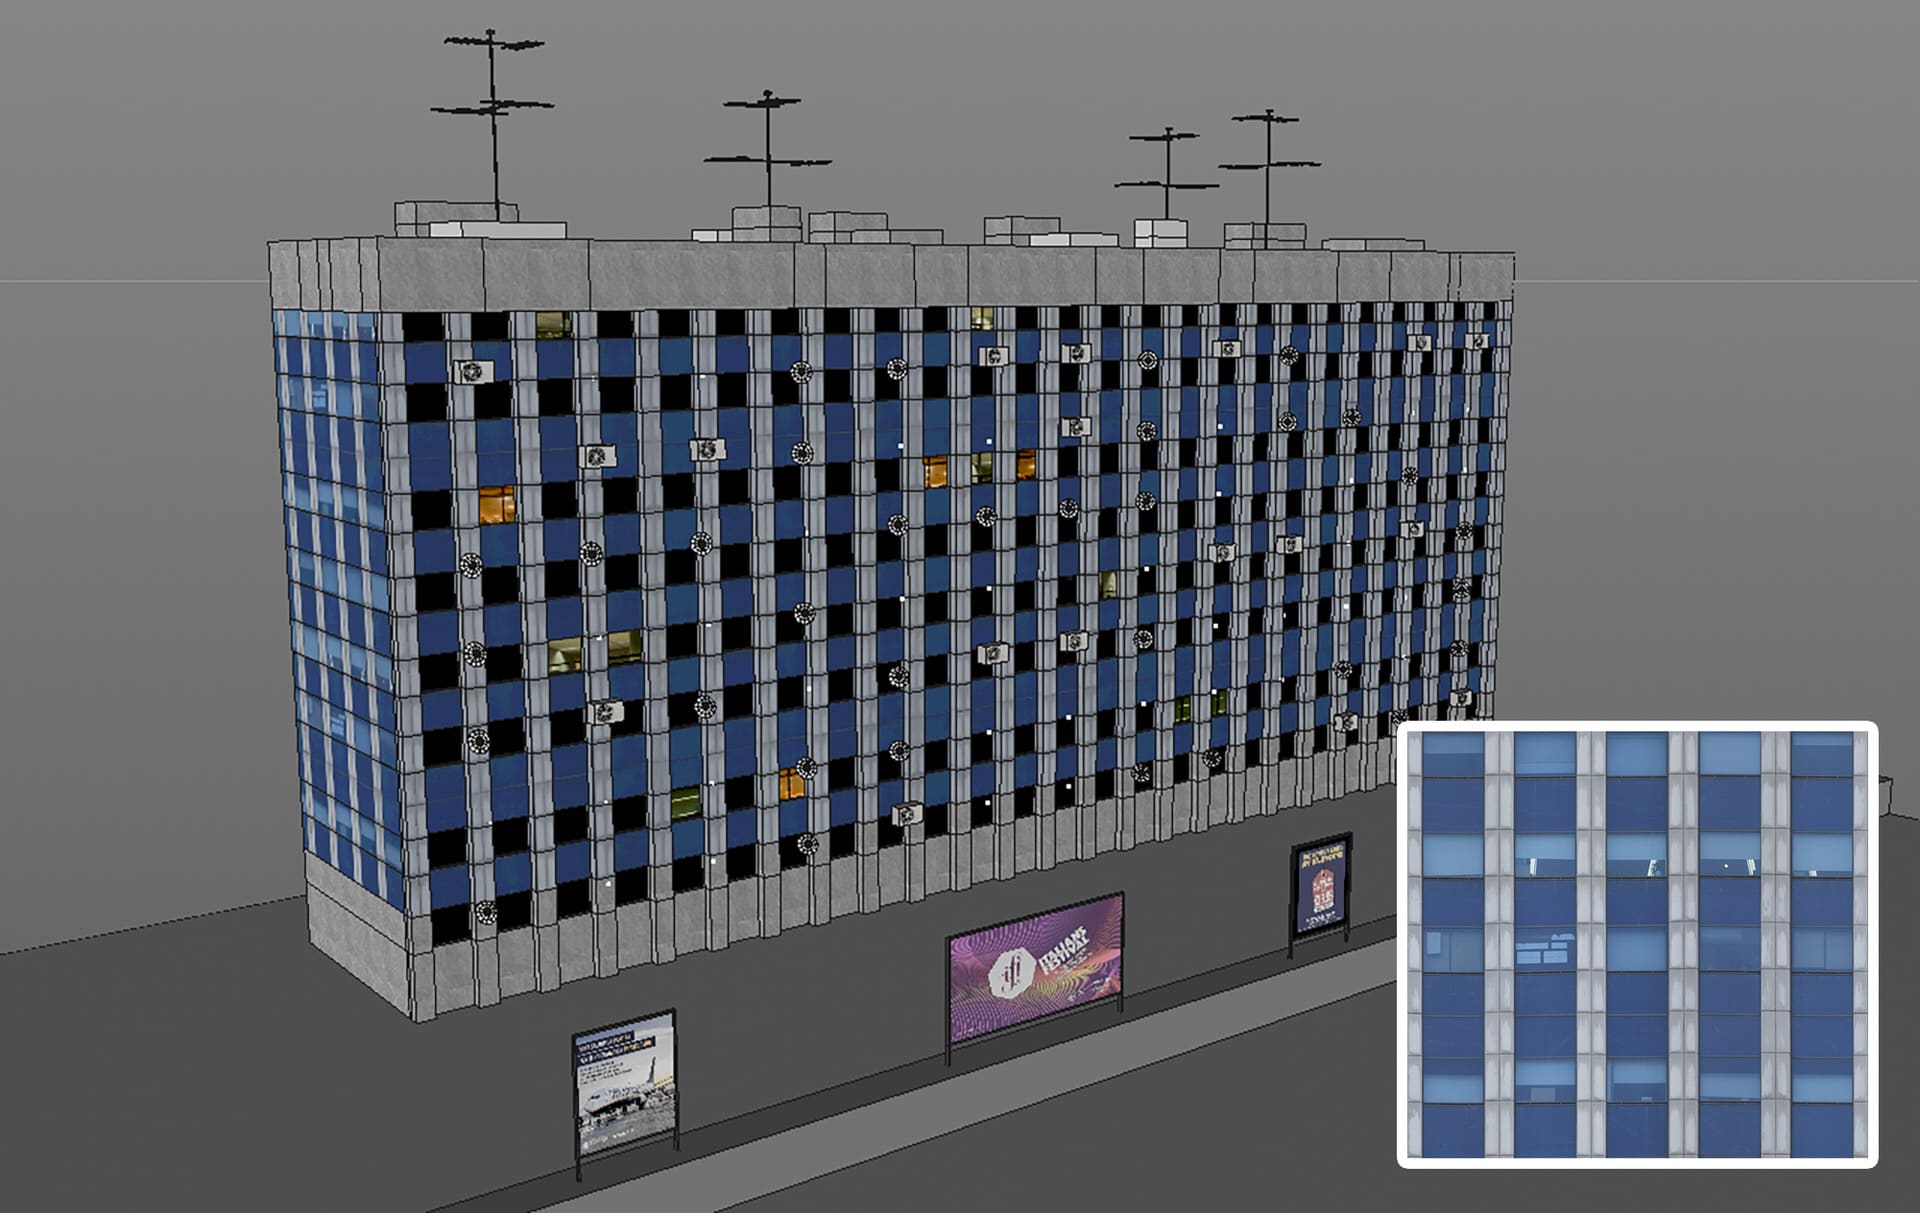
Even though the area is very closed by the surrounding buildings, we needed some background buildings. For this, we picked a seamless texture from textures.com that we then applied onto a simple cube. We then started to cut and extrude following the windows and other elements portrayed in the texture. We continued by creating concavity and convexity and keeping the model very light and easy to manage.
We put some additional details such as air conditioners and satellite antennas, keeping the shape always very simple.
The next step was to arrange an established foreground for every shot.
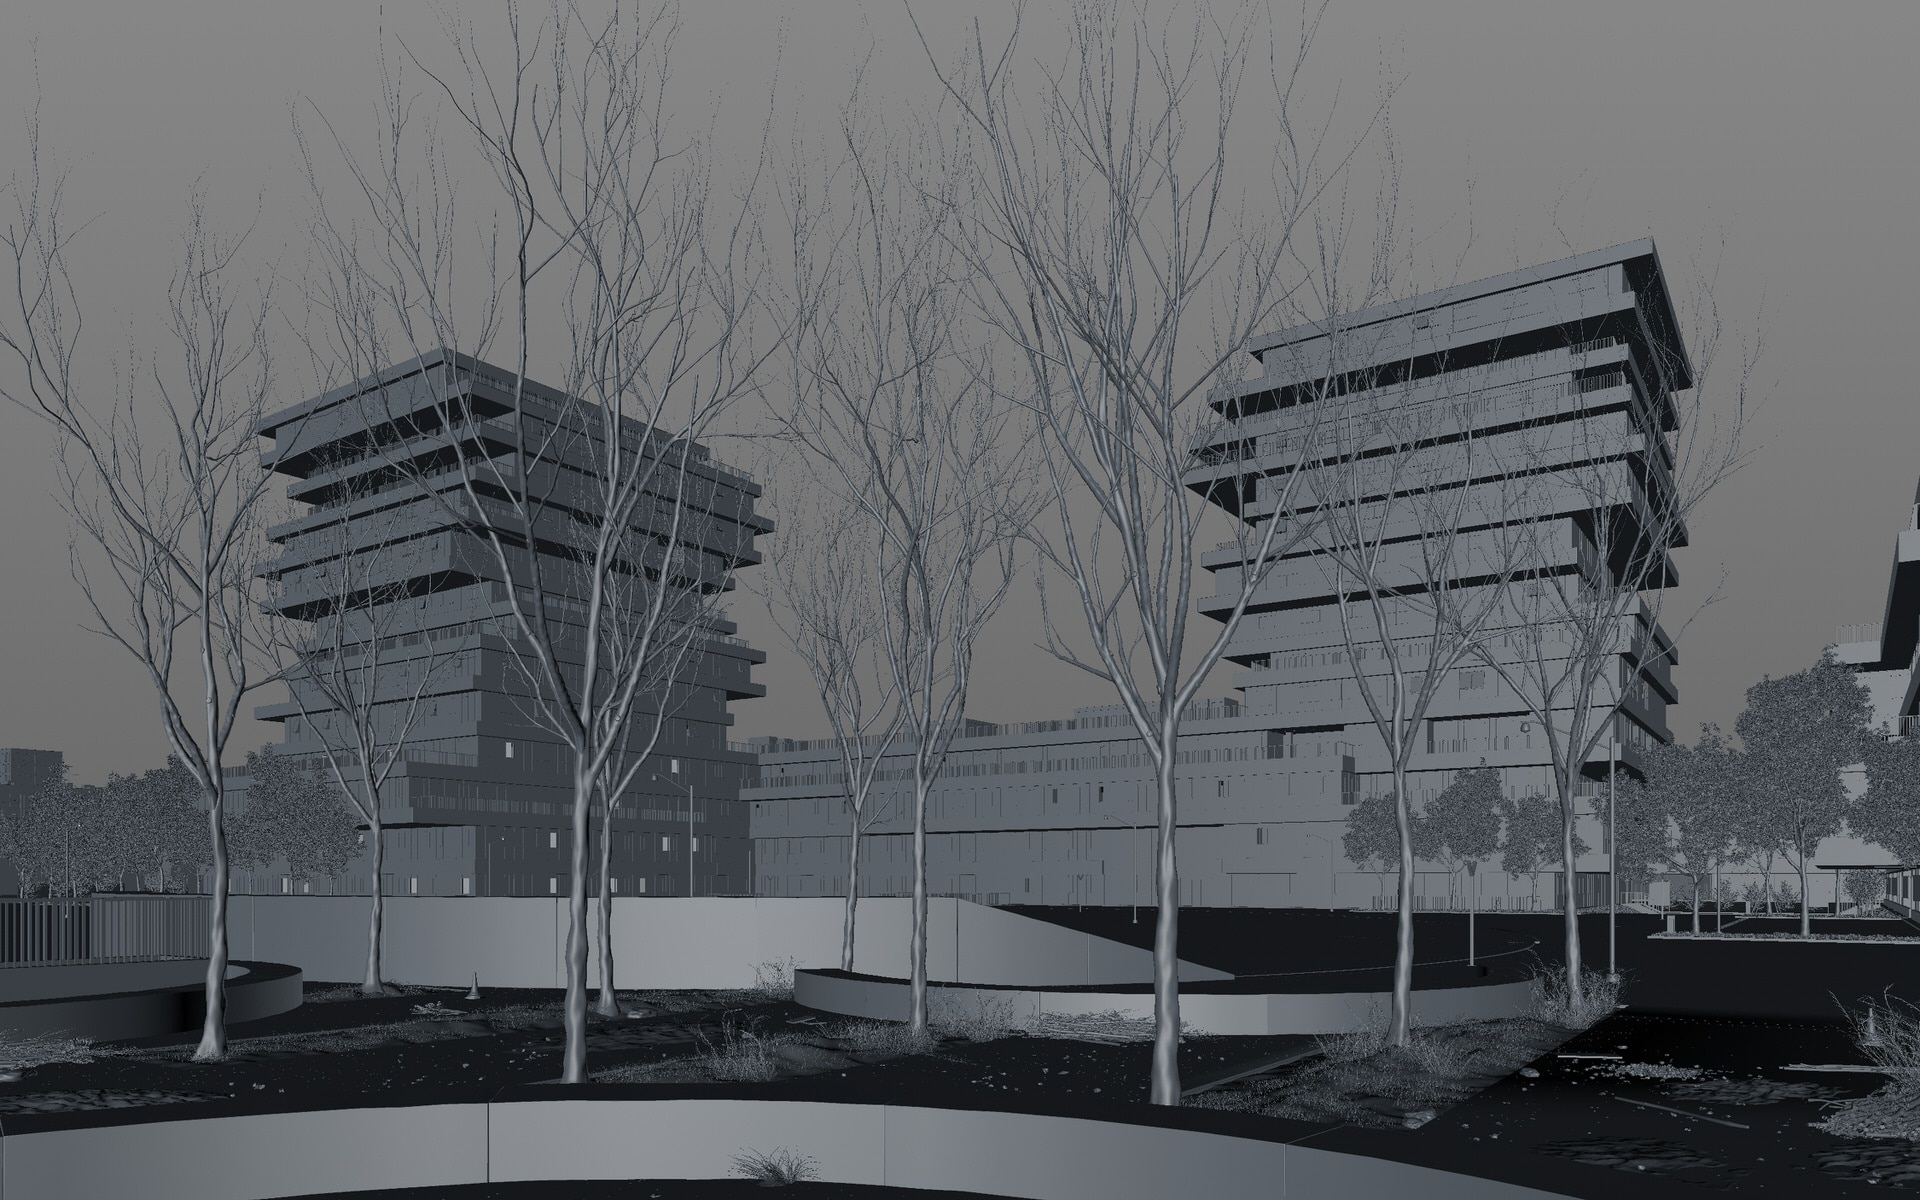
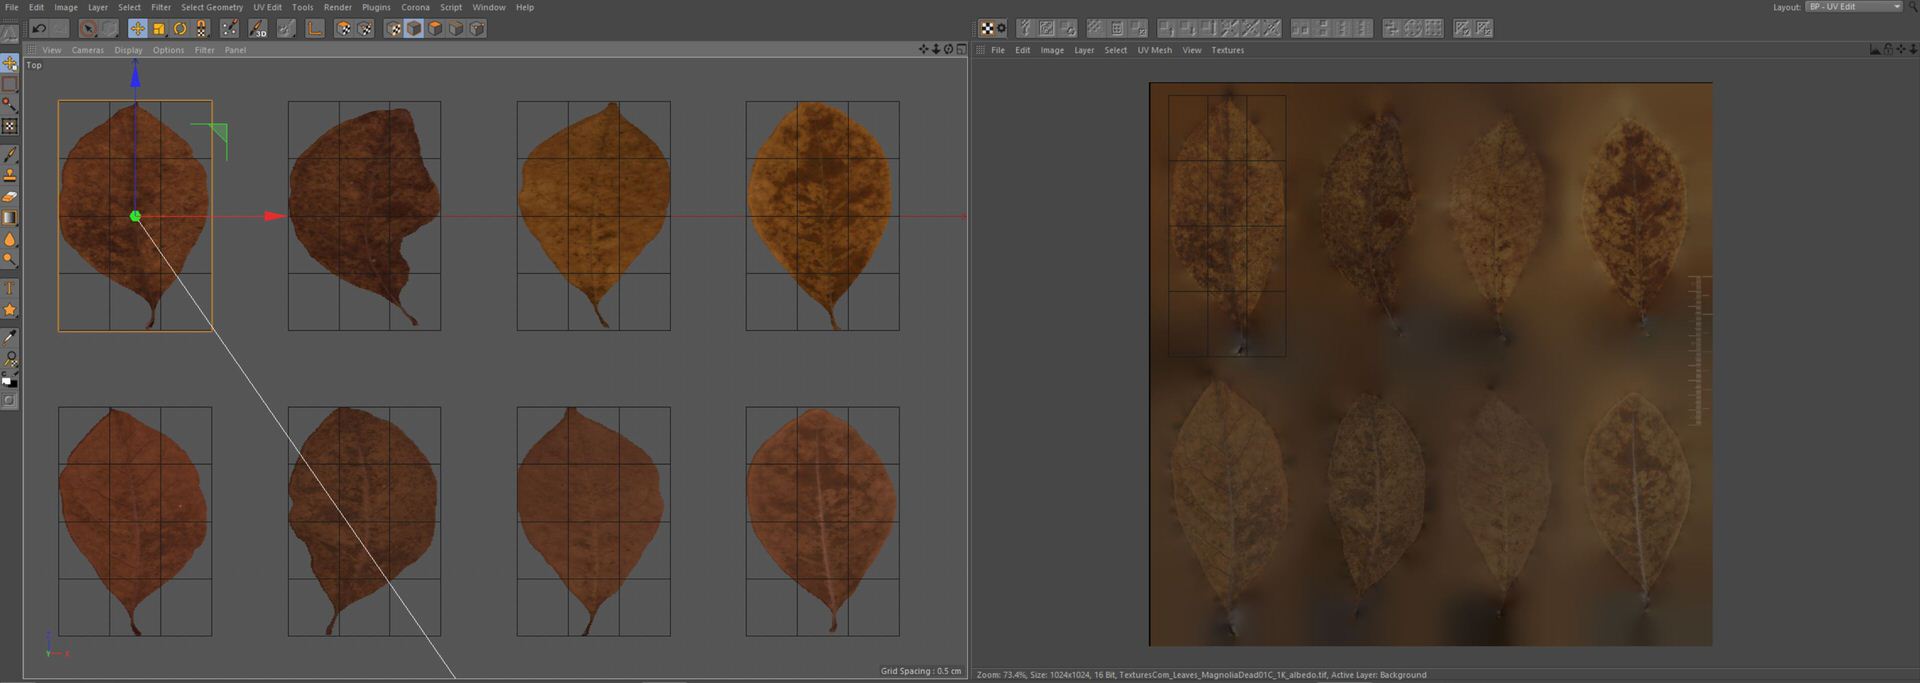
The shot with the bare trees was the most difficult one. We wanted to give this shot a real “worksite” look, spreading a pile of sand, rubbles, and old leaves on the floor.
We modeled and crumpled 24 different types of leaves by ourselves, and placed them on the ground with Cinema 4D simulation tools. We did more or less the same for the woodpiles.

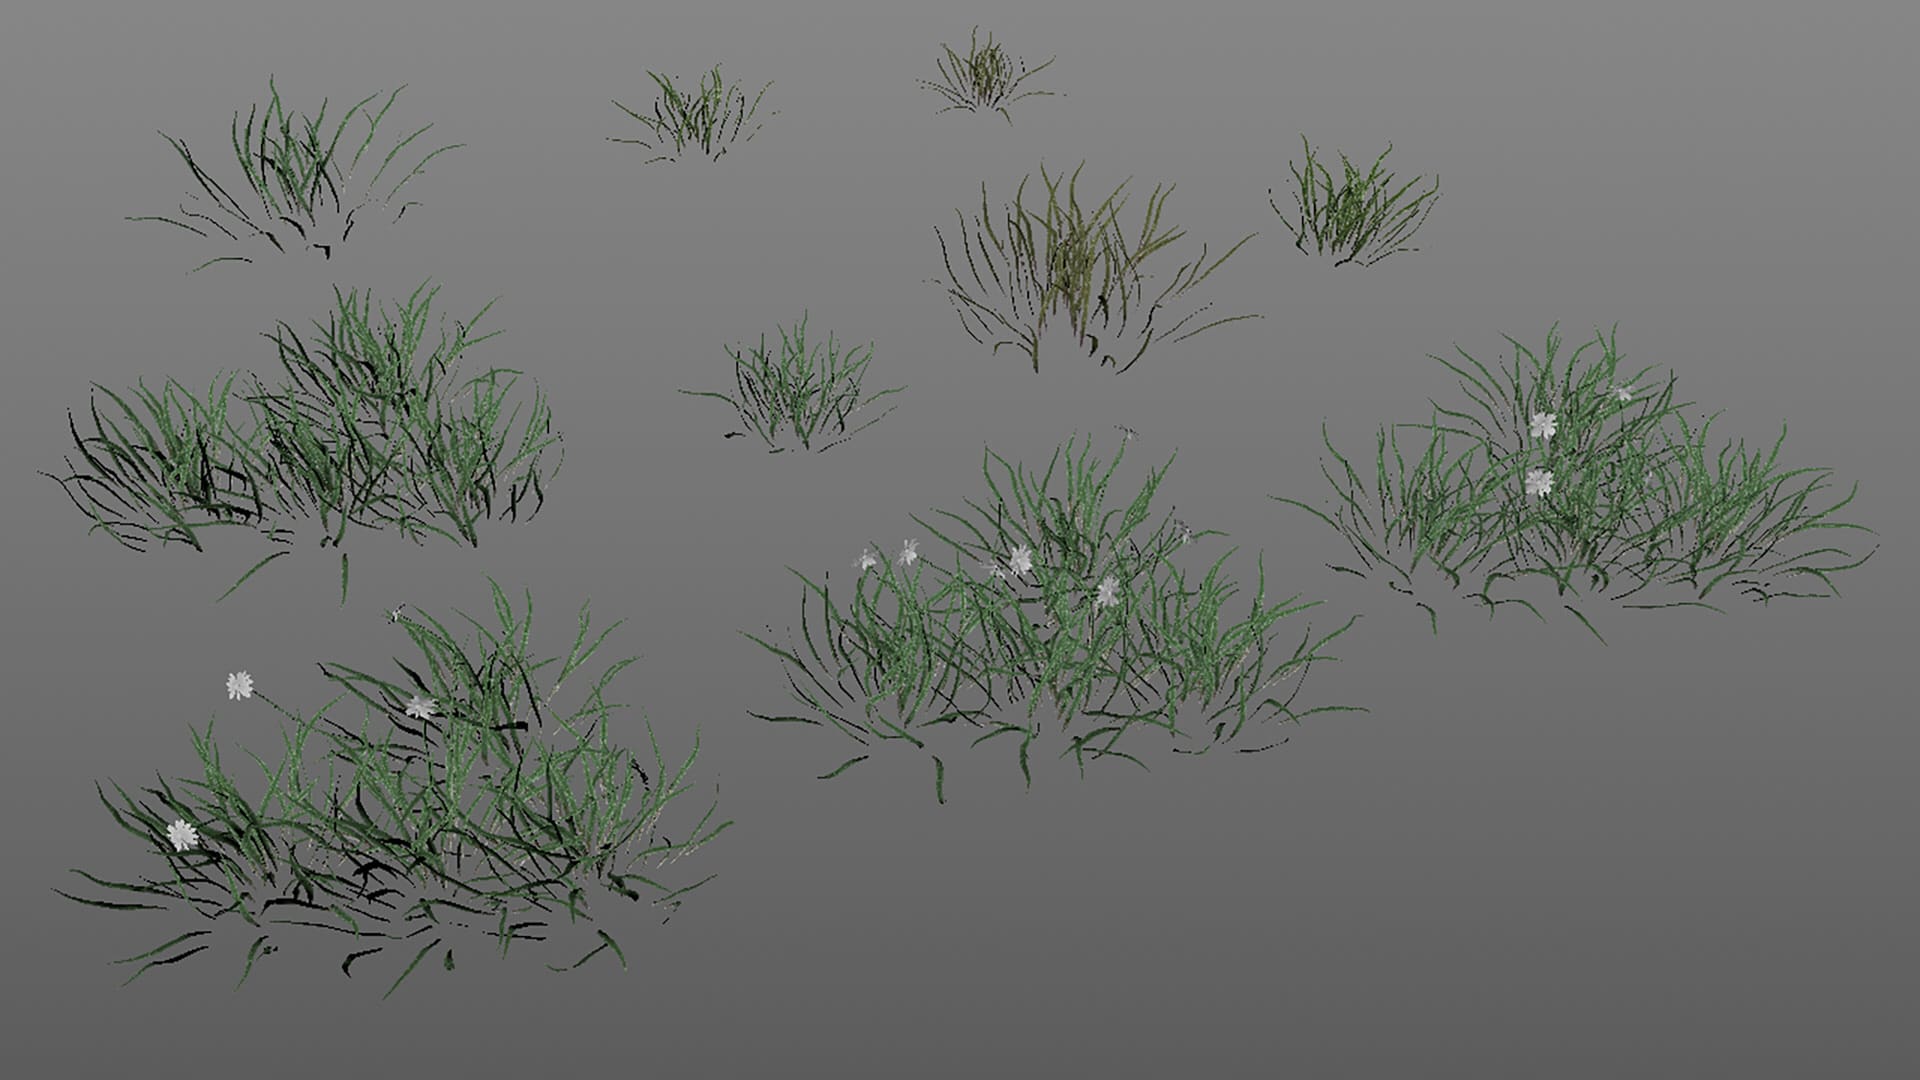
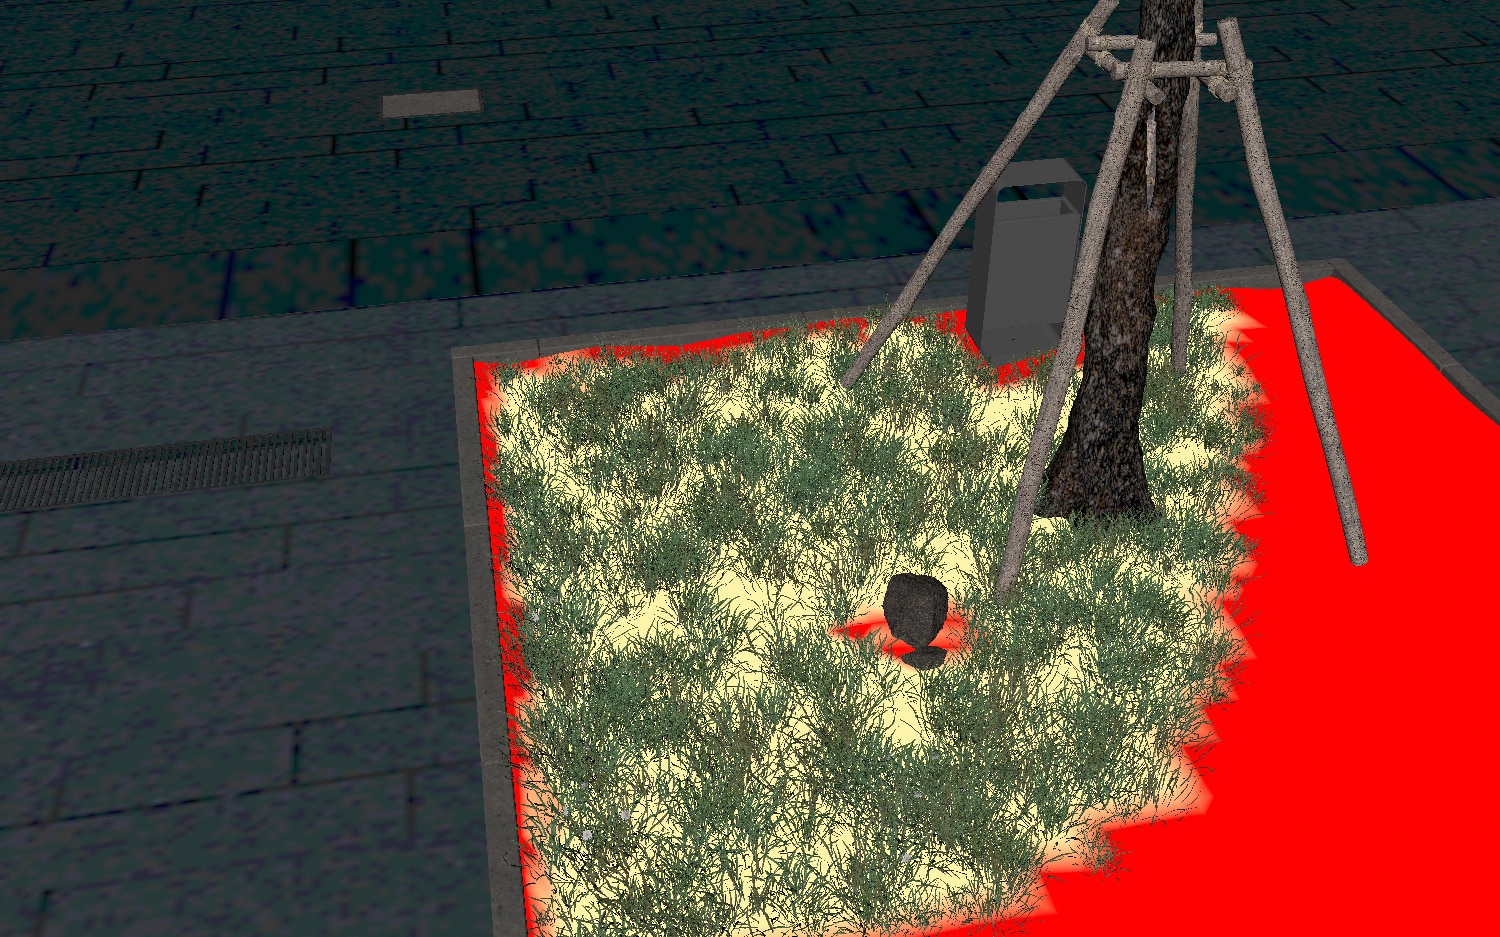
For the grass flowerbeds, we created some deformed mesh and did the rest with Forester and Multiflora. We used Multicloner to spread the grass on the ground. The Filtering by Vertex Map option allowed us to paint directly on the surface and place the grass exactly where we wanted it to grow. We made the rocks with Forester too.
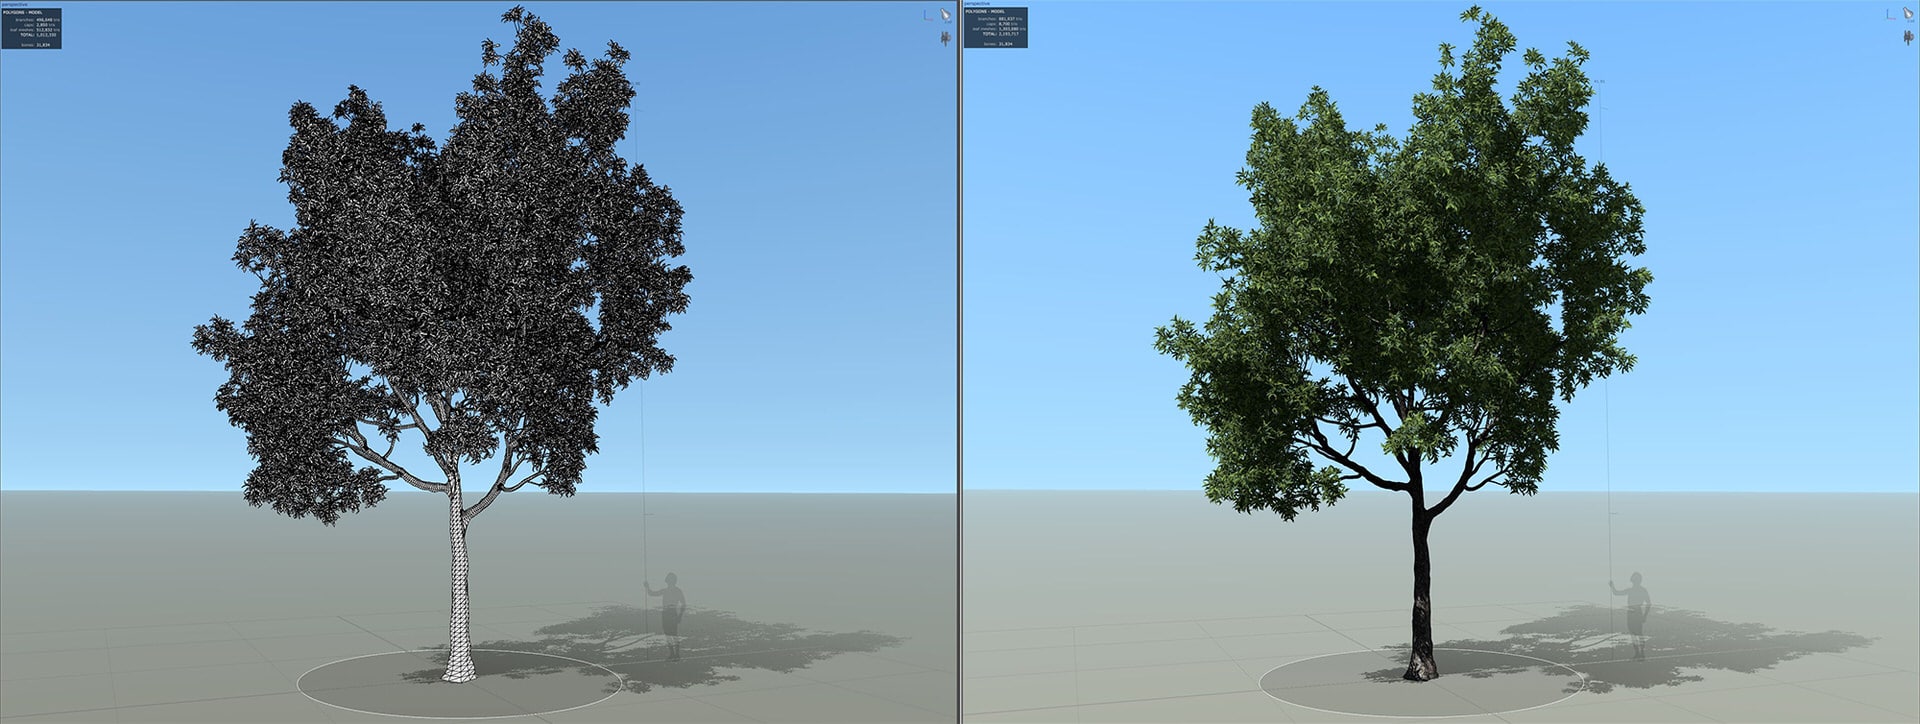
We made the trees with SpeedTree. We worked hard to make the trees look very realistic and different from each other, following real tree photos and using the Random Seed option. We exported three different versions of every tree with a different polygon count, to use the right (and lightest!) version depending on the camera distance.
Once the model was ready, we advanced to the next step.
[av_masonry_gallery ids=’123669,123670,123671,123672,123673,123674′ items=’-1′ columns=’flexible’ paginate=’pagination’ size=’flex’ gap=’large’ overlay_fx=” container_links=’active’ id=” caption_elements=’none’ caption_styling=” caption_display=’always’ color=” custom_bg=”]The Lighting Stage
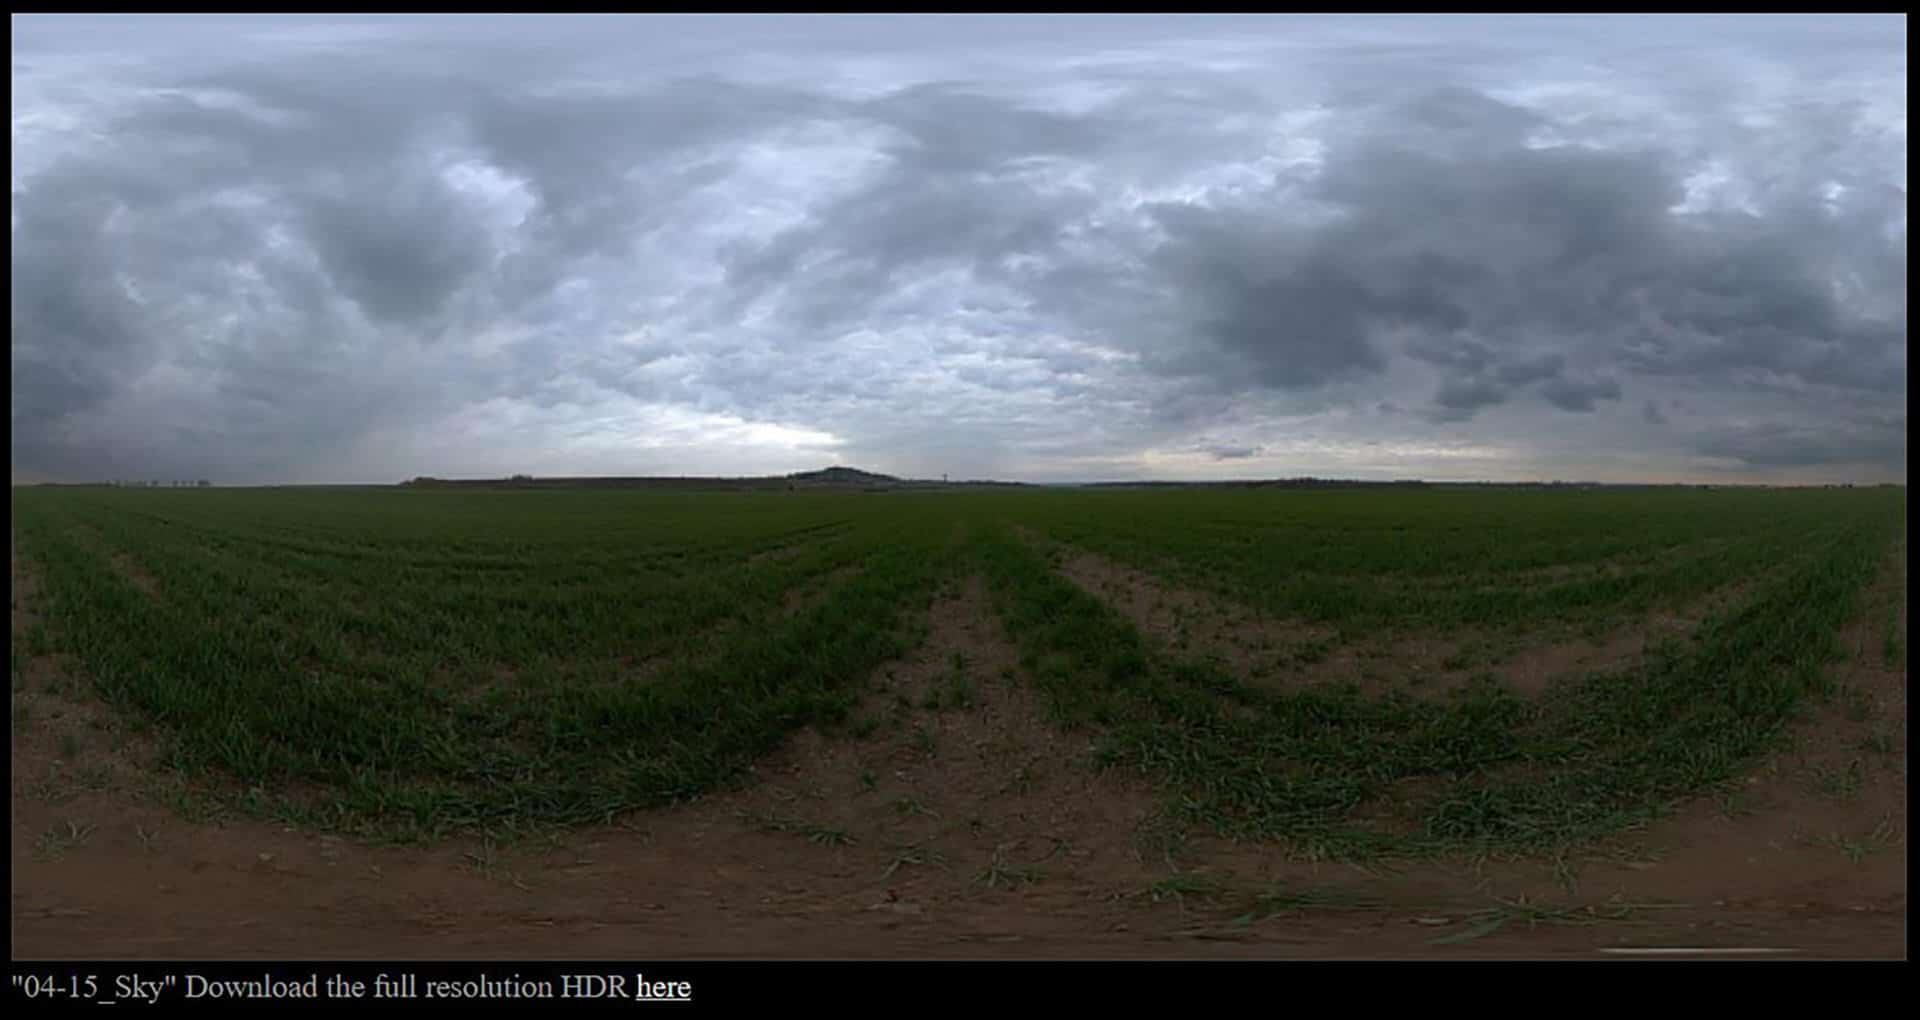
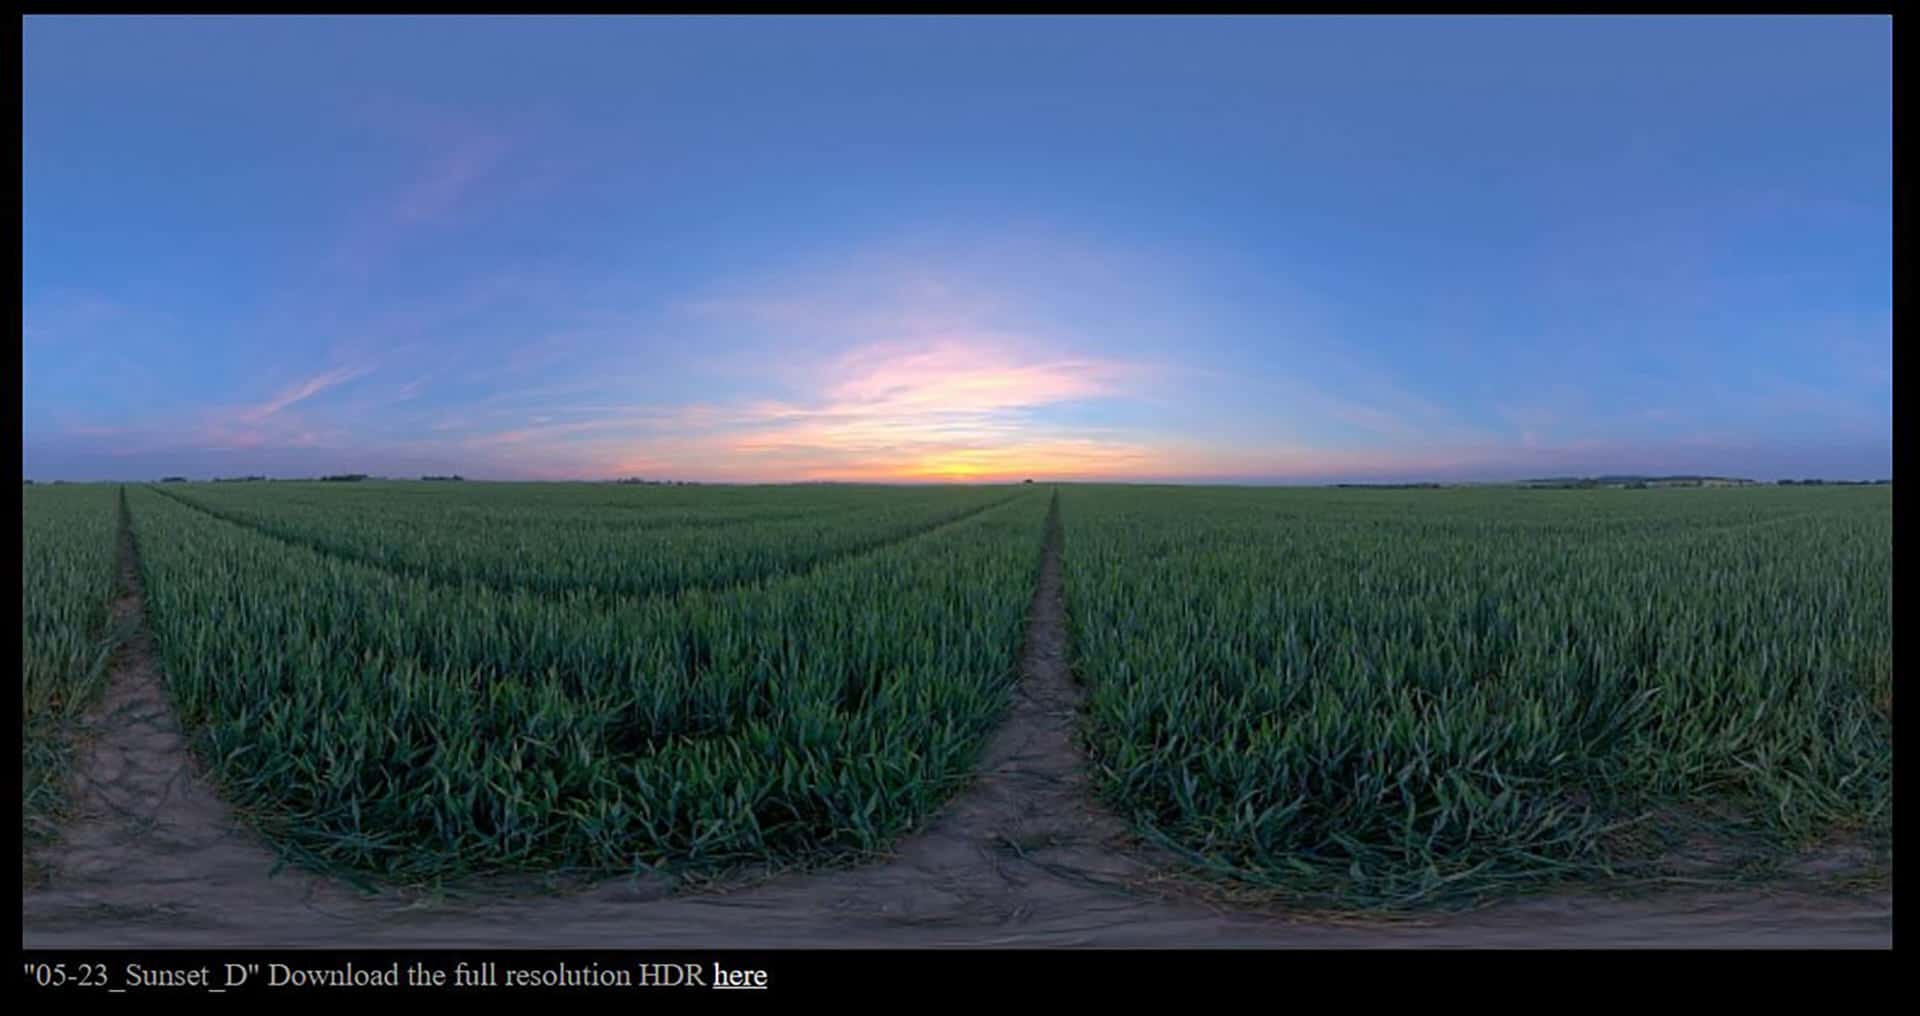
The moods are mainly two: the first is a gray, rainy day, and the other one is a late afternoon, almost evening when natural light creates a high contrast with indoor lights. The primary light sources are two HDRI’s freely downloaded from noemotionhdrs.net. We used the first one for the rainy mood and the other one for the evening mood.
Most of the indoor lights are Area lights, with different temperatures, but in the highest floors, we also used light materials, because we just needed to see the light itself and not a real light hitting surrounding surfaces.
[av_masonry_gallery ids=’123677,123678,123679,123680,123681,123682′ items=’-1′ columns=’flexible’ paginate=’pagination’ size=’flex’ gap=’large’ overlay_fx=” container_links=’active’ id=” caption_elements=’none’ caption_styling=” caption_display=’always’ color=” custom_bg=”]The Texturing Stage
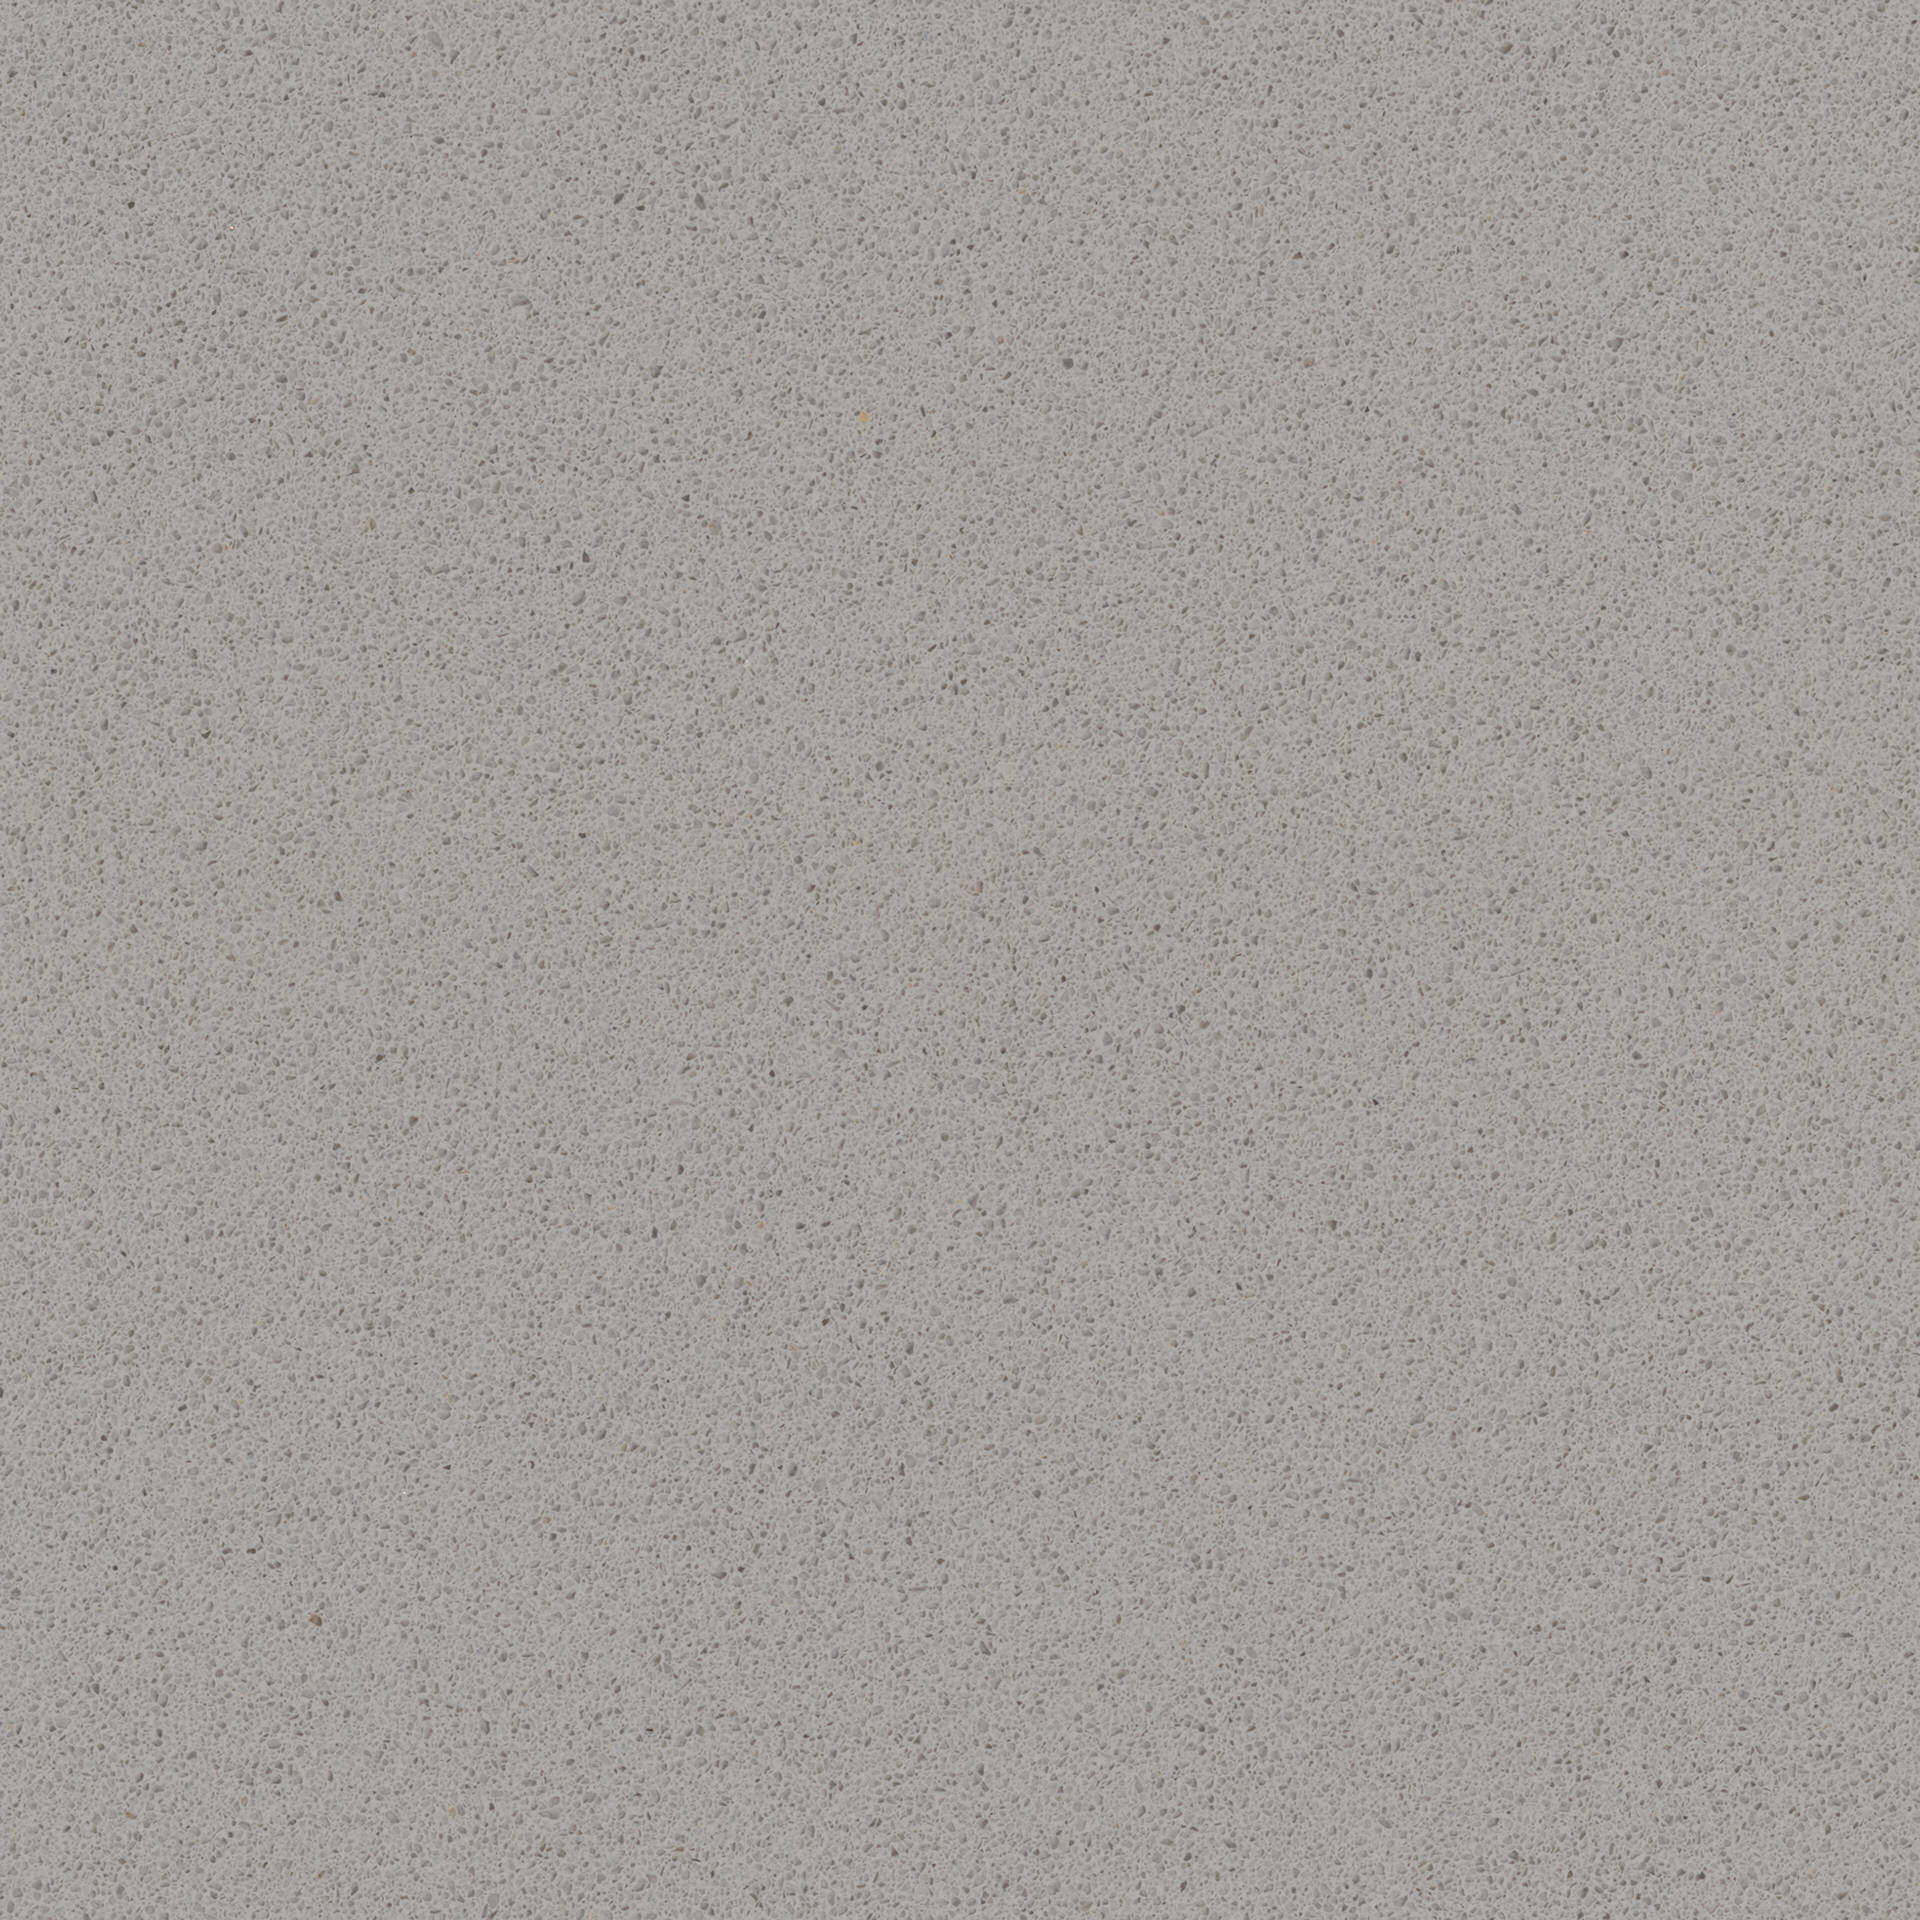
When we were ready to texture the 3d model, we started from the bigger surfaces: the square. We created three different textures out of a single image, again from textures.com, and we used the glossiness map and the normal map.
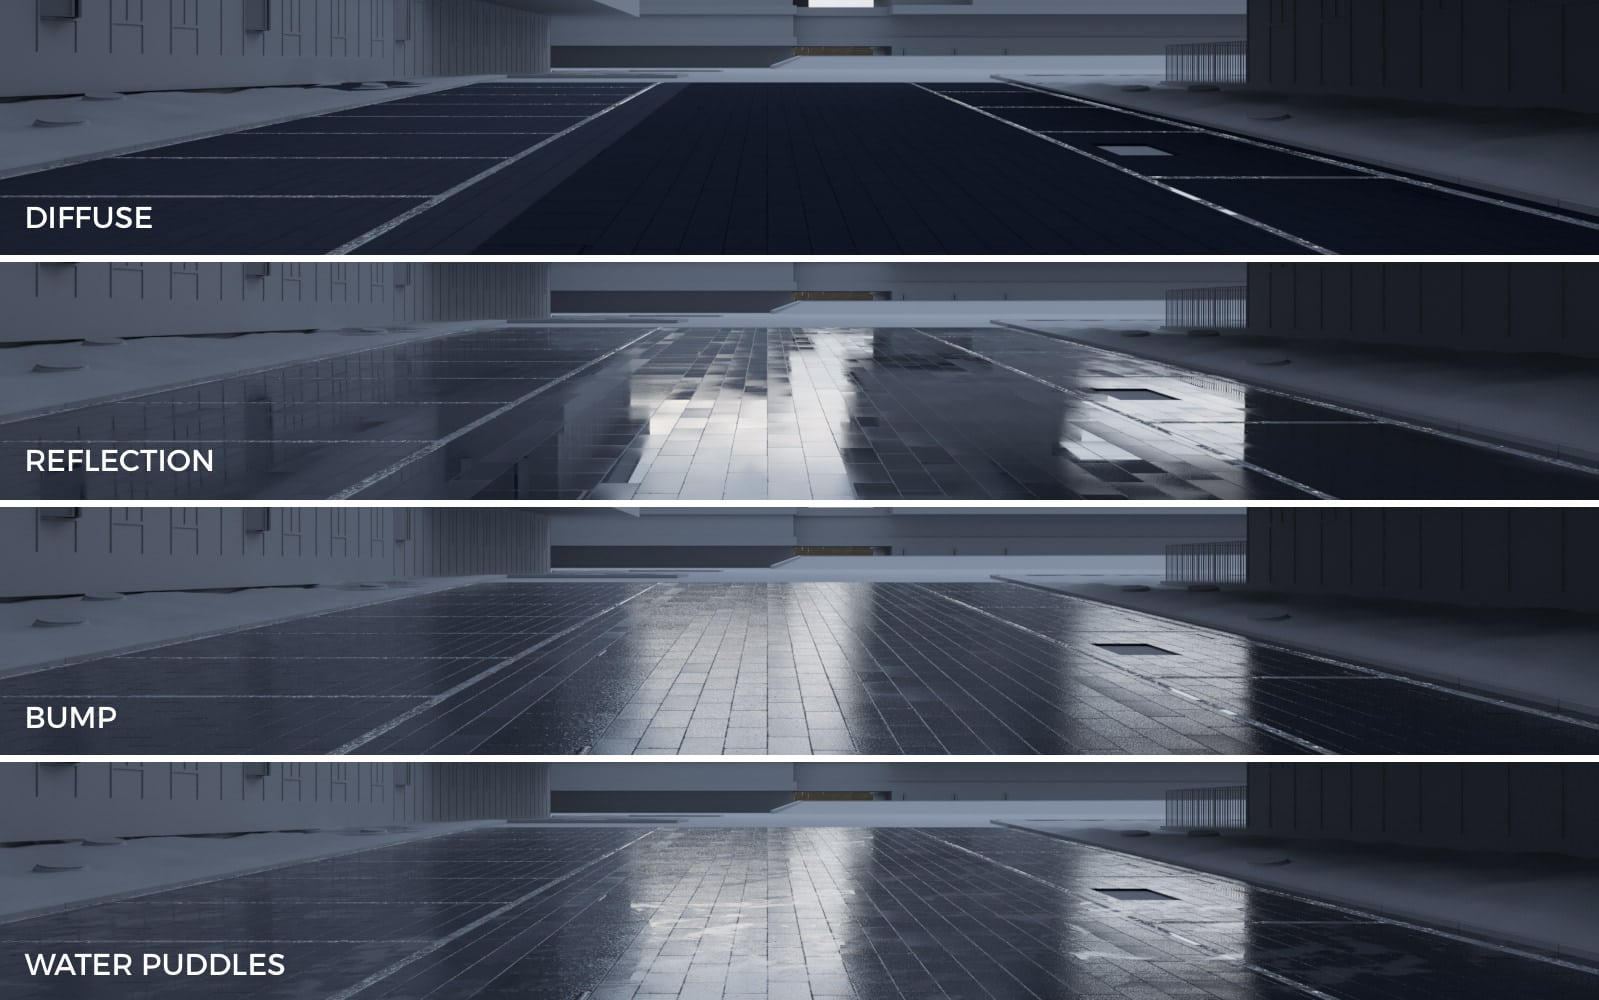
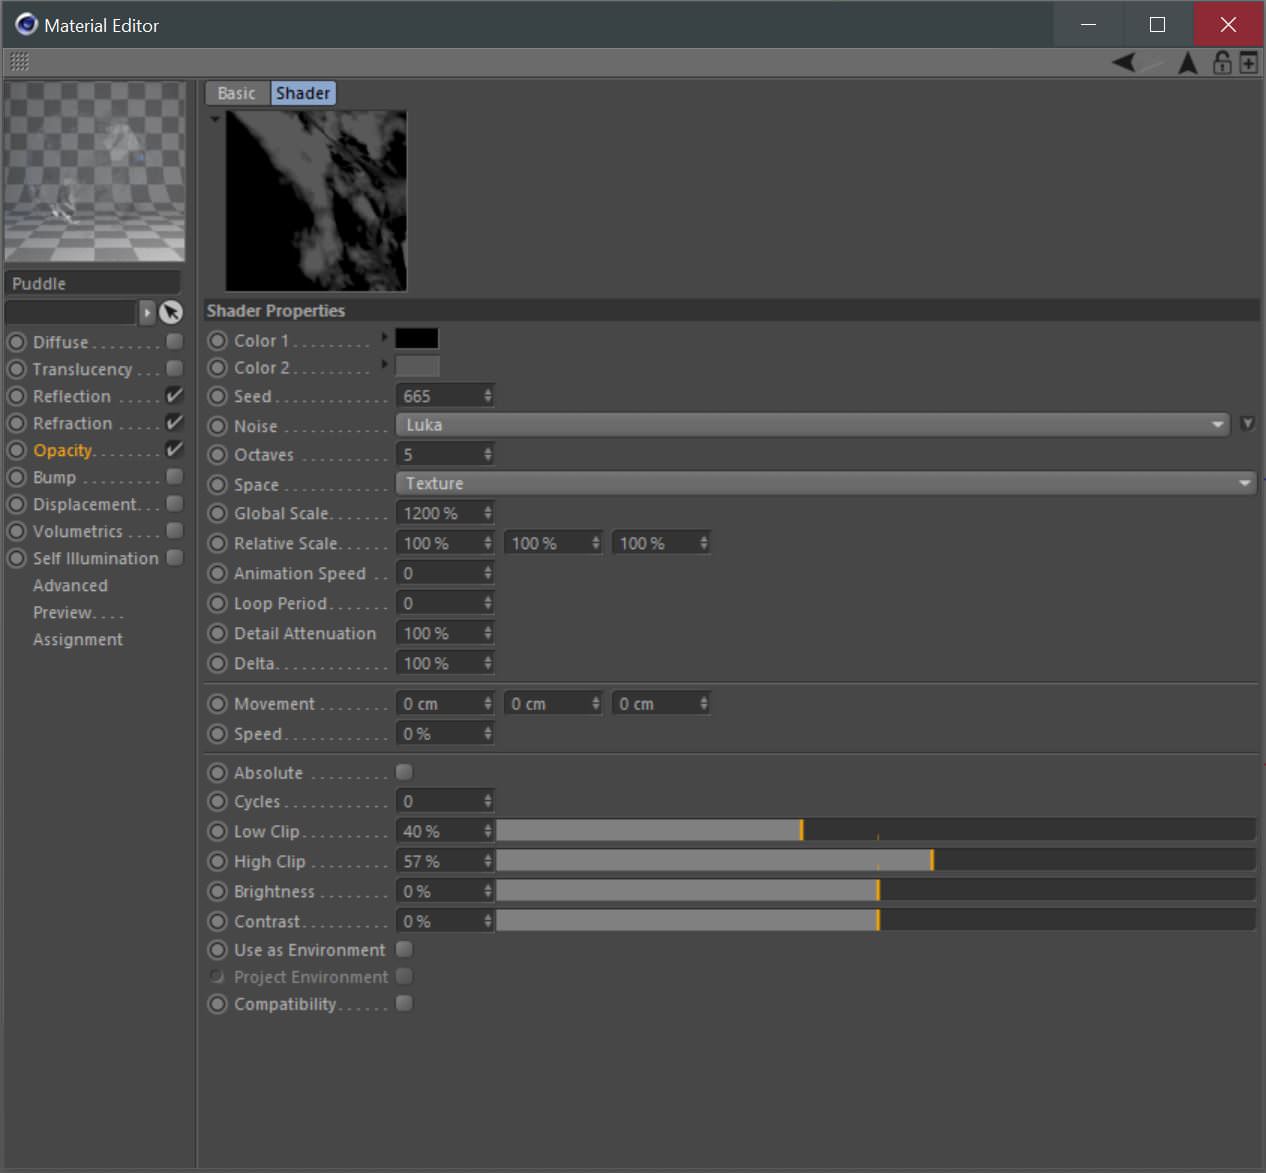
[av_masonry_gallery ids=’123685,123686,123687,123688,123683,123684′ items=’-1′ columns=’flexible’ paginate=’pagination’ size=’flex’ gap=’large’ overlay_fx=” container_links=’active’ id=” caption_elements=’none’ caption_styling=” caption_display=’always’ color=” custom_bg=”]For the water puddles, we created a pure water material, using only reflection and refraction layers, and placed inside the opacity layer a Luka Cinema 4D noise with a large global scale.
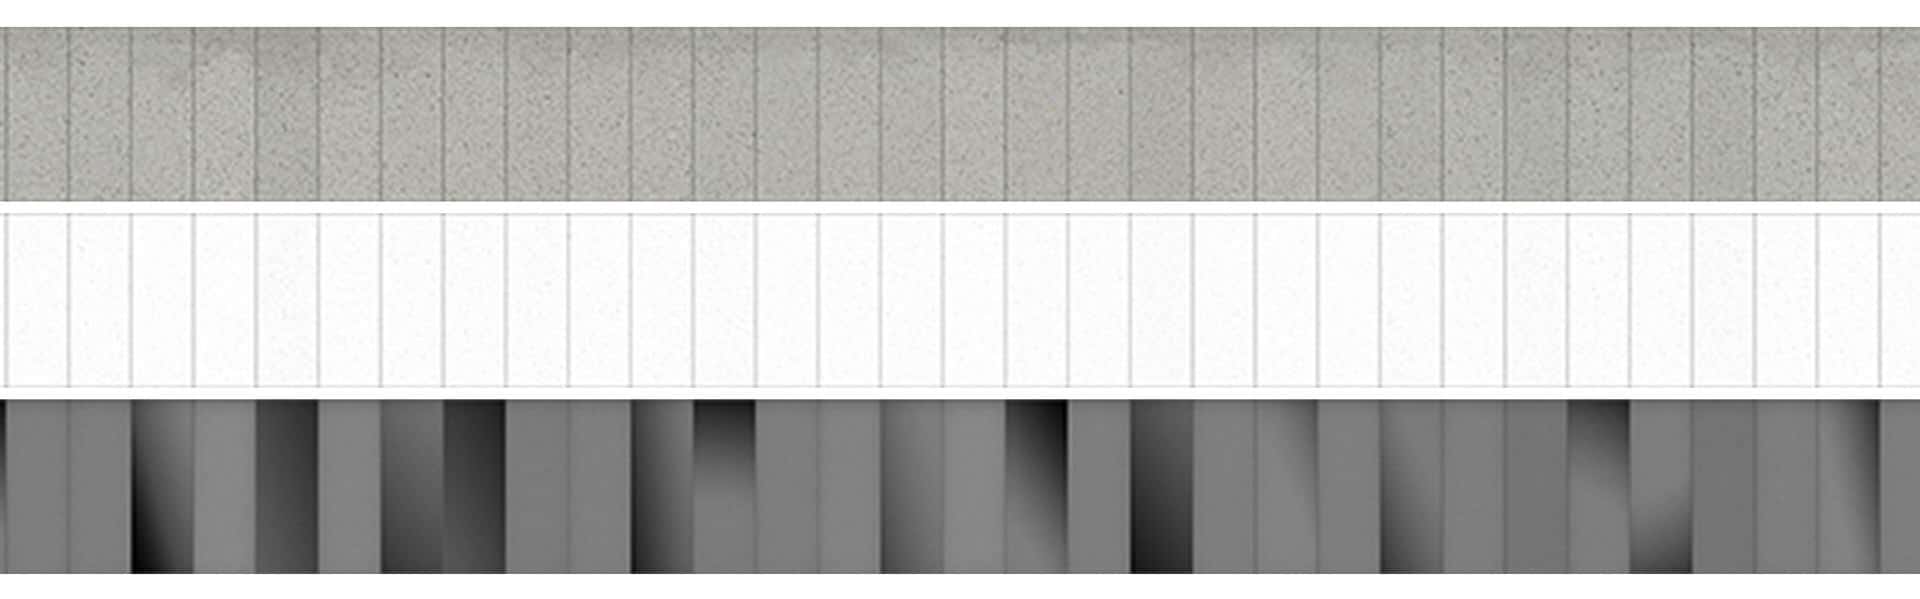
The protruding floors texture is made from a single marble texture and a lot of photoshop for the leaks and the overlying dirt. Finally, we have created a bump texture, adding some black and white gradients on every slab to make them look not perfectly aligned in their assembly.
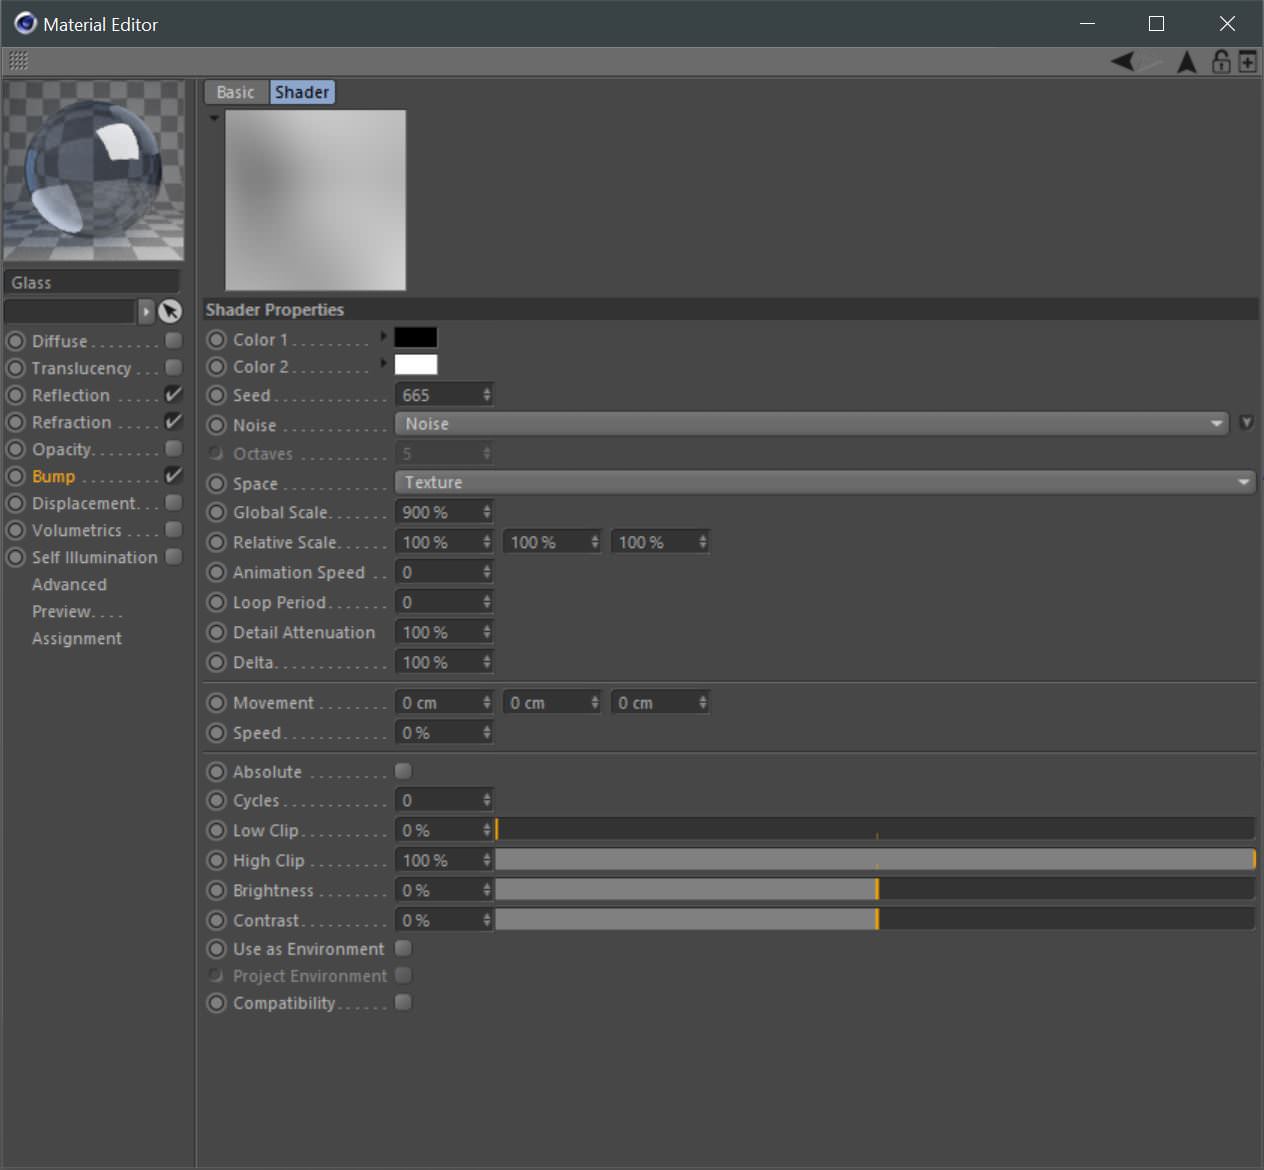
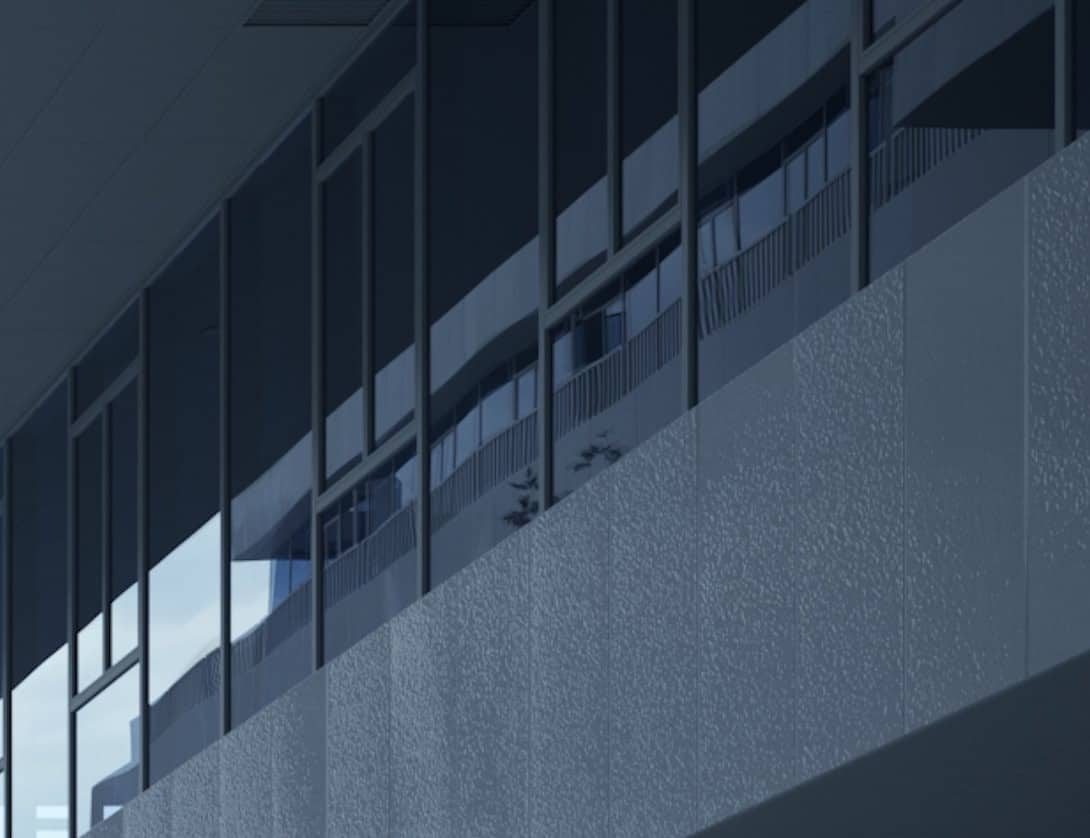
The glass is a straightforward glass material, with a large-scaled noise in the bump layer, to make the glass create slightly curved reflections.
The Render settings
There are no extraordinary things to report about render settings. We used default Corona settings. Here you can see the raw renderings as they came out of the Corona VFB ready for post-production.
[av_masonry_gallery ids=’123695,123696,123697,123698,123699,123700′ items=’-1′ columns=’flexible’ paginate=’pagination’ size=’flex’ gap=’large’ overlay_fx=” container_links=’active’ id=” caption_elements=’none’ caption_styling=” caption_display=’always’ color=” custom_bg=”]The Post-production Stage
We always try to get the best result directly from the render output, but, you know, sometimes it is challenging for many reasons.
That’s why we work until the result is good enough to allow us to reach the perfect realistic look working with post-production to reduce production times.
We do not use Photoshop only to improve contrast and colors. Most of the time, we use it to bring the look of raw renderings more close to the real photos, which is possible only with the right amount of alpha channels.
We rarely work with a separate pass (Reflections, Lights, Shadows), but we always use multipass to make an alpha channel of basically every single material and object of the scene.
[av_masonry_gallery ids=’123703,123704,123705,123706,123707′ items=’-1′ columns=’flexible’ paginate=’pagination’ size=’flex’ gap=’large’ overlay_fx=” container_links=’active’ id=” caption_elements=’none’ caption_styling=” caption_display=’always’ color=” custom_bg=”]The post-production process is fundamental, indeed, and it has no secrets. We use the most popular Photoshop adjustment layers to bring brightness, contrast, and colors of the raw rendering more closely as we can to the brightness, contrast, and colors of the real photo.
One of the many Corona’s VFB features that is helpful for our way to manage the post-production process is the chance to save two or more exposures in seconds.
Through the VFB controls or saving the image in *.cxr format and manipulating the lights with the Corona Renderer image editor, that also works when Cinema 4D is closed.
Once saved, we mix the multiple exposures in Photoshop to get the best from every light and shadow. We are thus avoiding underexposure and overexposure in the process.
Here you can see the final results, thank you for reading!
[av_masonry_gallery ids=’123711,123712,123713,123714,123715,123716′ items=’-1′ columns=’flexible’ paginate=’pagination’ size=’flex’ gap=’large’ overlay_fx=” container_links=’active’ id=” caption_elements=’none’ caption_styling=” caption_display=’always’ color=” custom_bg=”]