
Originally published at: https://www.ronenbekerman.com/making-of-meteora/
Tresde’s Santi Sánchez is no stranger to the blog, with two great articles attributed to him here – Making of IRACEMA in the Dusk & Making of Crystal Box Villa. This time he took Quixel’s Megascans for a serious spin while creating METEORA, a personal concept design project based on a volcanic vivarium pavilion, developed with the intention to use Megascans 3d models as hero characters and study the use of this software + content library combo in an ArchVIZ context.
Hello, everyone!
Before we get started, I’d like to thank Ronen once again for inviting me to write an article about how I used a fantastic CG tool and scanned asset library called Quixel Megascans.
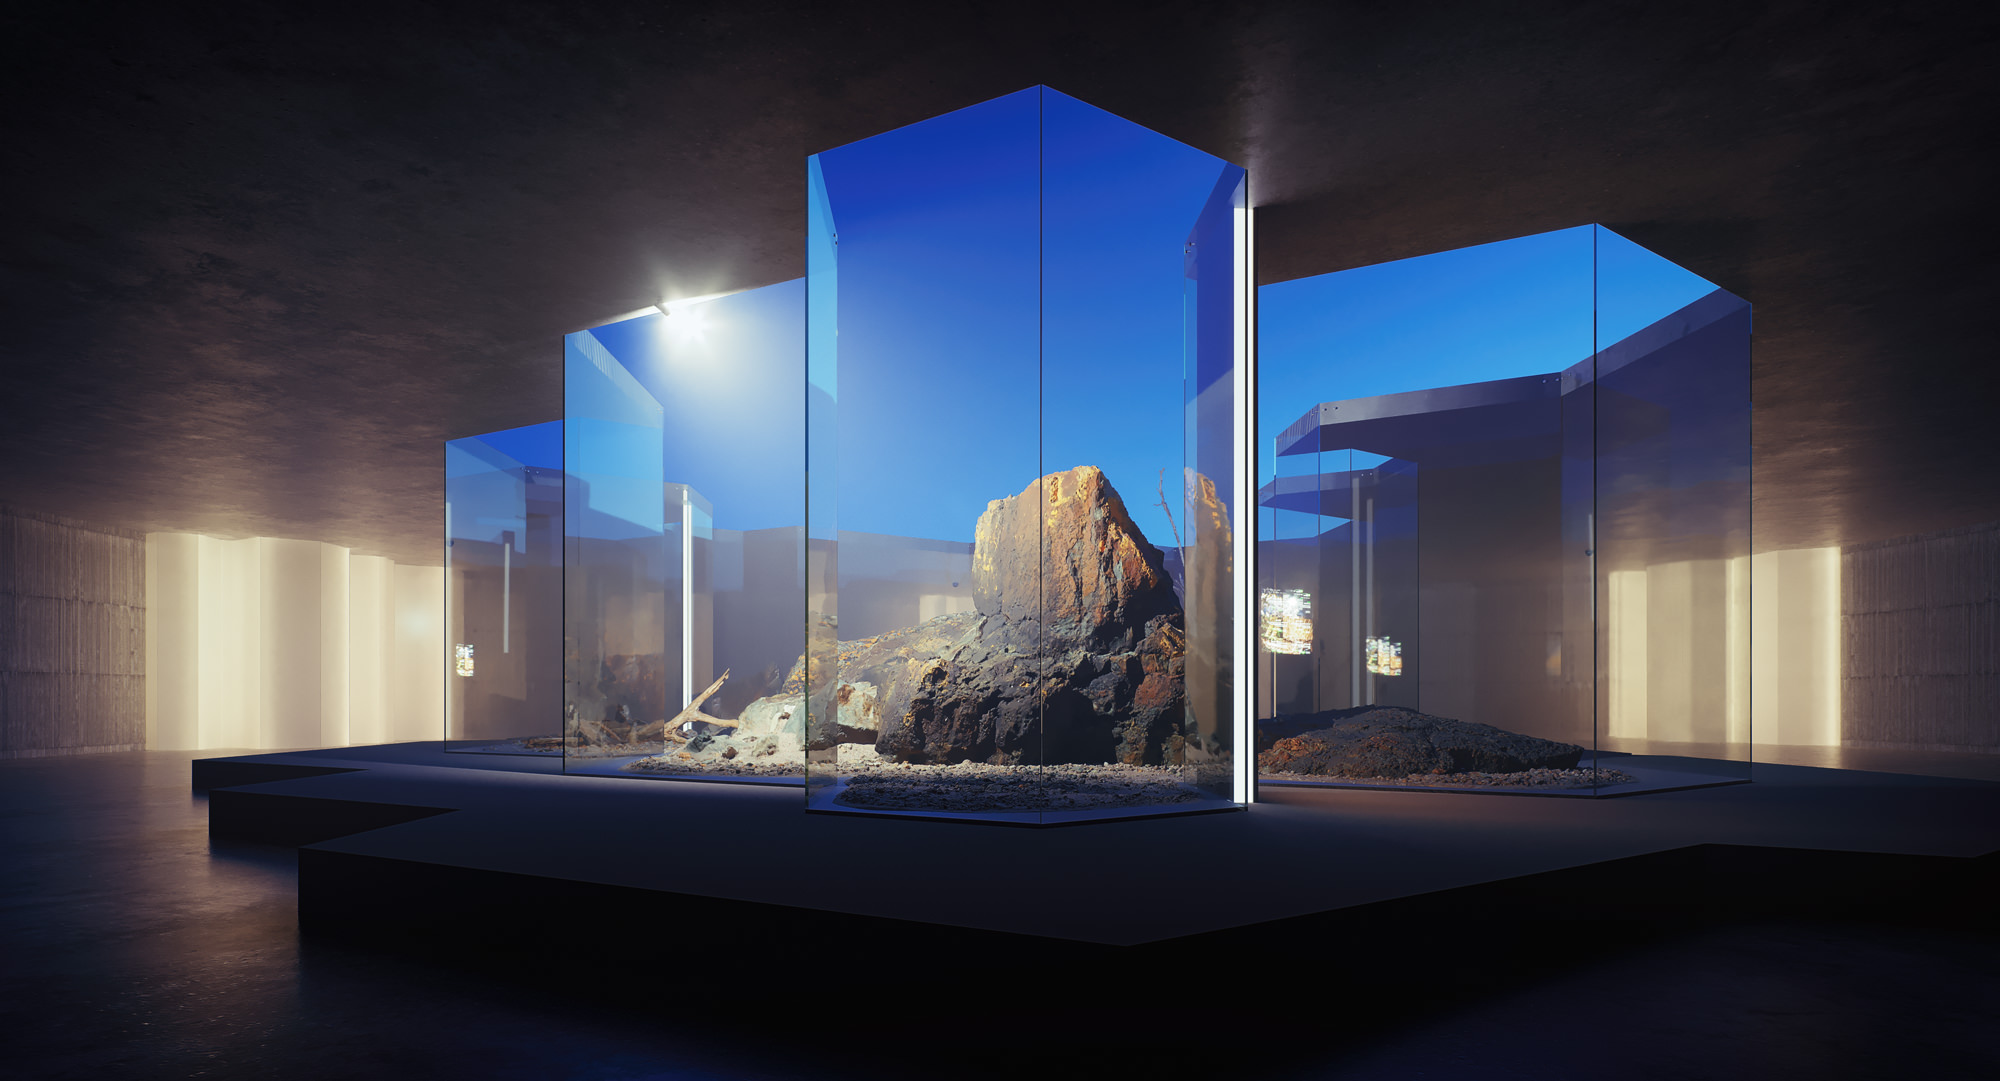
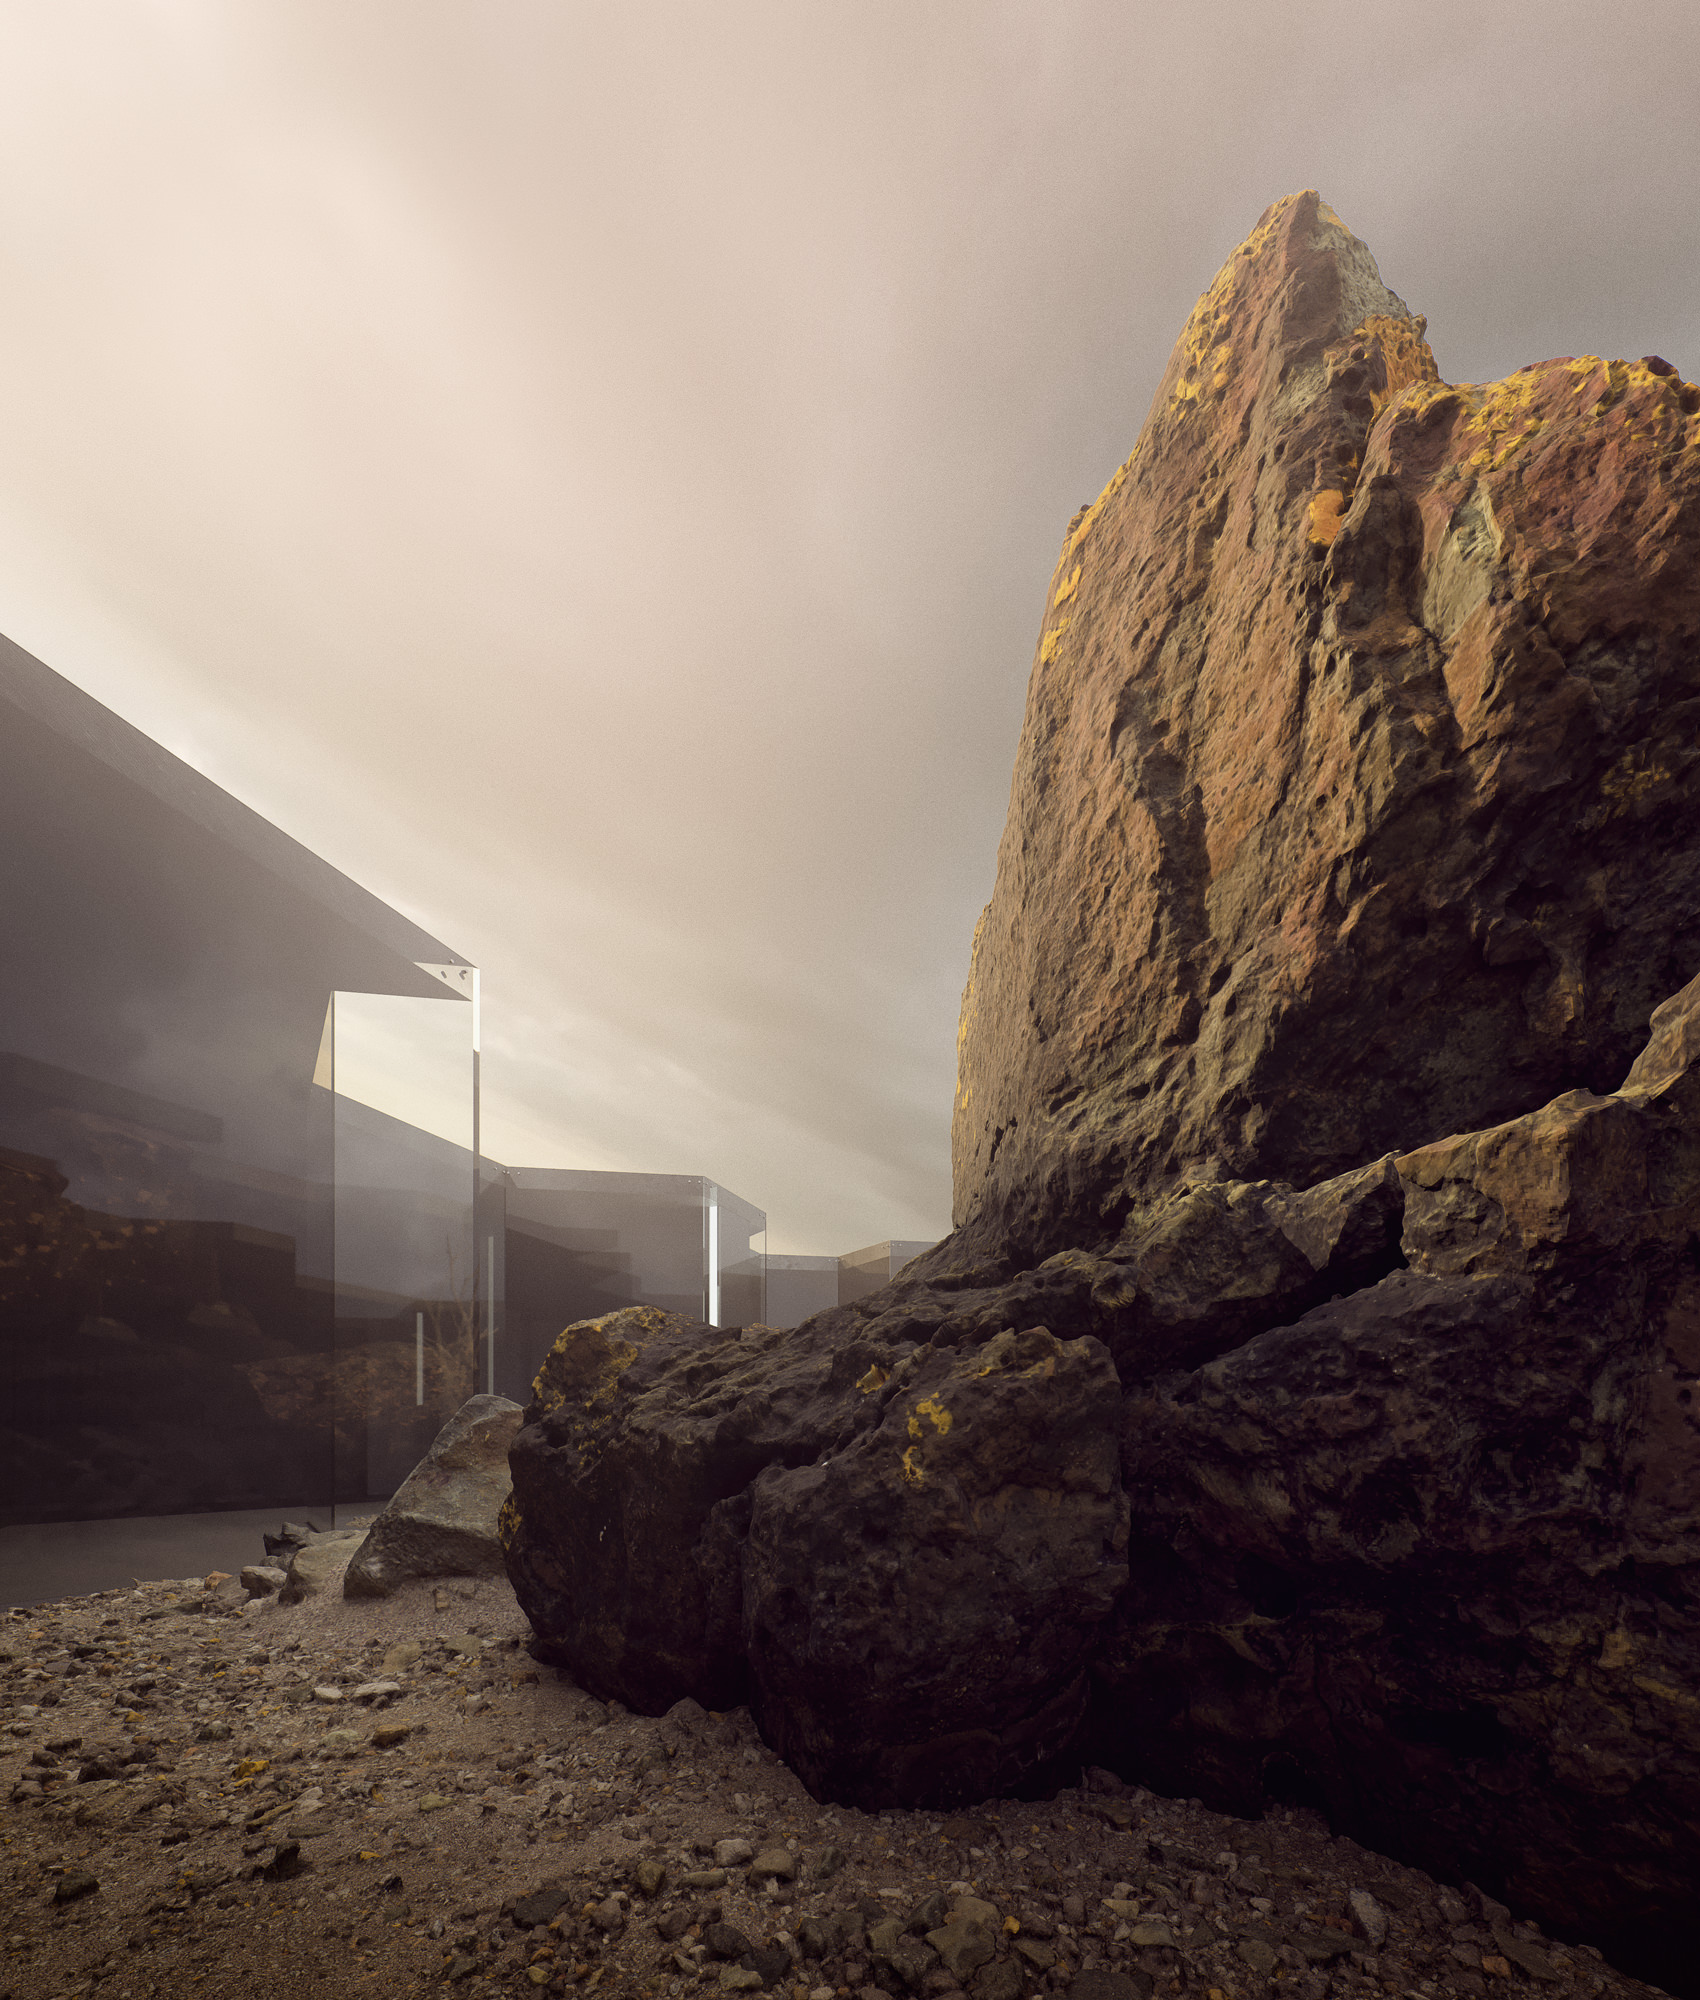
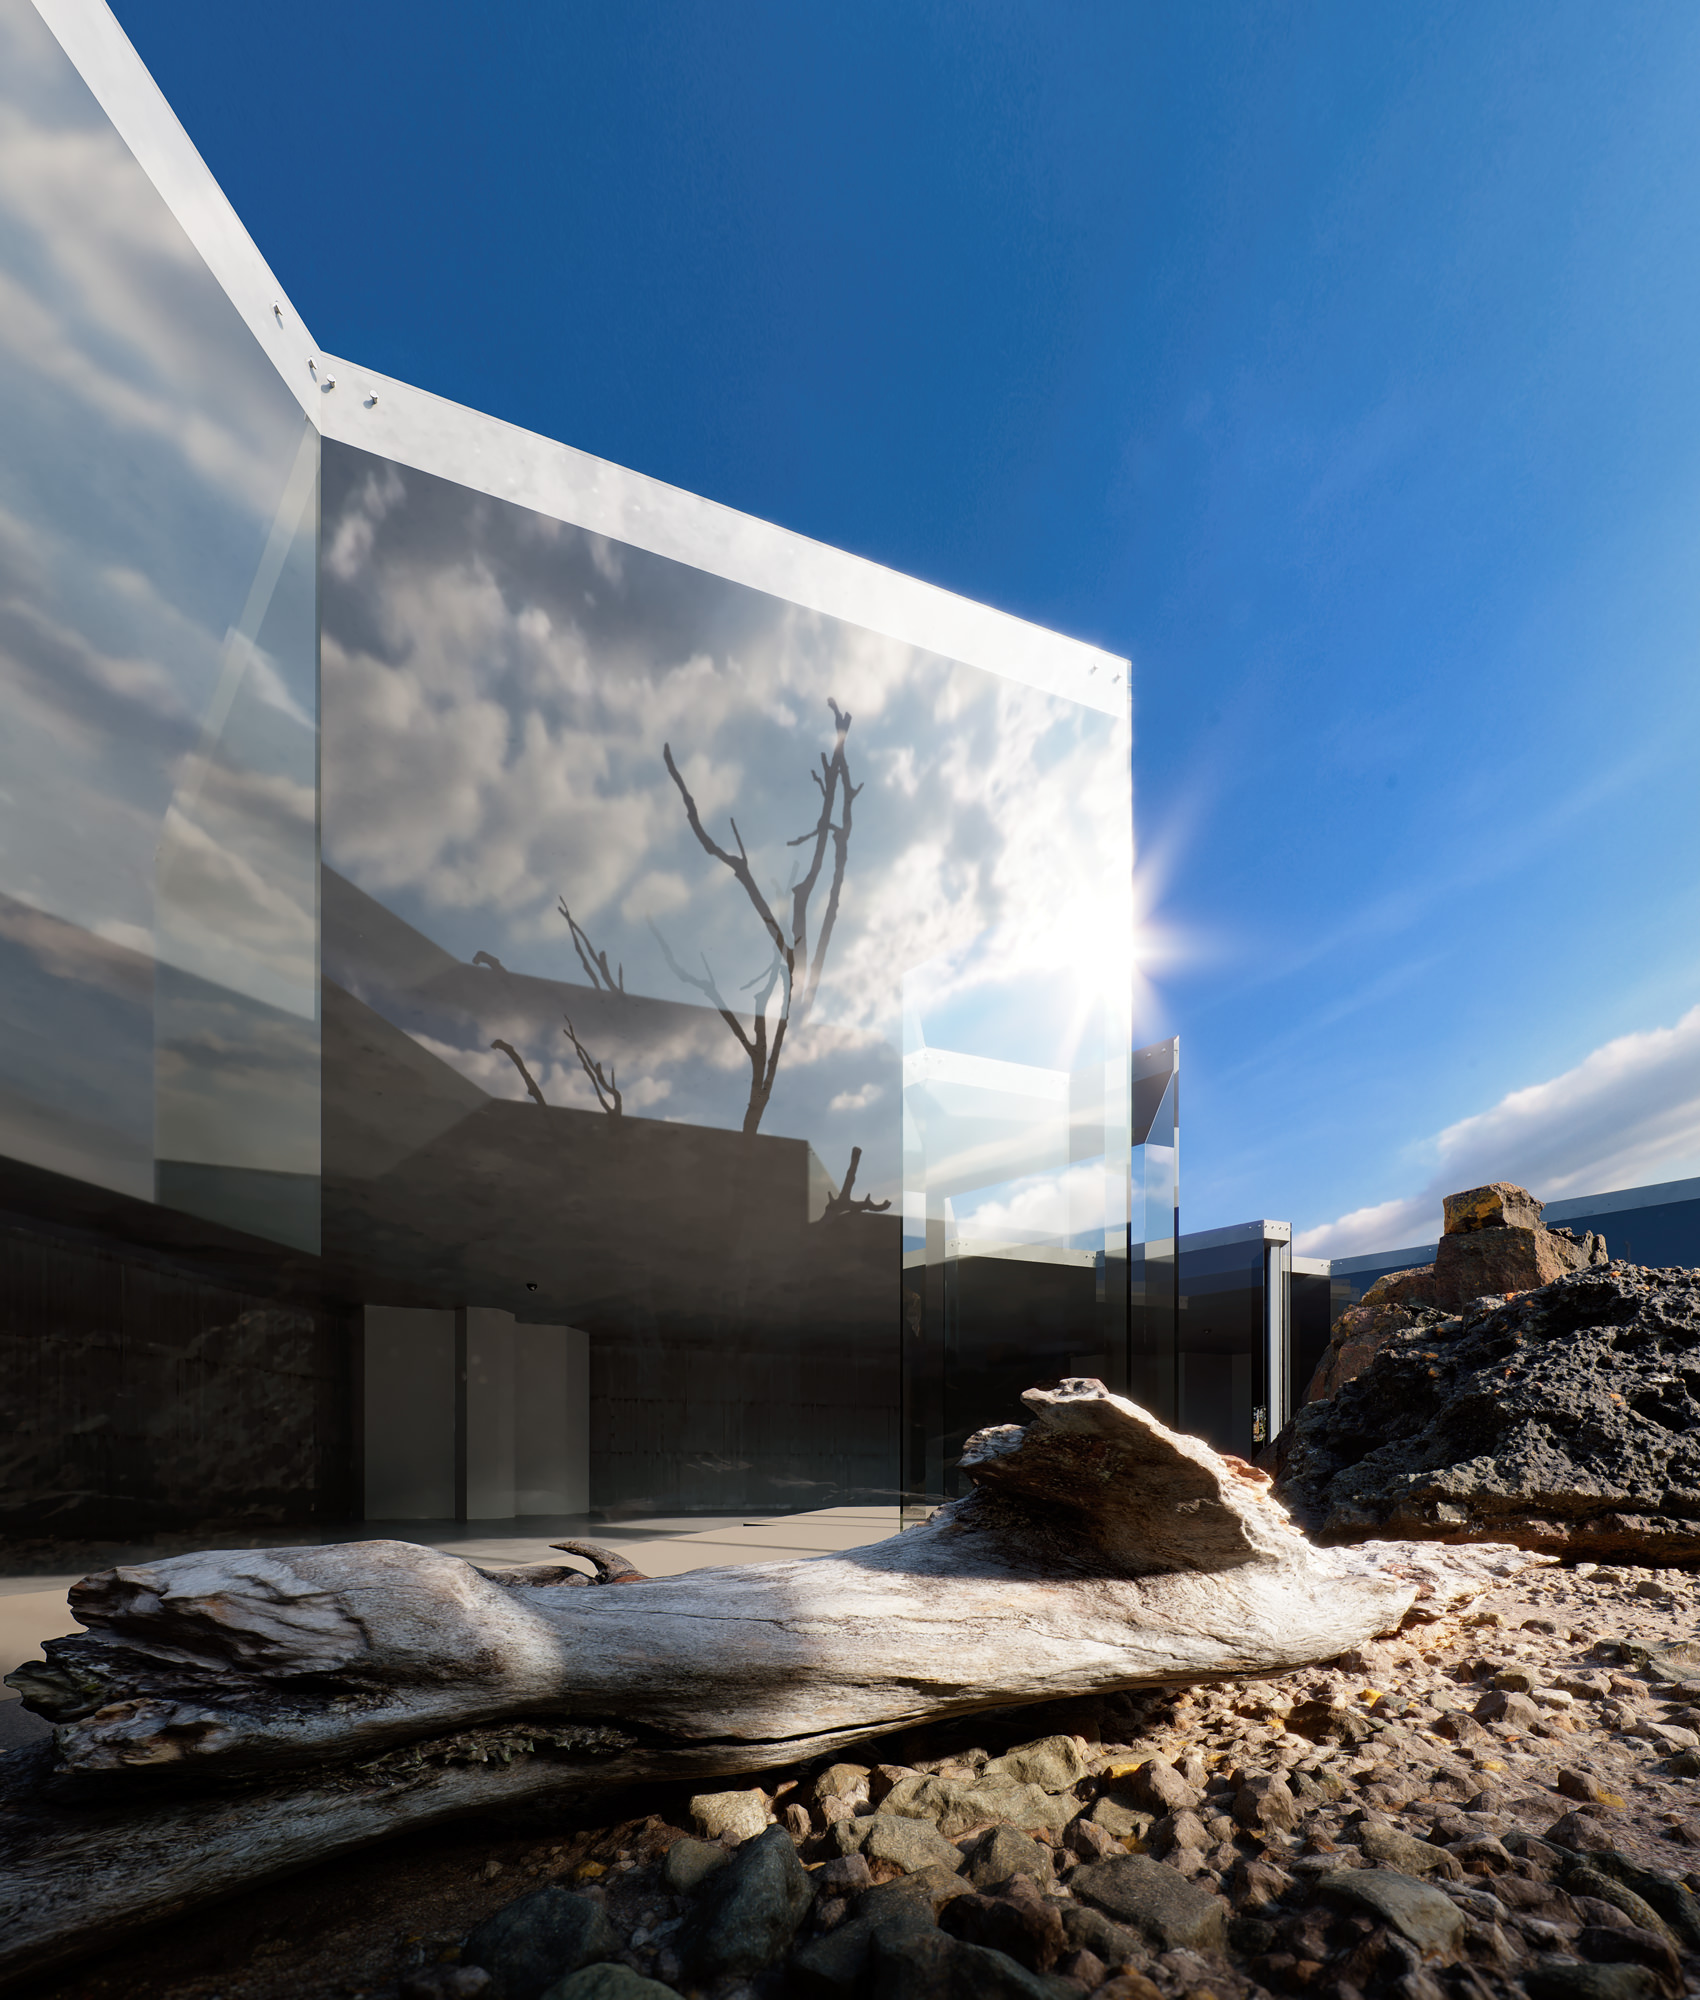
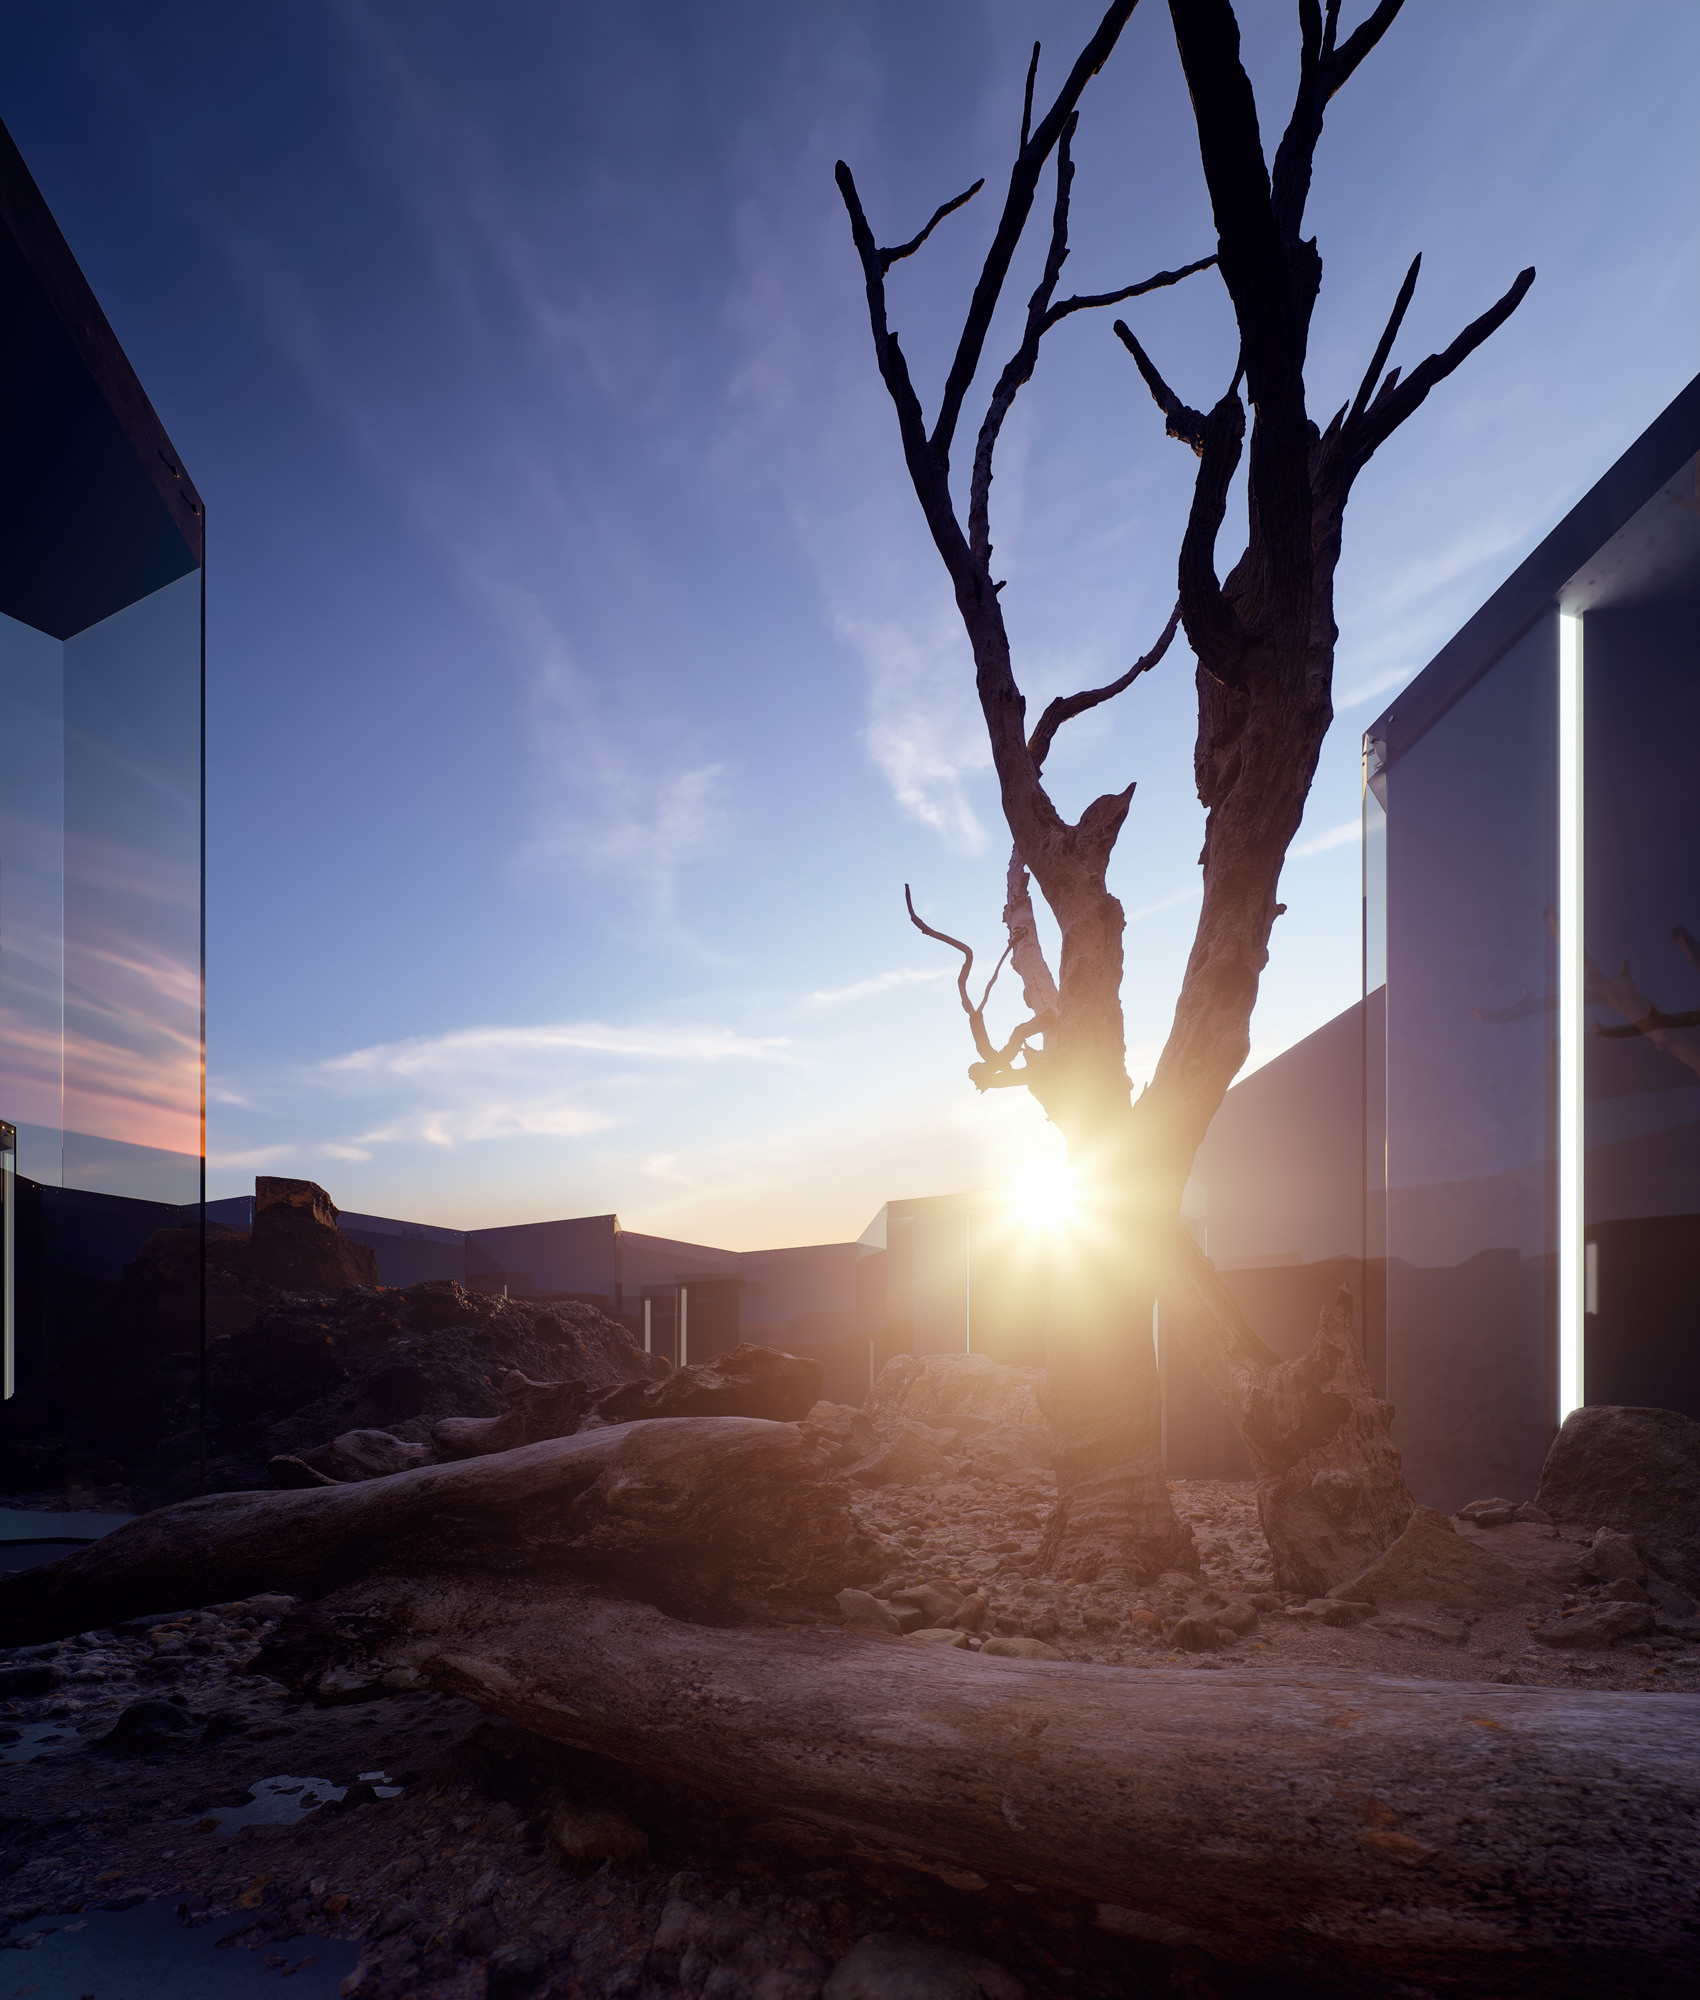
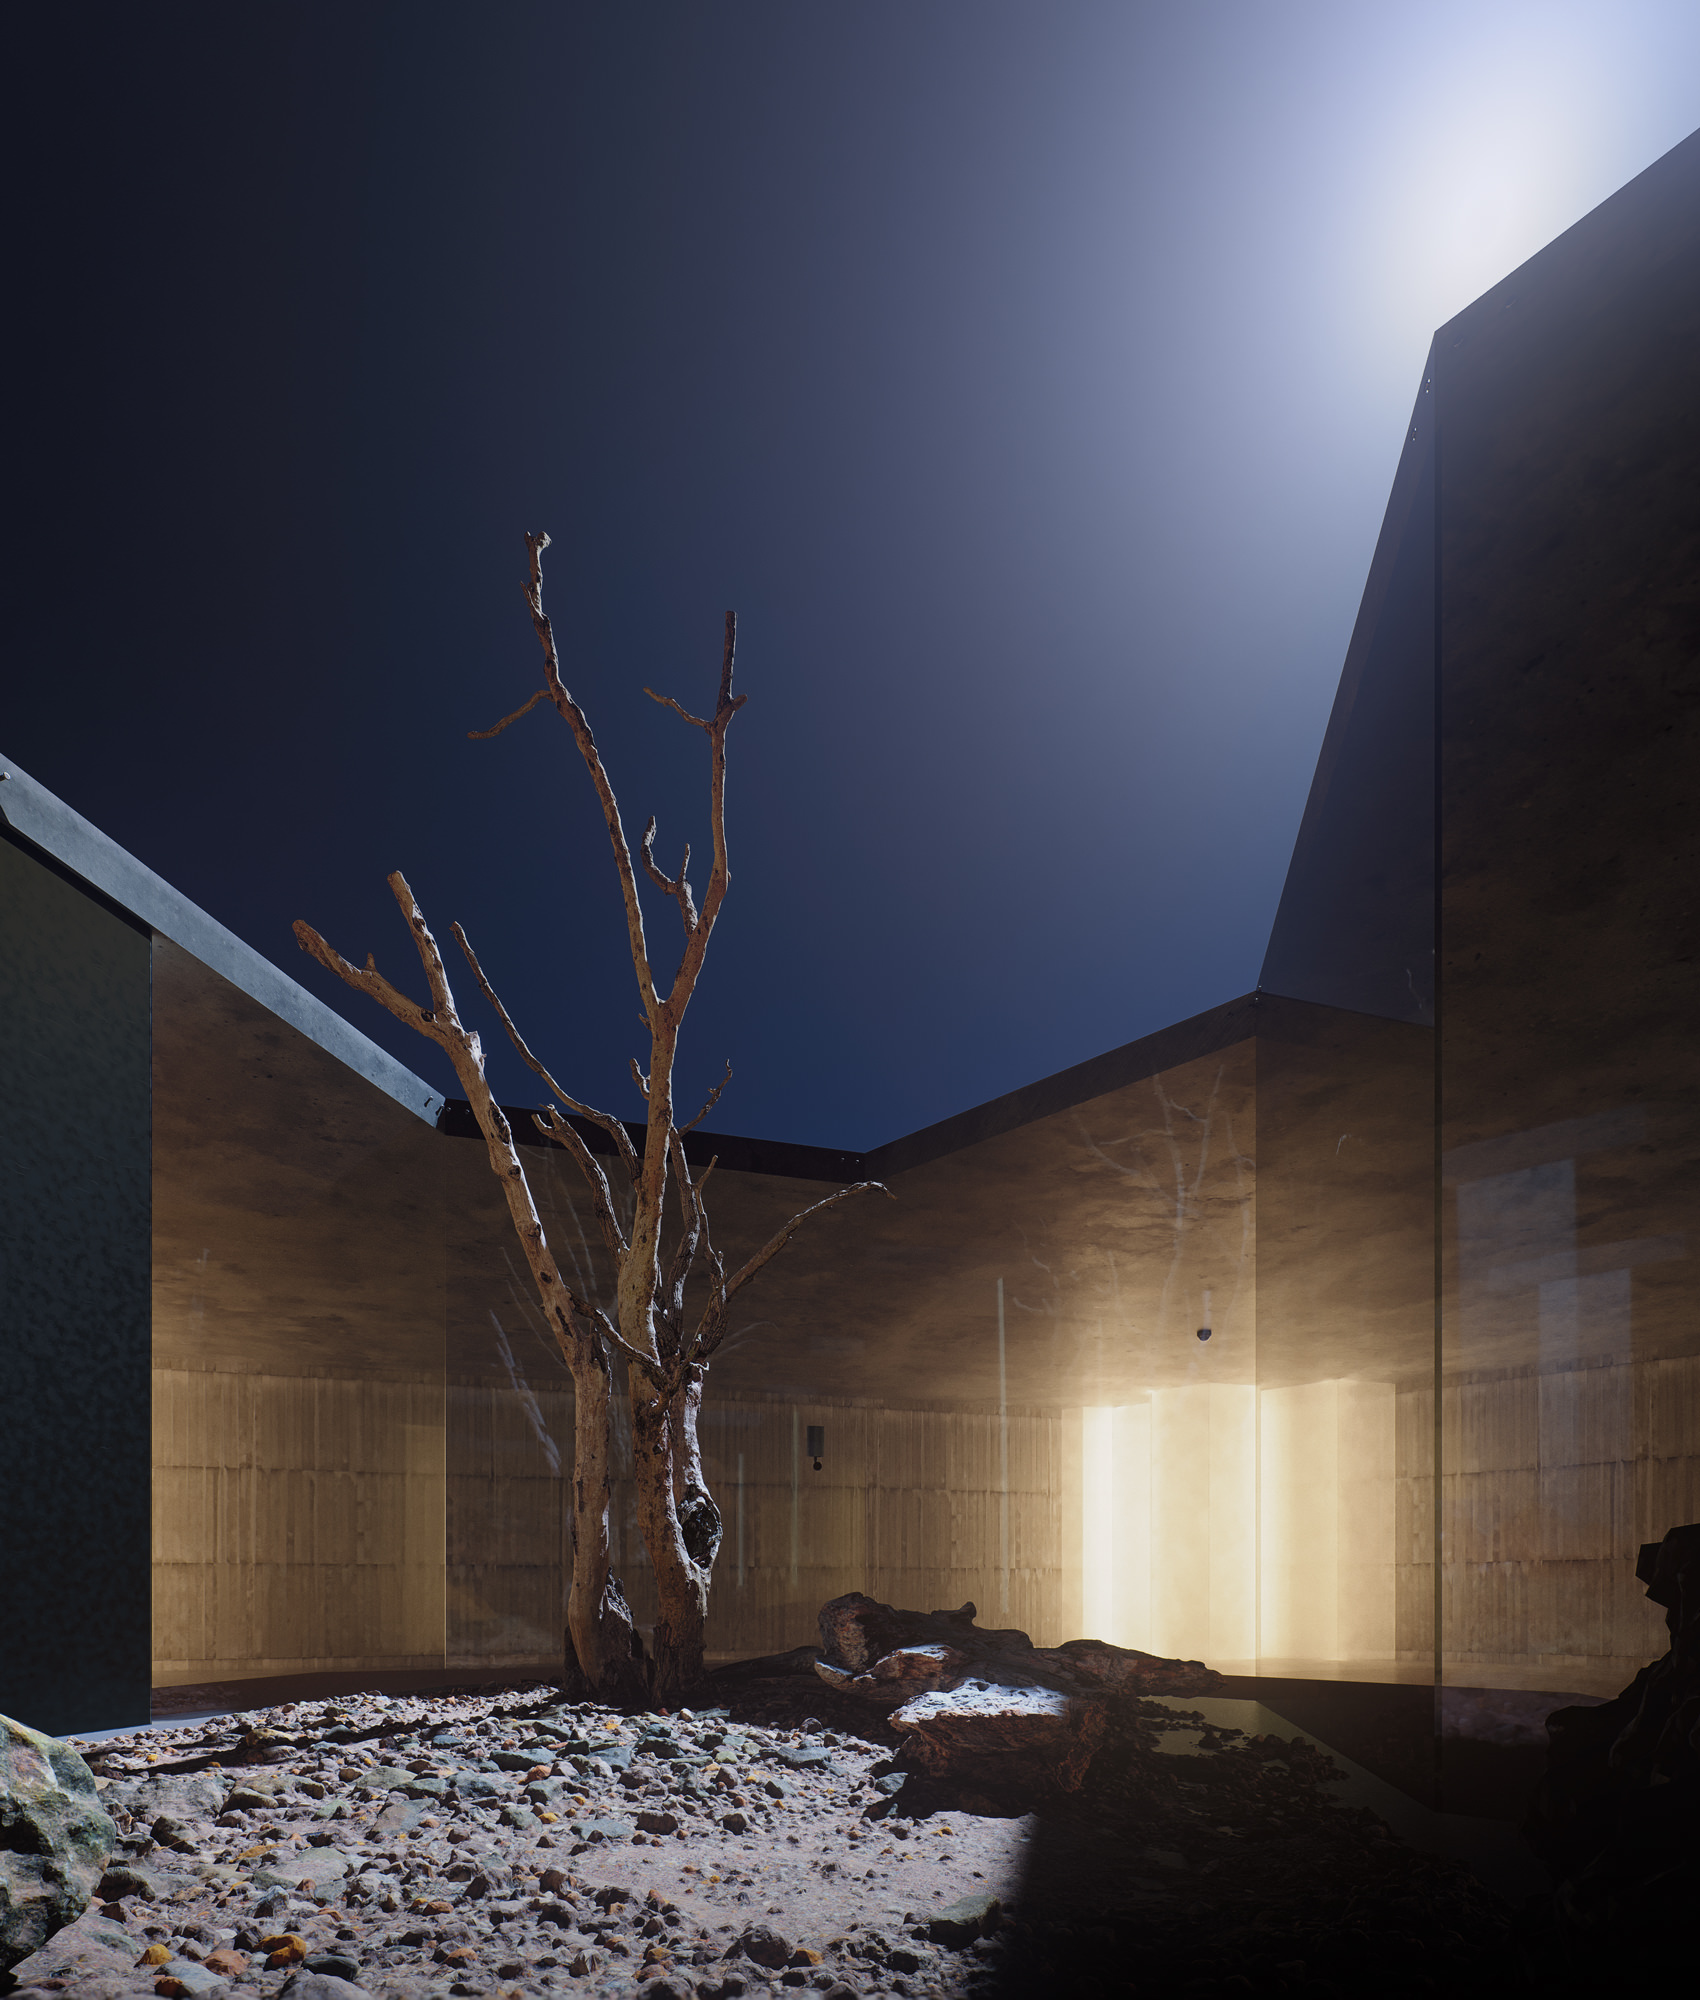
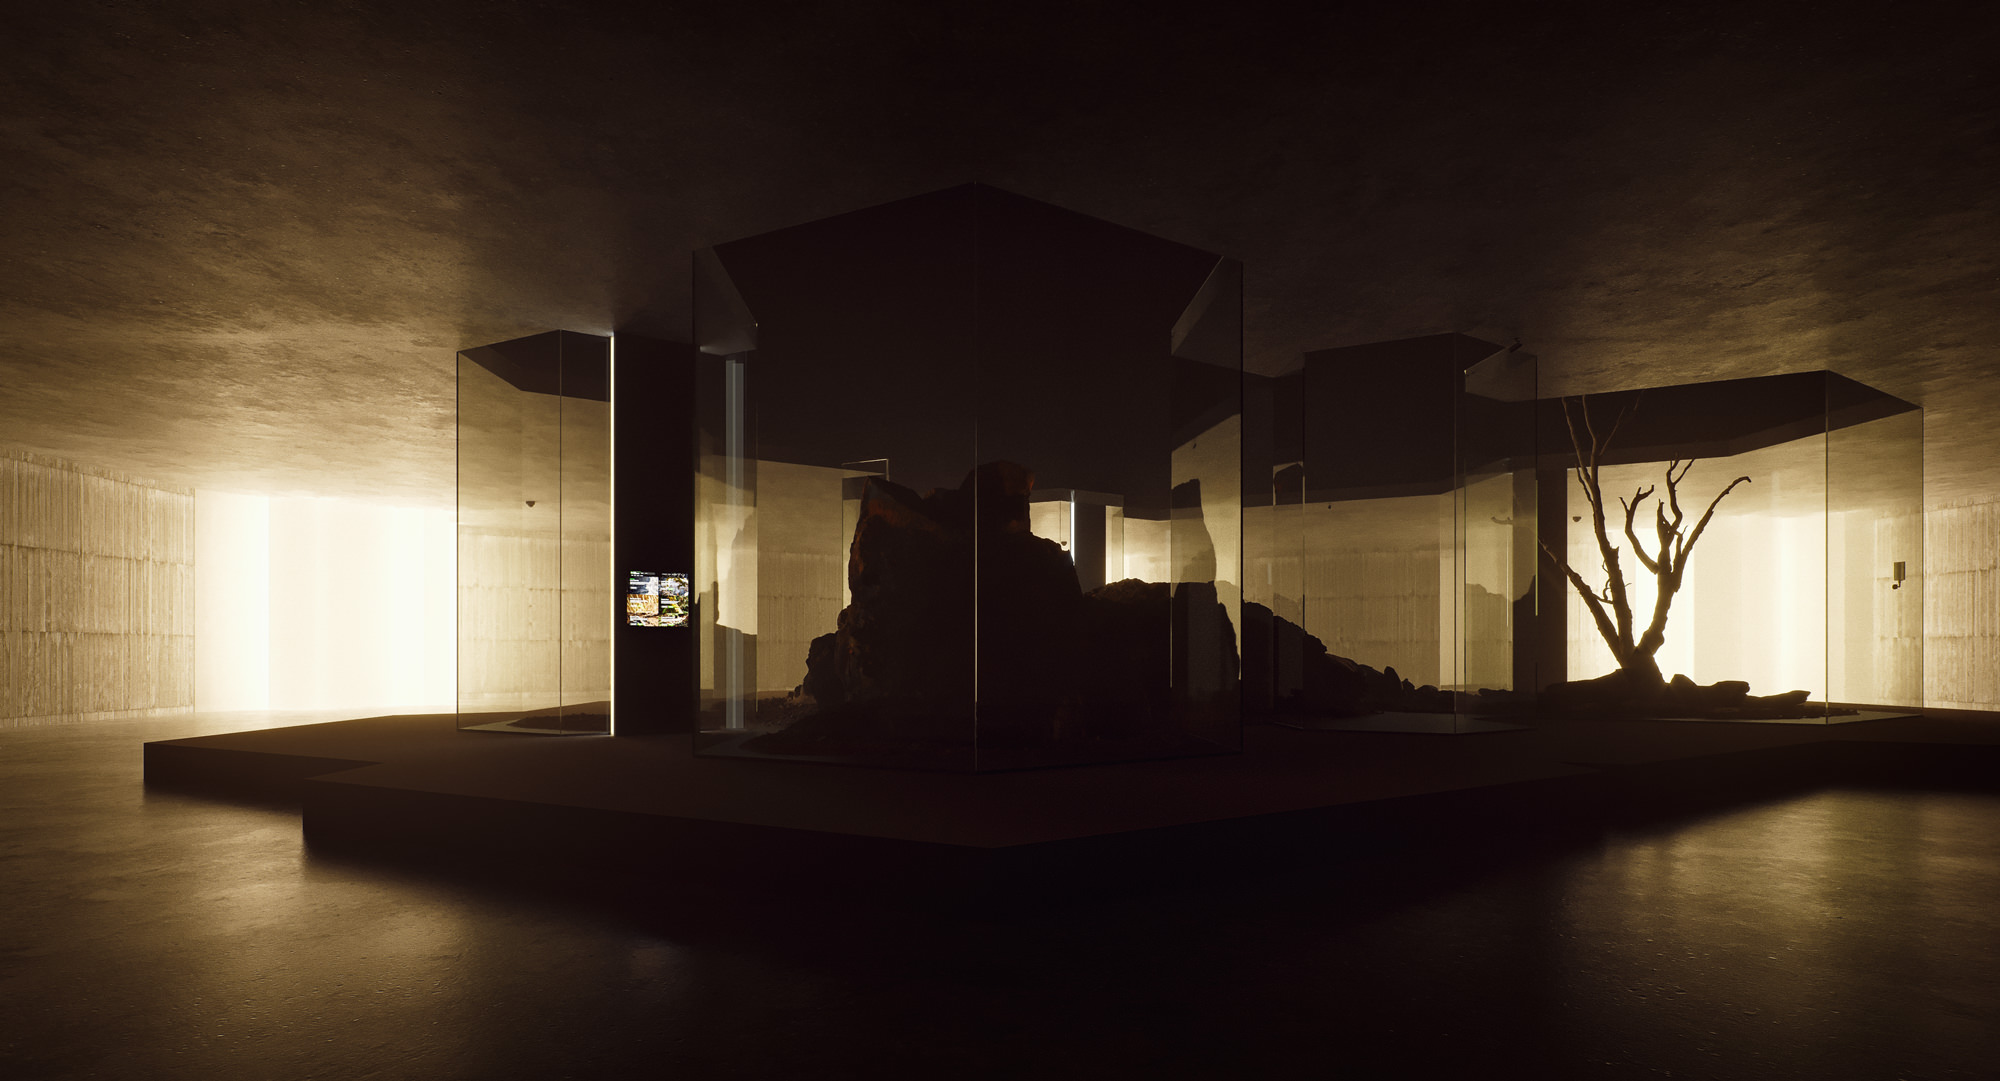
METEORA is a personal concept design project based in a volcanic vivarium pavilion. I developed this project with the intention to use Megascans 3d models (as the main characters) and study the behavior of this software in the ArchVIZ context.
In this making of I will share my impressions about Megascans plus some specific information based on my personal ArchVIZ workflow approach.
For this project, I used 3ds Max 2014, Corona Renderer 1.5, Megascans models, Megascans Bridge, SIGERSHADERS Corona Material Presets Pro, Photoshop CS6 and Nik Software.
MEGASCANS
Megascans is a powerful tool designed to use and customize 3d scanned models.
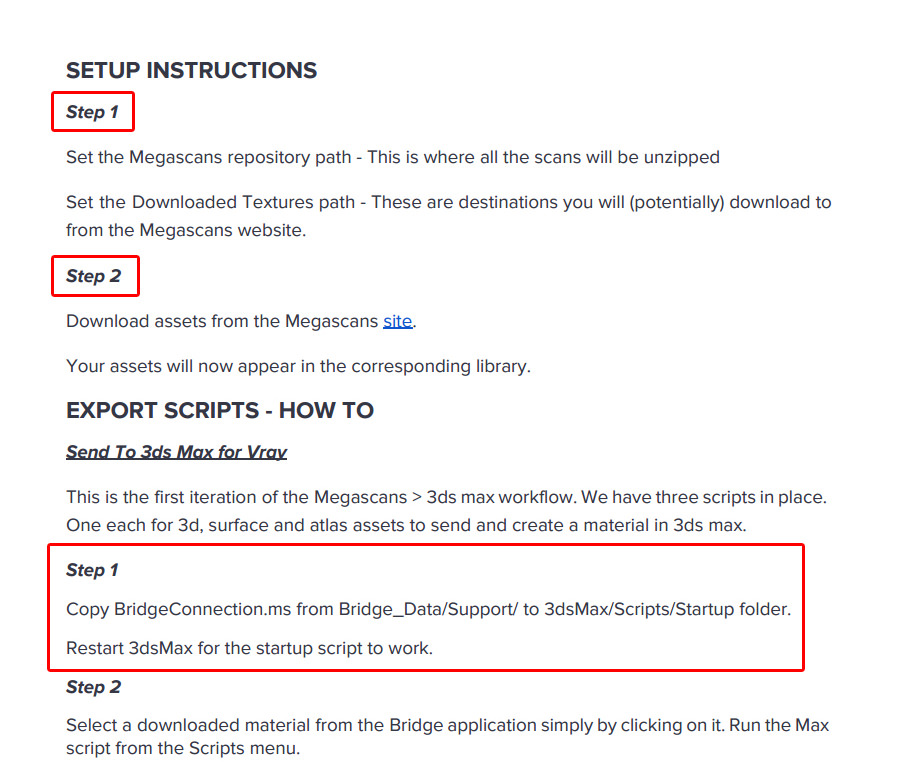
The first step is to go to the Megascans website and subscribe to the service and download Megascans Bridge and Megascans Studio. Please be sure to read and follow the installation instructions.
Before you go on a download binge, make sure you check options like scale, assembly, open mesh, resolution (limited based on subscription level), and maximum LOD (Level of Detail).
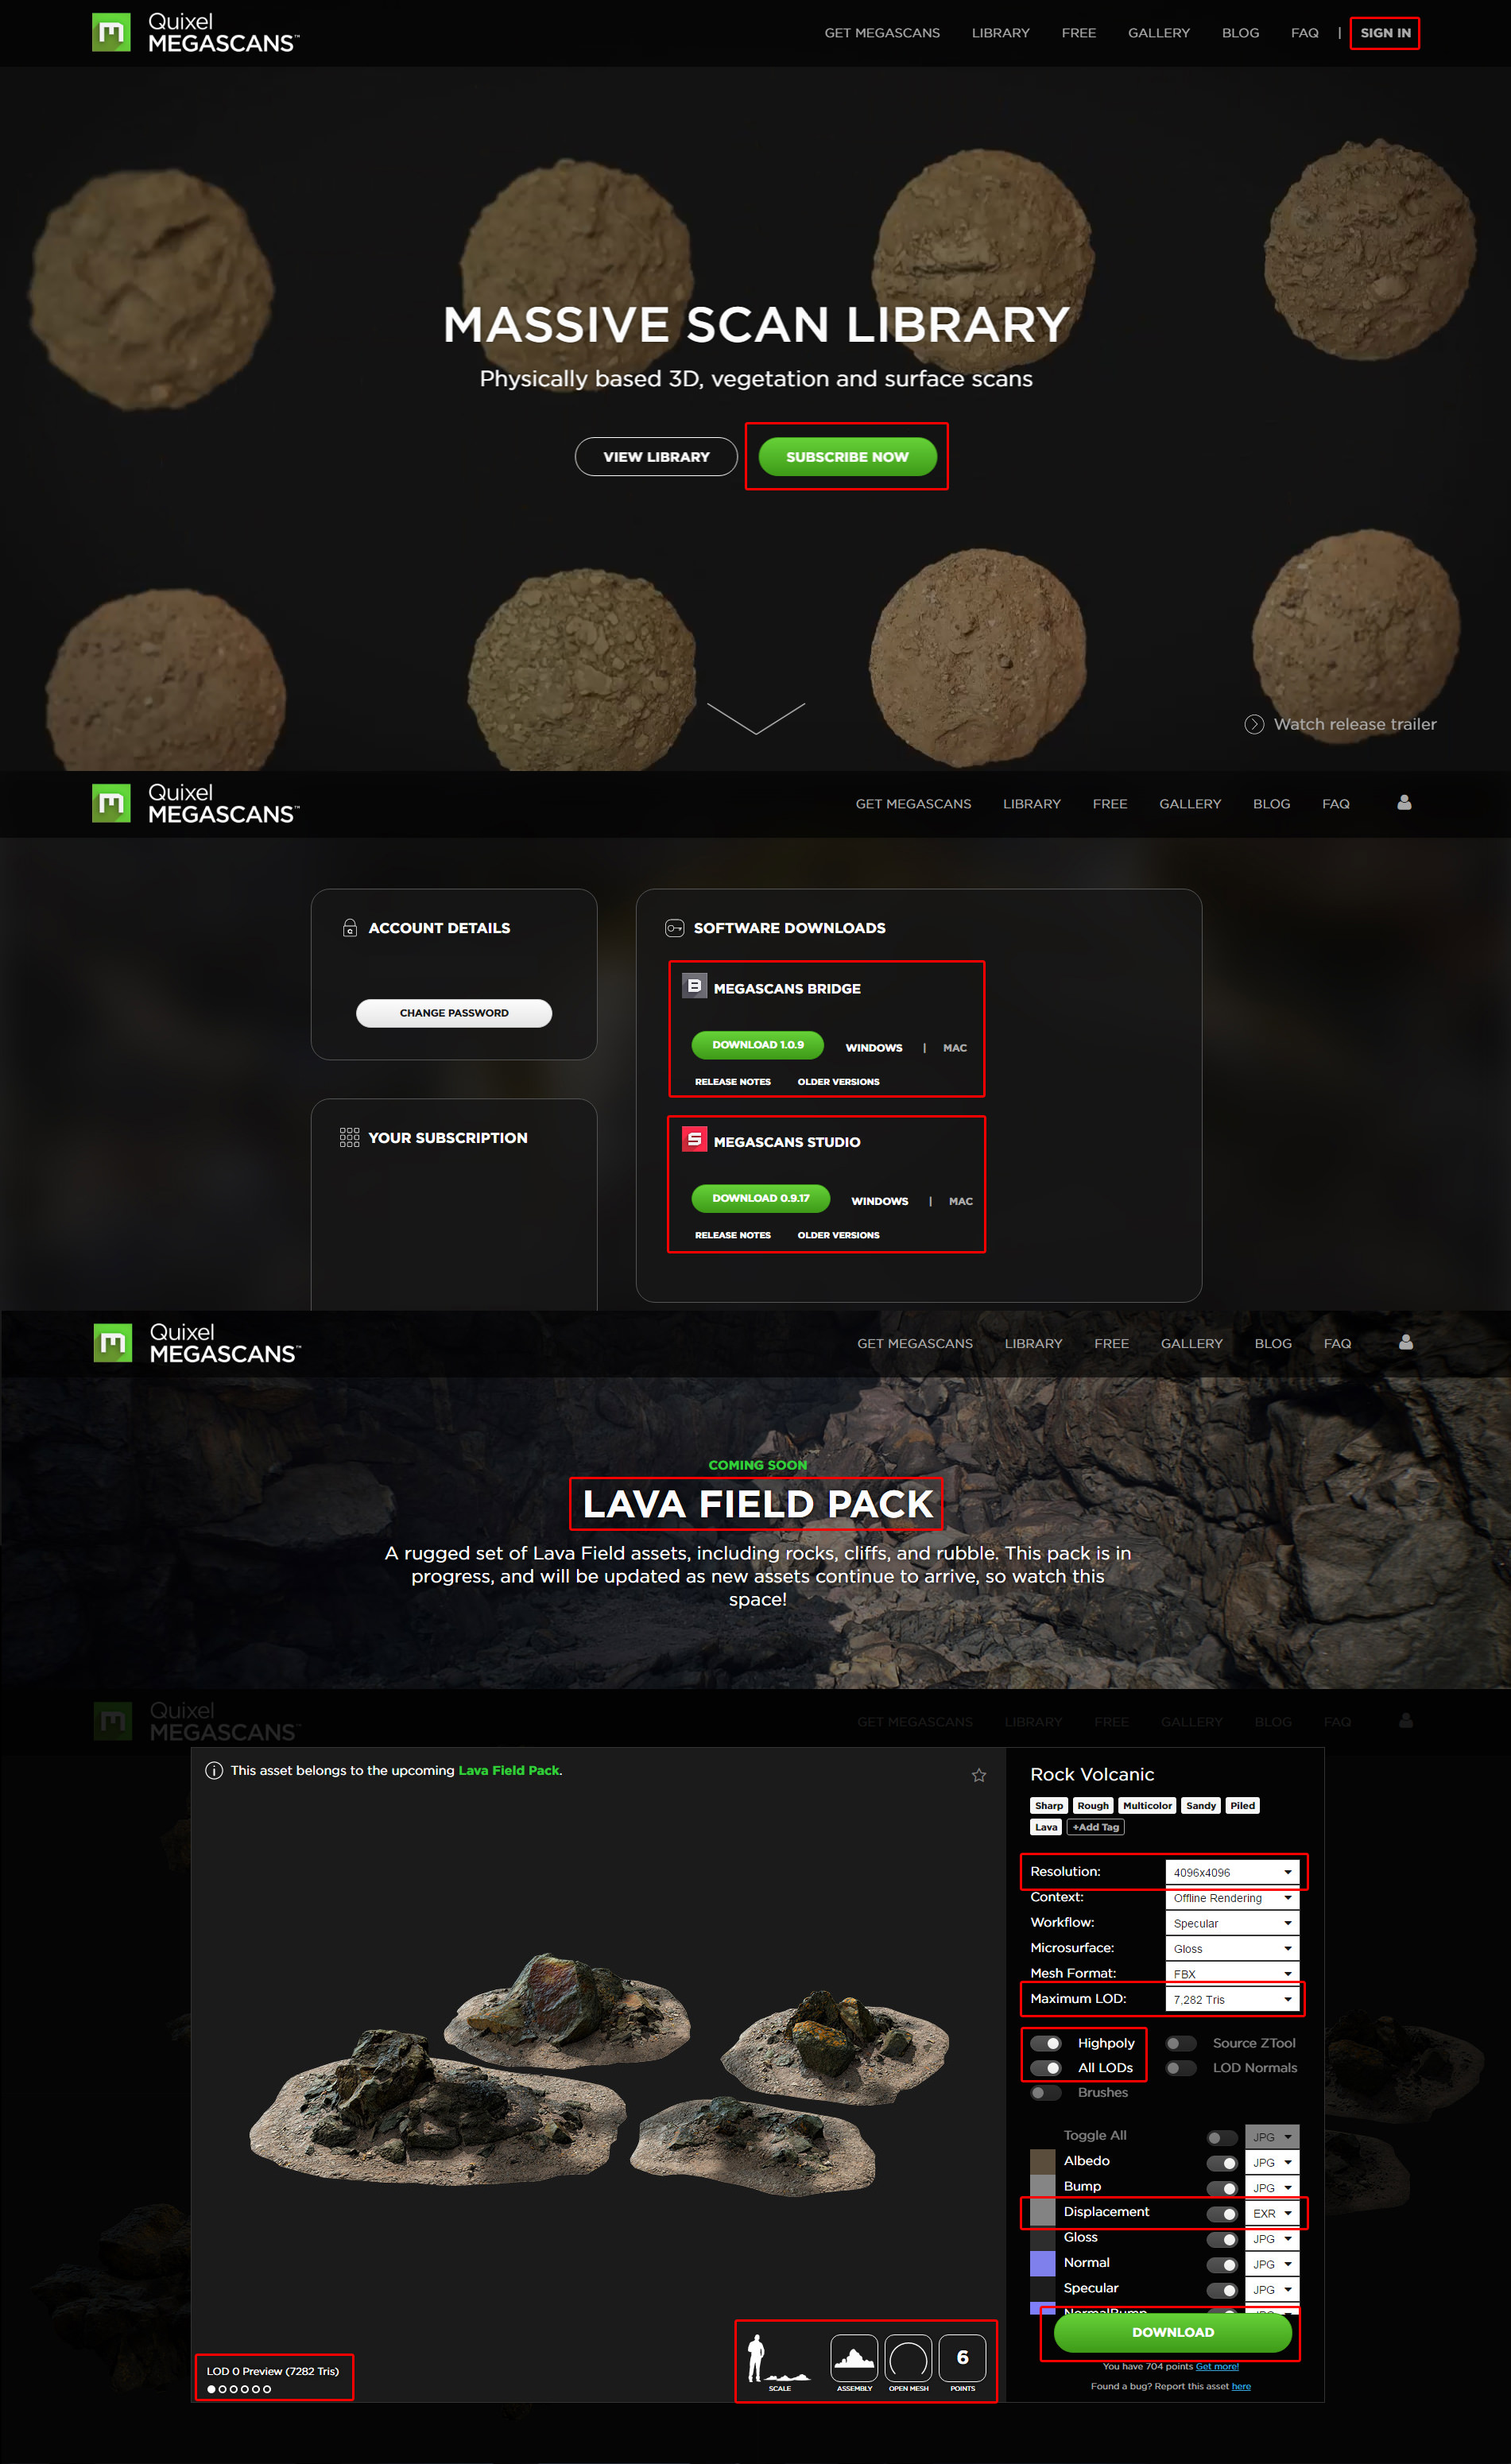
There are two ways you can go about downloading and using scanned 3d models from Megascans :
The first one is getting the full high poly 3d model and avoid using any displacement options (my way).
The second one is by getting a medium to low-level poly model and apply a displacement map (EXR quality) to get the proper amount of details in the render.
Now you are ready to download models (single models or full packs) and take them to the Megascans Bridge.
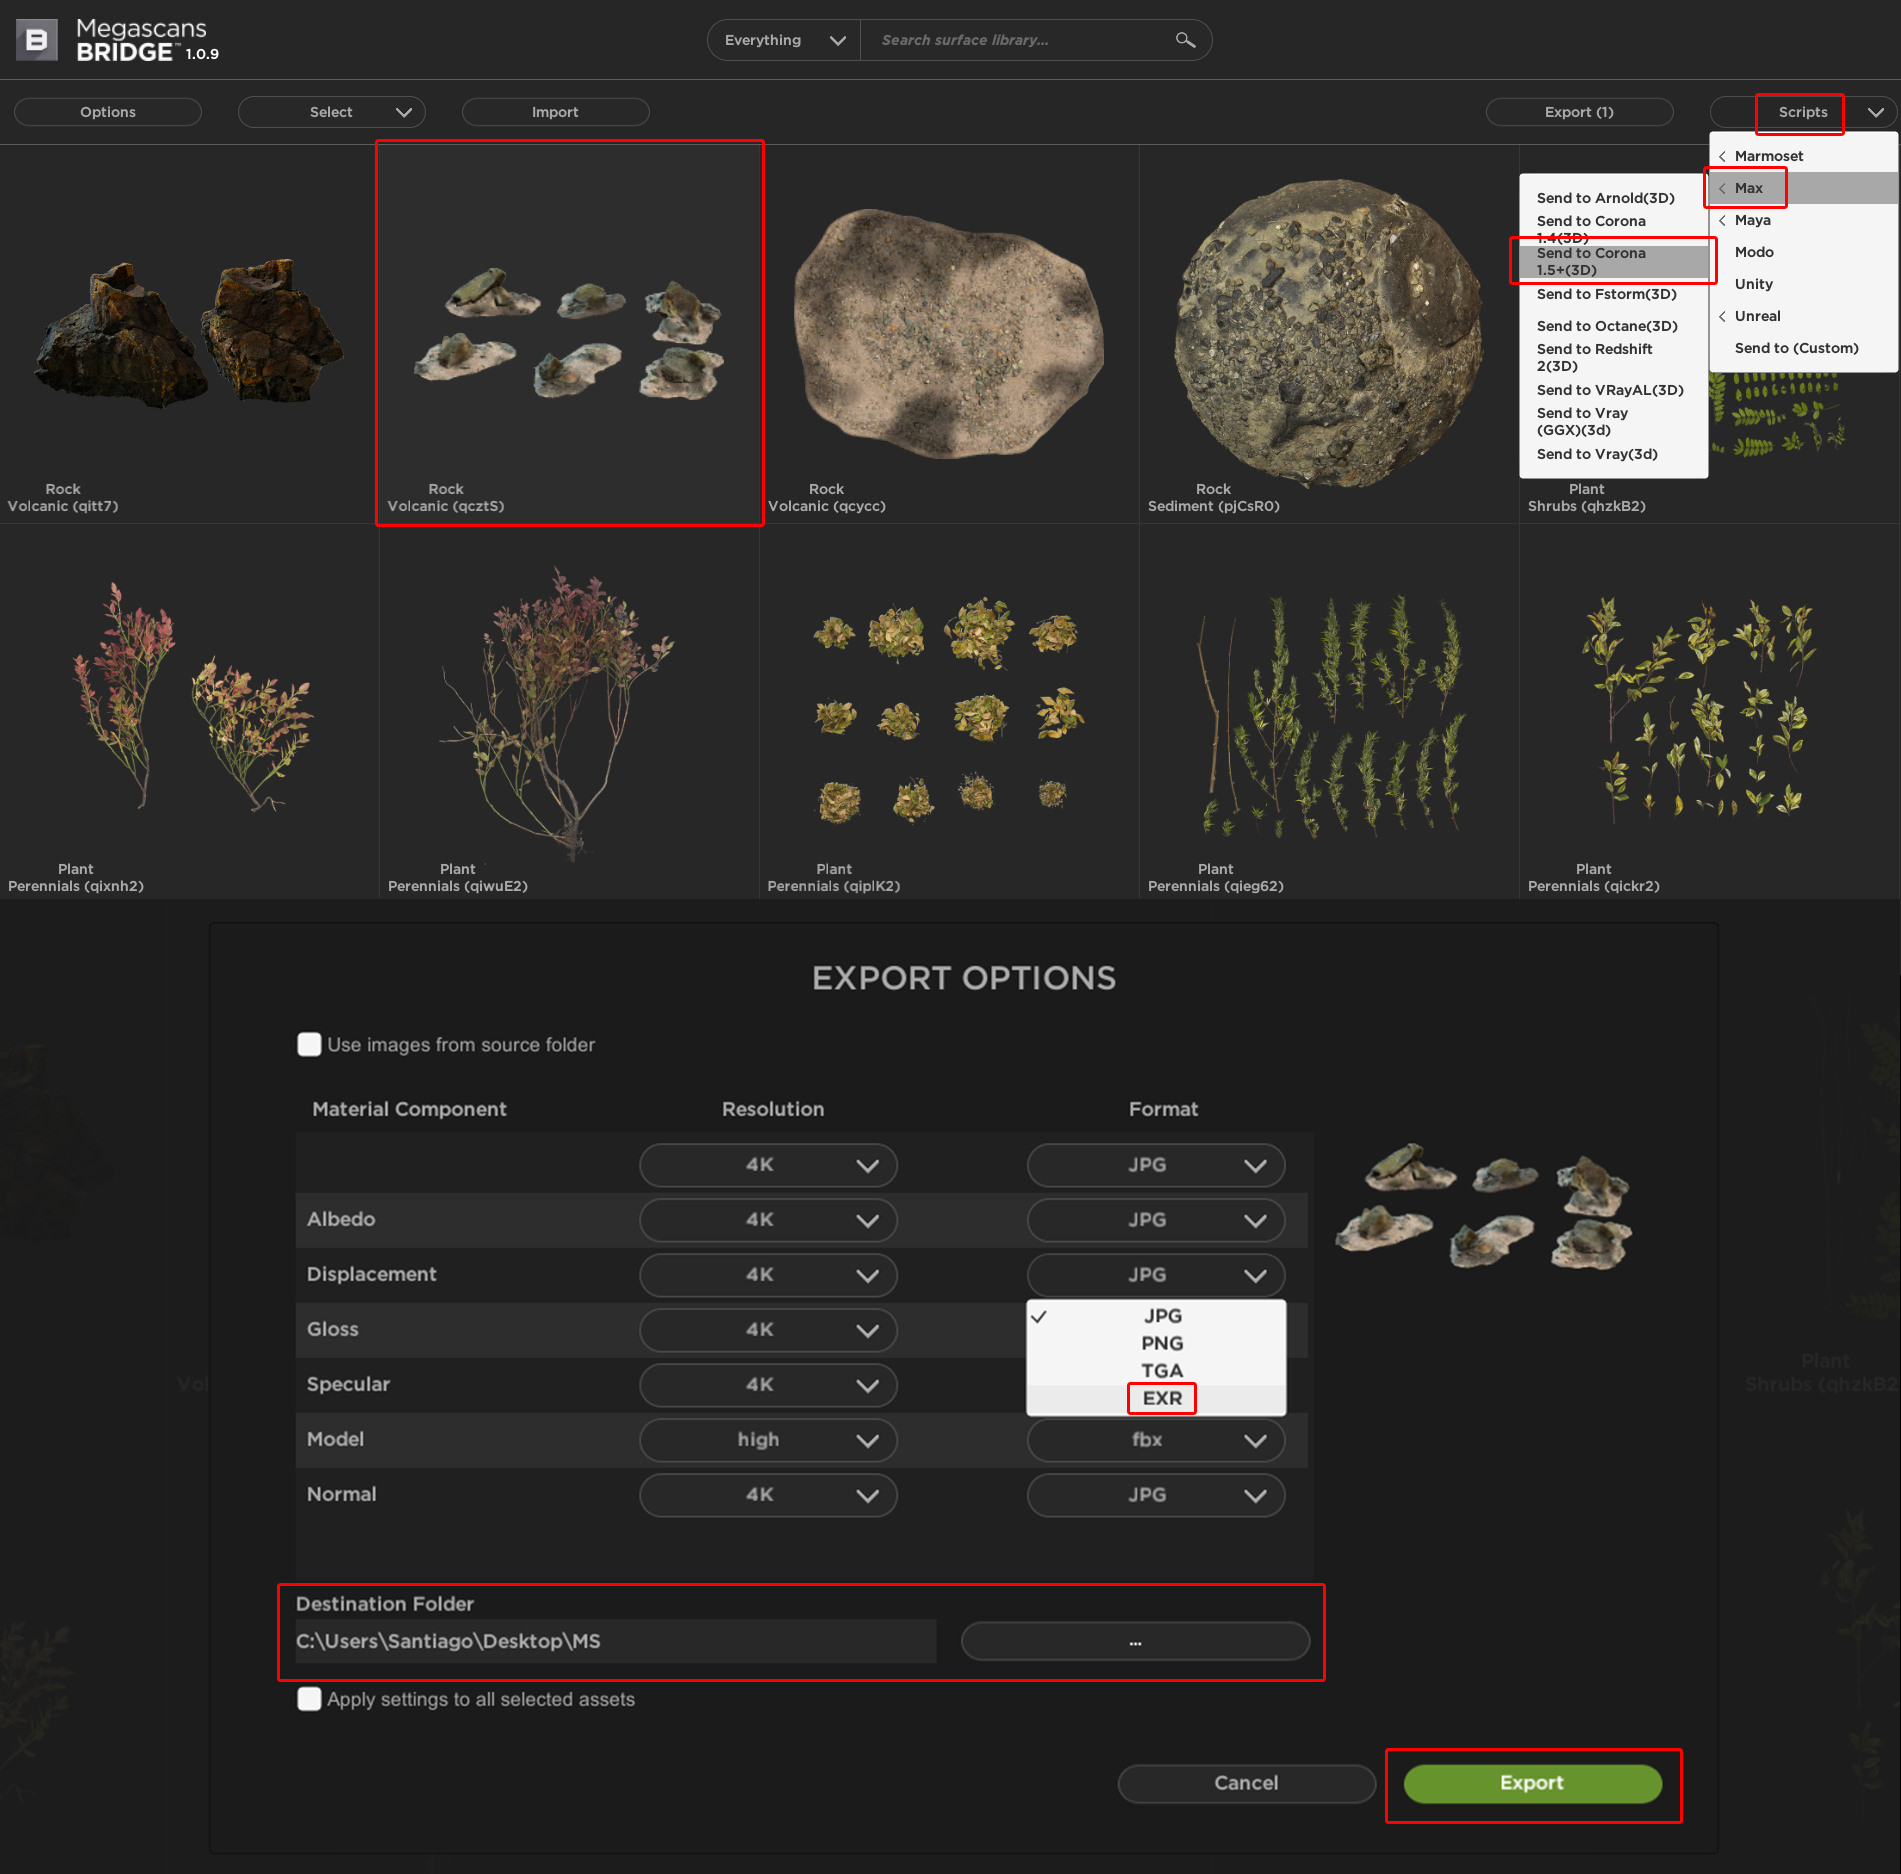
The models will be exported automatically to 3ds Max (FBX file) with all the materials ready to render. You can use any scatter software as well.
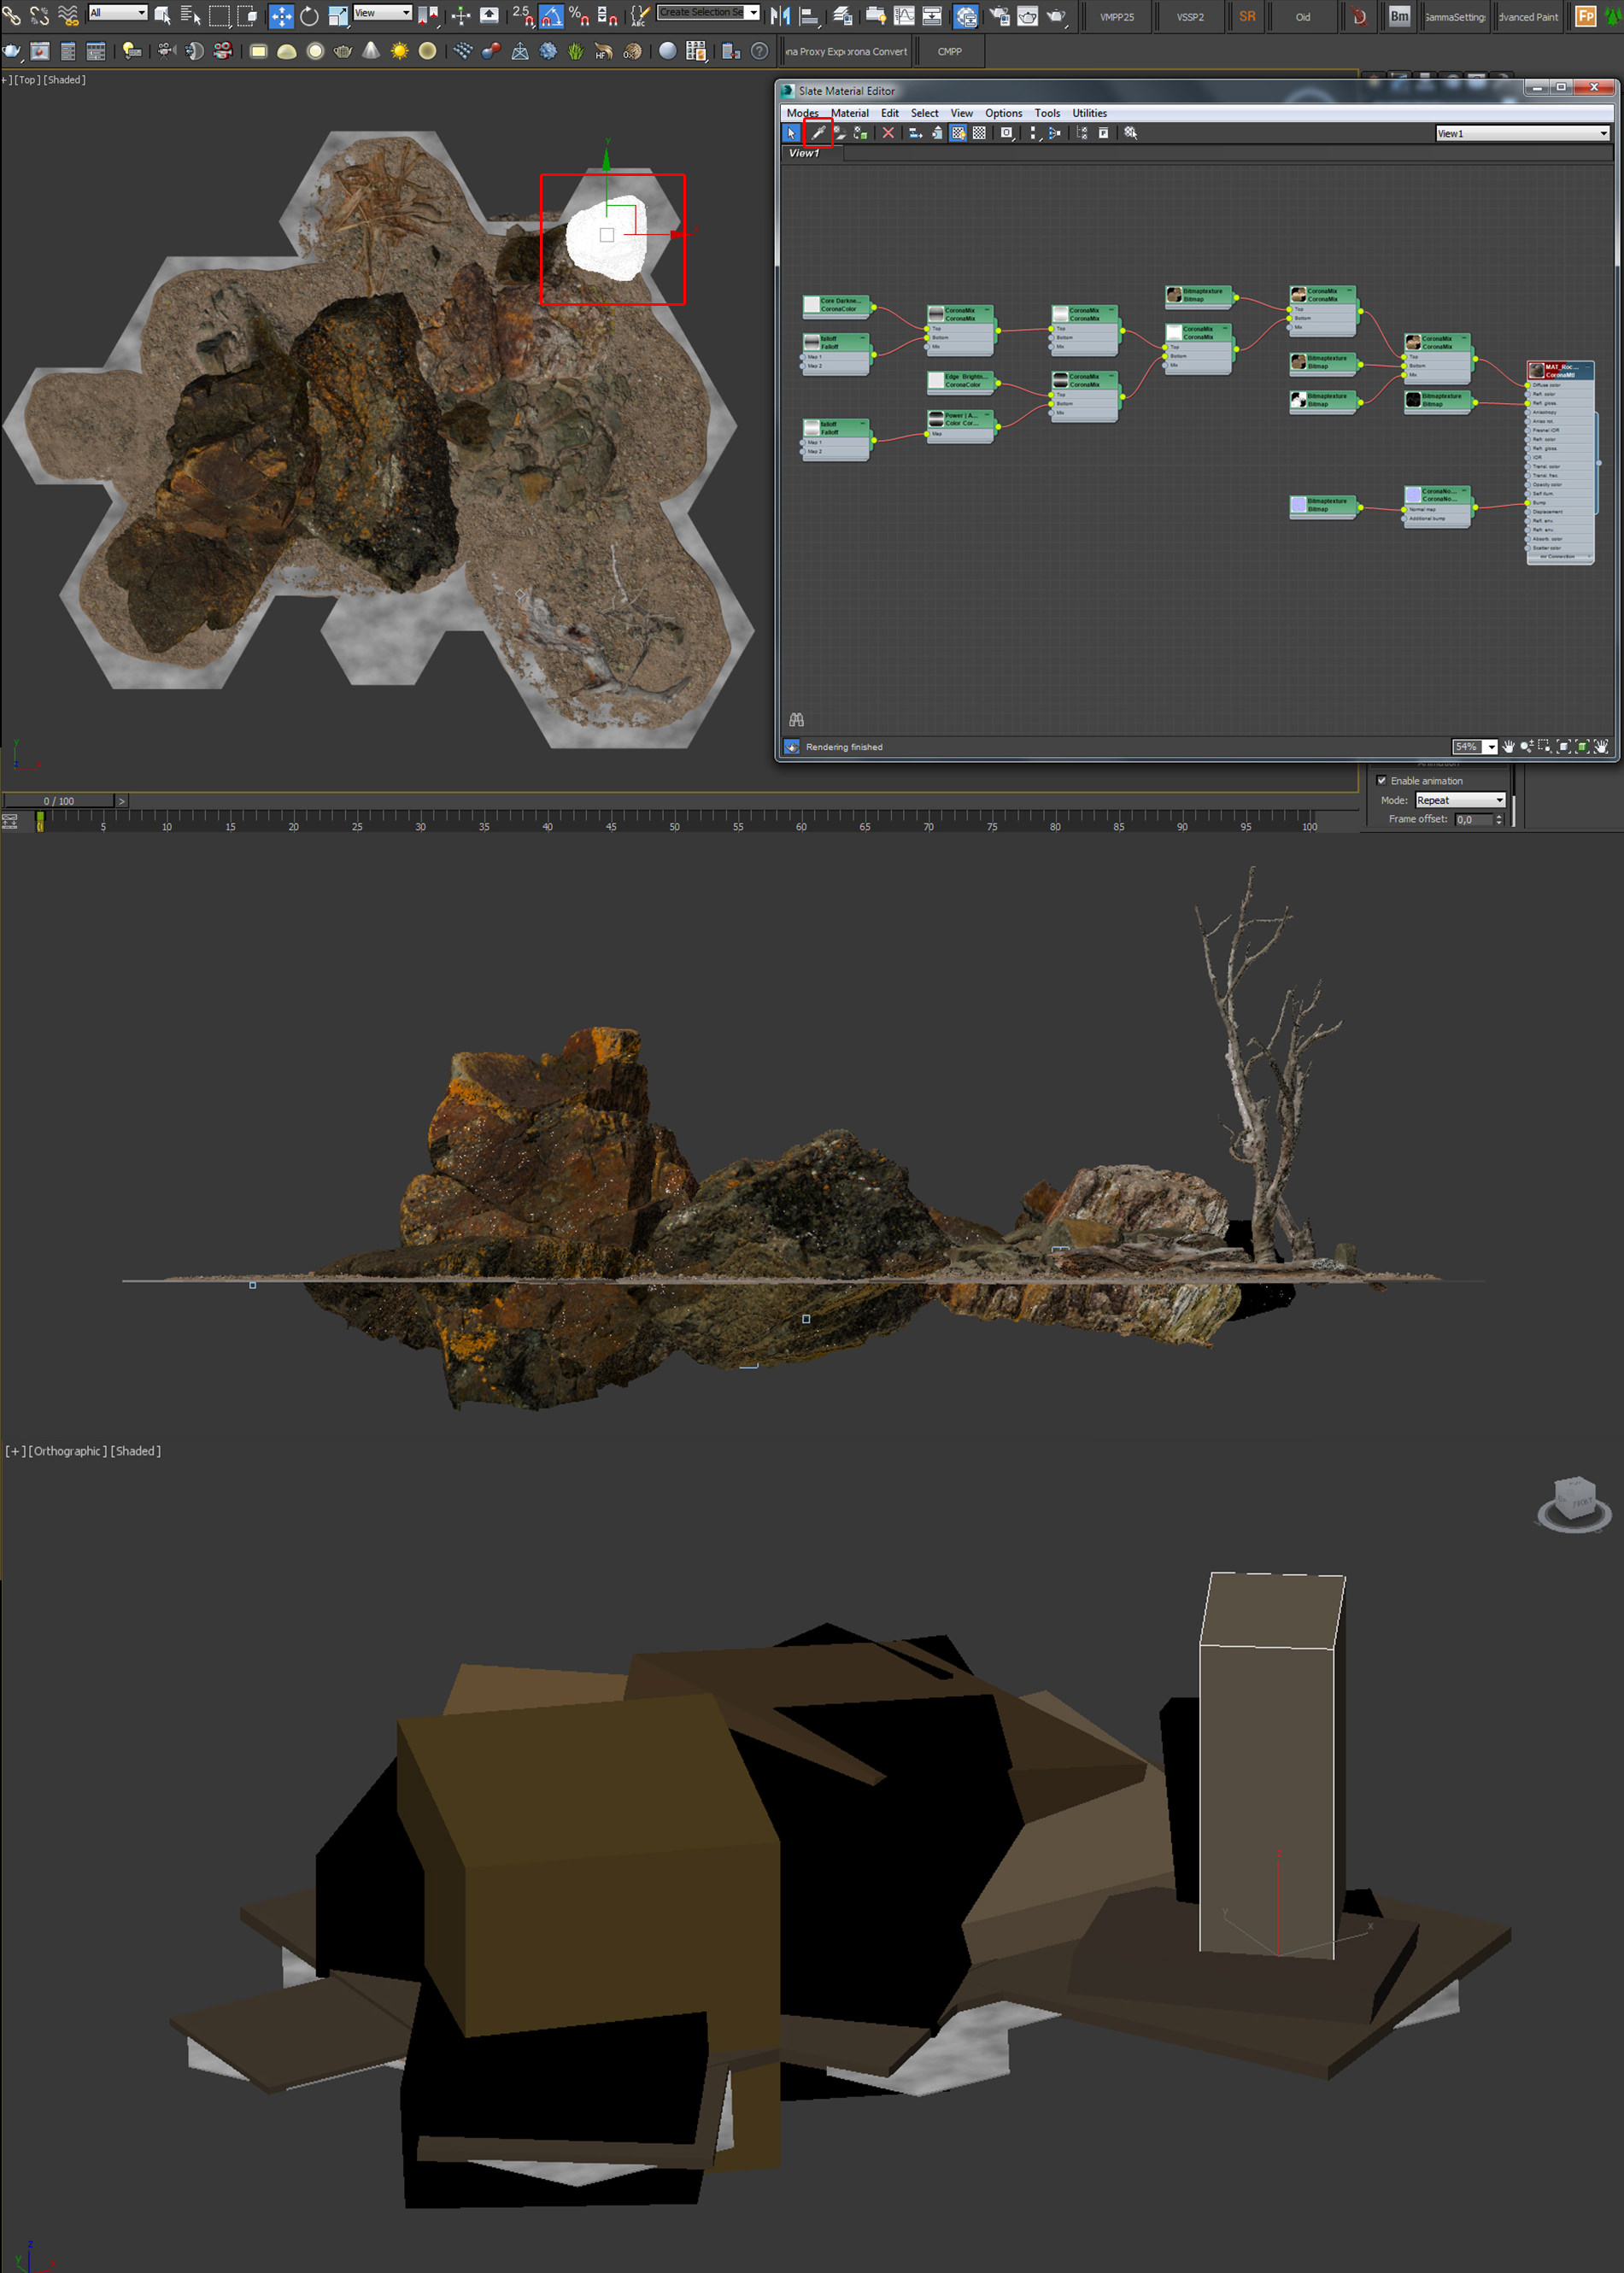
Megascans 3d models come with the materials already set for you, so you won’t spend time dealing these, the shaders are just perfect as they are.
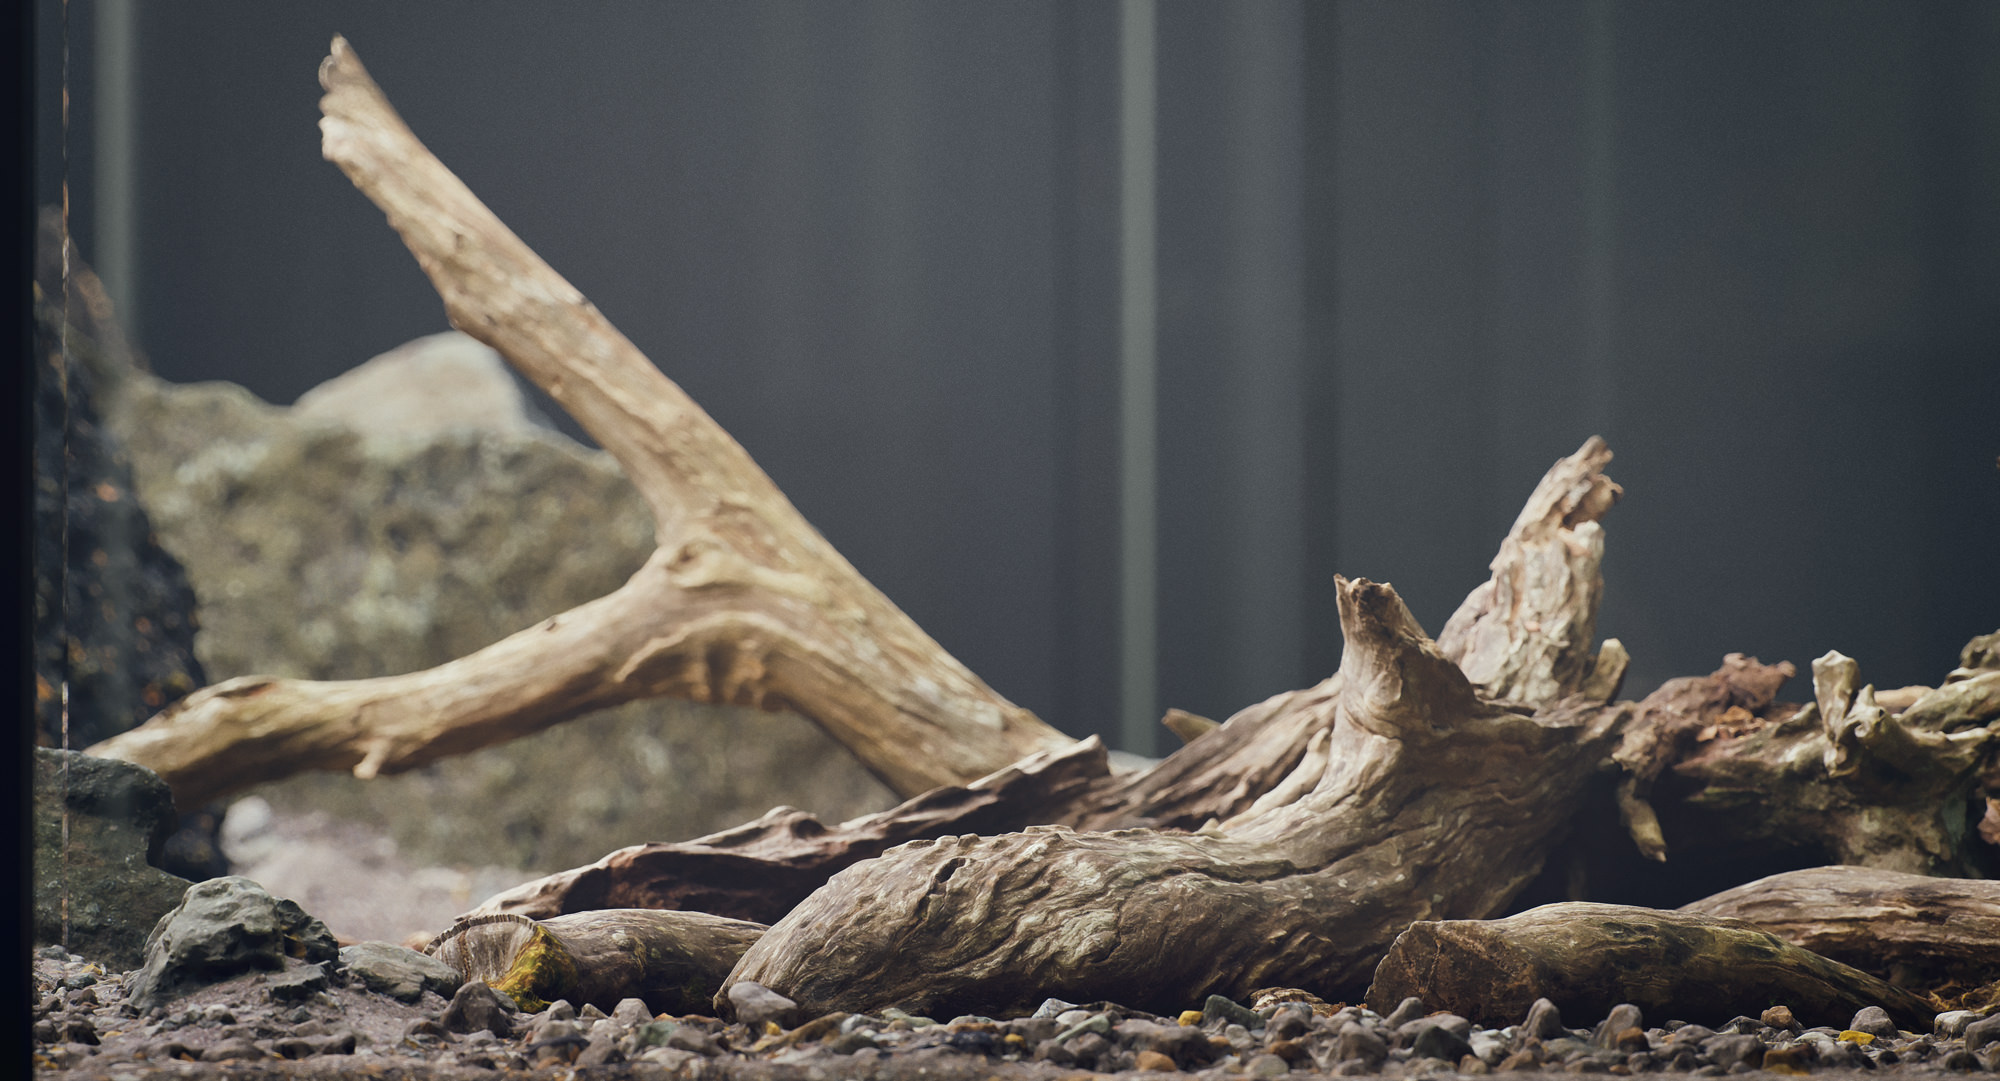
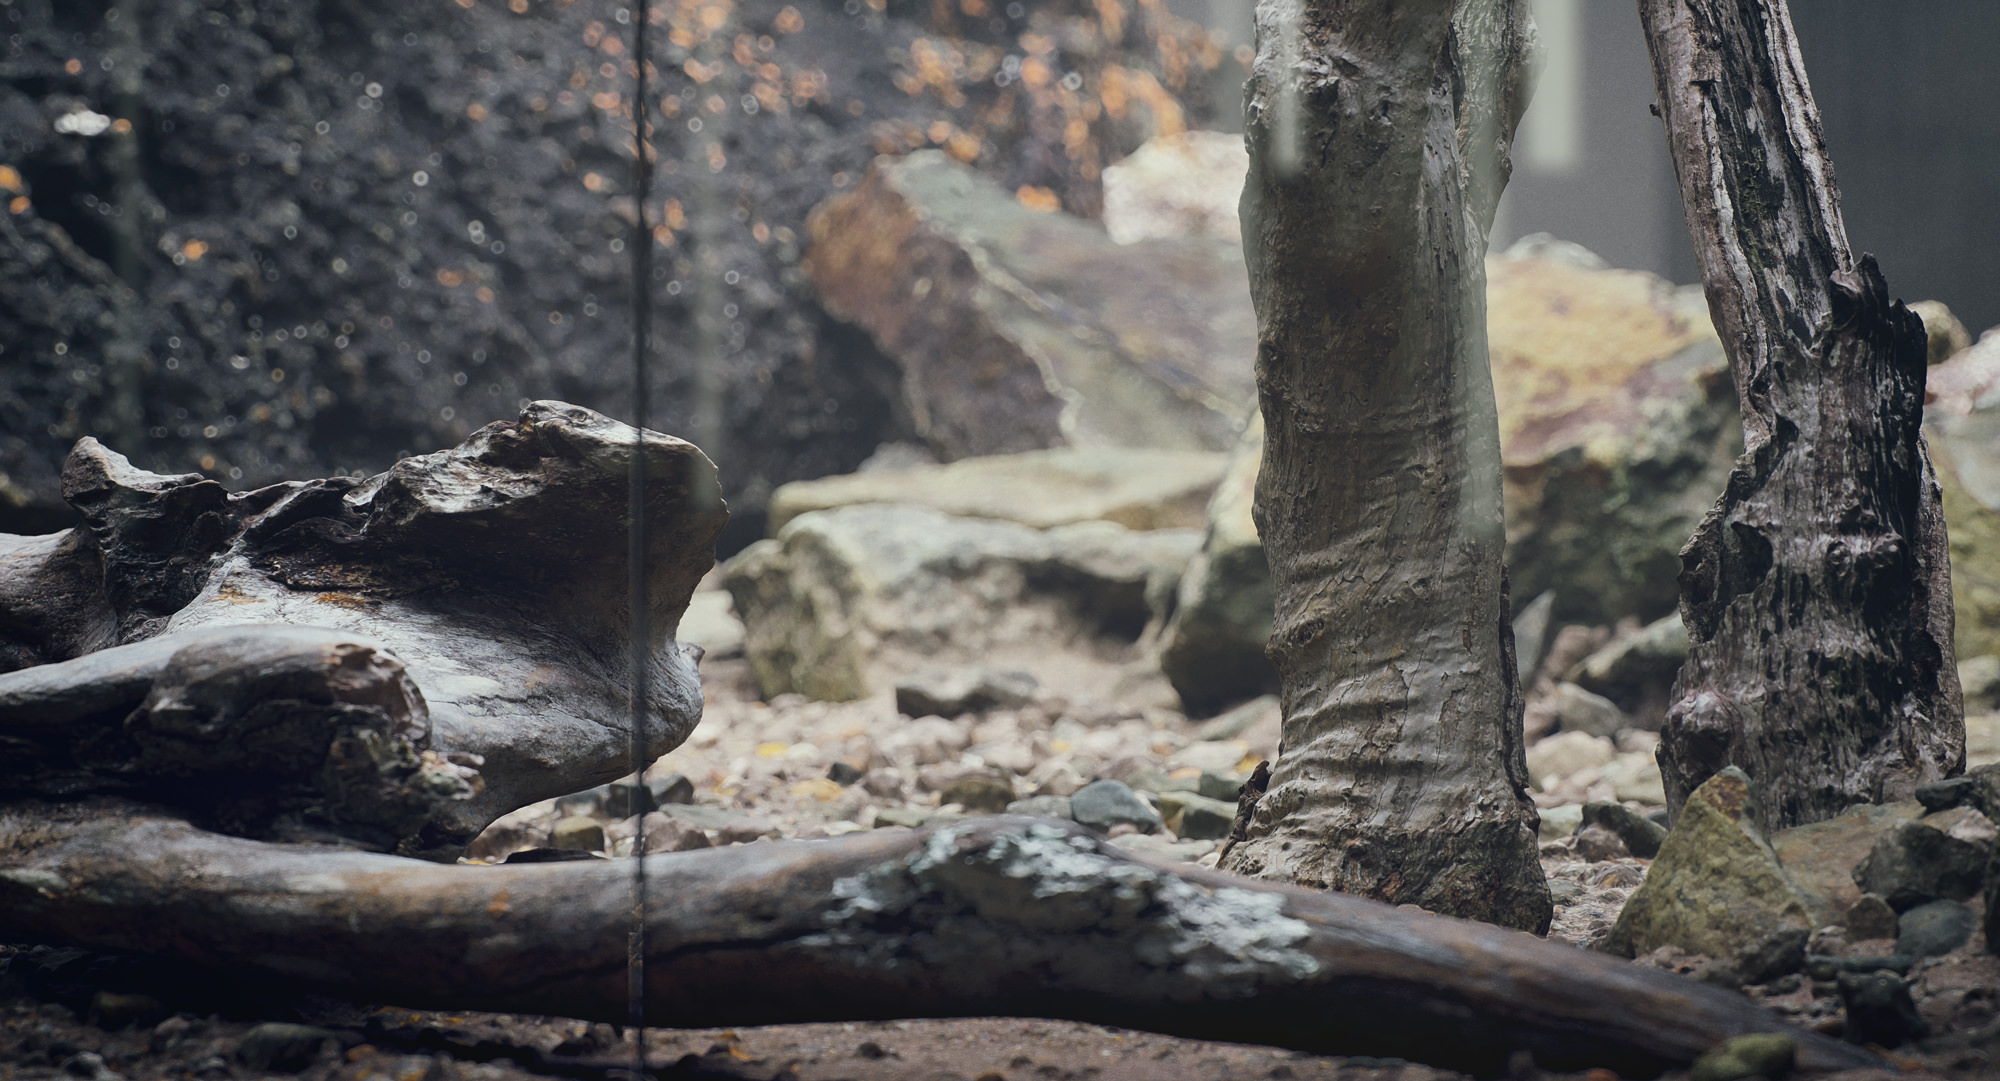
One of the main advantages of using high poly versions of the 3d models is when you have to do close ups you won’t need to change the model or apply any displacement map. The models have an incredible amount of detail to them when getting the highest LOD versions.
The assembly process is very easy; my personal recommendation is to do it by hand for small spaces and use a scatter software for large surfaces and of course convert the models into proxies.
This is the list of models I used for this project :
- Rock_Granite_ohFsZ
- Rock_Granite_pkjsG
- Rock_Granite_qluup
- Rock_Volcanic_qcjrP
- Rock_Volcanic_qcycc
- Rock_Volcanic_qcztS
- Rock_Volcanic_qdgr5
- Rock_Volcanic_qitt7
- Rock_Volcanic_qjmvT
- Wood_Branch_pbbau
- Wood_Log_phyr5
- Wood_Log_qdhxa
- Wood_Stump_qdyf7
- Wood_Tree_qjovi
- Wood_Tree_qlEtl
Modeling
The initial concept has had several changes at the beginning, so I decided to keep it simple to induce the whole attention to the 3d Megascan models. As always I used ACAD to model the base and import it into 3ds Max.
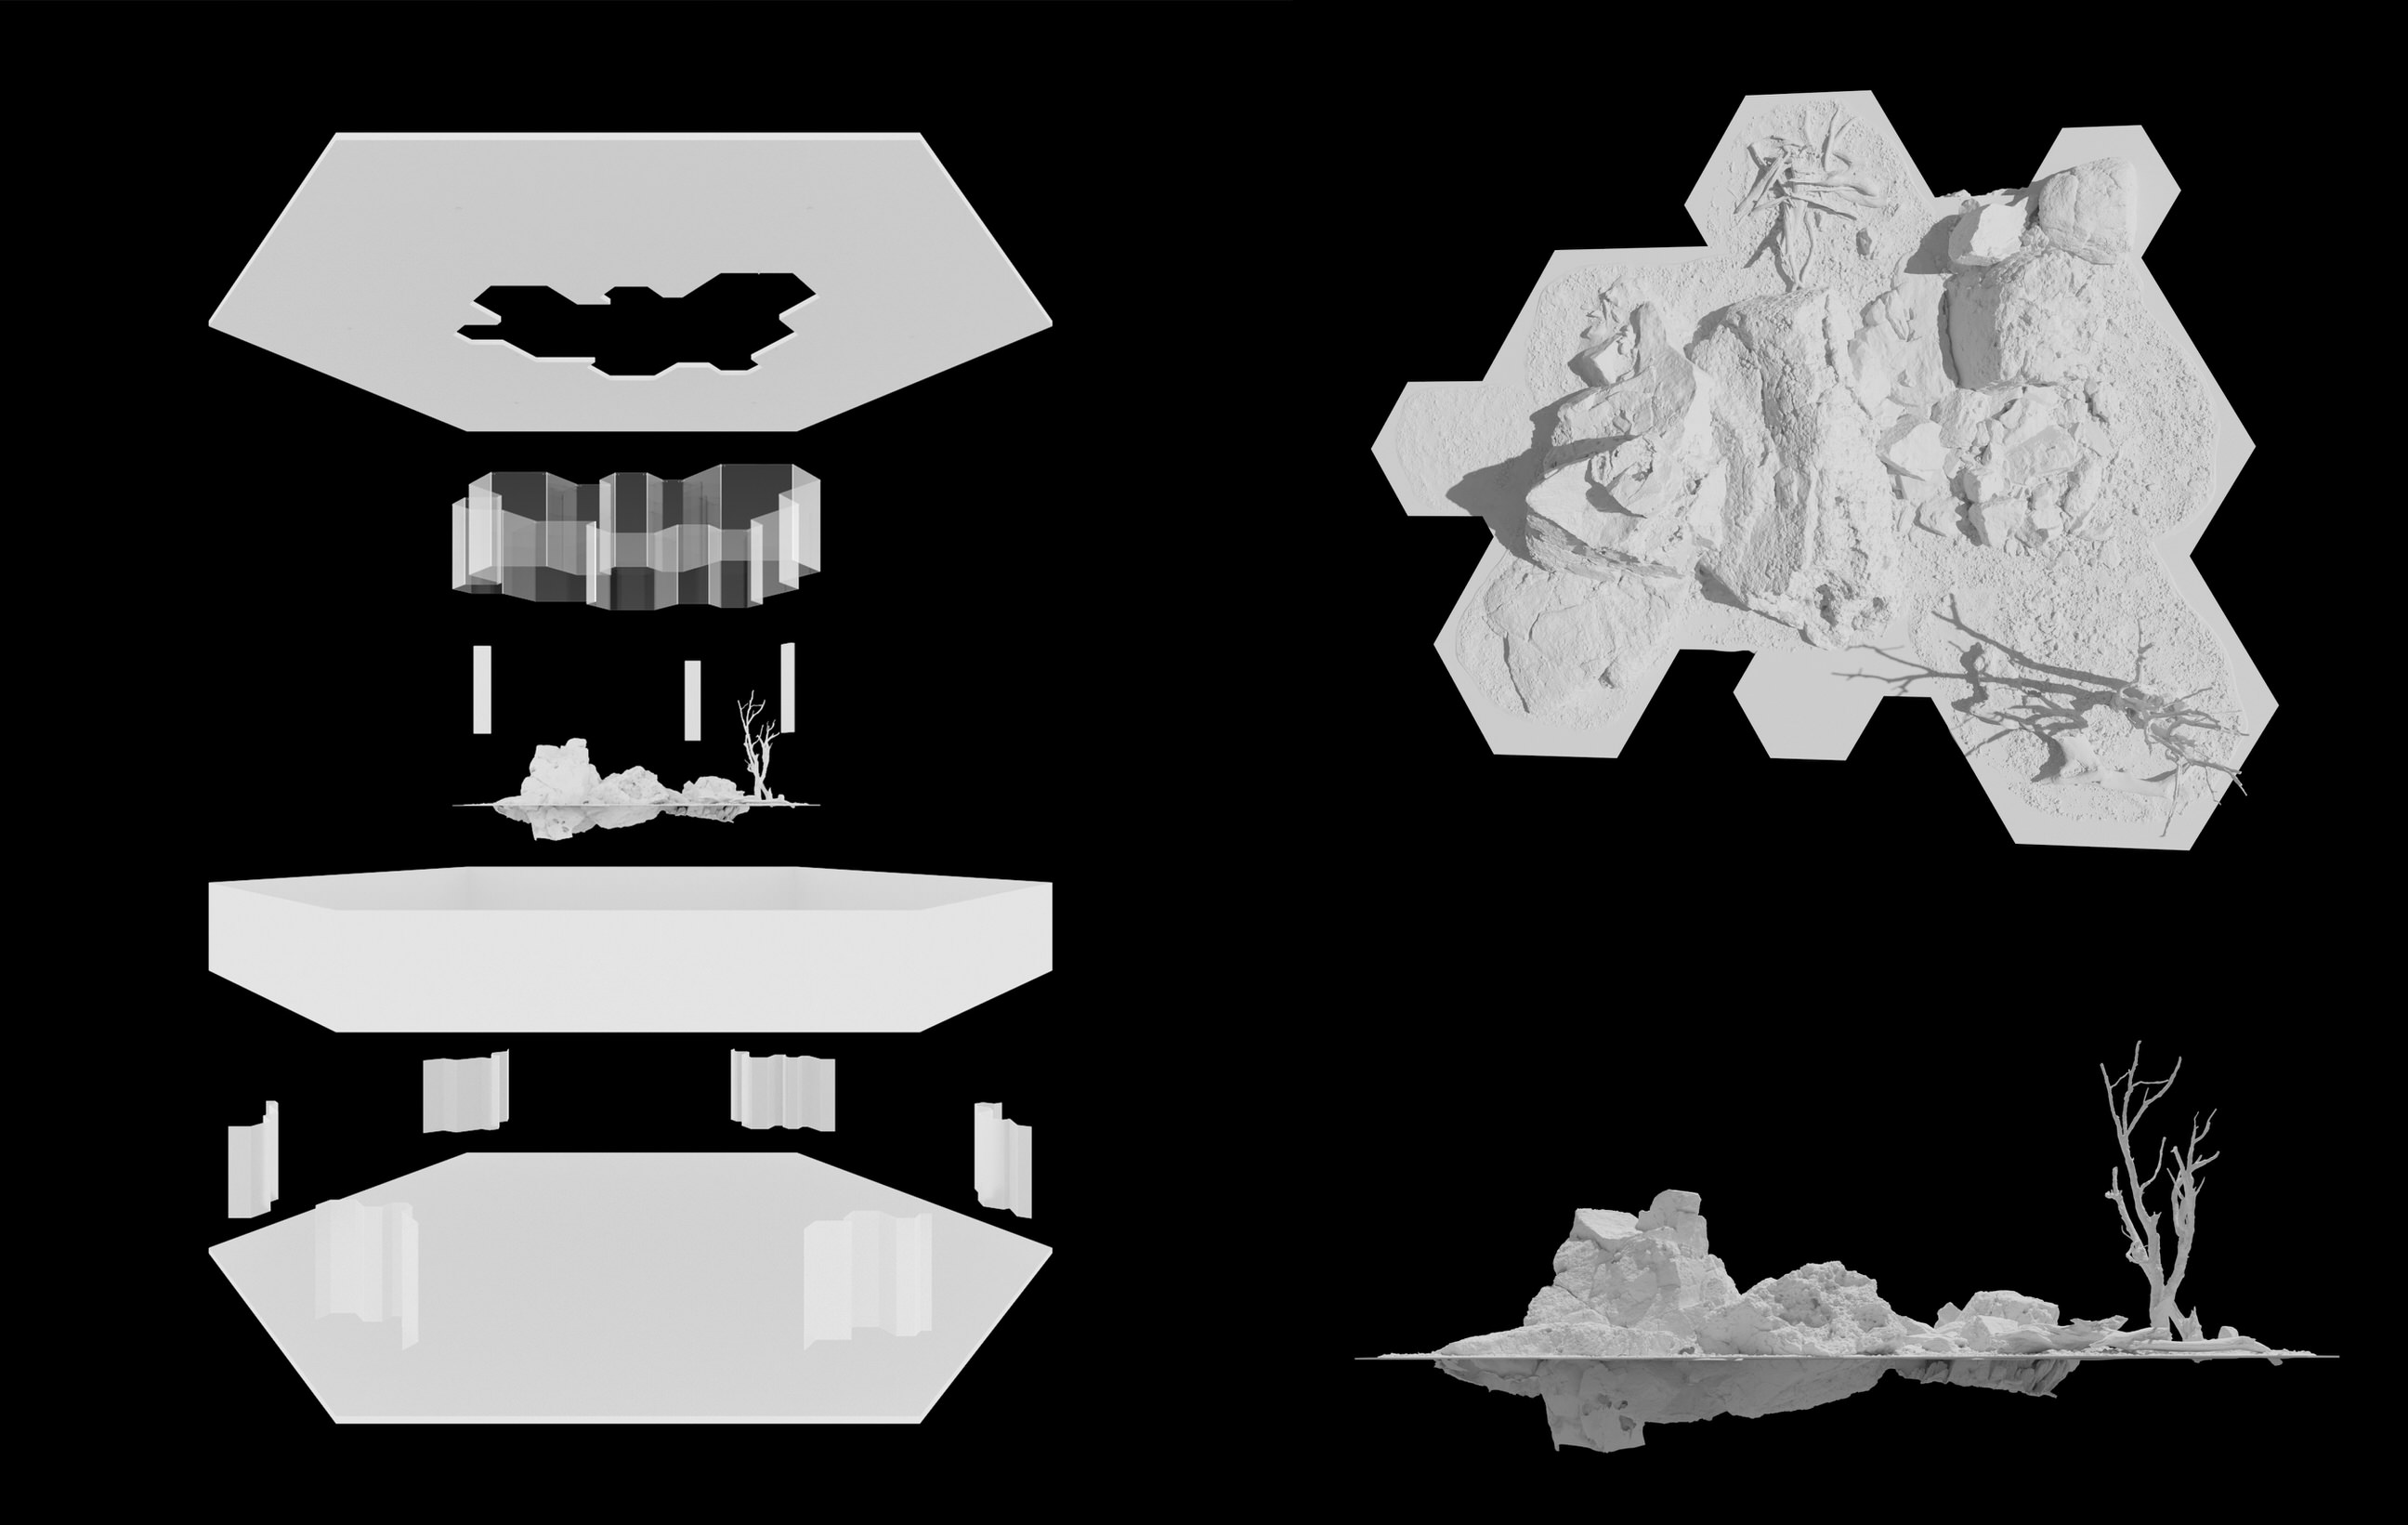
As secondary models, you will find informative digital touch screens, ceiling cameras, ceiling lights, indirect lighting emitters (opaque glass plus cylindrical corona lights inside) and an environmental digital thermometer.
In the next image, you will see the whole assembly of the project.
Shading
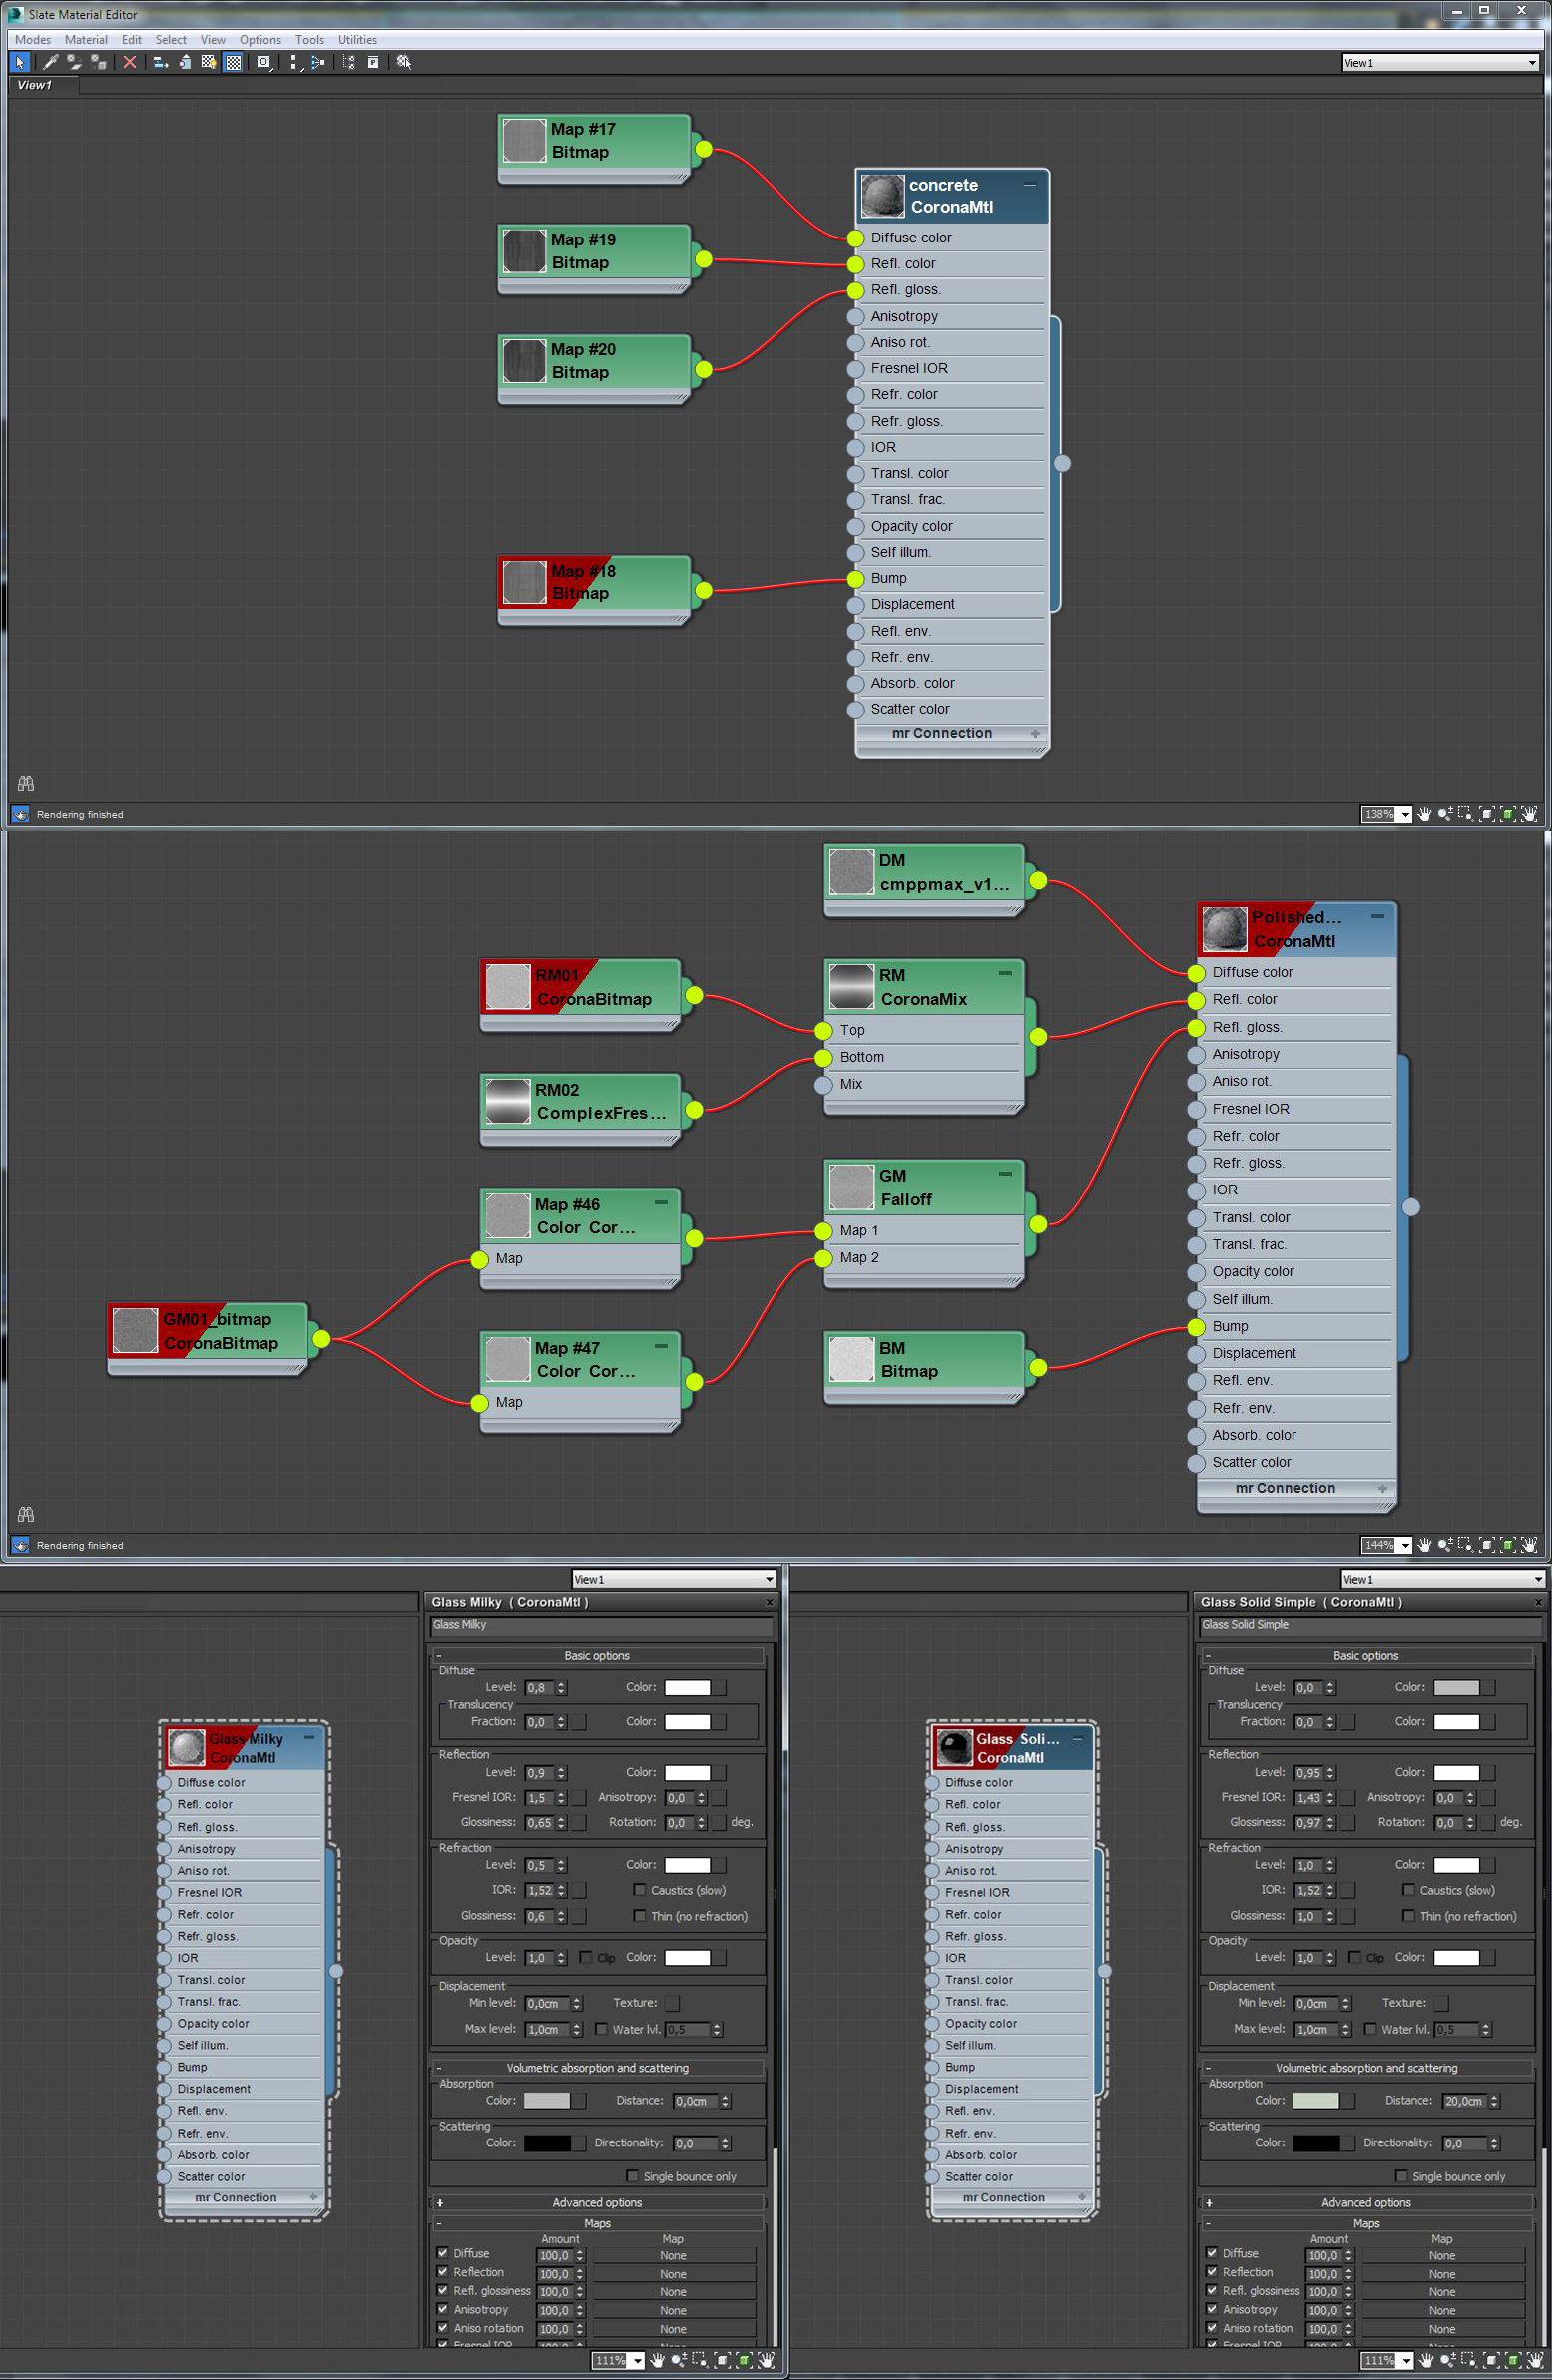
I’ve used CMPP (SIGERSHADERS plugin), and I’ve customized some parameters, primarily reflection and bump to achieve a more accurate result.
Here are some images with the main shaders structure. Wall concrete shader, Floor concrete shader and two different type of glass; solid (glass wall) and opaque glass (corner lights).
Lighting
The lighting approach for this project was developed with the idea to create a unique lighting situation for every composition.
Use a standard camera (with the corona camera mod), or a V-Ray physical camera basically won’t affect the results.
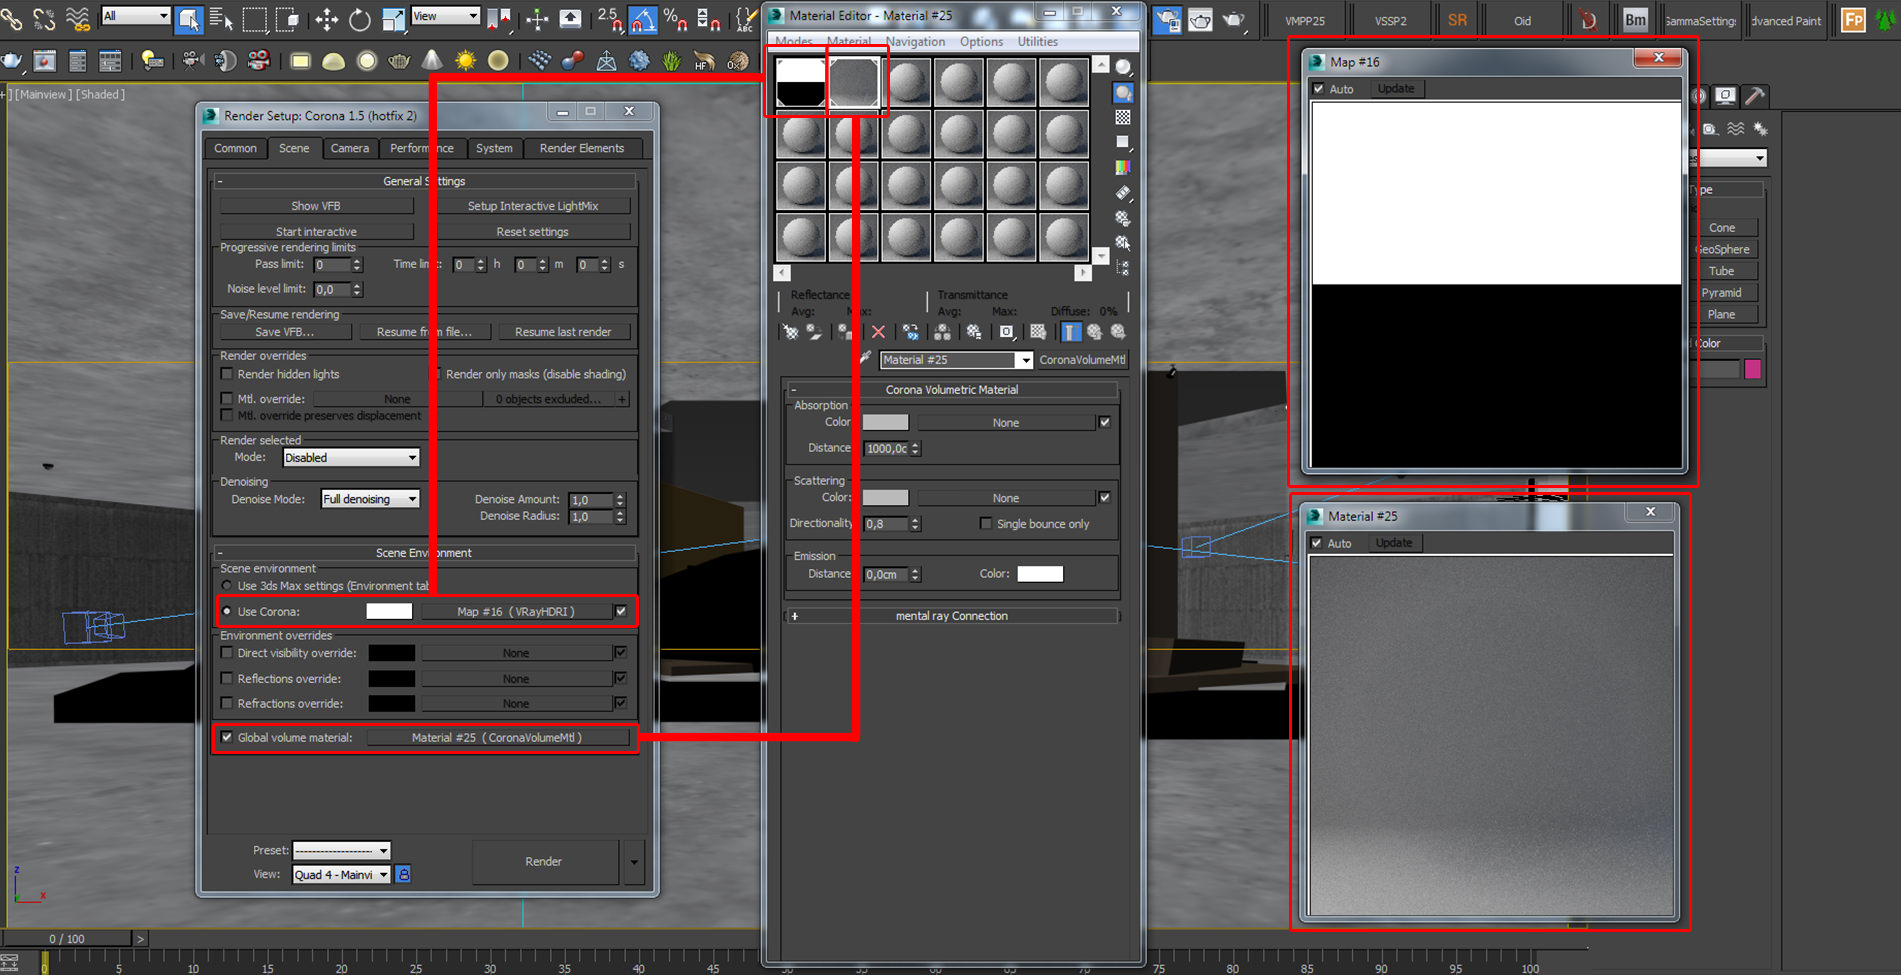
As always the HDRI lighting technique is one of the most useful techniques at the moment to reach this stage of the process. As additional information, I used the Corona Renderer volumetric material for most of the scenes.
In the next image, I will describe how I set up the HDRI map and the Corona Volumetric MTL.
I recommend PG SKIES, I’ve found them to be very accurate and very flexible regarding customization to achieve a particular mood.
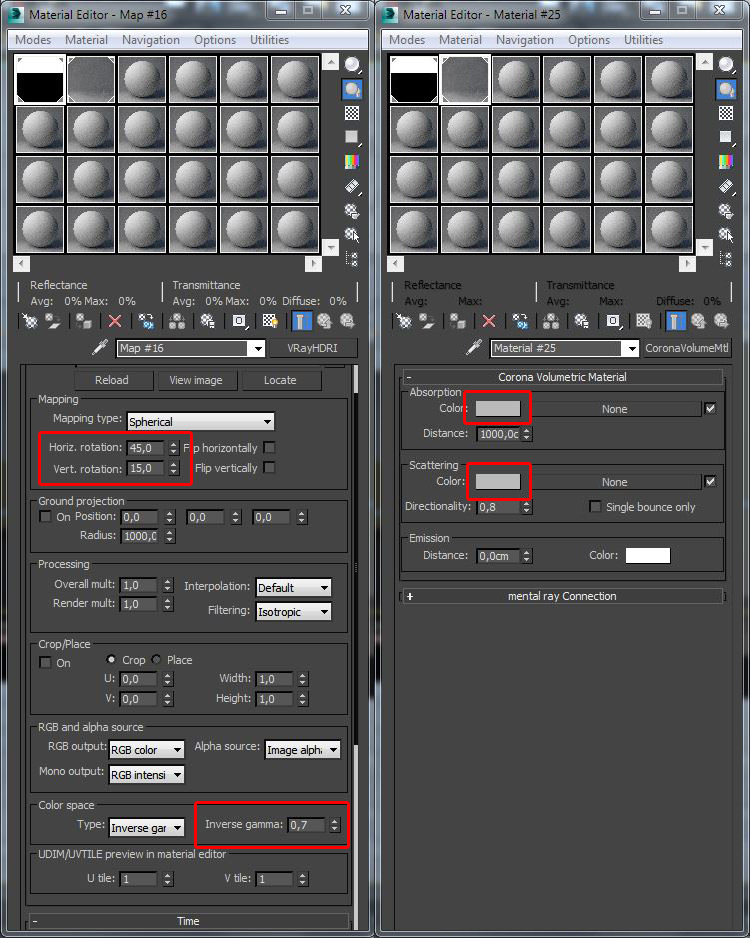
I keep using the HDRI V-Ray map because allows to change the inverse gamma value, so this means I can control levels of contrast or washout according to what the image needs.
For example, if I need a more sharp and contrasted shadows effect; a value of about 0.7 will do the trick, on the other hand, if I need a more neutral and smoother result regarding shadows and highlights a value of about 3.0 will work right without any problem. Every single lighting situation has a particular inverse gamma value.
Every HDRI has their sun, and it’s crucial to make some tests rotating the HDRI not only in the horizontal direction but vertical too. It might break the “reality” of the HDRI, but this will allow you more levels of control over highlights and shadows orientation.
The use of Corona Renderer volumetric material offers control over particular light reaction, specifically in images with moods where I need to decrease the HDRI effect by using a high-density fog effect, or when I want to create a very diffuse light effect.
The first step would be to set up the volumetric material to Gray (128) in both of the color slots (absorption and scattering) after that we have to understand the numeric values.
For example, the higher the value of the absorption distance will be, the lower the density of the fog will be and vice versa. With the scattering option, the numeric value will control the position of the fog based on the depth approximation. For example, with a 0.9 value, the fog will start from the foreground. With a 0.5 from the middle ground. With a 0.1 the fog will be placed in the background.
The main idea is to play with these two values and create a balance between density and depth. Also, you can give a temperature (absorption and scattering color slots) to the fog or allow the lights do the work (my way).
Rendering
The default Corona rendering settings are perfect for any scene. As a progressive render engine, Corona is very easy to use inside any workflow.
Without any doubt, the interactive mode is one of the most powerful characteristics that I rely on and enjoy to work with it because it has no limitation (millions of polys, proxies and particles systems) and it is very stable.
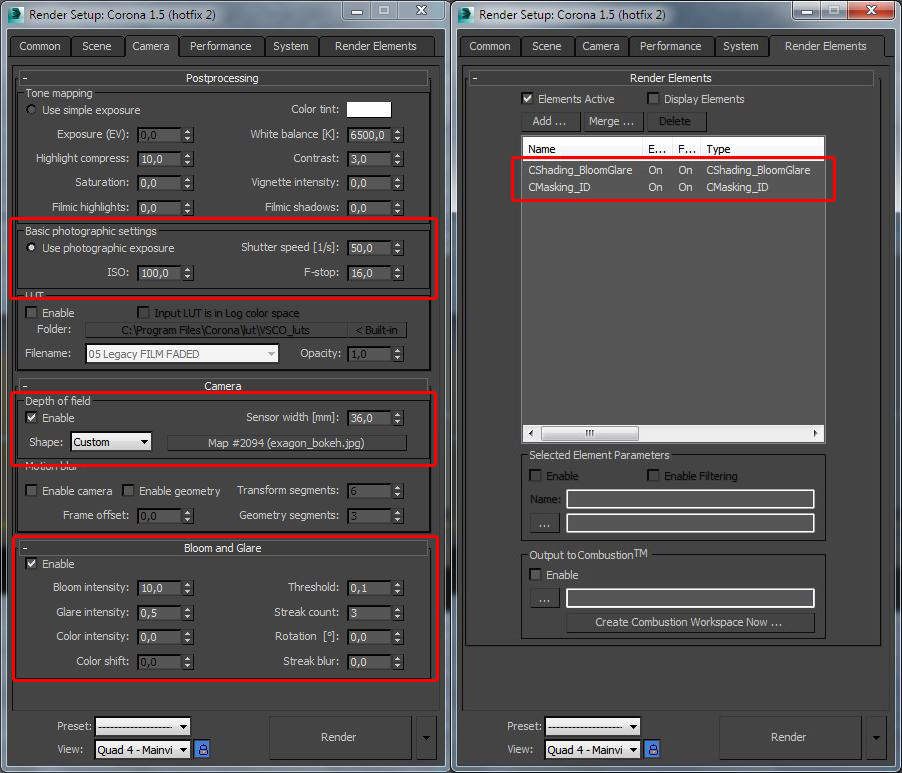
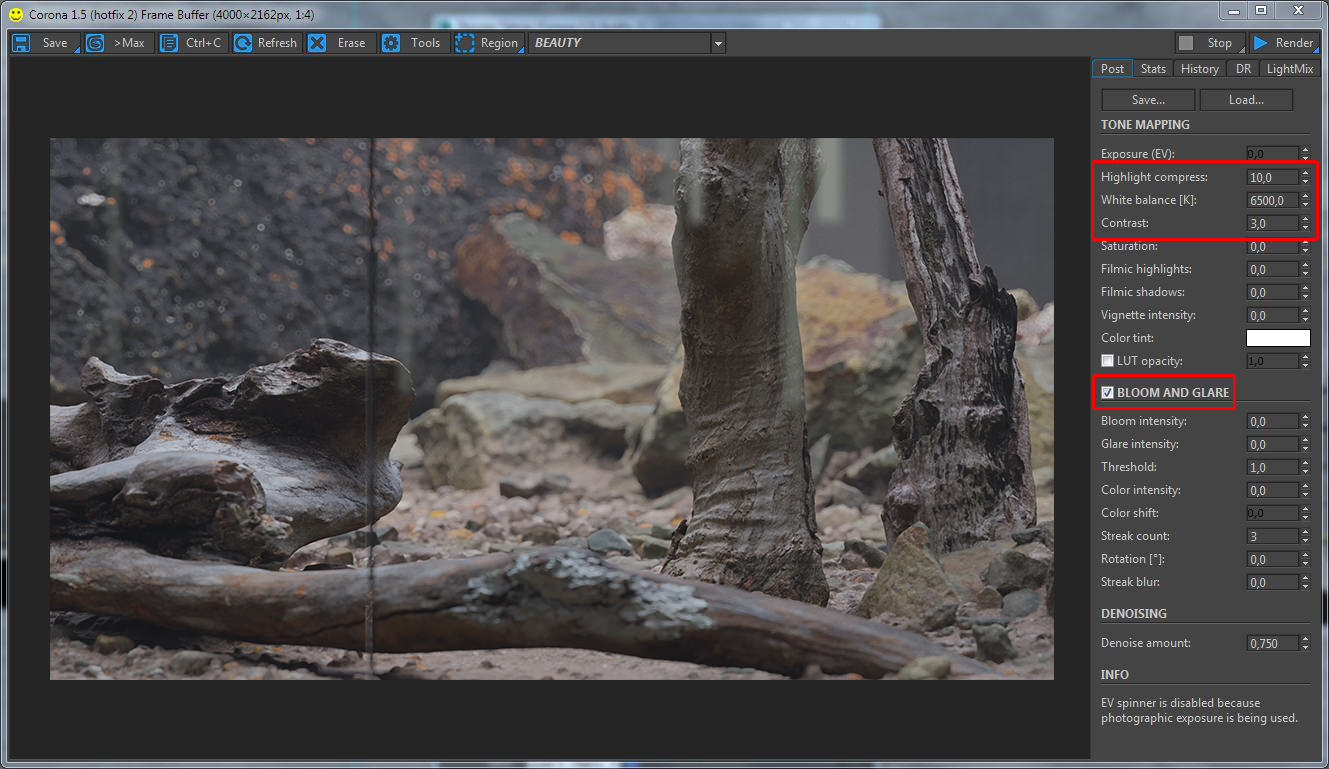
I prefer to use basic photographic settings rather than tone mapping because I will have more flexibility in the post production stage.
Some shots have a depth of field effect created directly in the camera by using a custom bokeh map. In some images, I used the bloom and glare effect to have a more natural physical reaction. I can suggest to enable the CShading_BloomGlare corona element from the Corona settings (Render Elements) and add this effect using a blending mode (screen) later in Photoshop.
Denoiser
After doing several tests, I’ve found that there is a straight relation between the amount of noise and the rendering output size and I’d like to explain it from my point of view. The higher the rendering output size (4k – 5k), the less aggressive the Denoiser will be with the small details.
For example, a 4k image can have a 5% – 10% noise left so with a full denoiser value (1.0) you will clean up everything without destroying the detail. Meanwhile, for a 2k image, you will need to reduce the tolerable amount of noise to a lower value (2% – 3%) to avoid destroying the level of detail and the antialiasing.
The most efficient way to set up Corona is by using the Noise level option because the quality is not about how many passes or how many hours the image will need, so we will have a more accurate result if we base our result according to the amount of acceptable noise that we decide to reach.
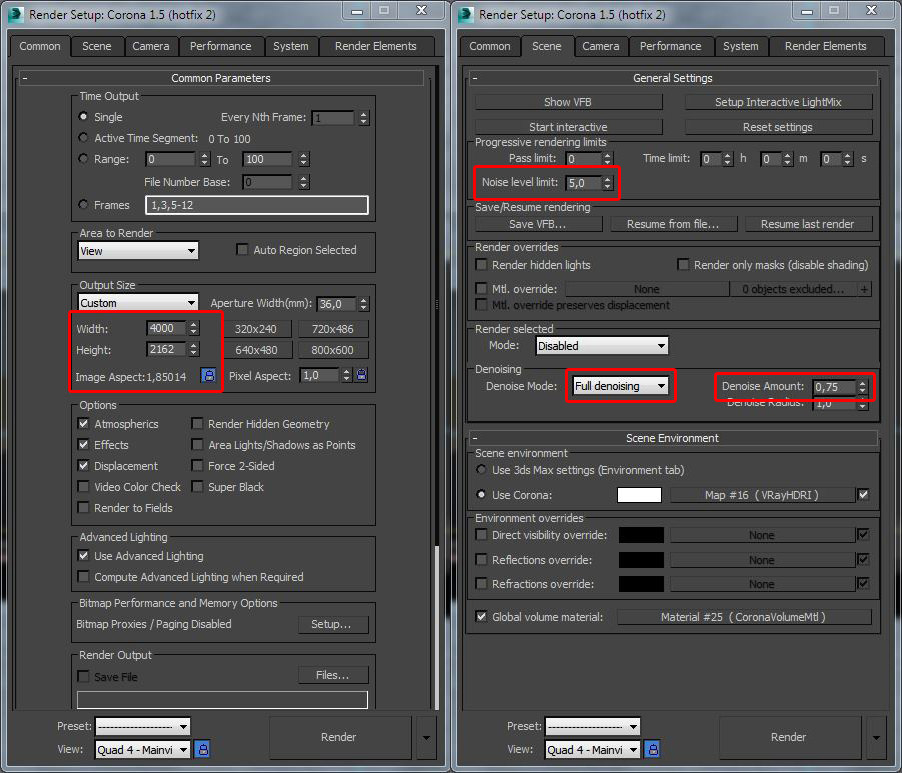
Final renders were done in 4k res and had an acceptable noise level between 4% and 7%, as a constant for all the images I used a highlight compress value of 10, white balance 6500 and a contrast value of 3. All images were saved as .exr files.
Post Production and finals results
I haven’t applied too much post production to the finals images just a basic color correction approach using Color Efex Pro 4, and for the lens effects (chromatic aberration and vignetting) I used Analog Efex Pro 2.
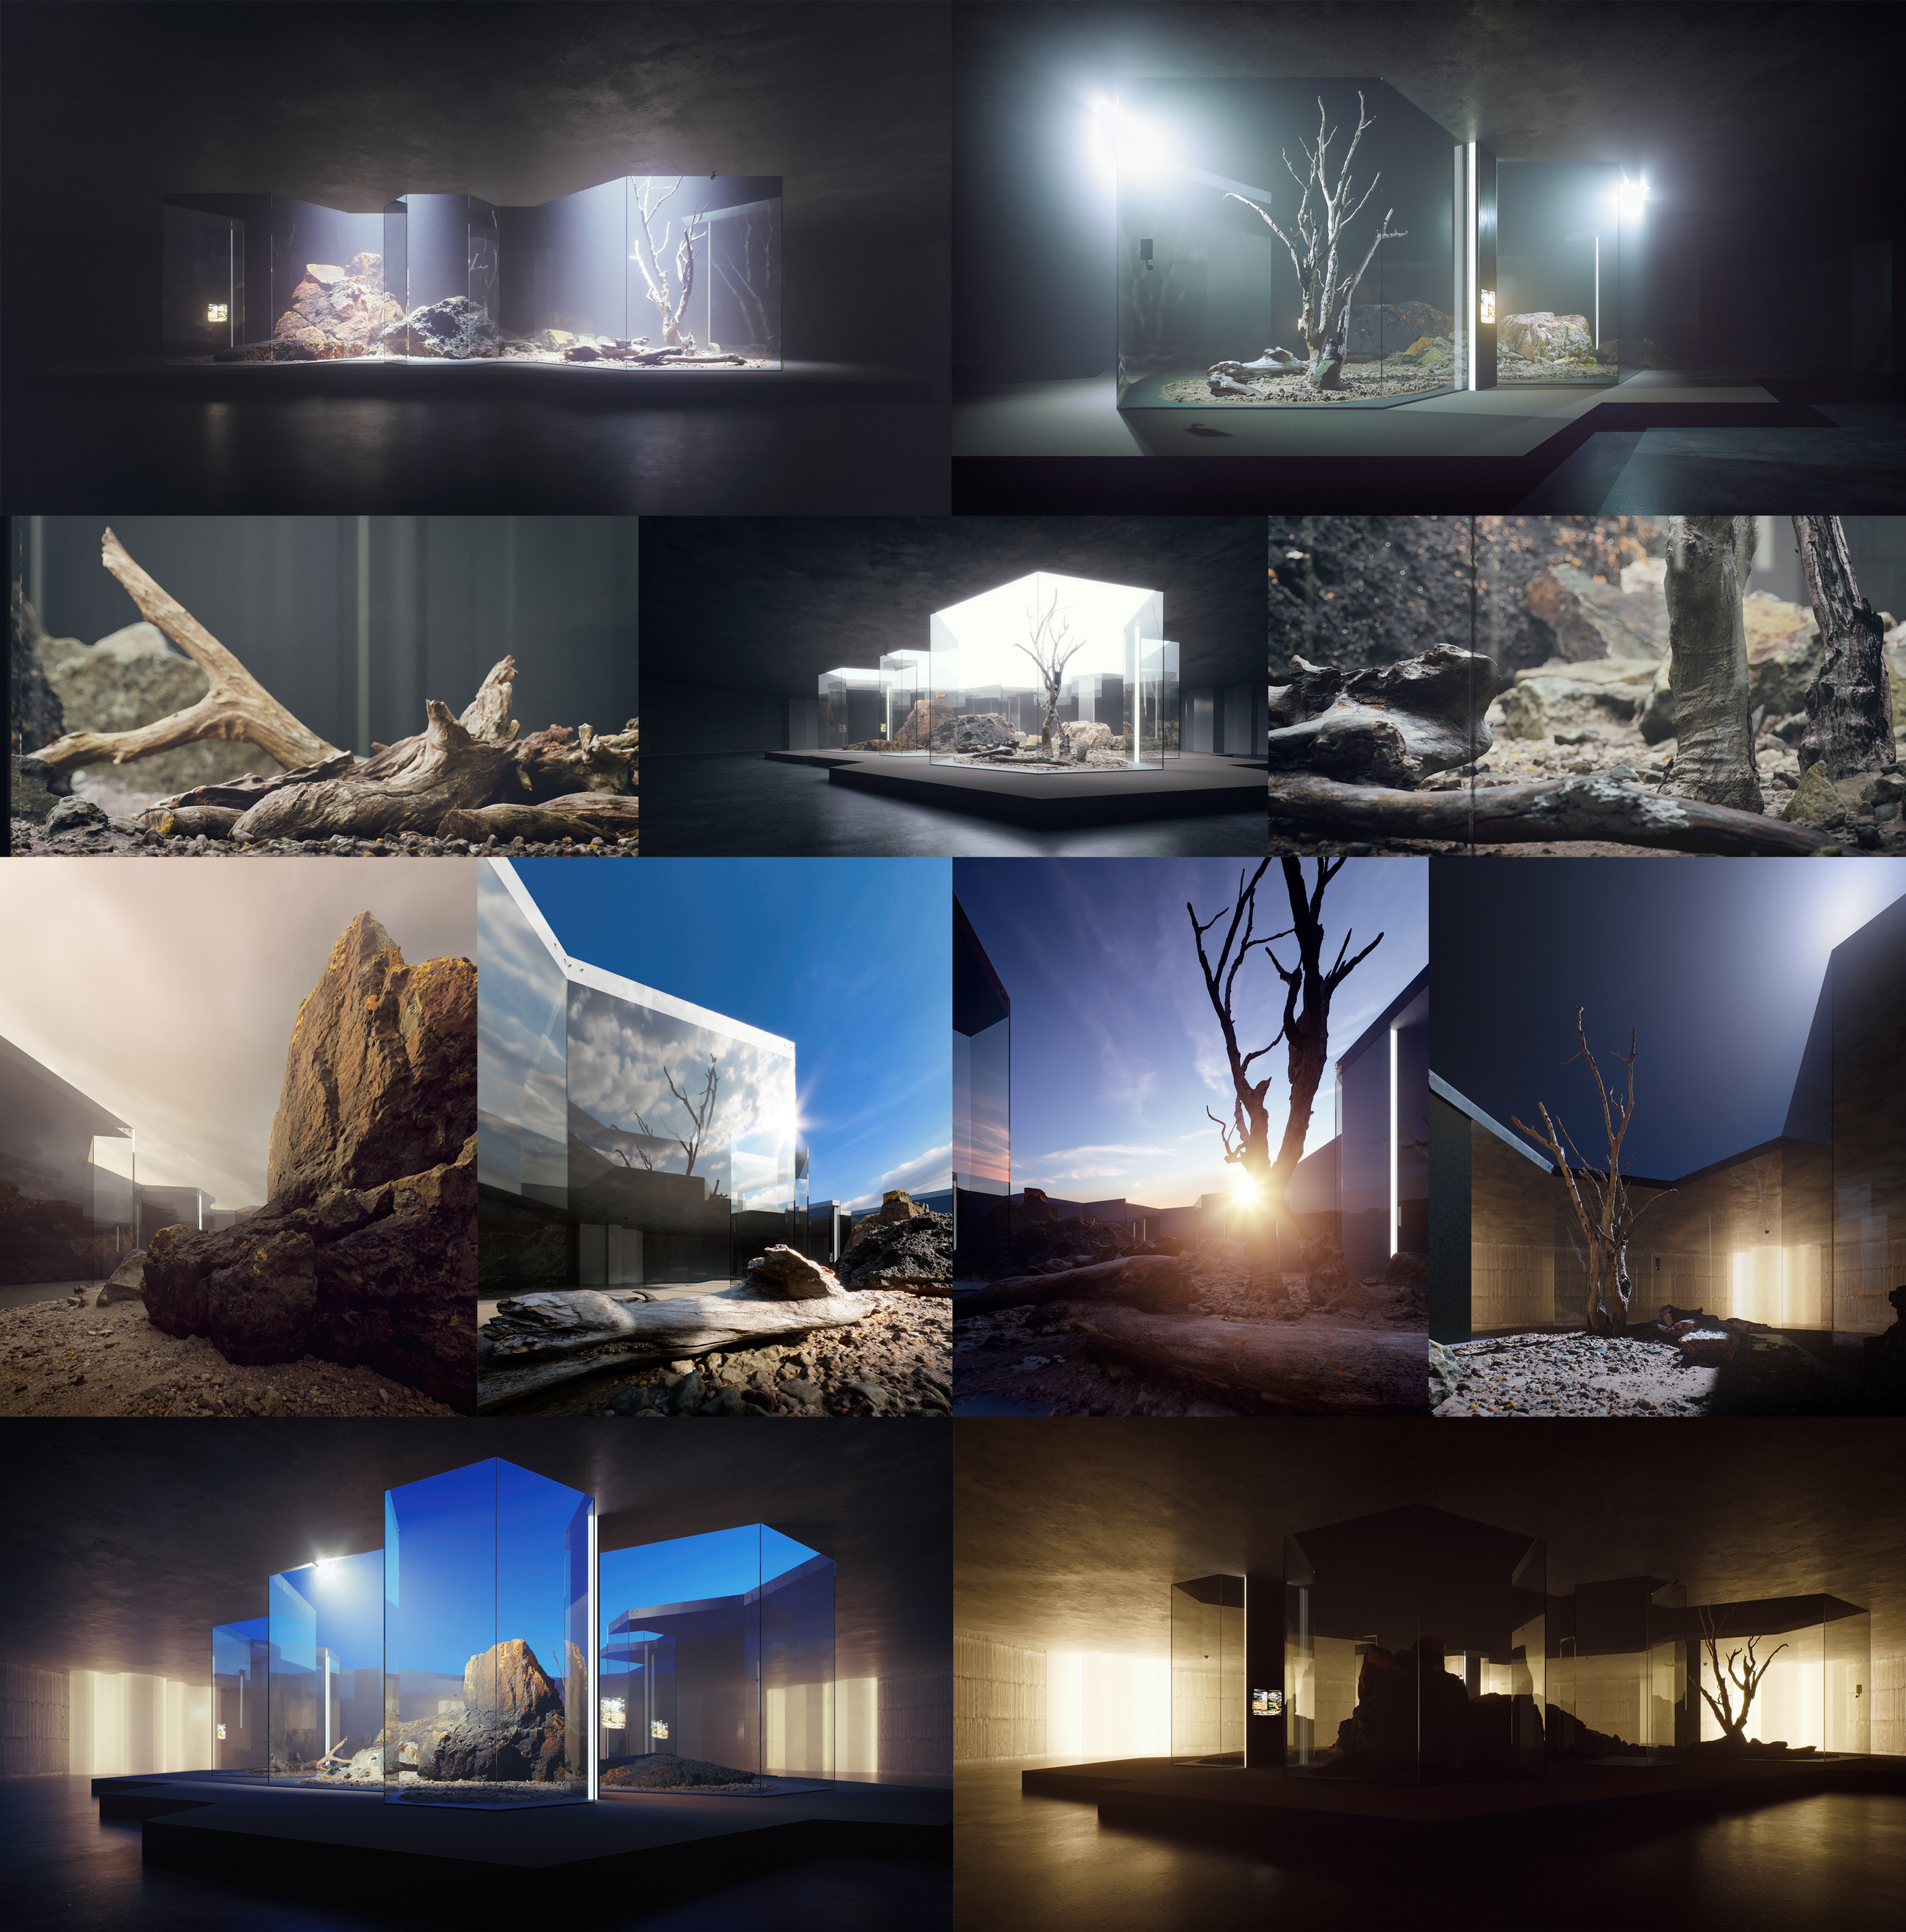
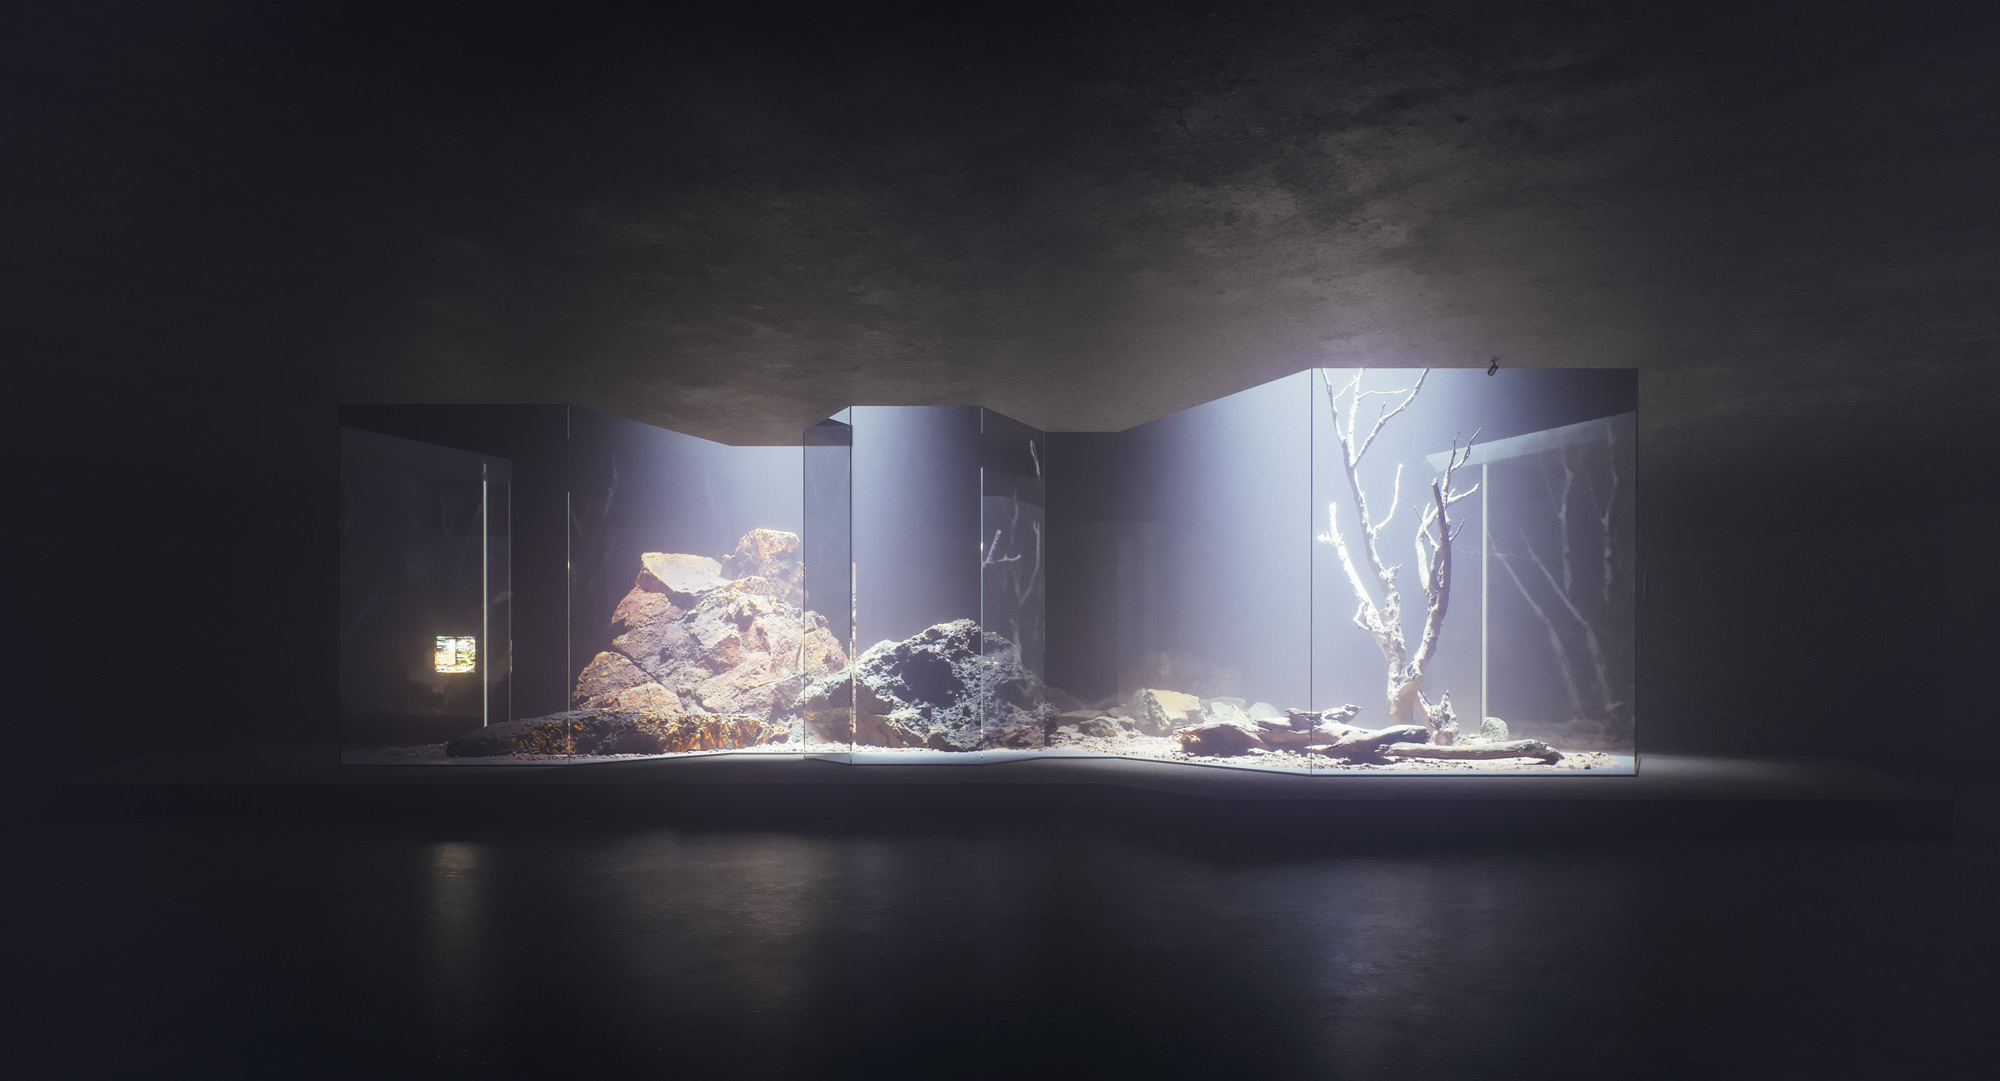
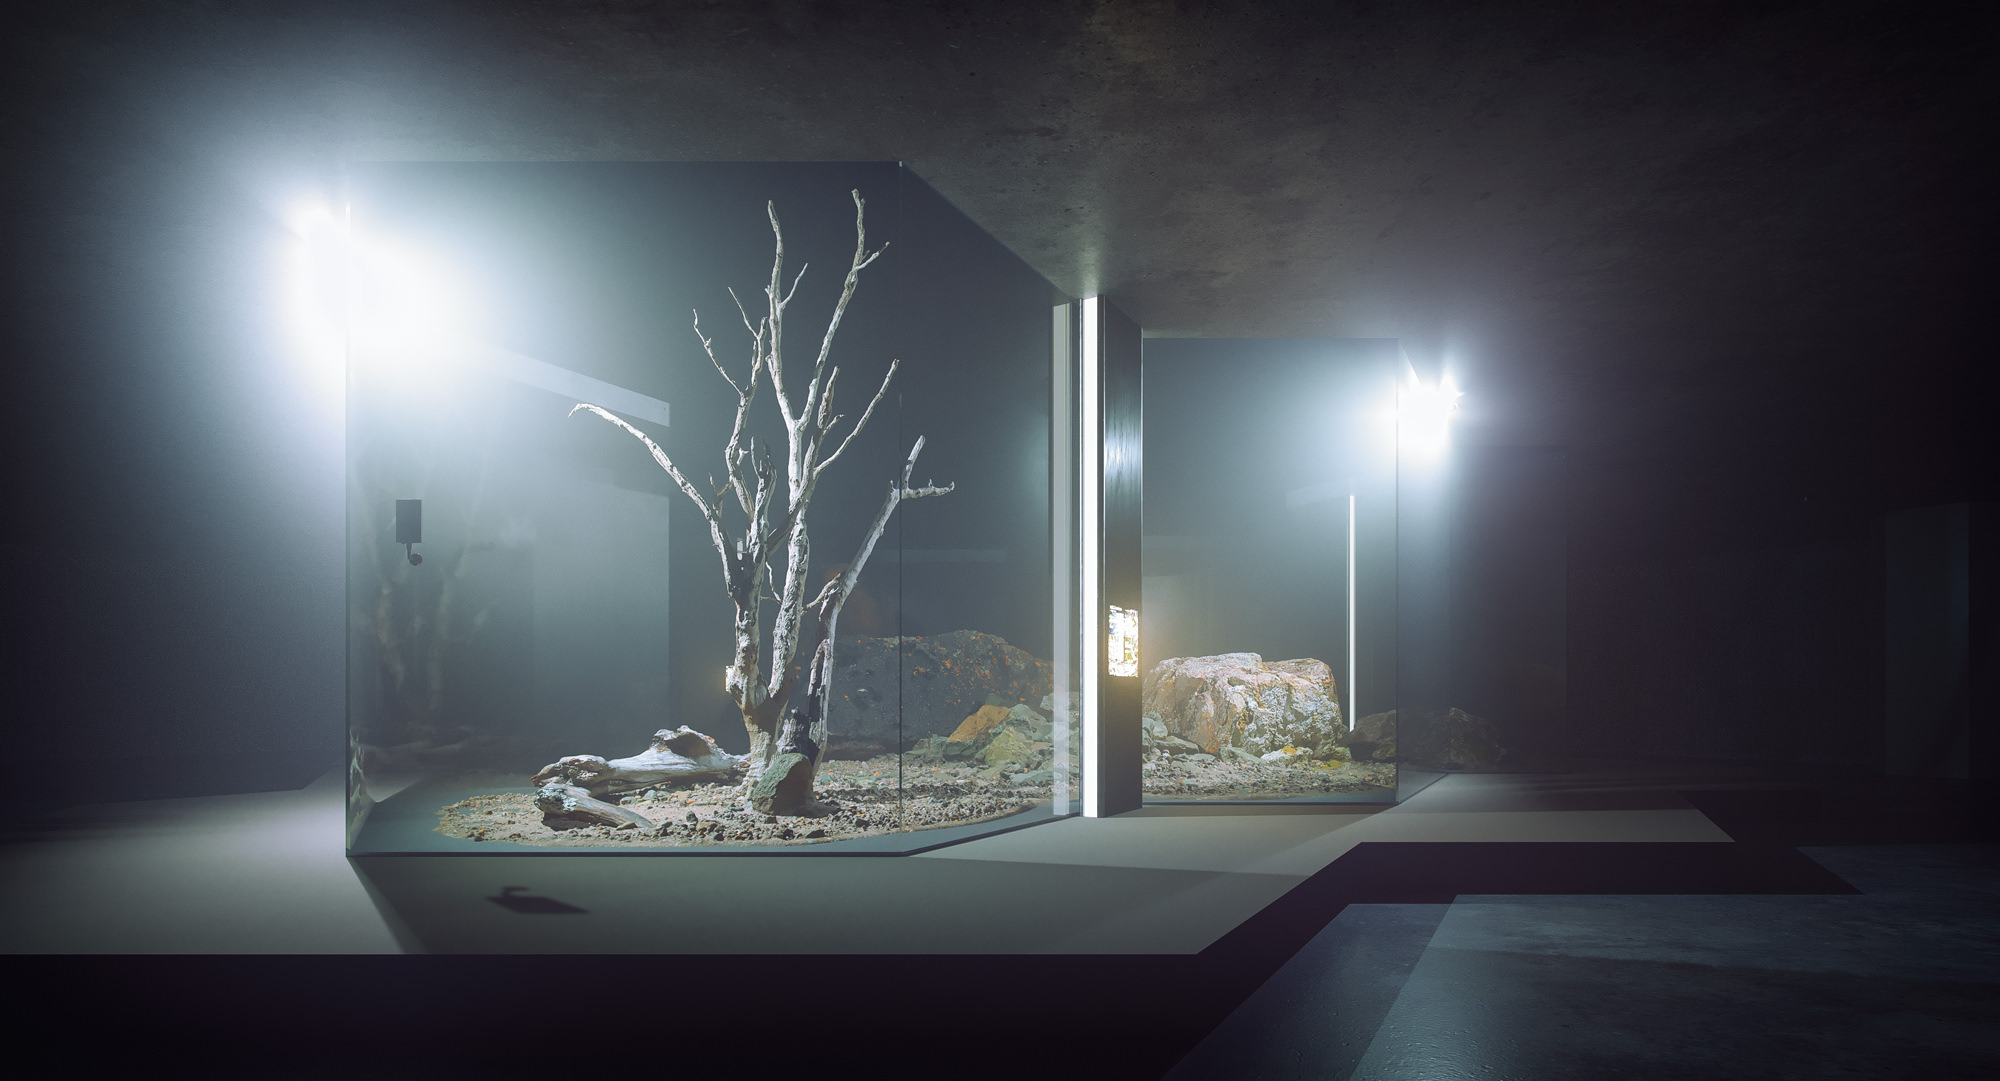
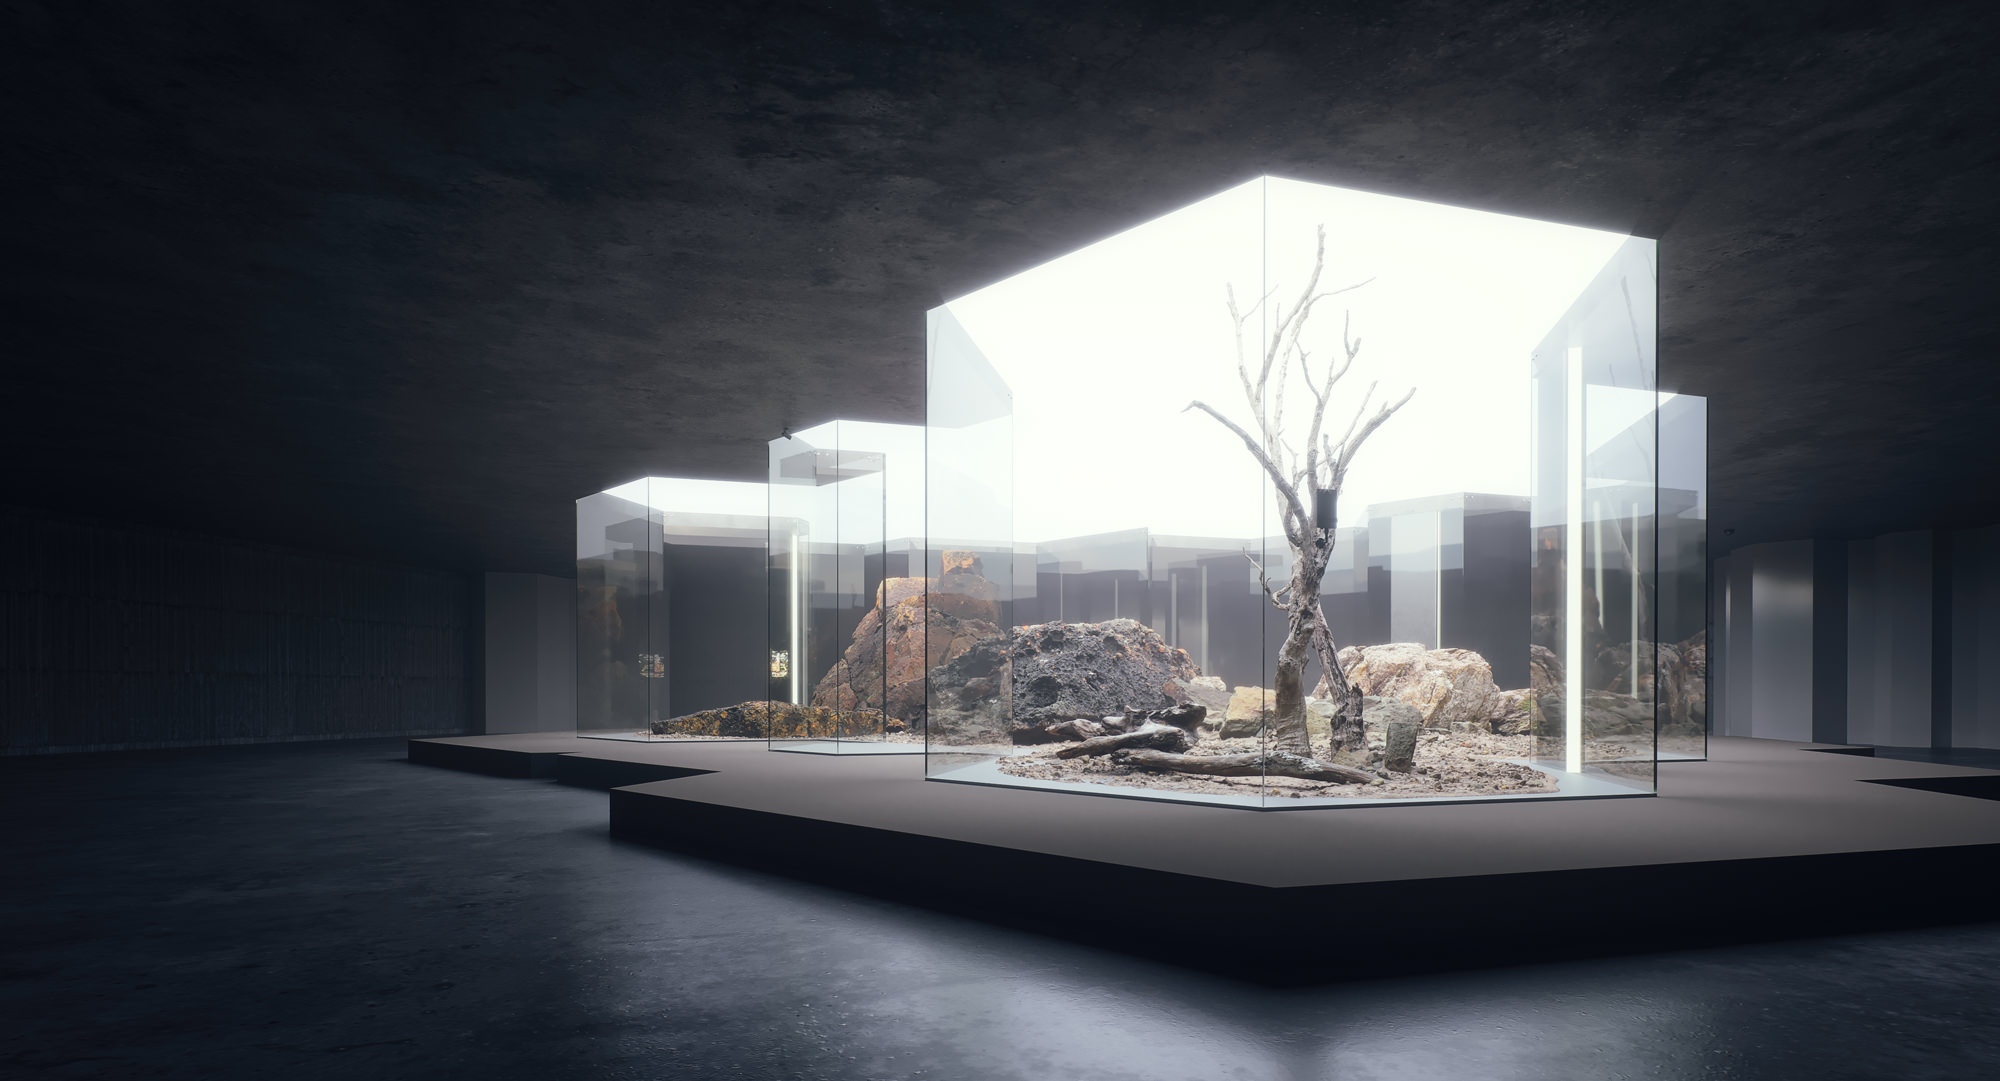
Here are the final results plus some valuable info about technical parameters for every single image.

Conclusions
The next conclusions are based on Megascans software used in the presented project based on my own experiance. This is my personal point of view.
ADVANTAGES :
- Best 3d scanned vegetation models.
- Offering various LOD’s with high-level of details at the max setting.
- Easy exportation process (models are ready to render).
- Very easy to assemble in scene and scatter around.
DISADVANTAGES :
- No single model purchase option (subscription or pre-made packs).
- Can be highly addictive!
Once again I’d like to thank Ronen and all the Quixel Megascans staff. I hope all of you guys enjoyed and found this article practical.
Greetings from Ecuador!
Cheers.
Santi
[av_video src=’https://www.youtube.com/watch?v=vuD2yeLAD8k’ format=’16-9′ width=’16’ height=’9′]For more artworks visit :
https://www.behance.net/tresde
https://www.facebook.com/tresdearchviz/
https://www.instagram.com/tresdeavs/