
Originally published at: https://www.ronenbekerman.com/making-of-lake-lugano-house/
David Santos has set upon recreating the Lake Lugano House. A beautifully designed house by JM Architecture that he modeled using SketchUP 2015 and rendered with V-Ray for SketchUP v2.0 as part of a personal study of HDRI based dusk lighting. Follow David in this article as he takes us from start to finish on this one. Enjoy!
Introduction
The Lake Lugano House (Brusino Arsizio, Switzerland) project was born out of my motivation to explore the new possibilities enabled by SketchUp 2015 and V-Ray for SketchUP 2.0. It is a personal interpretative study of a house, designed by JM Architecture on the shore of Lake Lugano, Switzerland.
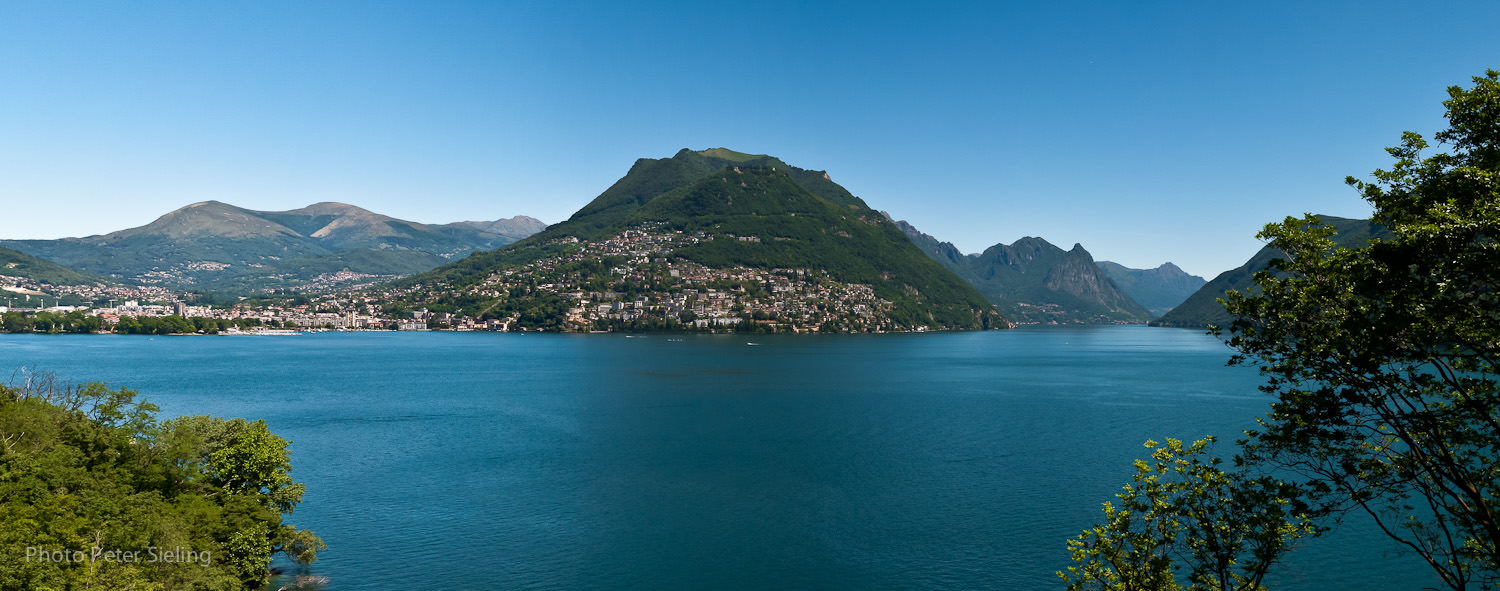
Photo by Peter Sieling
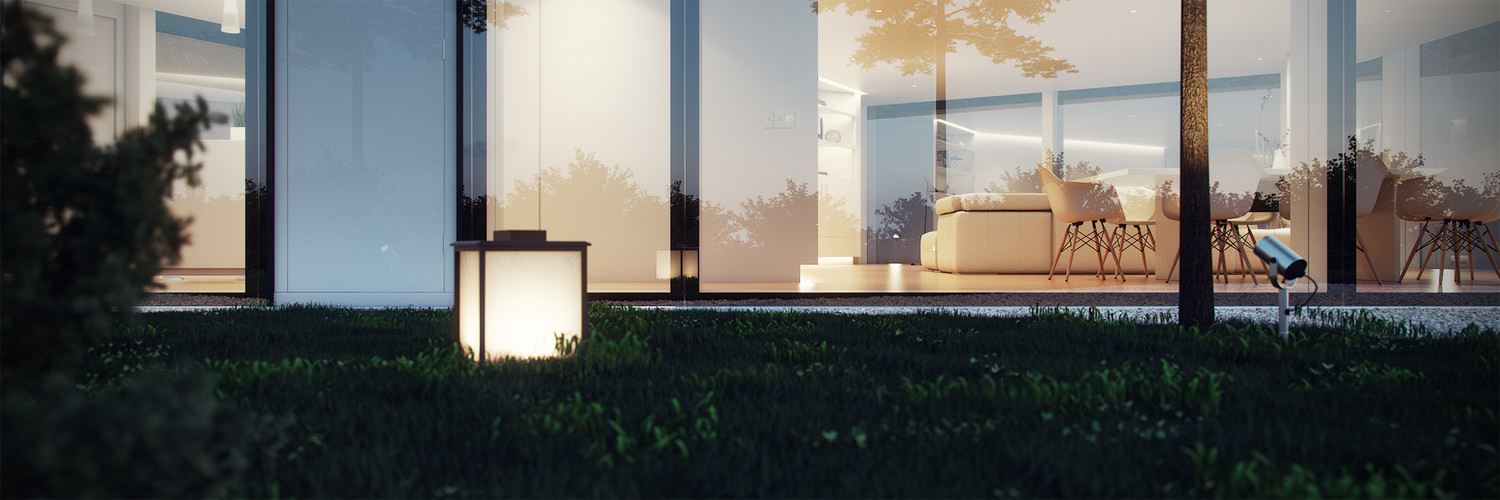
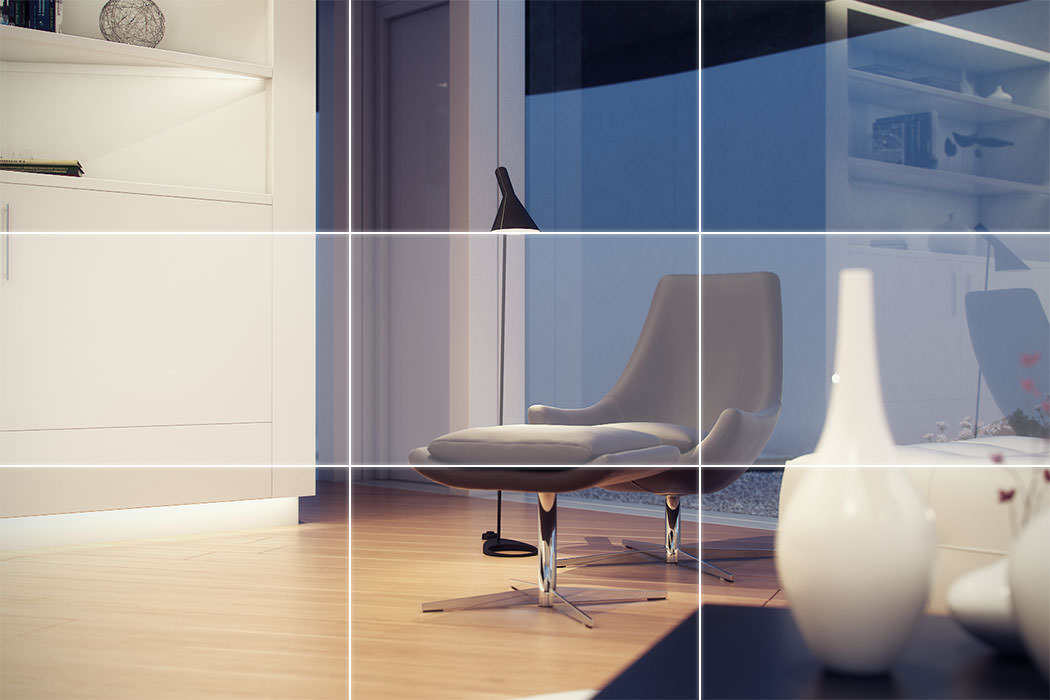
My goal with this project was to study dusk scenes with artificial interior and exterior lightning, and took close to two weeks to complete. I also attempted to achieve a photo realistic look using the built-in depth of field feature in V-Ray for SketchUP. There was a focus on crisp and contrast-rich images achieved thanks to the cinematography color grading plug-in used during Photoshop post production.
The project also includes an image with cloudy sky and gold interior. The tones seen here were mostly achieved using Photoshop.
About the House
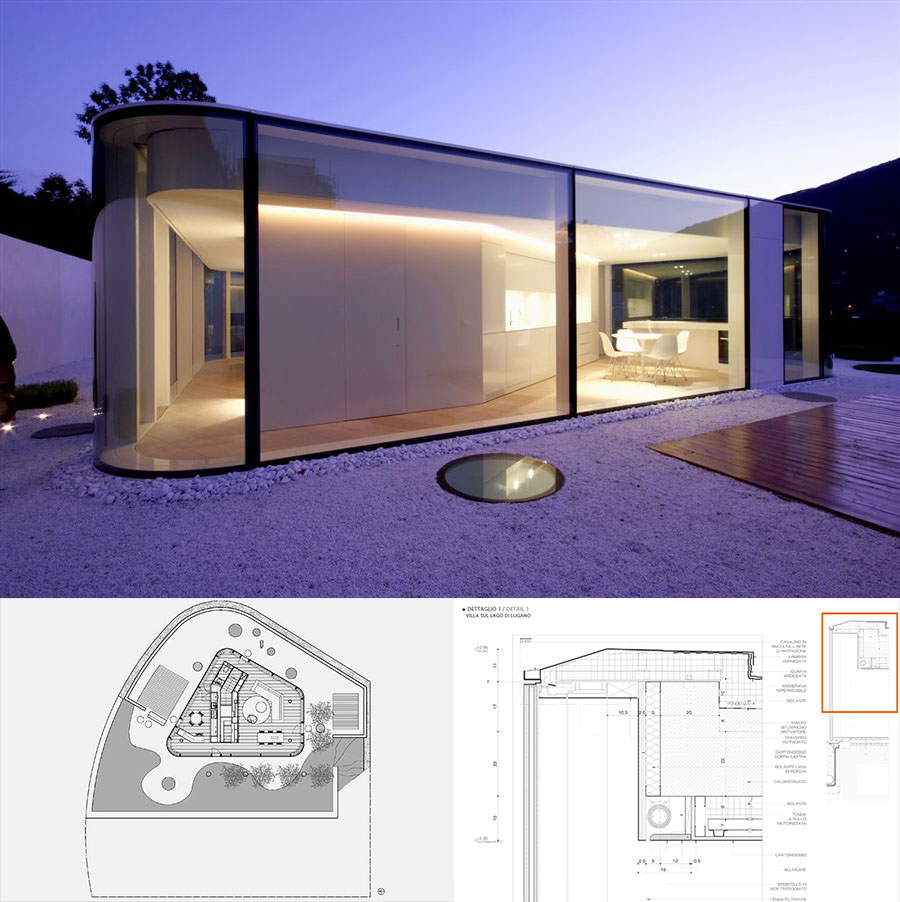
Lying on the slope of a hill, on the shores of Lake Lugano, the villa consists of two volumes organized on different levels due to the particular topography of the site. A polygonal shaped glass pavilion with rounded edges stands above a linear underground block. The living and dining room, the kitchen and storage spaces are located in the pavilion, while bedrooms, bathrooms and garage are in the lower level.
Each level relates itself with independent outdoor spaces, which are closely related with the interiors. The glass pavilion overlooks two much defined areas : the first, toward the mountain, is a very private zone resulted in the area between the property line and the building setback line according to the local building code. The second is a garden overlooking the lake. In the same way, the bedrooms face a garden enclosed by the building and the perimeter wall. The ring, obtained between the perimeter wall above and the pavilion, amplifies the interior space, with seems much larger than what it actually is.
- Architecture : JM Architecture
- Photographs : Jacopo Mascheroni
- Inspired by : James Pickford
The Project
First of all, I would like to thank Ronen for the opportunity of write this article. It’s a great honor and pleasure to be showcased here on the blog.
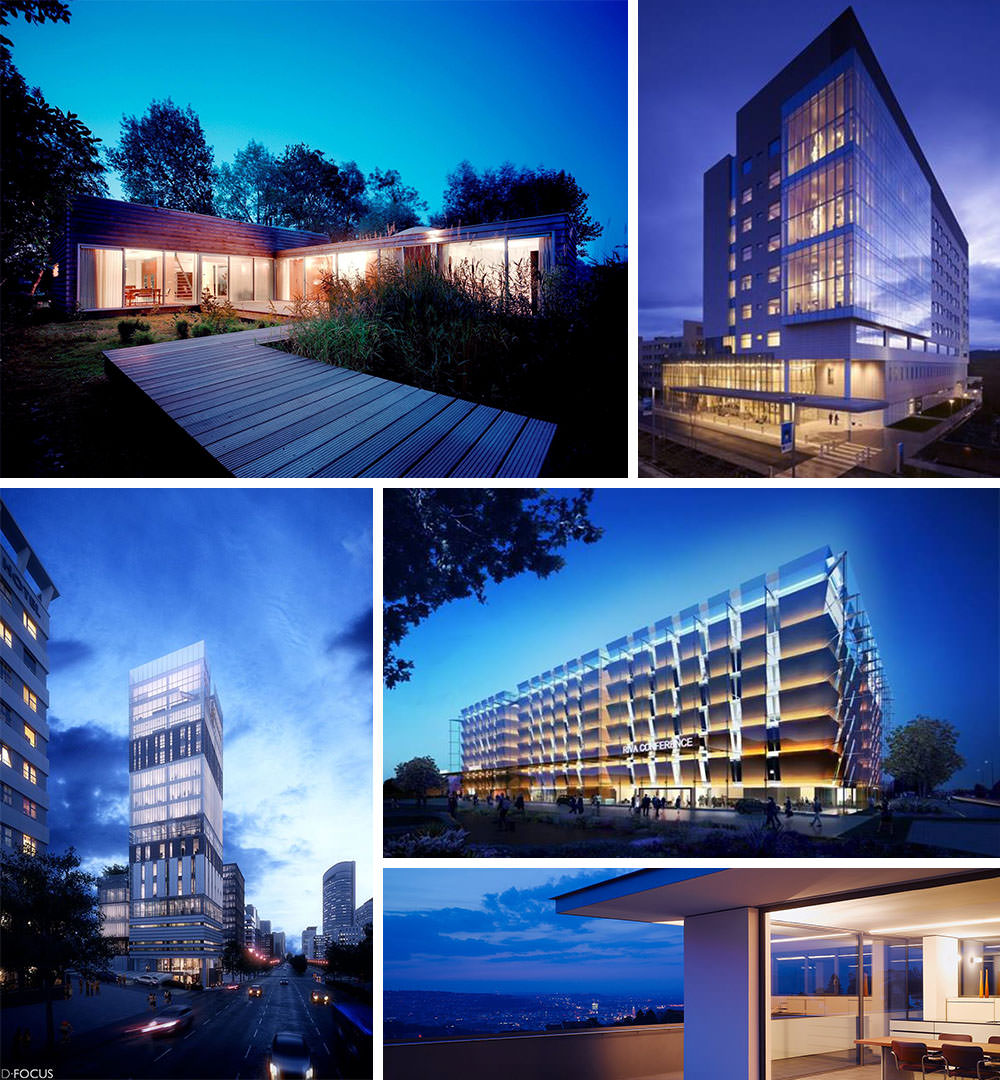
This project has its origin back three years ago. I was surfing the web, searching for references about the use of HDRi lighting and I found a project that caught my attention right away. It was the Lake Lugano House 3d recreation by James Pickford and I said to myself that one day I will attempt remaking this house and achieving the same kind of look in CG.
After many commissioned projects for clients, I decide that it was time to make a personal project. A project in which I can explore many things that I’ve learned over the years. Getting the dusk look & feel was something I was always fascinated about since I got started with ArchVIZ and achieving that mood where interior illumination and ambient illumination are combined and in balance was a goal for me during this personal project.
Once I finally got started, it was delayed due the amount of work I had and I was unable to complete. But, after the long-awaited 64-bit SketchUP 2015 came out, I knew that was a great time to resume this project and test the new capabilities.
Why SketchUP?
Because I love it! SketchUP is a powerful tool that is often underestimated, and let me show you the real power of this amazing tool.
Like I said before, the project beginnings dates back to last year, when I started modelling with a raw CAD drawing that I made from JPG’s of the original drawings. After a lot of tests I found the correct way of modelling this.
Selecting the Project
Why this house?
Easy!
First time laying my eyes on it the architecture seduced me. The simplicity of the architectural resolution is so clean and complex at the same time. It was a challenge to give it detail and to keep it clean. The curved glass is one of the elements that I thought was important to resolve well along with the surroundings and exterior design. The gravel and grass combination was a great challenge in SketchUP.
The prevailing white color and the attention to detail makes this project a real challenge.
The process started gathering as much information as possible, starting with the house drawings and photos.
As well as obtaining many visual references for the look & feel I was aiming for.
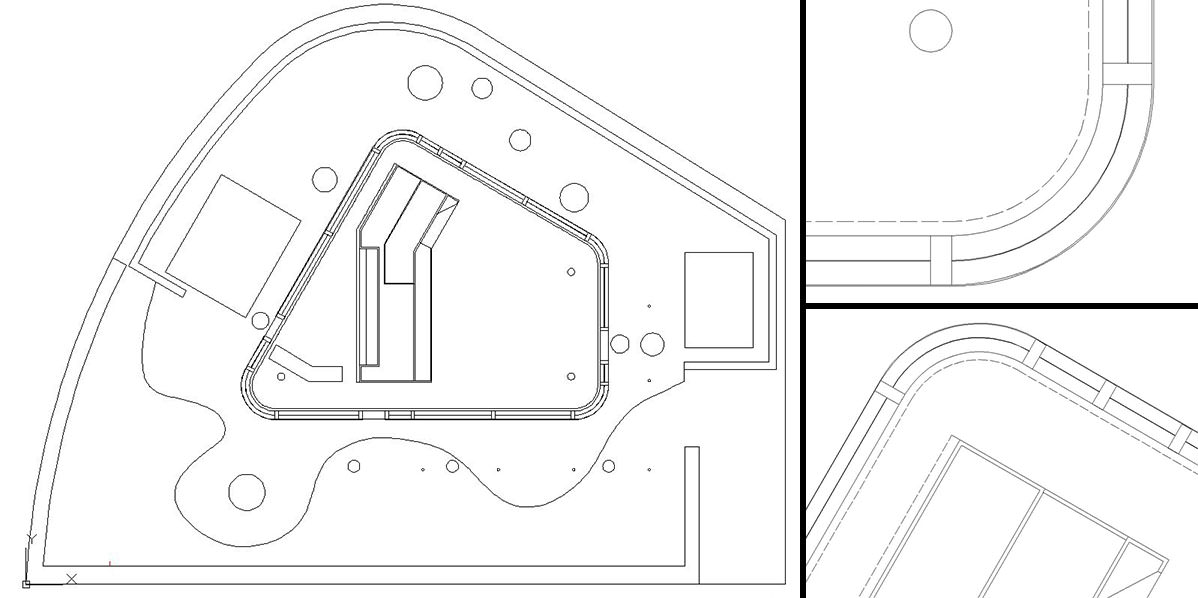
Quick AutoCAD draft
Since I didn’t have the original drawings and there was only a few references, much was guessed and eyeballed.
Modeling
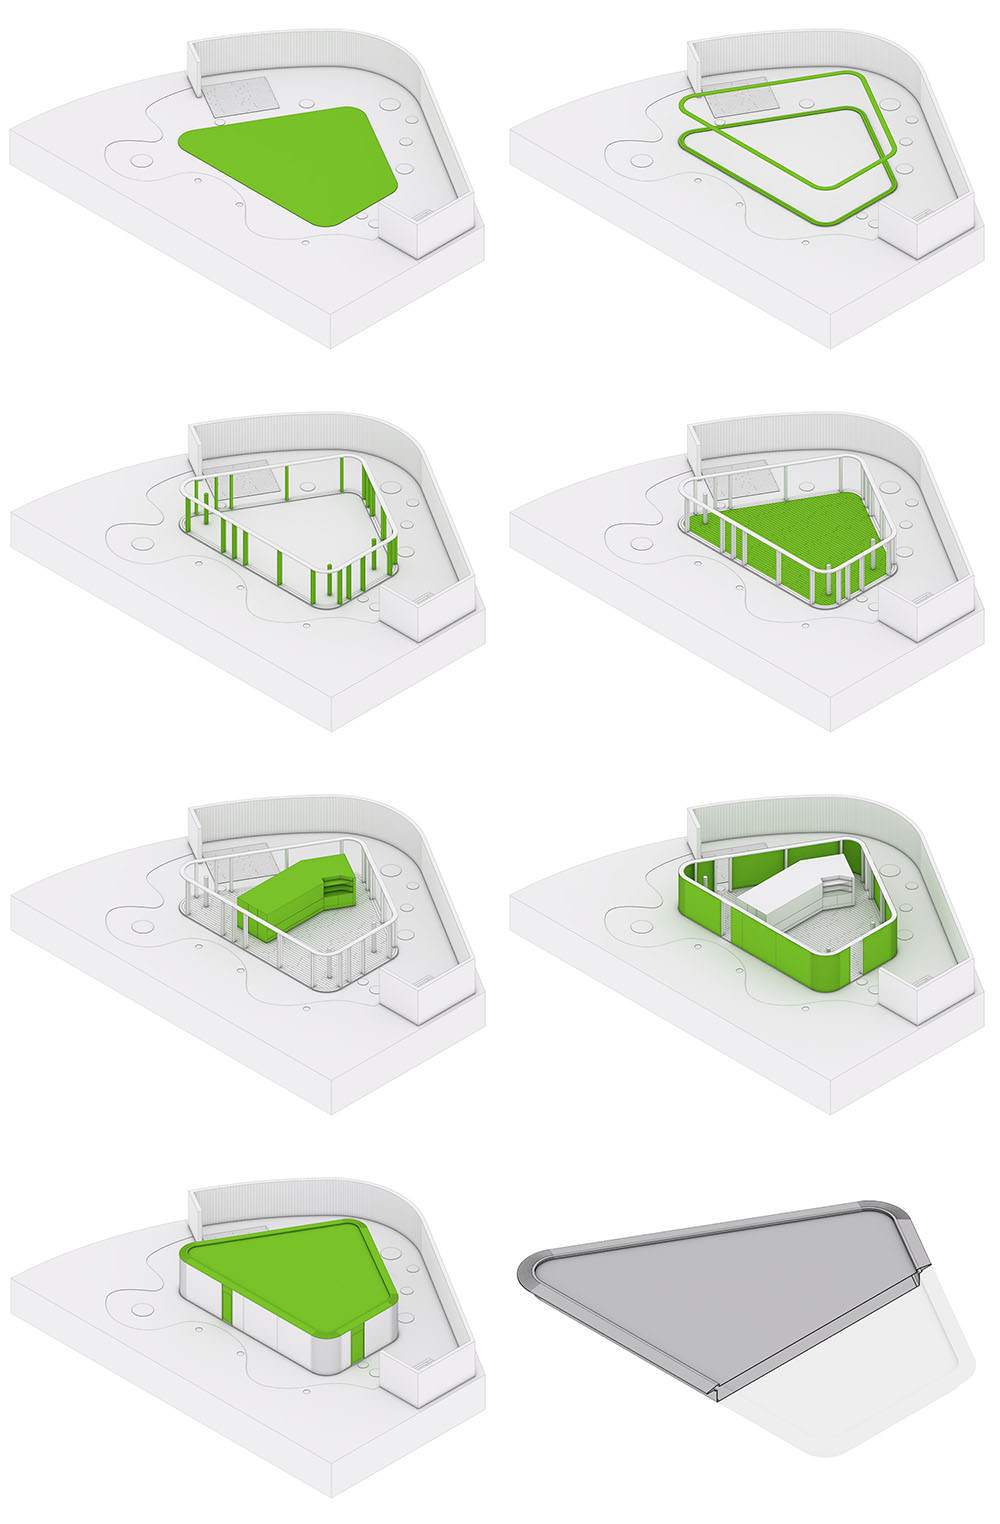
The “Ring” modeling approach
As the house doesn’t have 90 degree angles, I developed (after a lot of tests) a system in which all the parts of the house are modeled by offset to the main glass enclosure.
As you can see in this process, the steps are :
- Creating a plane that is the glass enclosure.
- Offsetting to create perimeter beams.
- Follow that with the glass and roof parts.
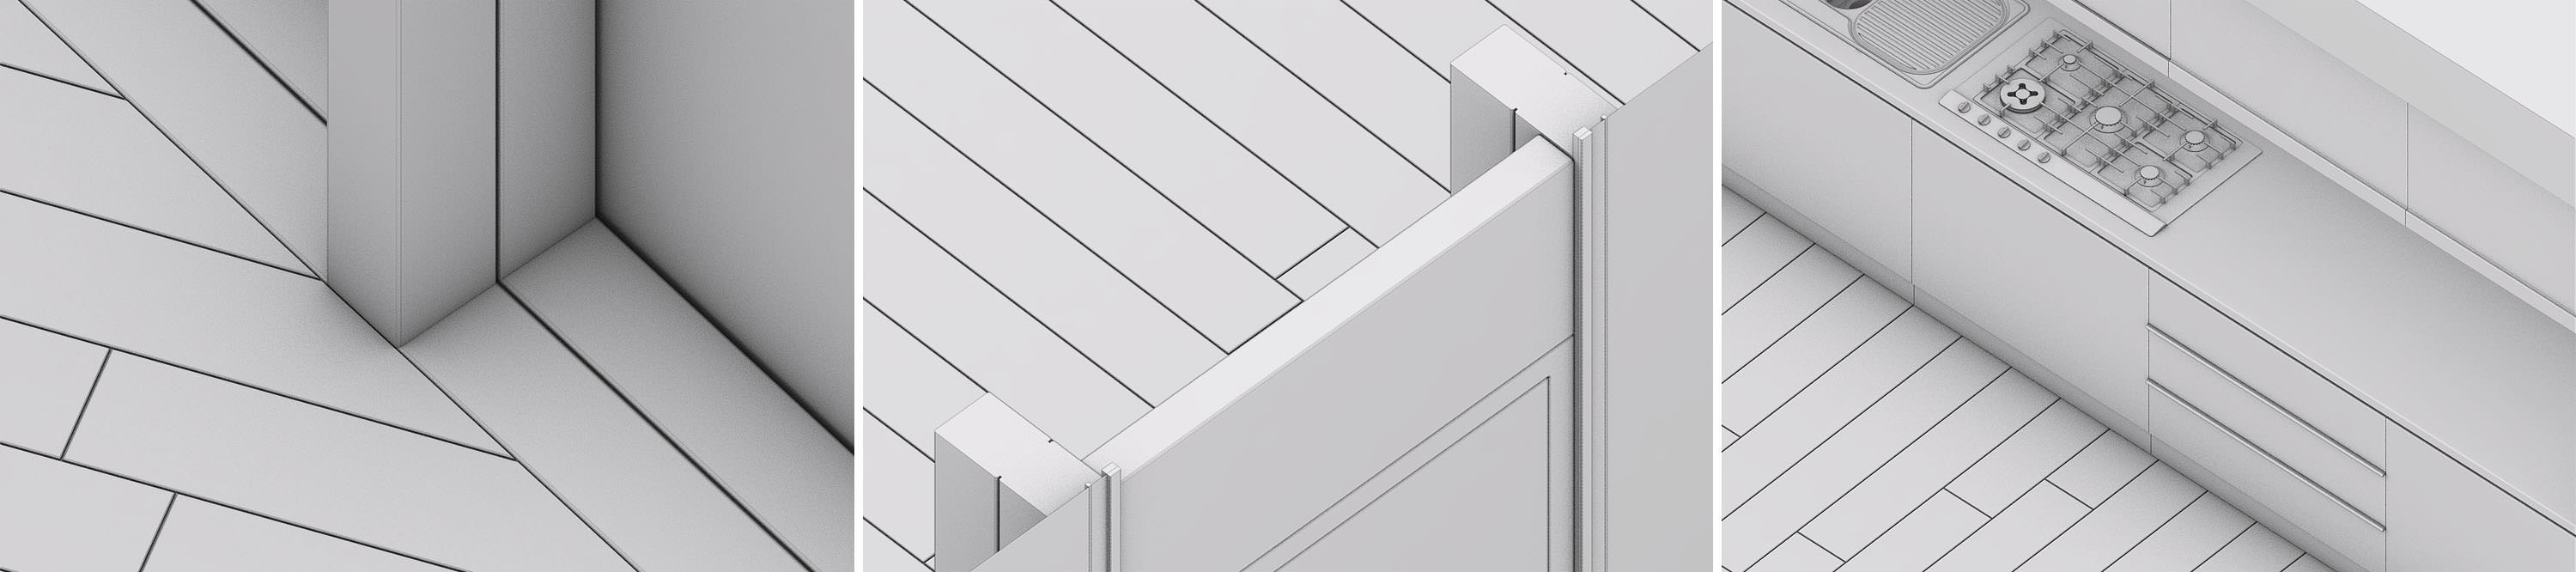
Detailing the Geometry
Getting into the small details took time and I used three plugins to help achieve what I aimed for :
- FLOOR GENERATOR – to create the interior and exterior floor pattern.
- ROUND CORNER – to give detail to edges.
- FUR – to scatter grass and trees.
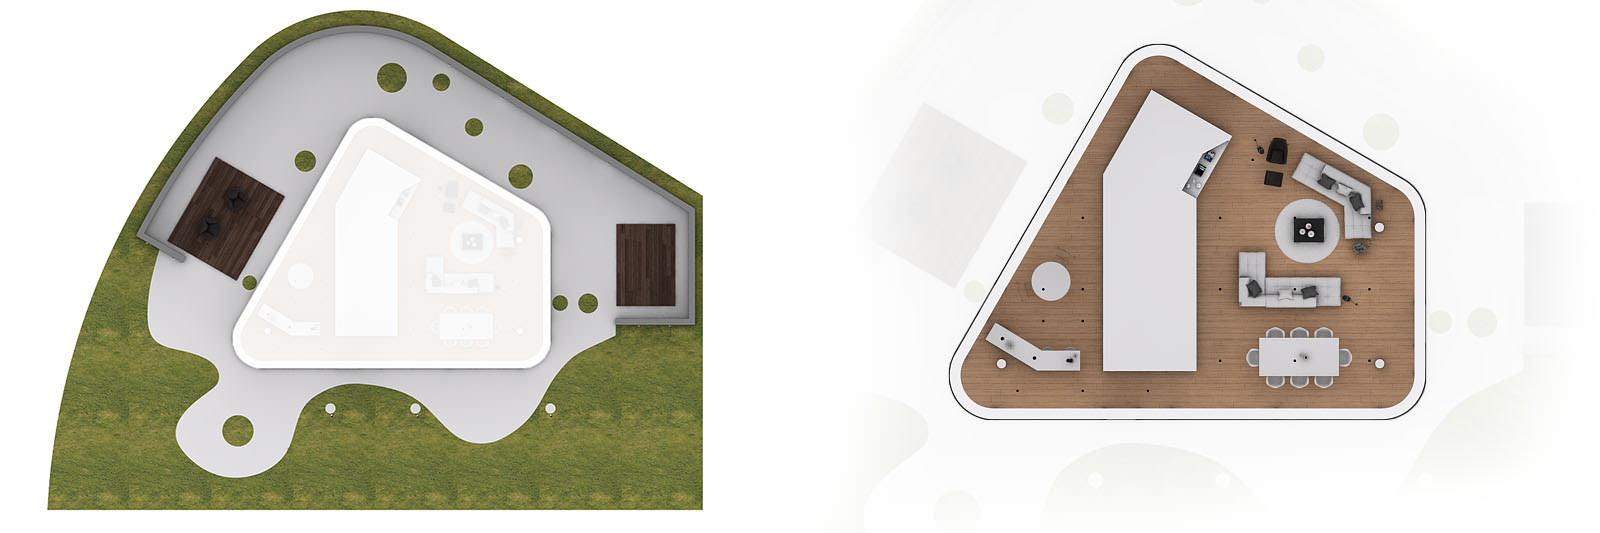
Interior Modeling (SketchUp view, plan view)
The interior modelling was relative simple given that the architecture itself it’s a lot of the project.
Exterior Modeling
The exterior modelling was achieved by the referencing photos of the original house, with emphasis on the vegetation and gravel.
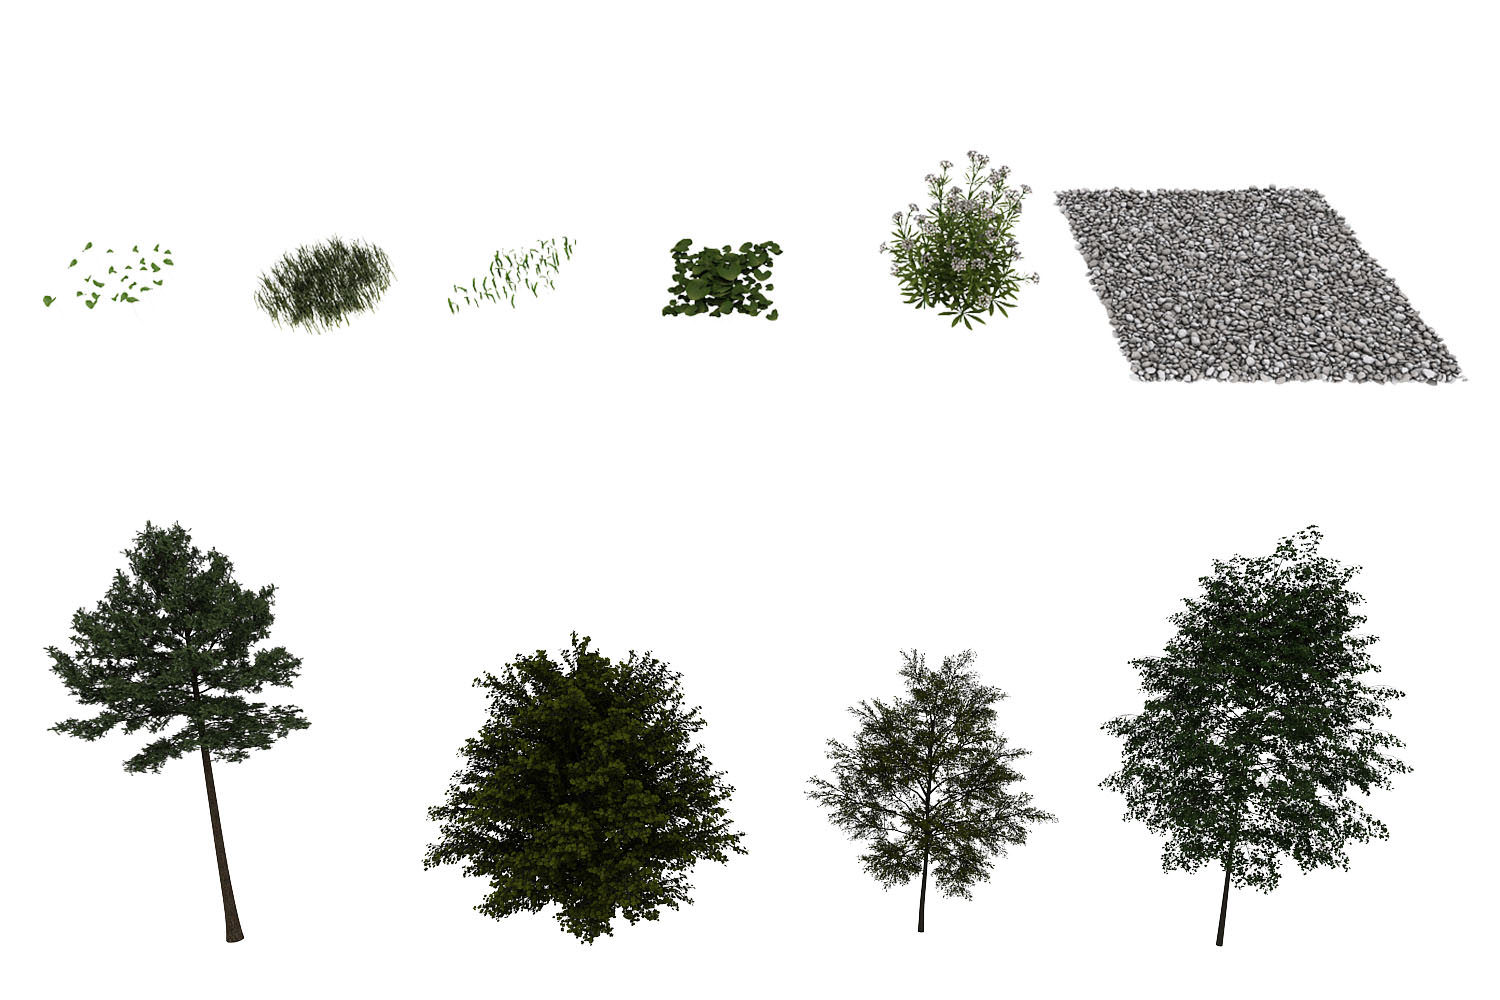
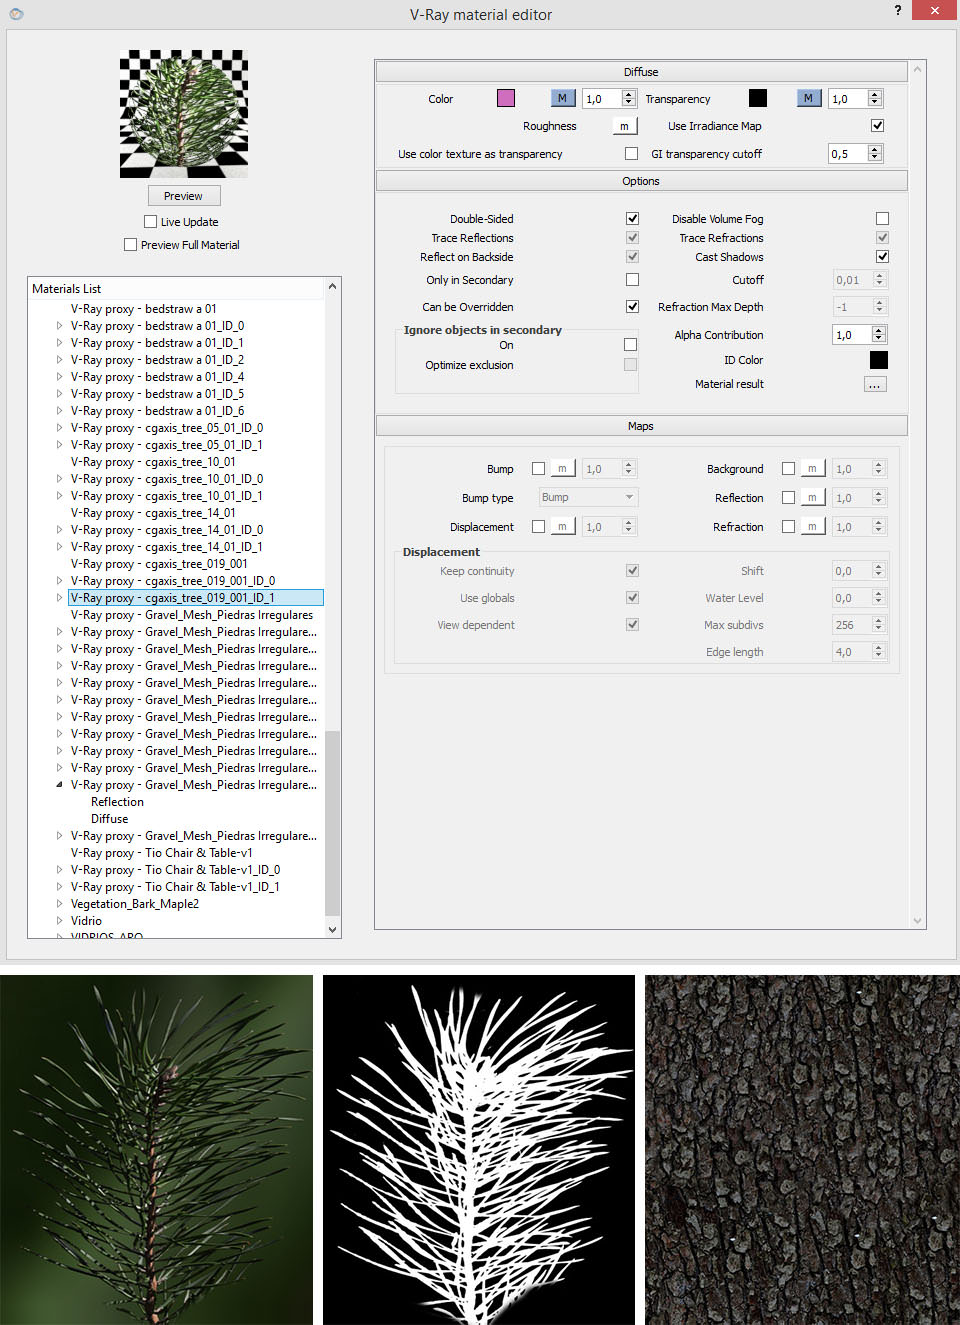
The Vegetation
Proxies used in this scene where from different collections : Evermotion, CGAxis, Arroway Texture, and various free sources.
The first set of V-Ray Proxies where used in the ground level. The second group as background trees.
Materials
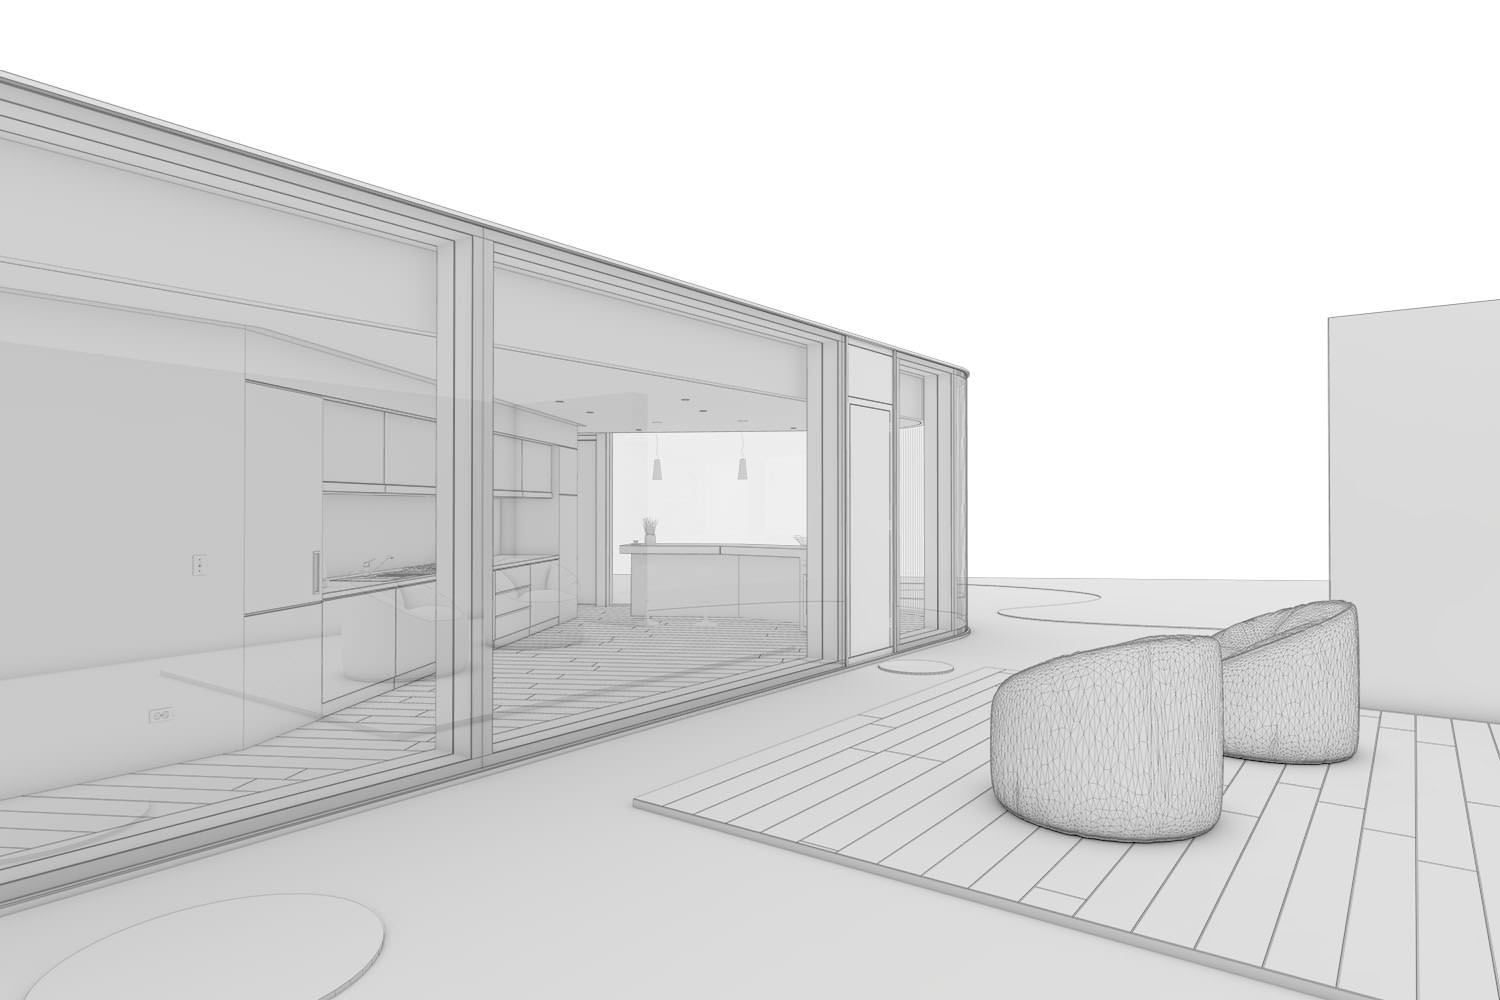
After the modelling part the next stage in the process is applying materials.
This is how the model looks like in clay style.
There where three special materials I give special attention to :
Interior Wood Floor

Exterior Wood Floor
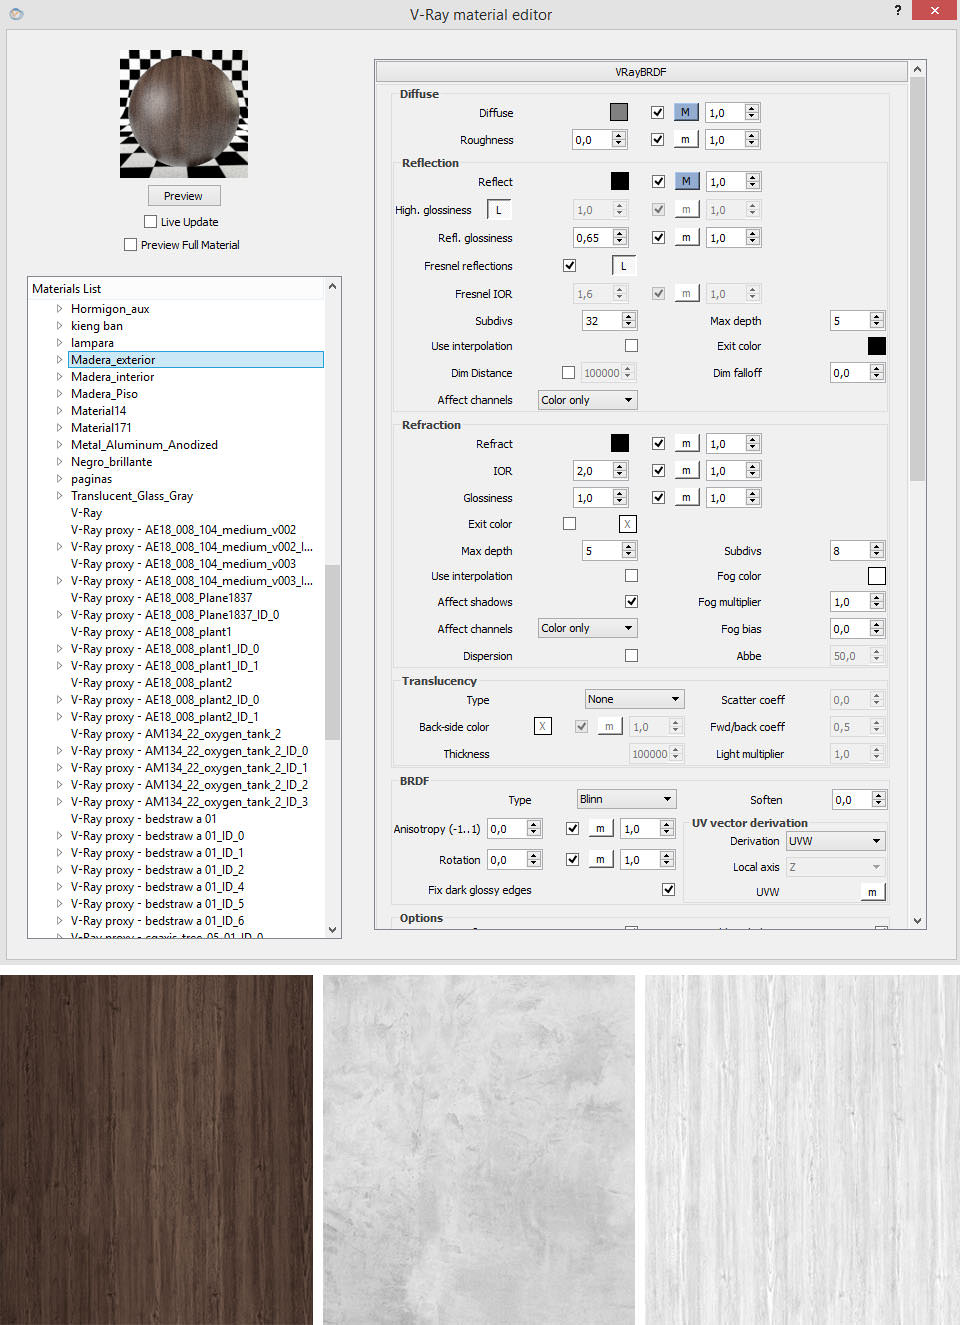
Concrete Perimeter Wall
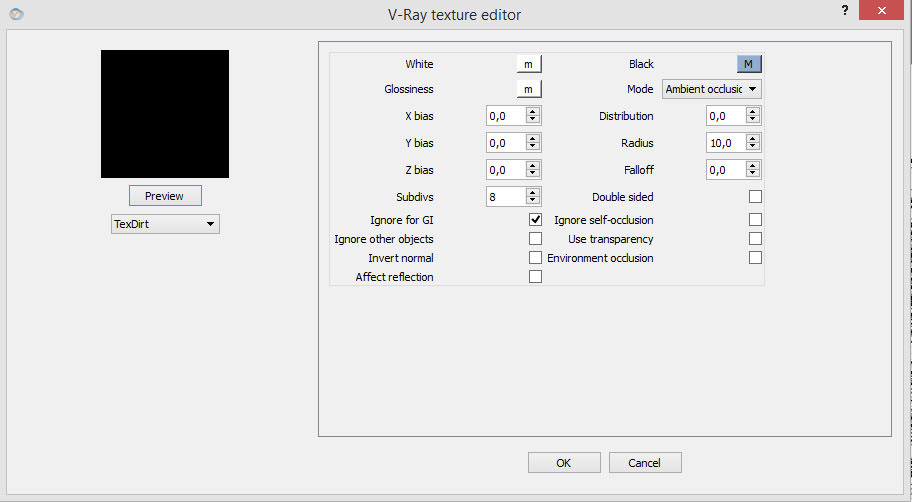
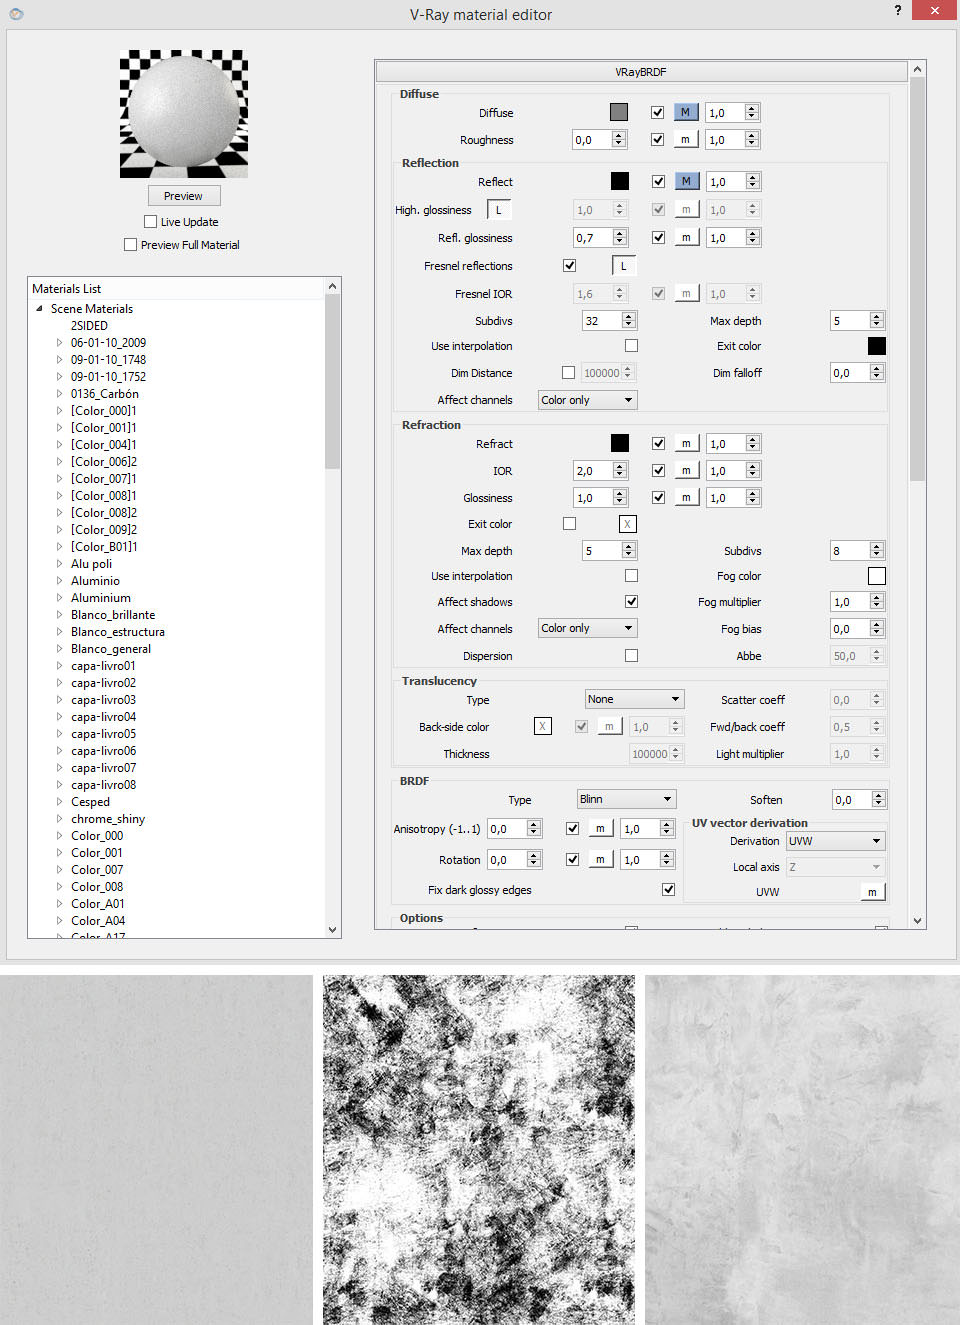
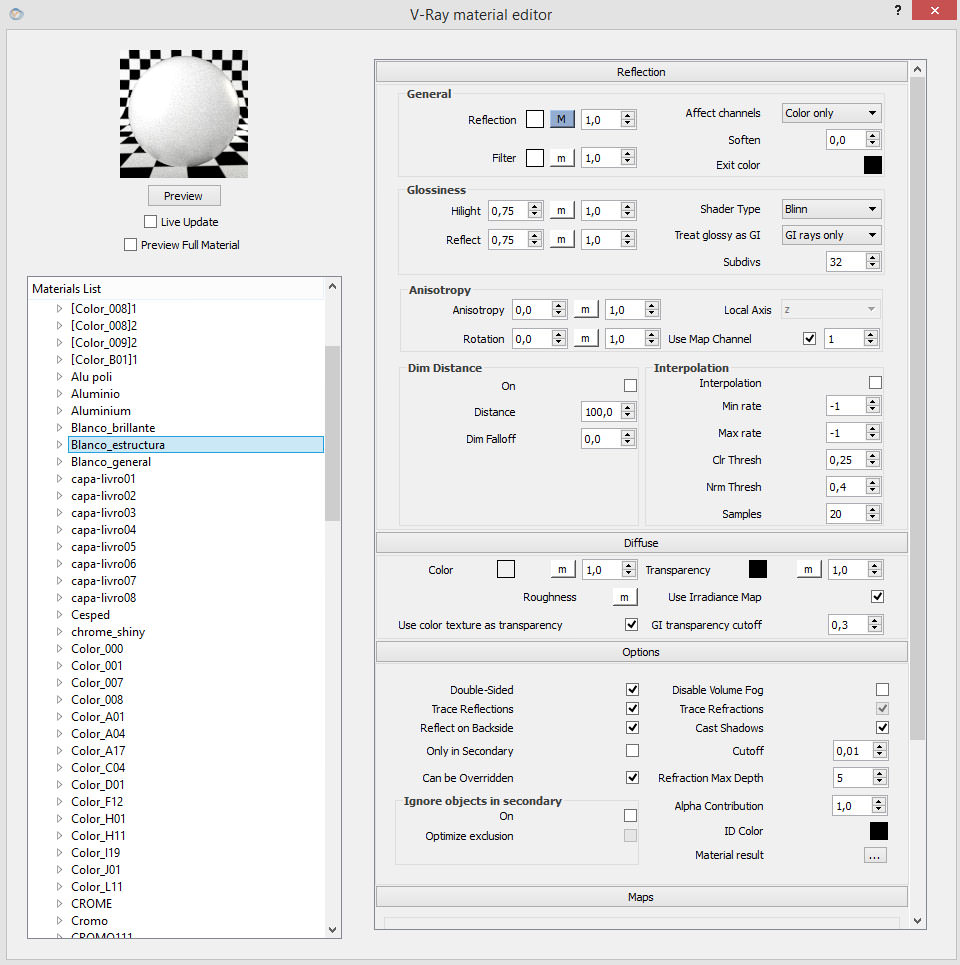
Standard Materials
The rest of the materials were very simple, basically a Diffuse and a Reflection layer.
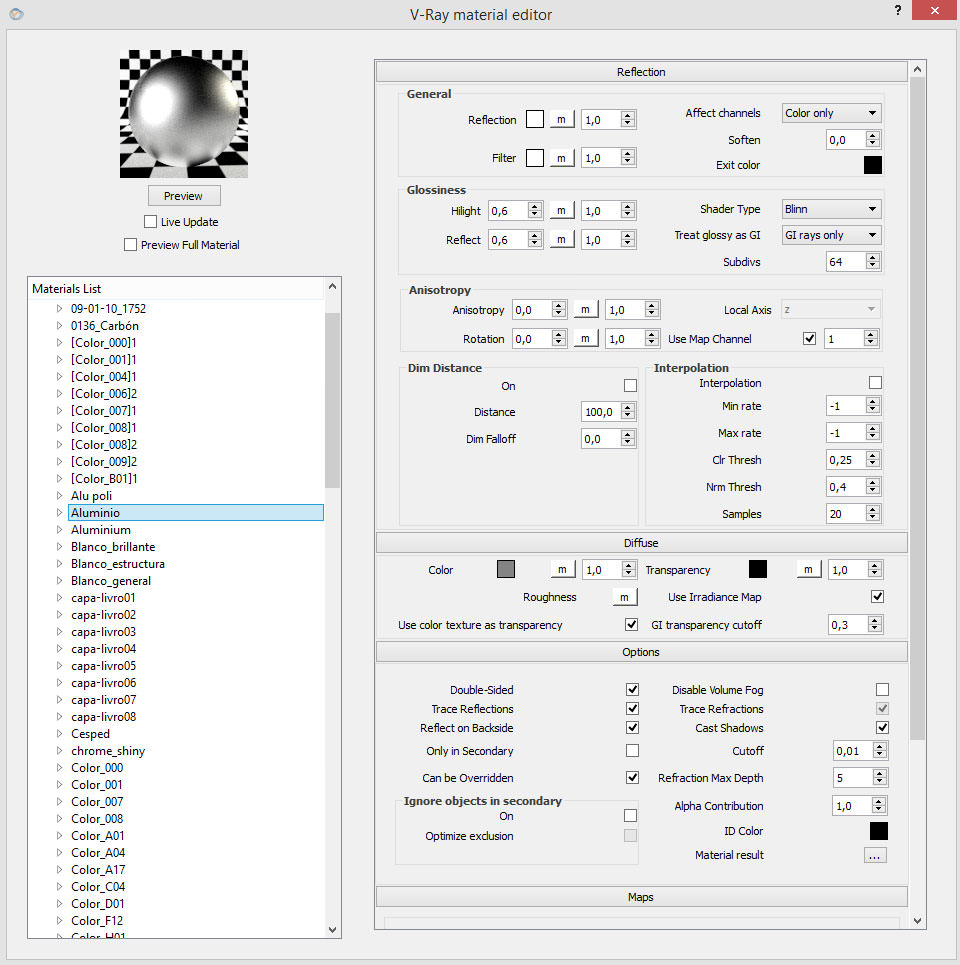
Chrome is a single reflection layer material with fresnel off, and small glossiness.
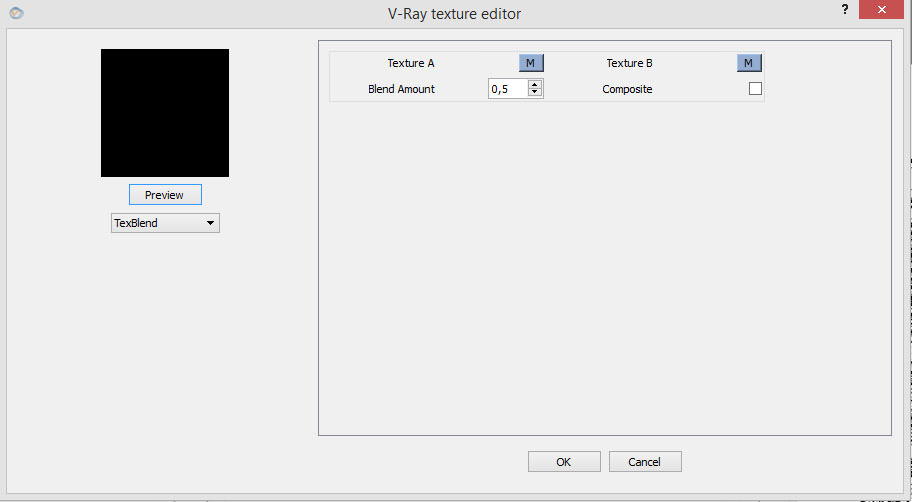
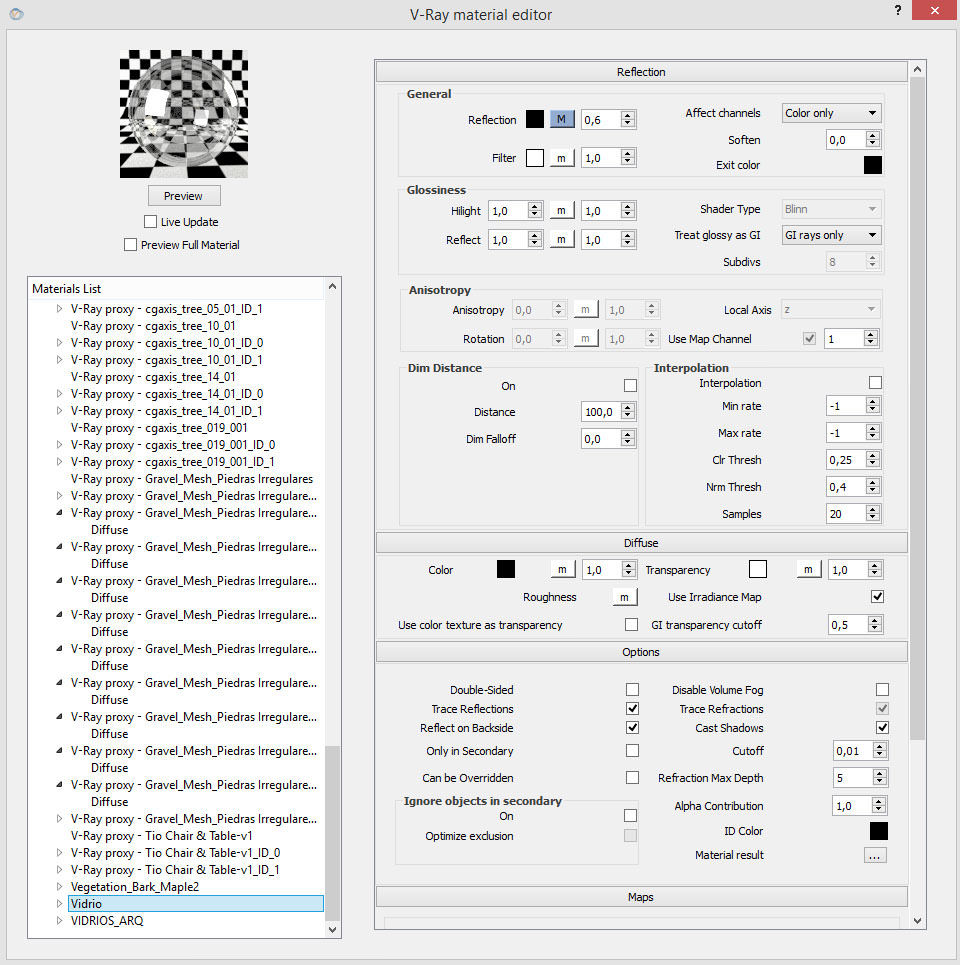
Glass Simplified Material
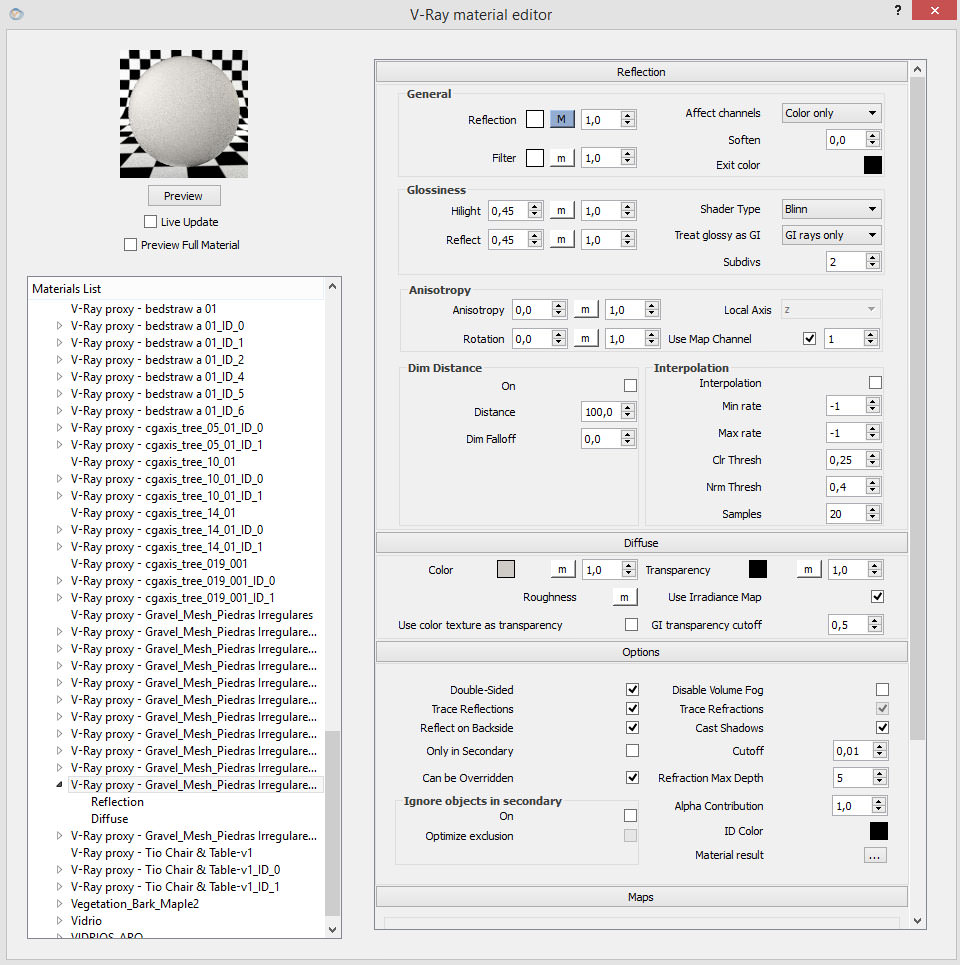
Gravel and Proxy Materials
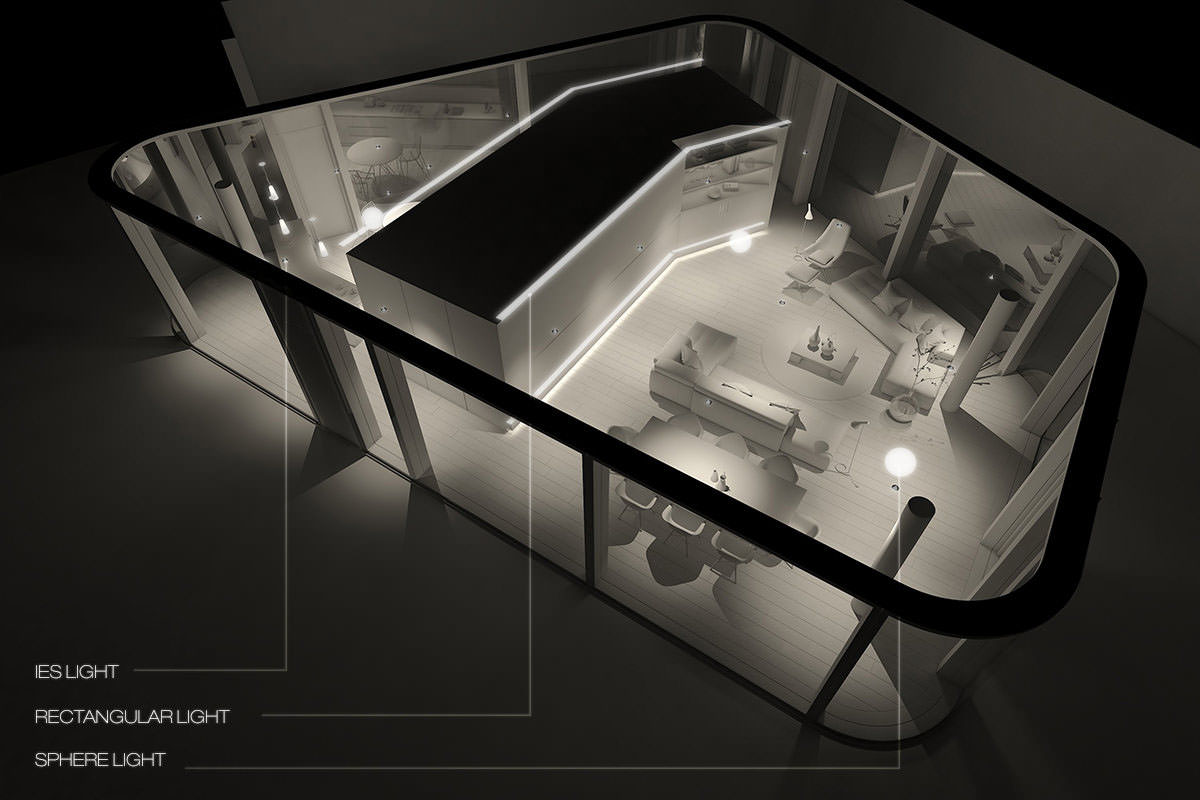
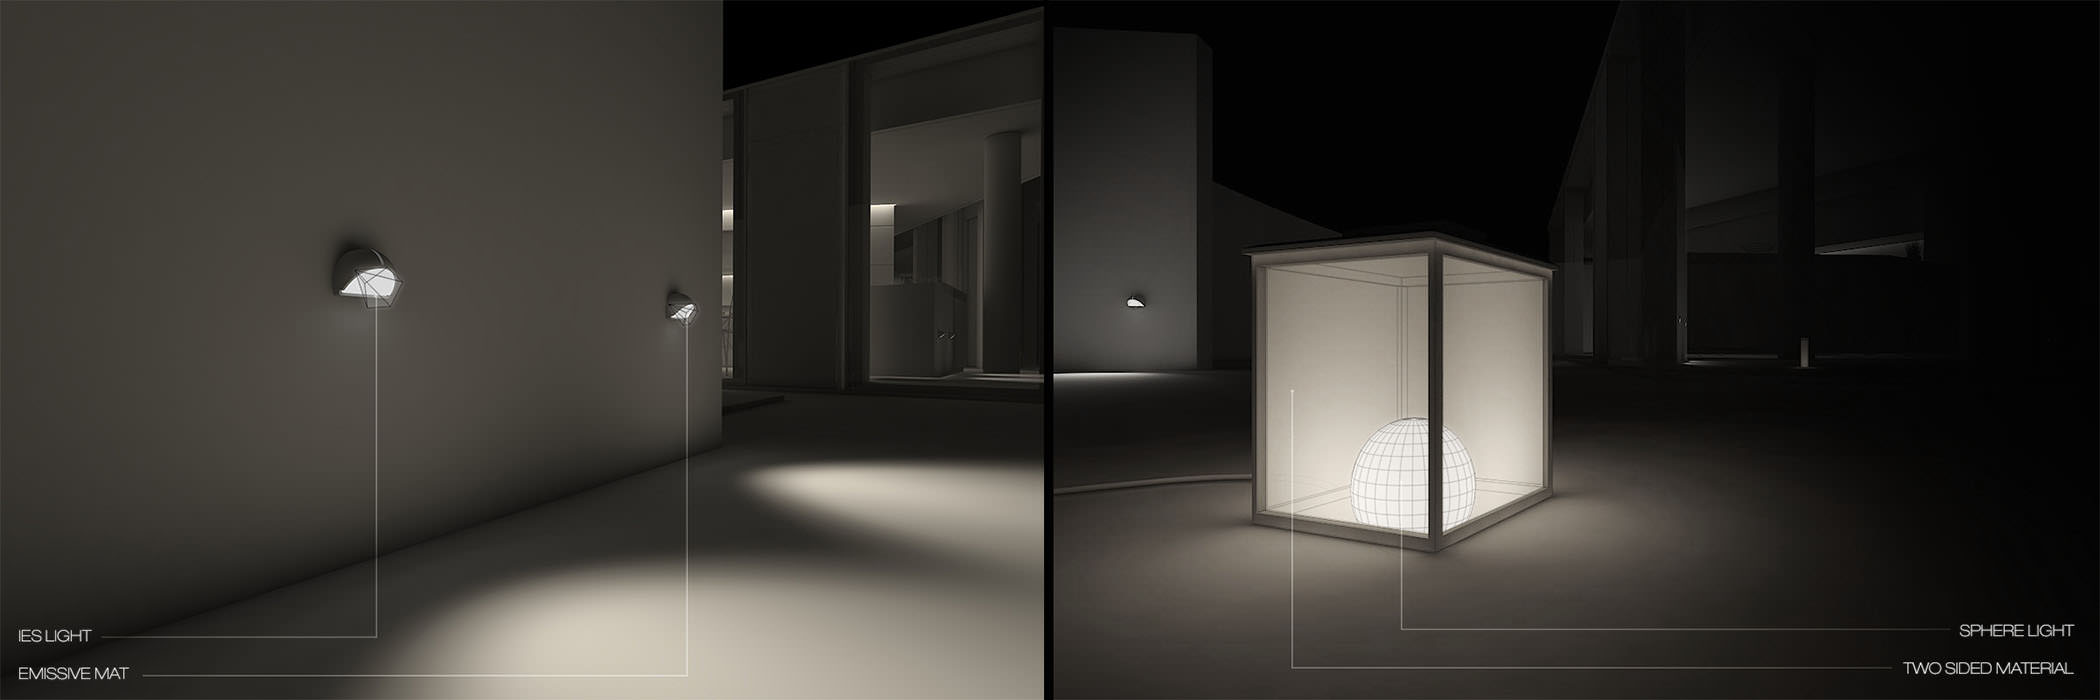
Lightening
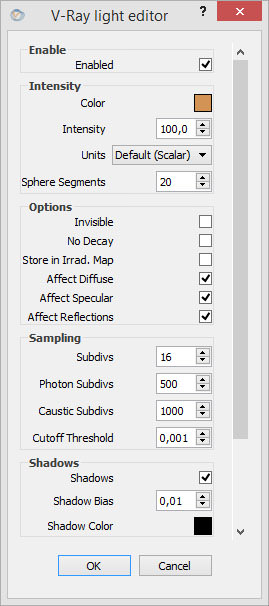
The interior illumination is a mix of IES & Sphere lights.
Interior light configuration without HDRi
Sphere Lights Settings :
Rectangular Lights Settings :
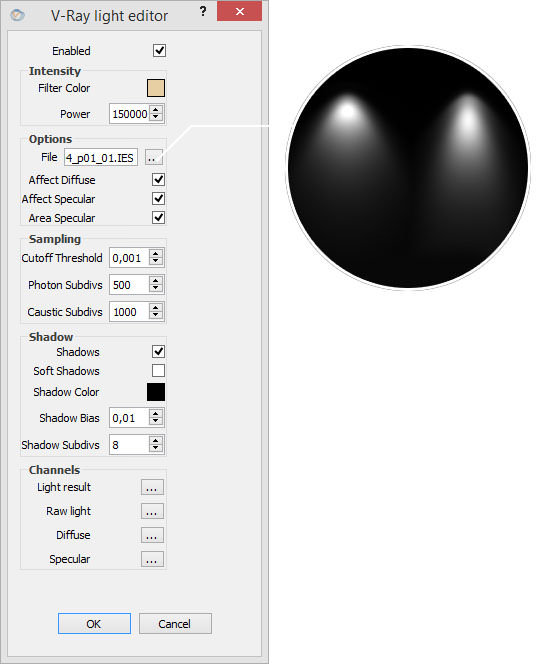
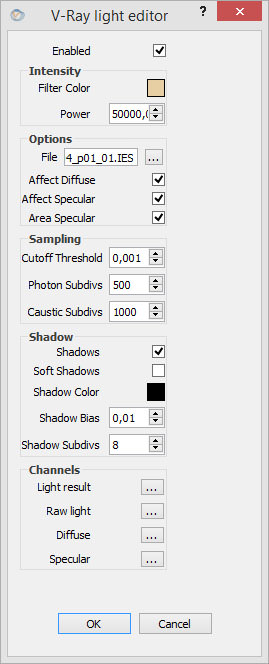
IES lights Settings :
Exterior light configuration without HDRi
Sphere lights Settings :

IES lights Settings :
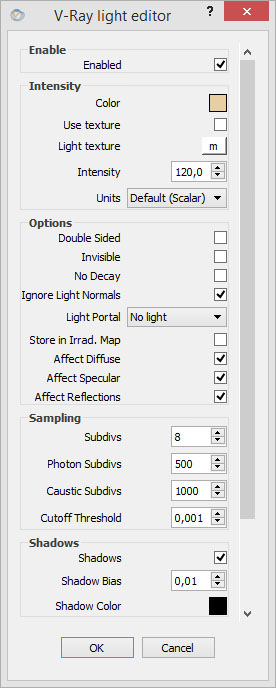
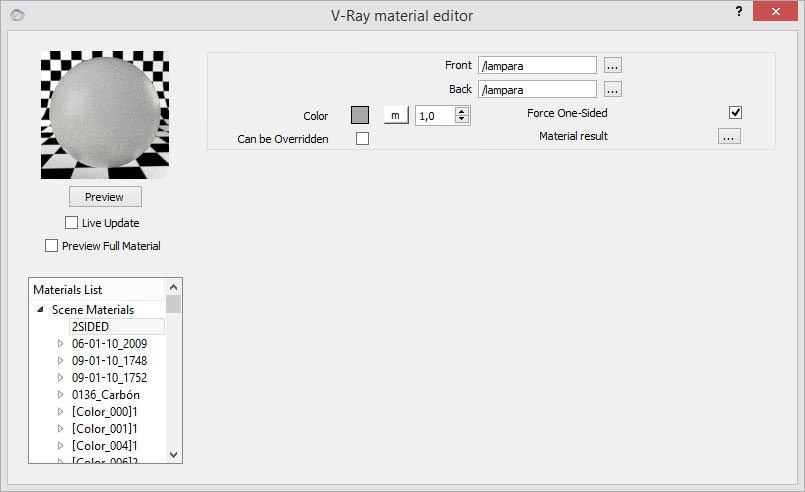
Two Sided Material :
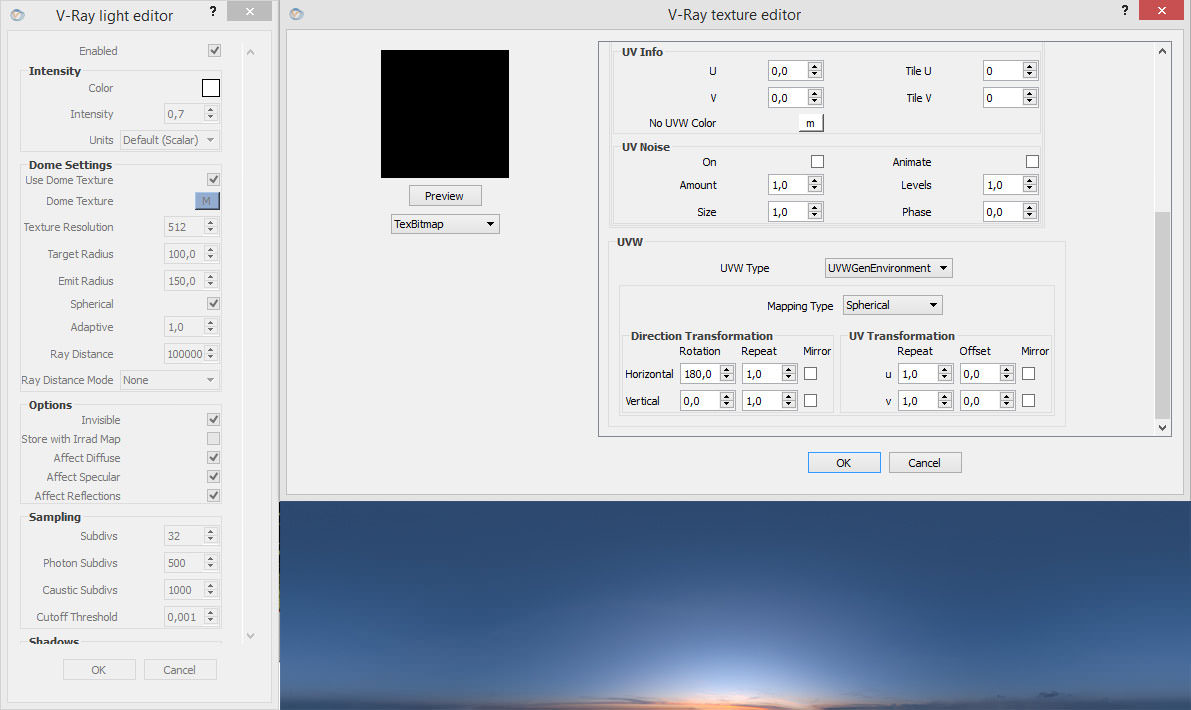
Global Illumination archived with a V-Ray Dome Light loaded with an HDRi (1957 Dusk Clear by PETER GUTHRIE)
V-Ray Dome Light Settings :
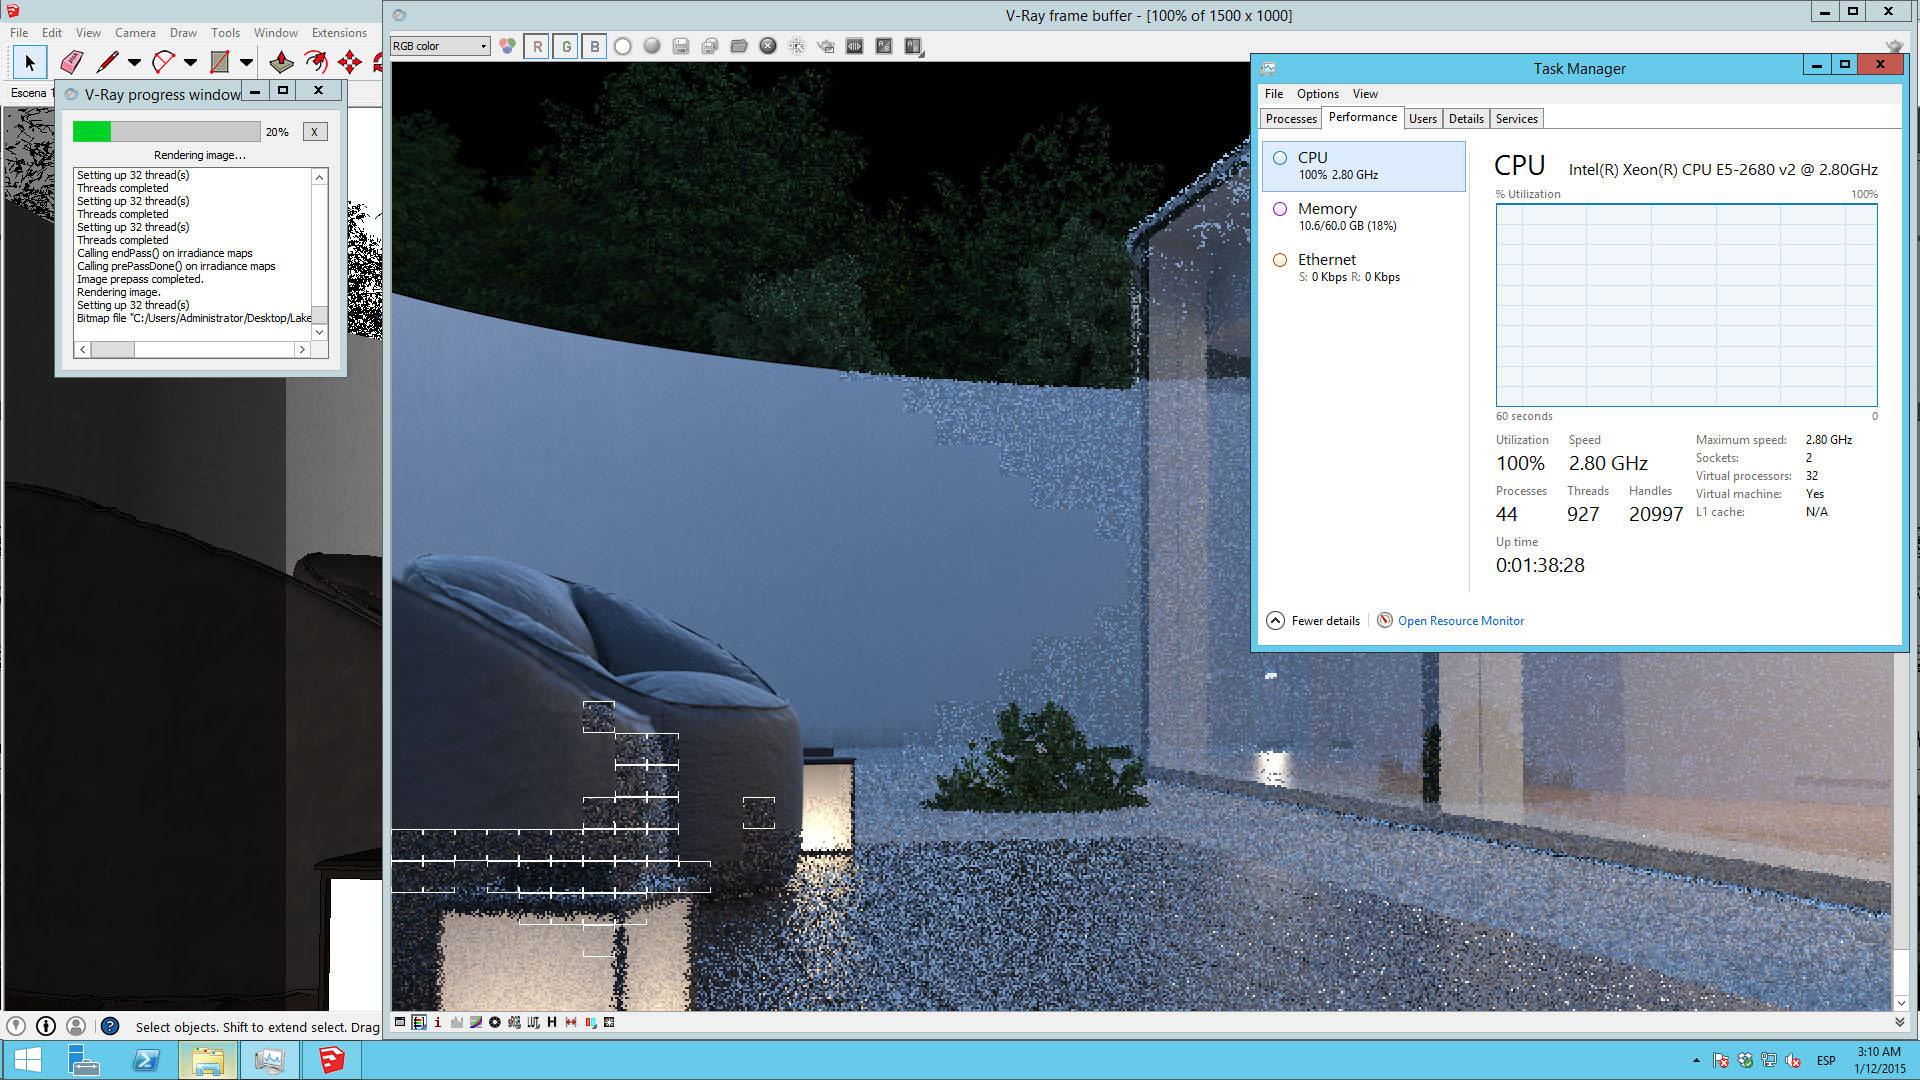
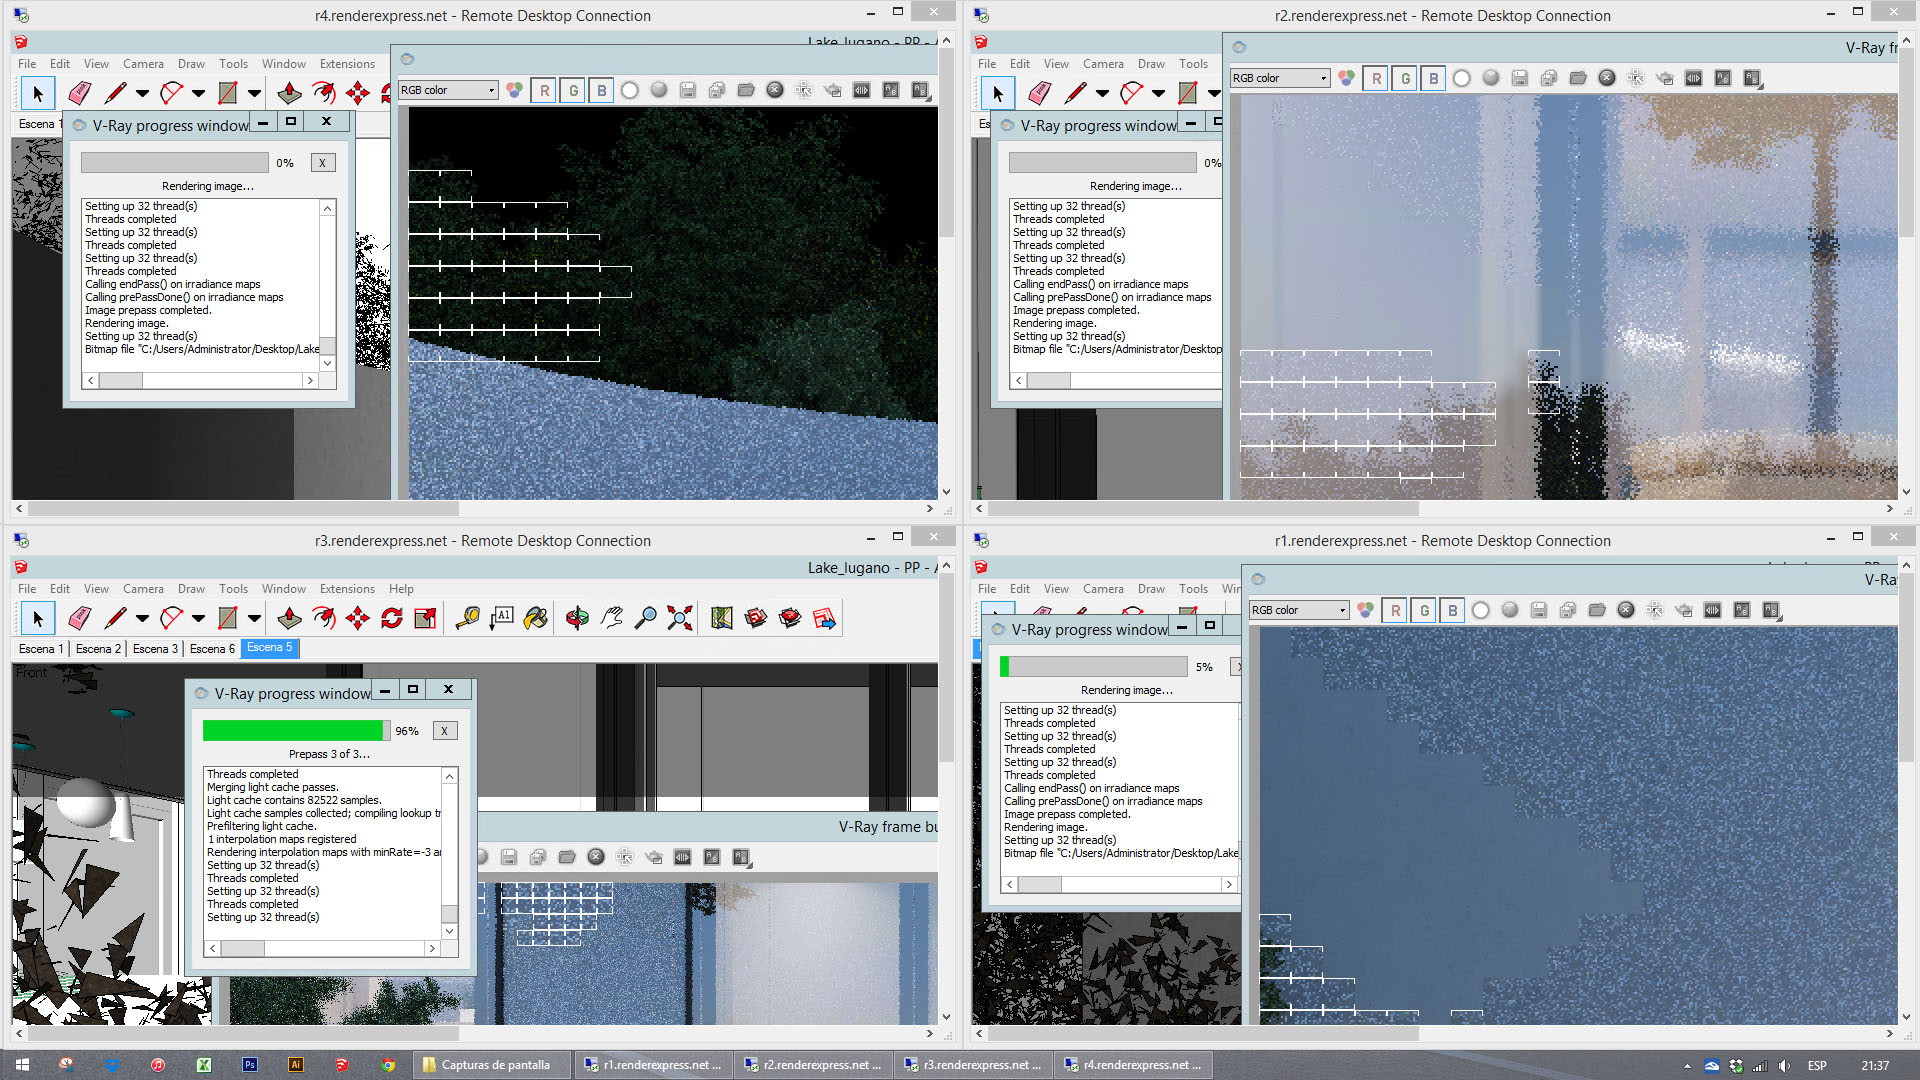
Rendering
The Rendering Settings
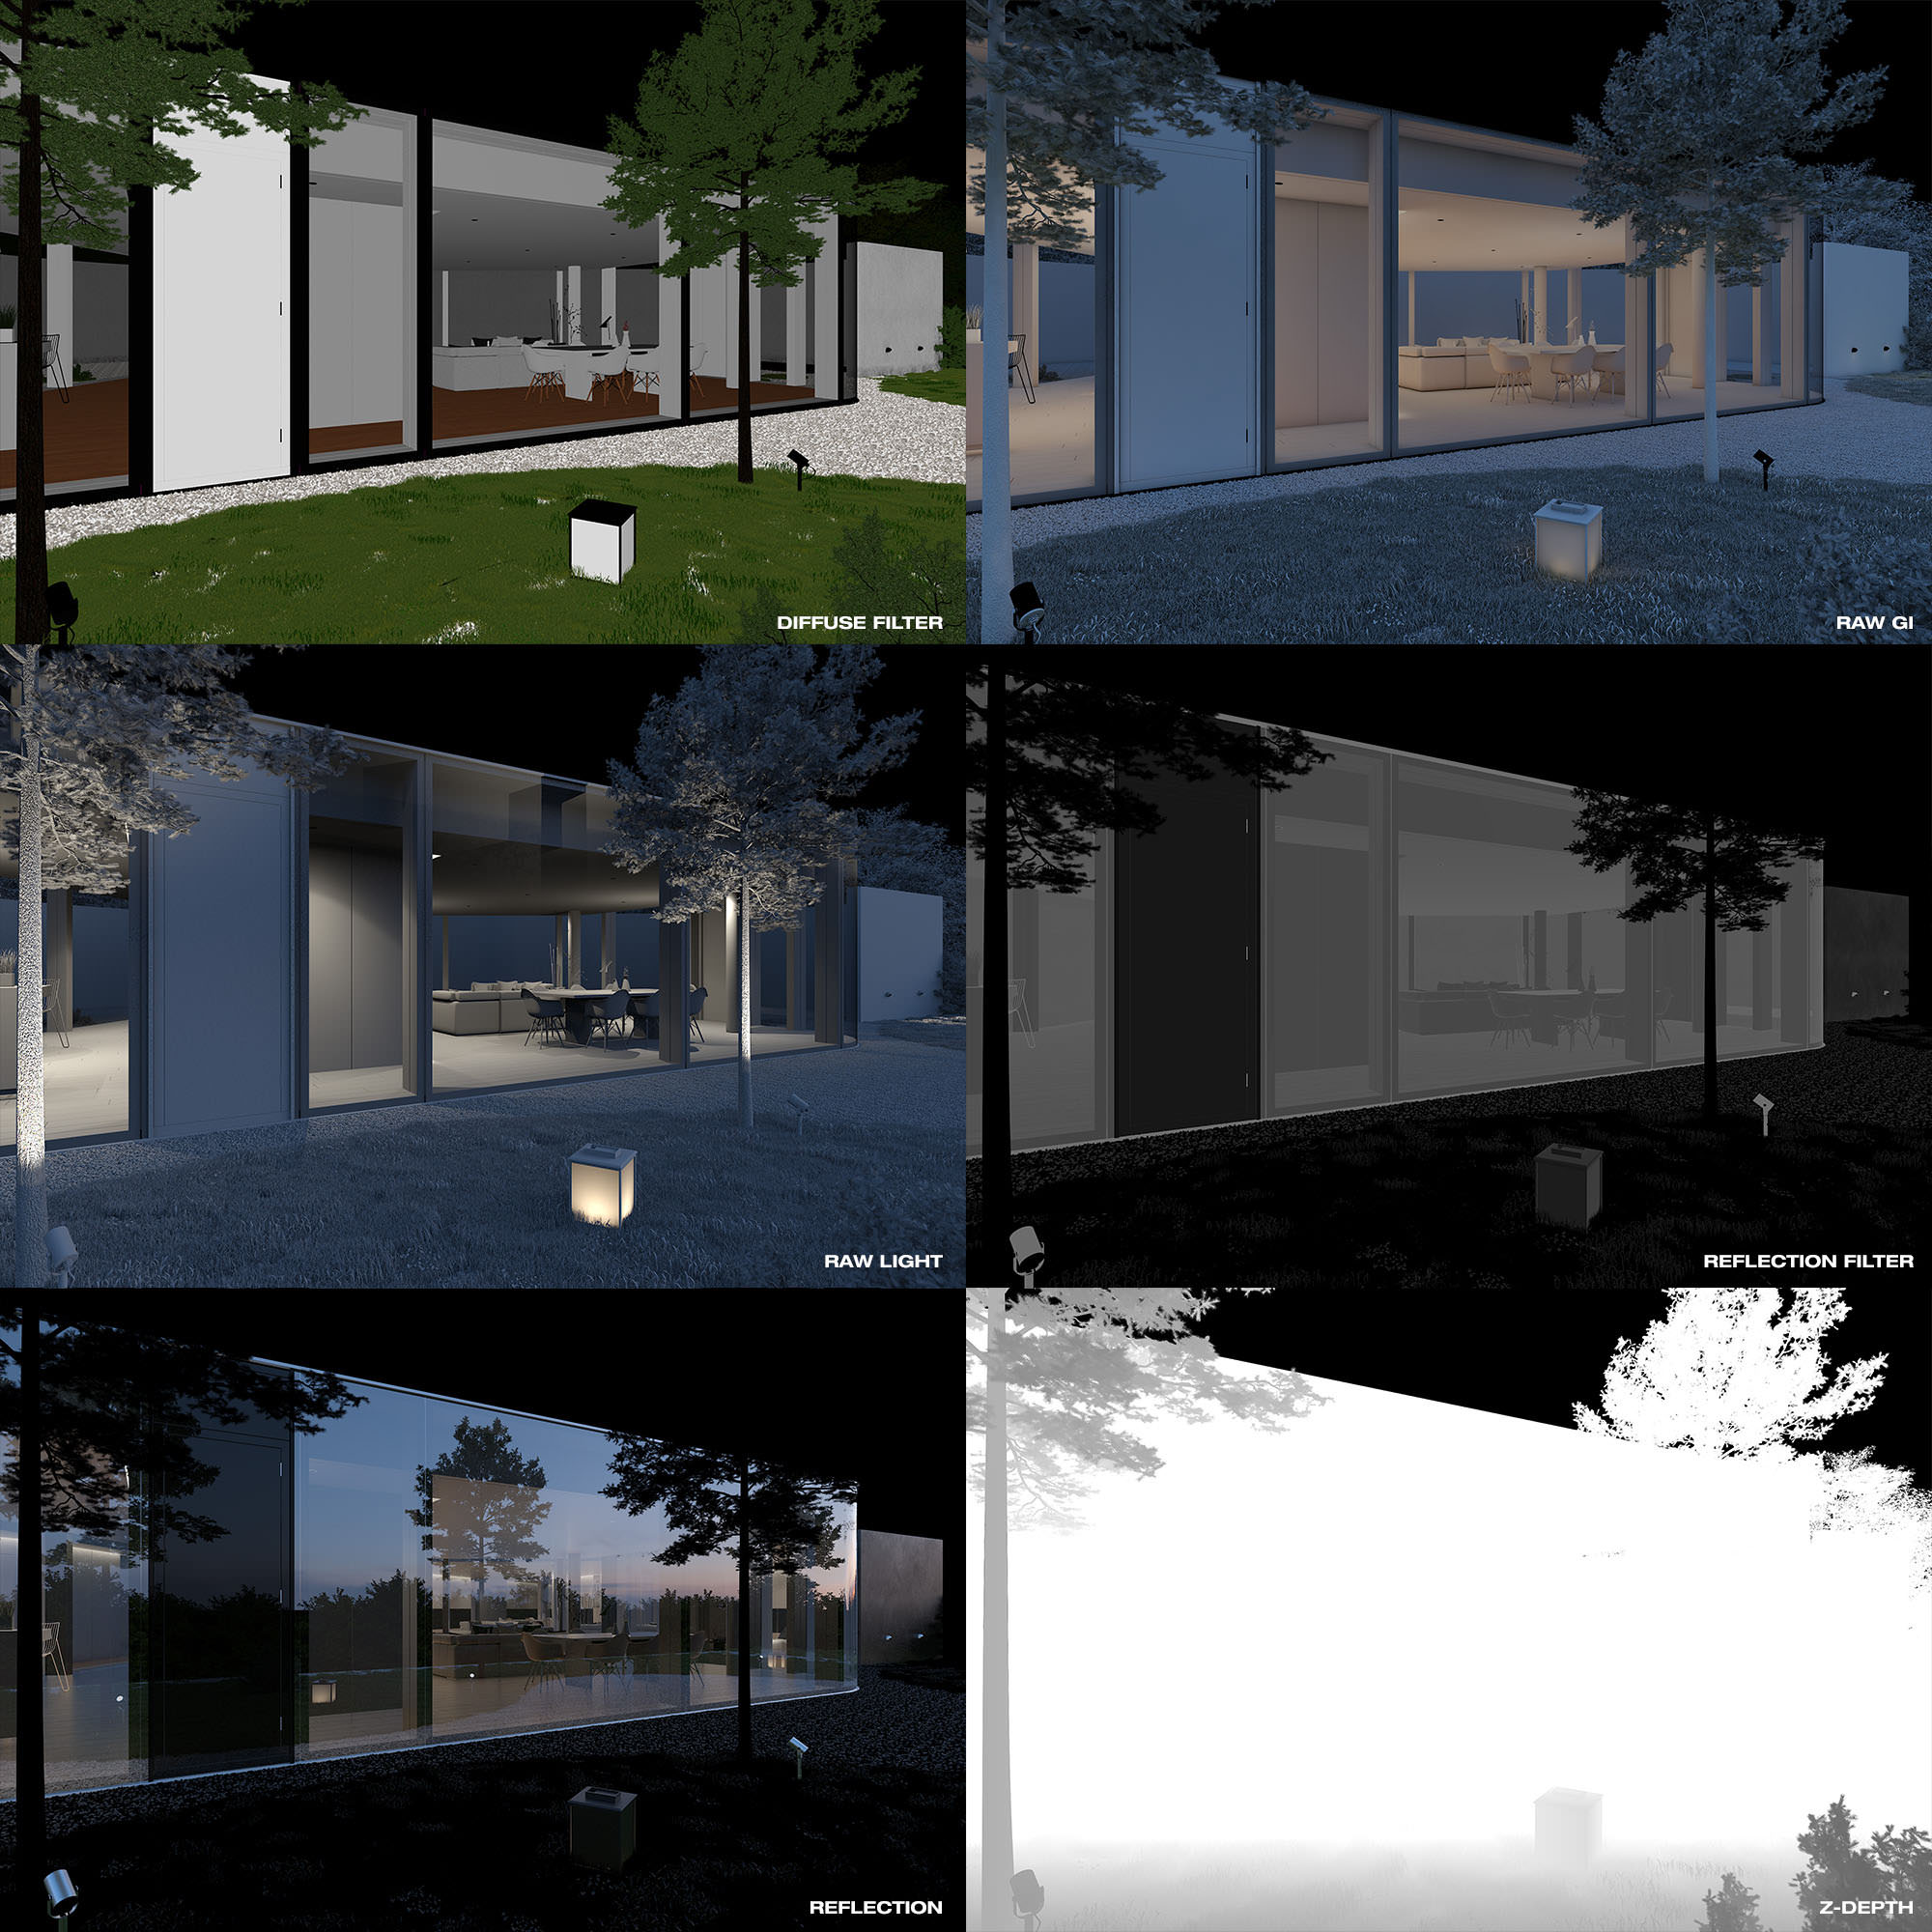
[av_gallery ids=’27927,27933,27938,27939,27943,27946′ style=’big_thumb’ preview_size=’no scaling’ crop_big_preview_thumbnail=’avia-gallery-big-crop-thumb’ thumb_size=’portfolio’ columns=’6′ imagelink=’lightbox’ lazyload=’avia_lazyload’]VFB channels (Image of the channels)
Rendering
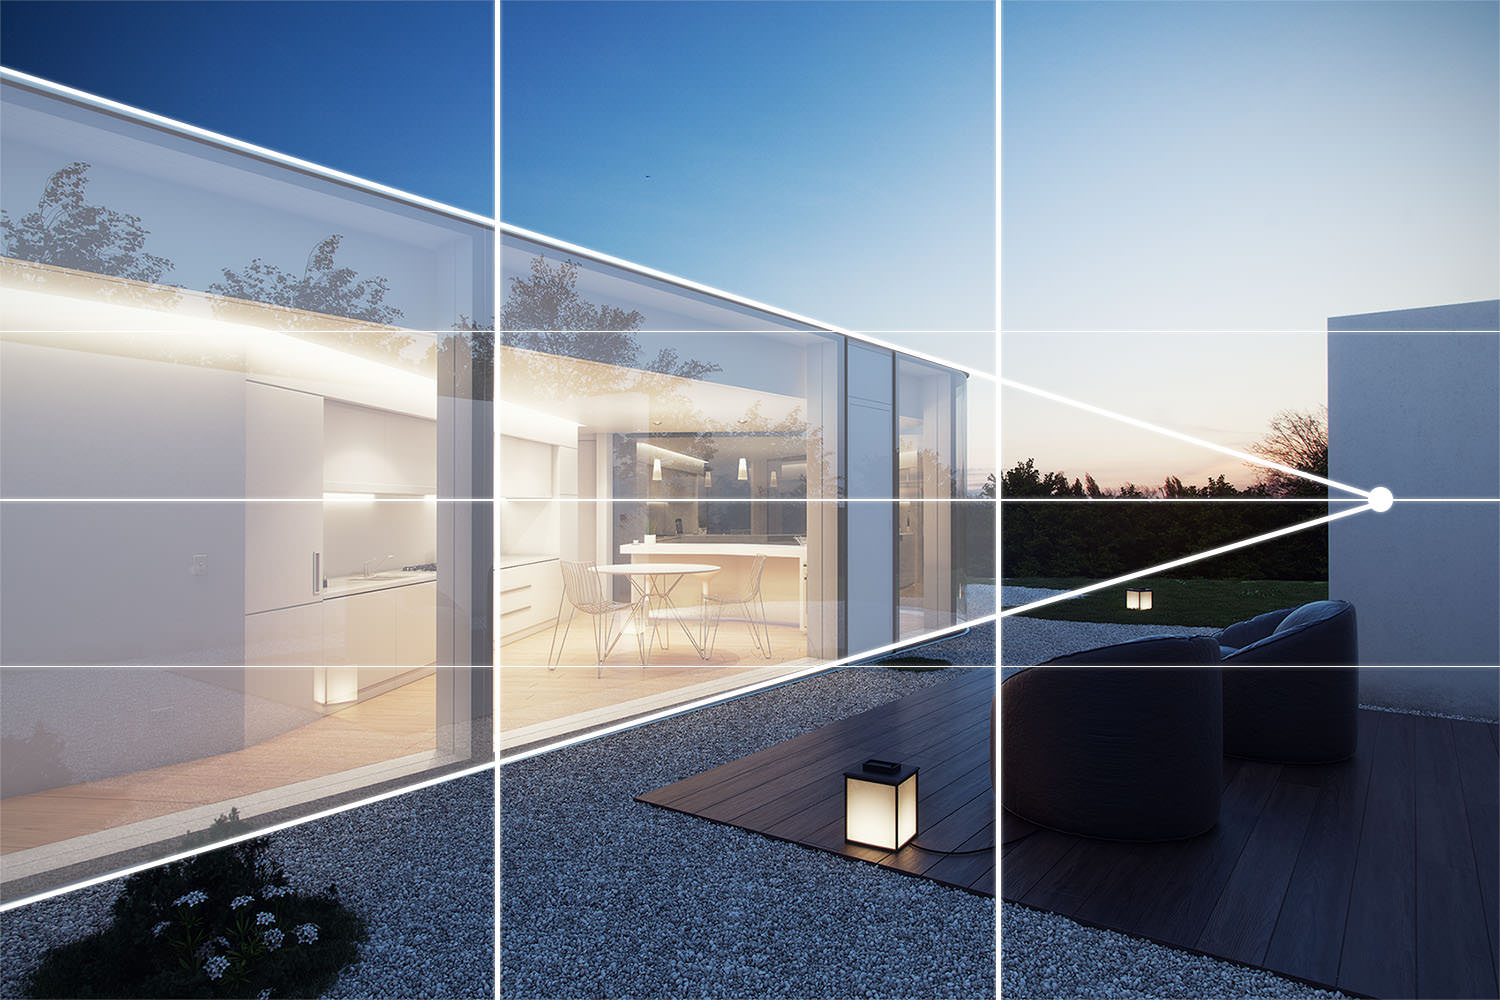
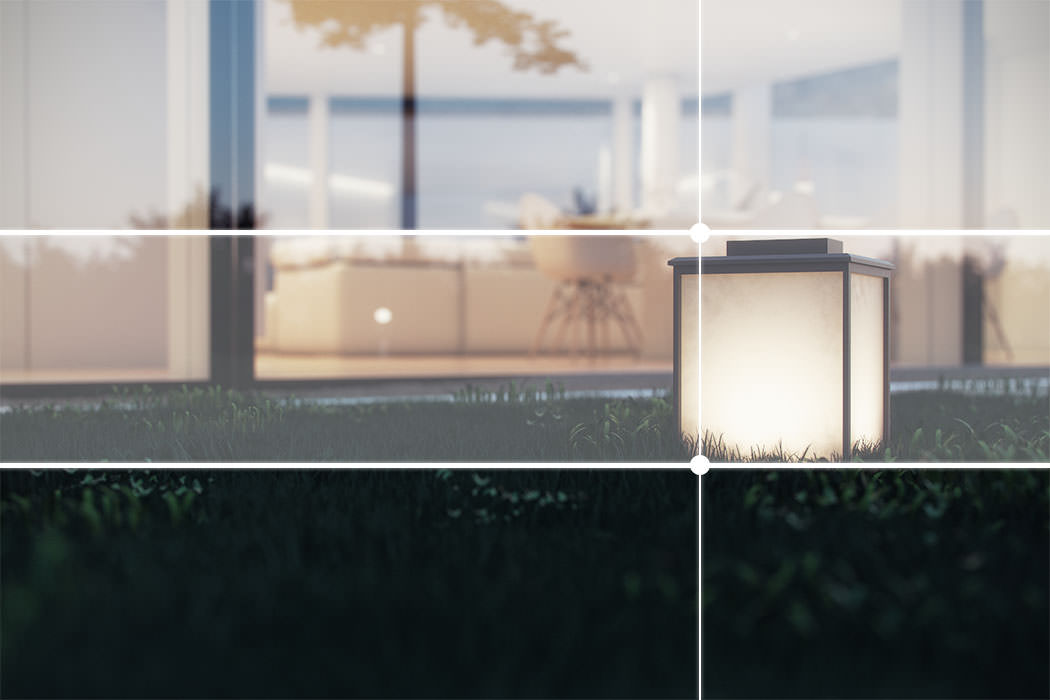
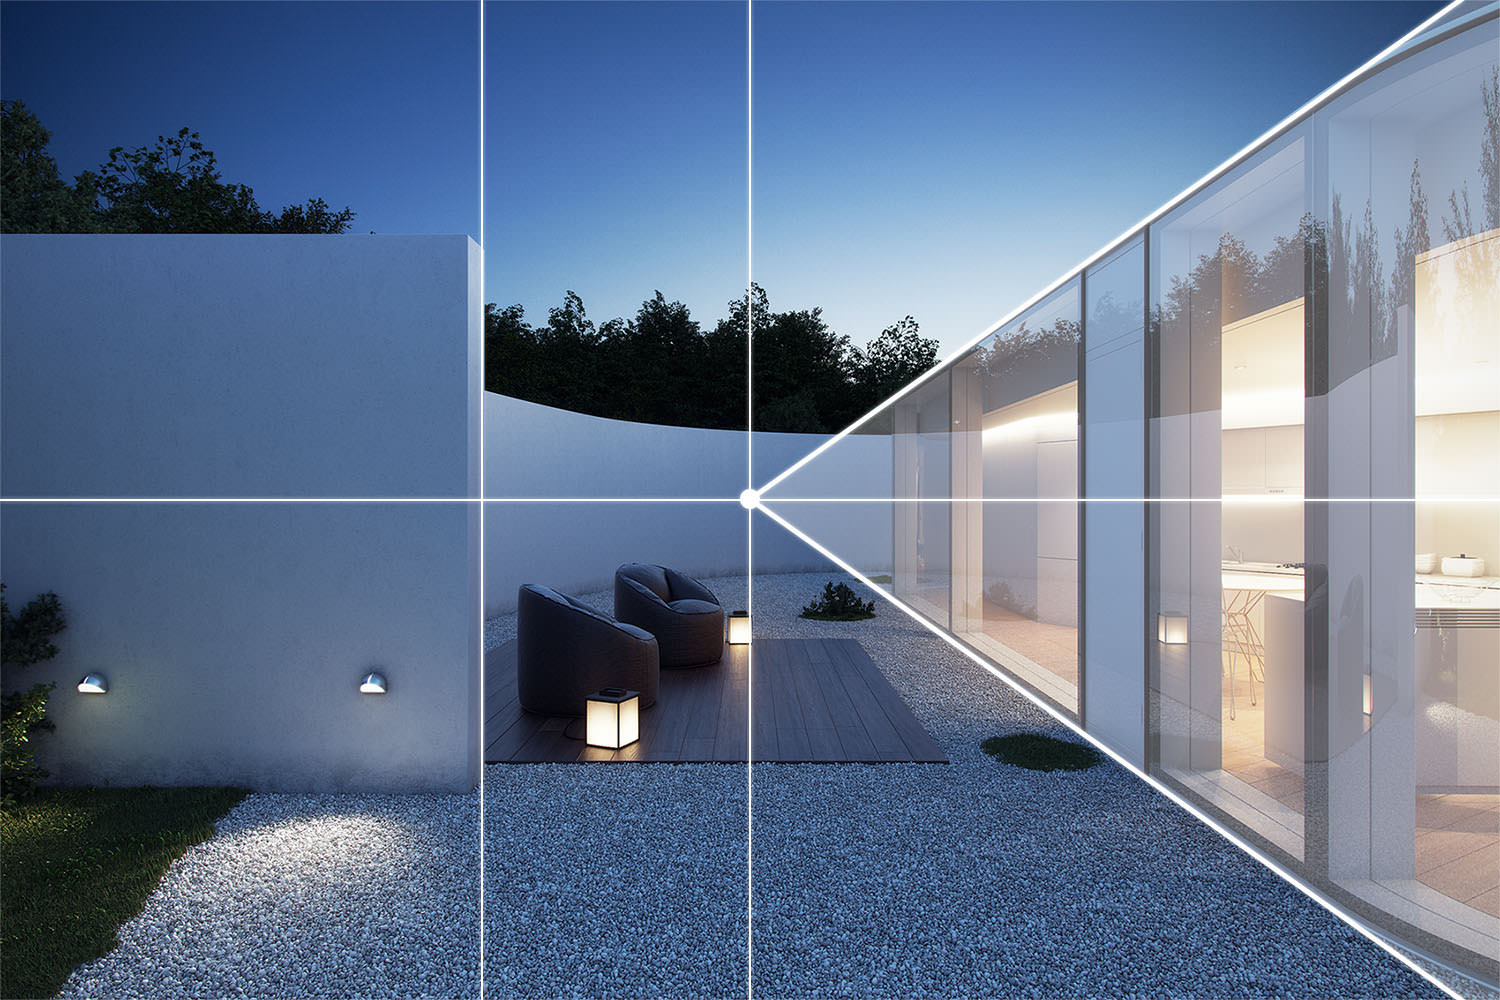
Framing : Photographic Composition
Below you can see what is behind the framing of the final images
Post Production
Here are the stages of the Post Production :
- Photoshop compositing (Screenshot layers).
- Correcting rendering errors (RAW render).
- Color correction (Comparison).
- Levels and brightness (Comparison).
- Color vision (Effects).
- Photographic effects (Finishing image).
So, that`s it.
I hope you enjoyed it. If there is any question regarding any subject I would be pleased to answer it.
[av_hr class=’short’ height=’50’ shadow=’no-shadow’ position=’center’ custom_border=’av-border-thin’ custom_width=’50px’ custom_border_color=” custom_margin_top=’30px’ custom_margin_bottom=’30px’ icon_select=’yes’ custom_icon_color=” icon=’ue808′ font=’entypo-fontello’] [av_testimonials style=’grid’ columns=’1′ interval=’5′ font_color=” custom_title=” custom_content=”] [av_testimonial_single src=’27945′ name=’David Santos’ subtitle=’www.labvisualizacion.com’ link=’http://www.labvisualizacion.com/’ linktext=”] David Santos is a 3d Artist from Ecuador. He studied architecture for 5 years in Universidad San Francisco de Quito. He started using SketchUp since the beginning, and ArchViz has become his passion. He specializes in 3D visualization and have been working on his own since 2014, mostly on local projects.[/av_testimonial_single] [/av_testimonials]