
Originally published at: https://www.ronenbekerman.com/making-of-mea-terra/
By Fat Tony Studio
Before we dive into the making of itself, we would like to thank Ronen for the chance to share some of our process with the community. We’ve enjoyed many Making of articles posted on the Ronen Bekerman’s Blog, so it is incredible for us to contribute to this evergrowing collection.

Introduction to the Making of Mea Terra
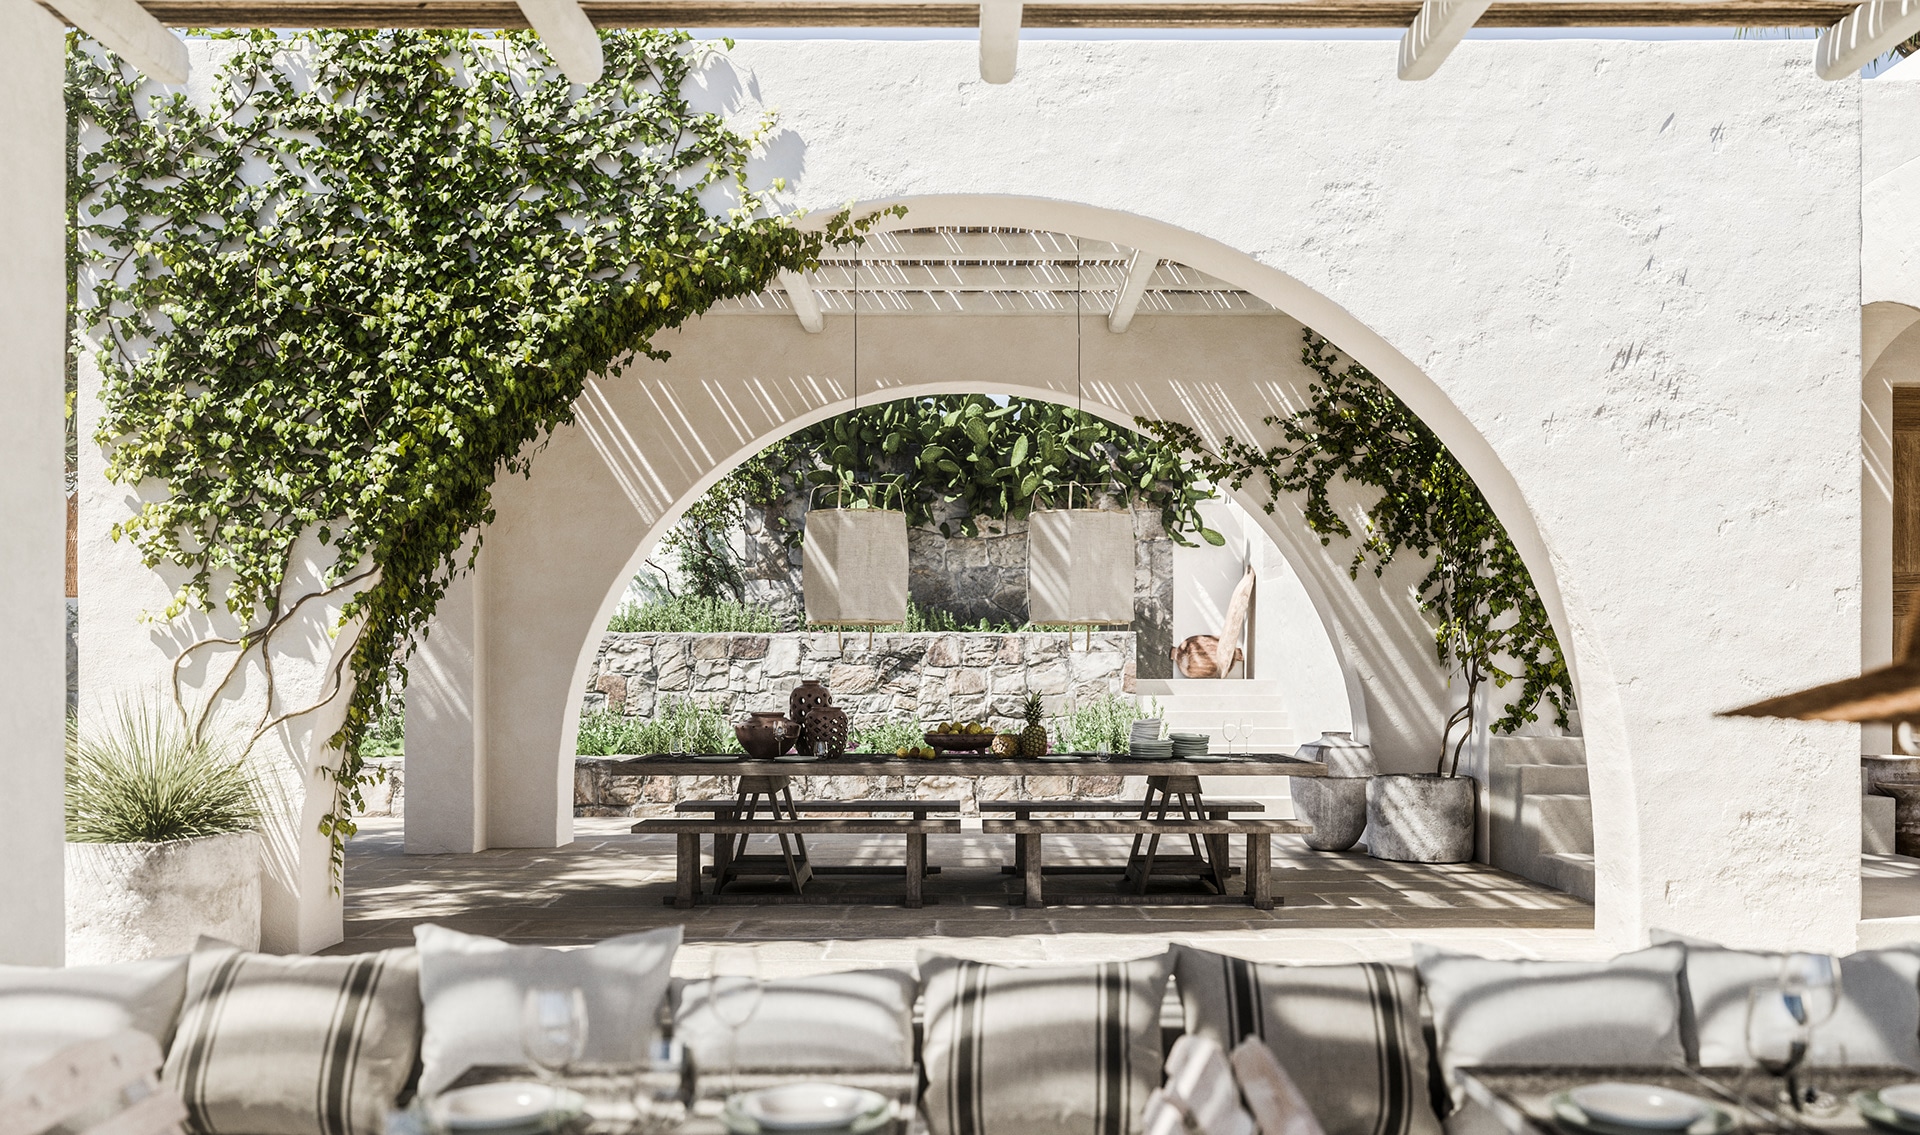
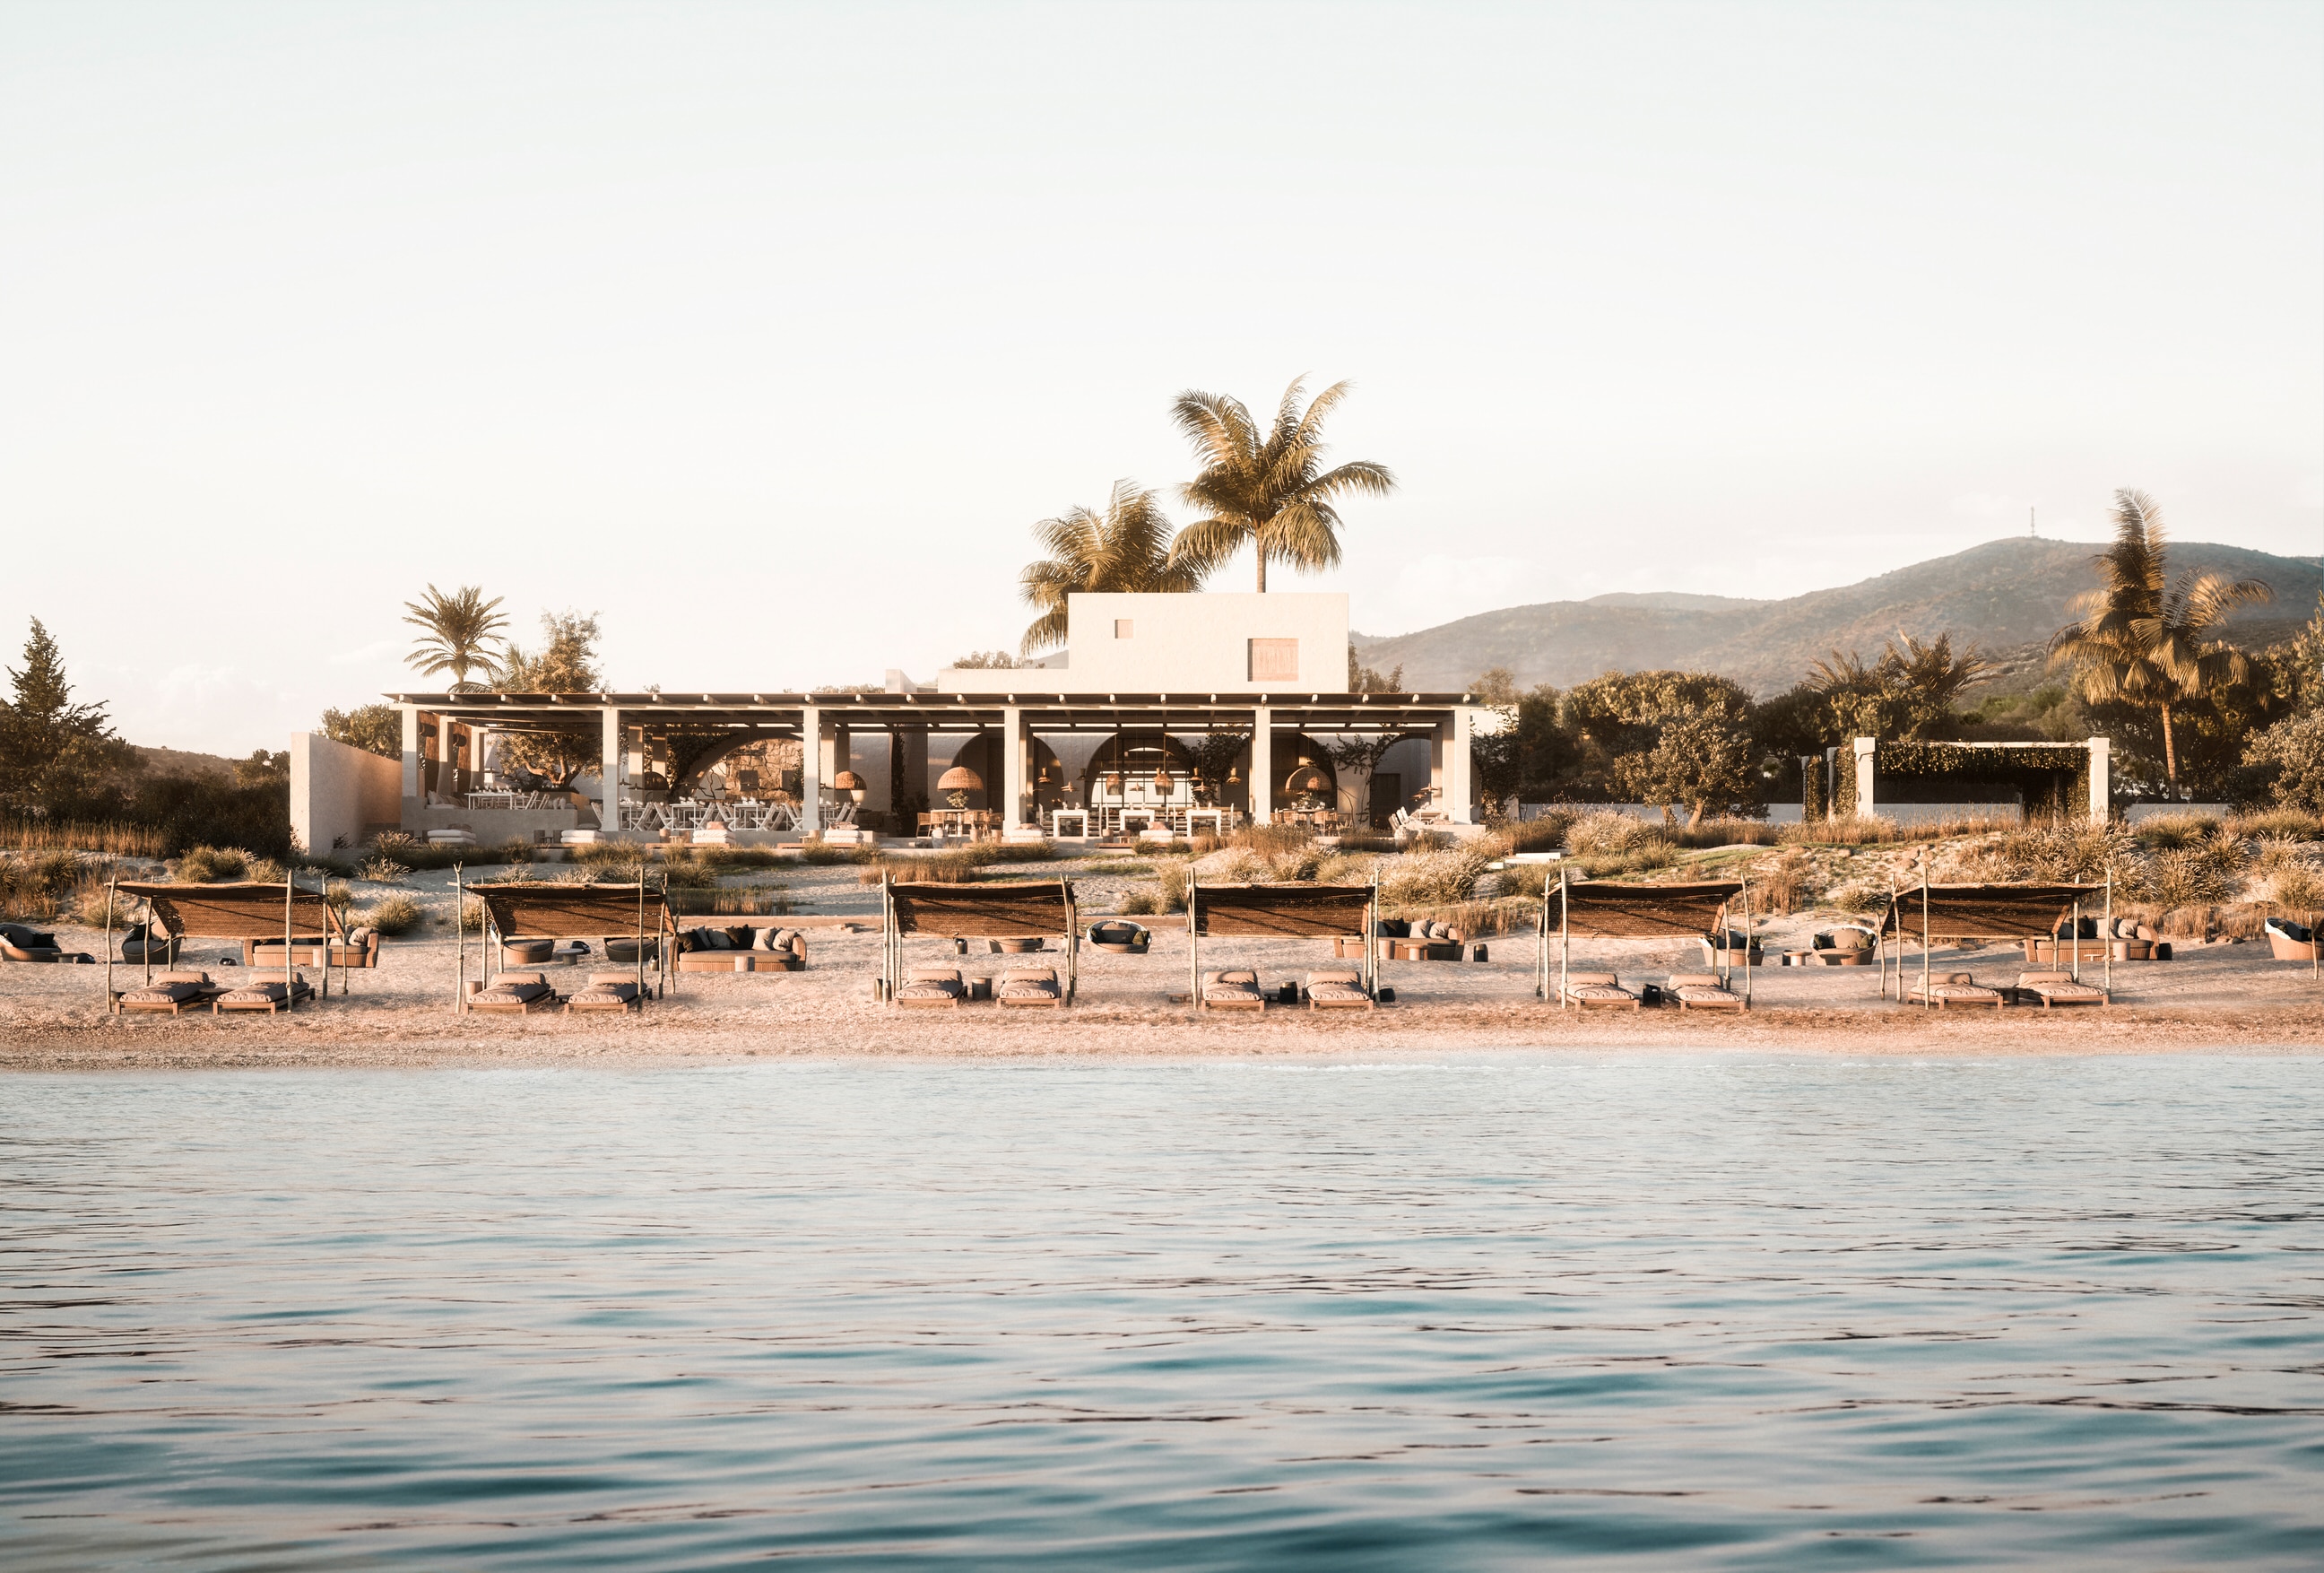
Mea Terra is a commissioned project that was assigned to us during the summer of 2018. It is an All-day beach bar/restaurant in beautiful Greek island Rhodos, area of Lachania.
We will go over the client’s initial brief, how we managed to convince the client to change the direction, and then, of course, how we executed the whole package.
We stumbled on quite some challenges that we didn’t recognize at the beginning, but we believe the result is quite alright, so it’s great that we can share our behind-the-scenes process with the community.
The structure of the article might not be so conventional, but we will try to present very carefully, step by step, what we did during the actual production.
This way, it will be more literally a Making Of!
Making of Mea Terra Client’s Brief
Every project starts with a client brief (unless it is a personal project), and if it doesn’t, its always good to prepare one on your own.
The initial brief for Mea Terra was a quite standard one. The client was the architect/designer, and together with the owner of the property, they came with the necessary information, some drawings, and references and requested the preparation of 4-5 images.
The layout of the project was split into more spaces: the waiting area, the main dining and bar, the lounge seating, the beach, the cooking corner/workshop area, and the open-air wedding space, each one with its unique characteristics.
We recognized the potential of the project right from the start. We decided to work towards delivering something that we will be happy to publish ourselves in full scope, and that will represent what we always want as the final result.
Another reason we tried to push for this approach was that we would be able to do some actual R&D within a commercial project, which is quite rare. Doing R&D like this is, of course, very difficult as there are deadlines, budgets, and expectations of all kinds.
Fortunately enough, the client trusted us, and now it was the time to prove ourselves!
Analyzing and Preparation
We prepared a new proposal for the client, for which we took some time to break down and examine ourselves. We aimed for a more comprehensive presentation of the project with more images but with a marketing and sales point-of-view in mind.
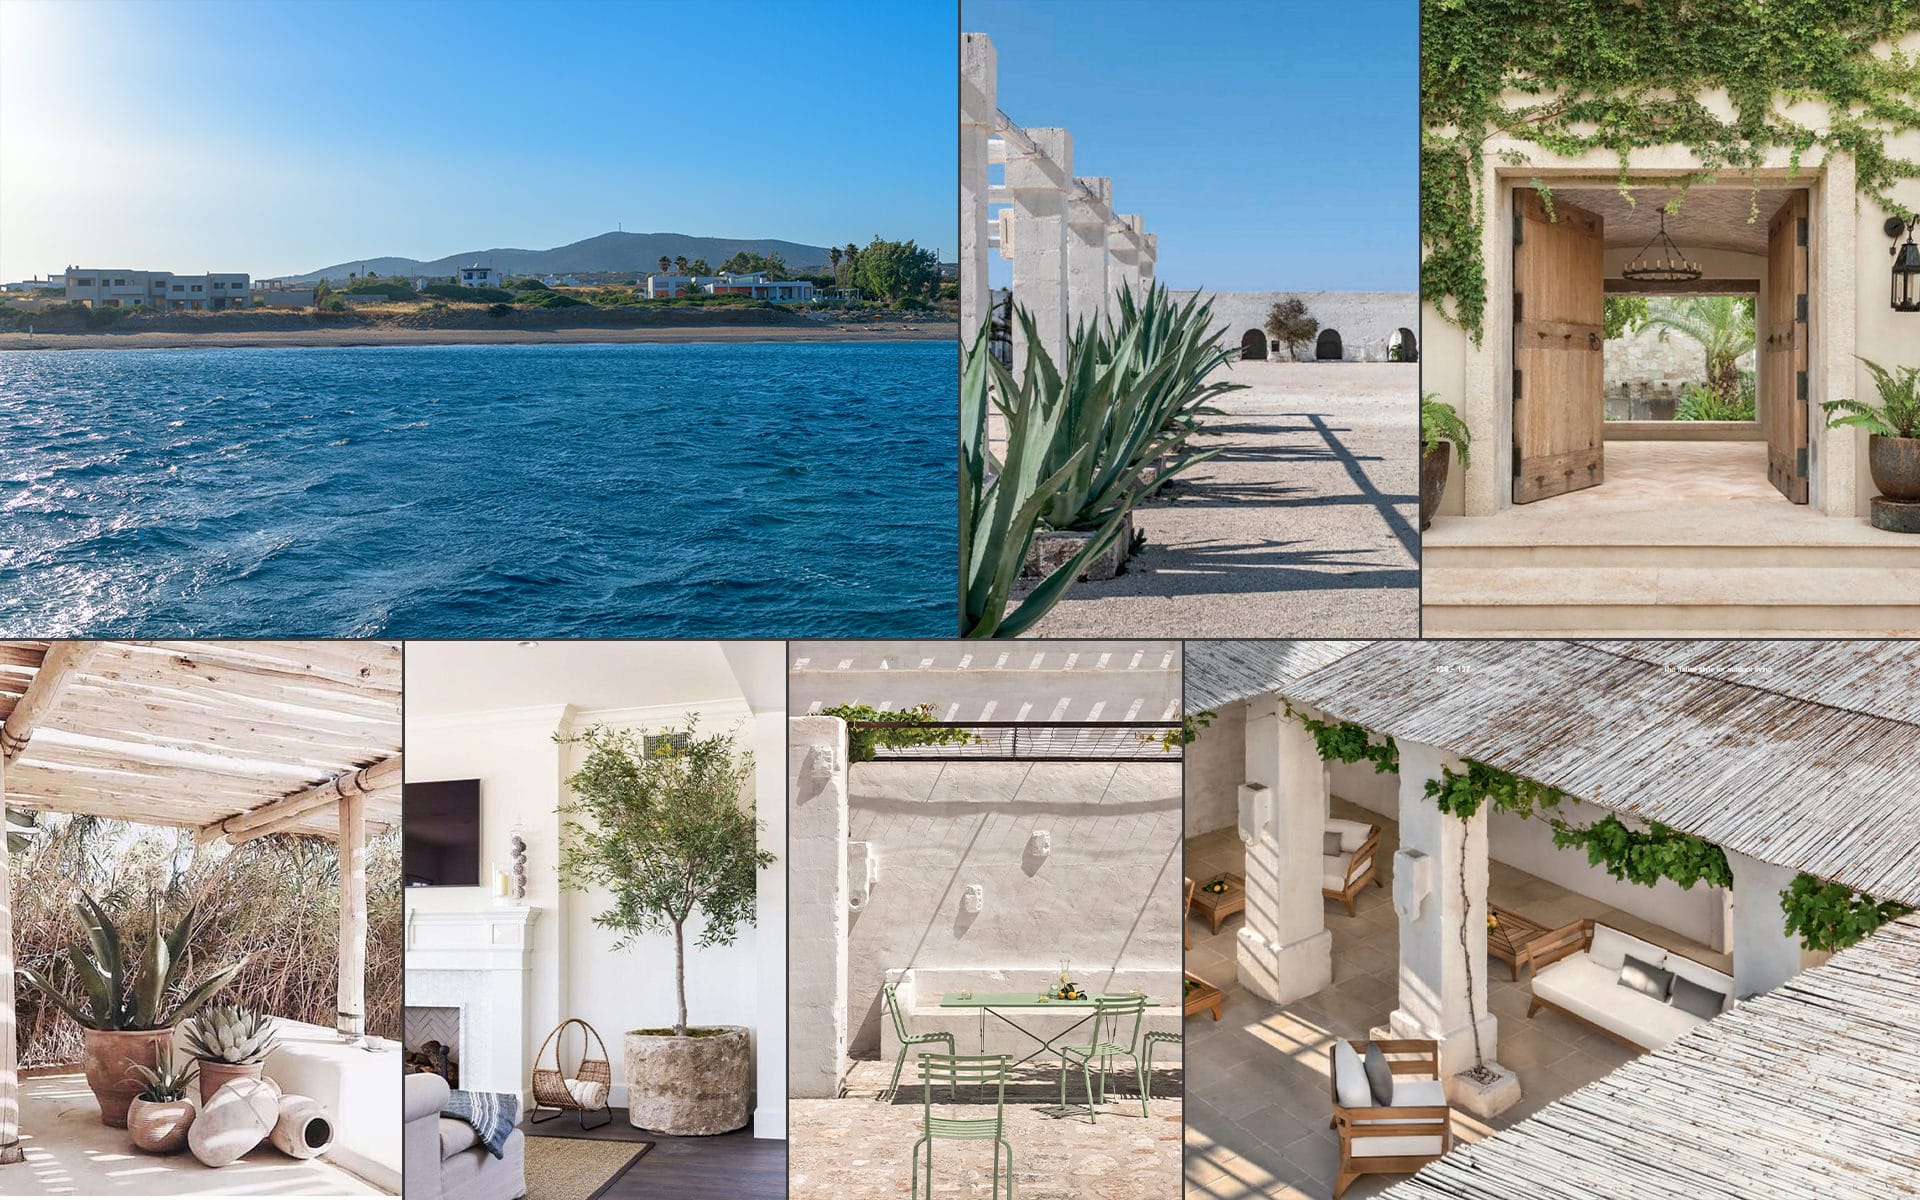
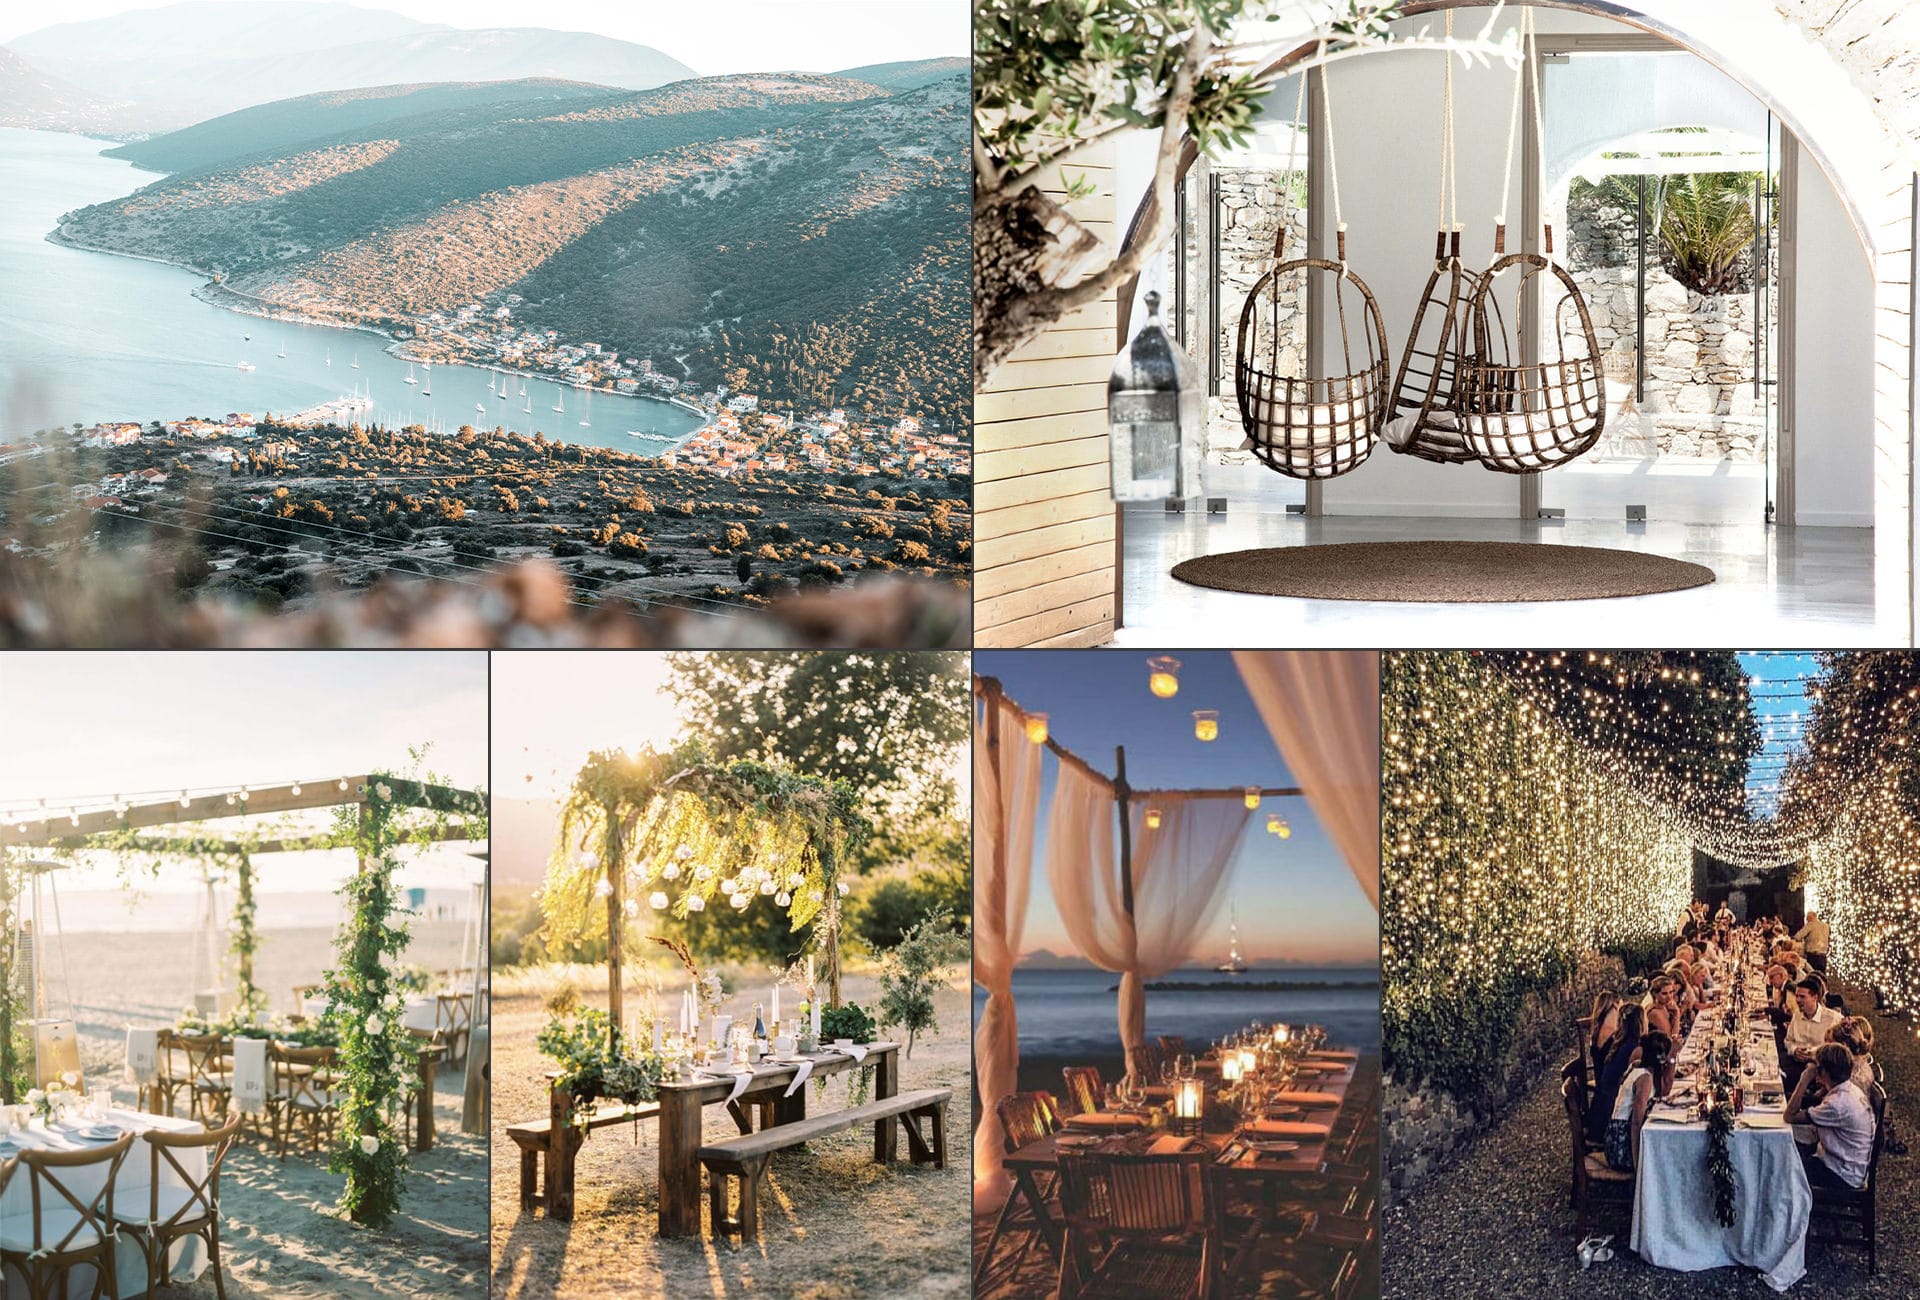
After discussing with the client and clarifying their intentions, we built a new set of mood boards identifying the mood and feel of the project. The goal was to present the spaces in a curated way that goes beyond the generic “Mediterranean Restaurant.”
New mood board with various conditions
Mood board presenting different approaches to views
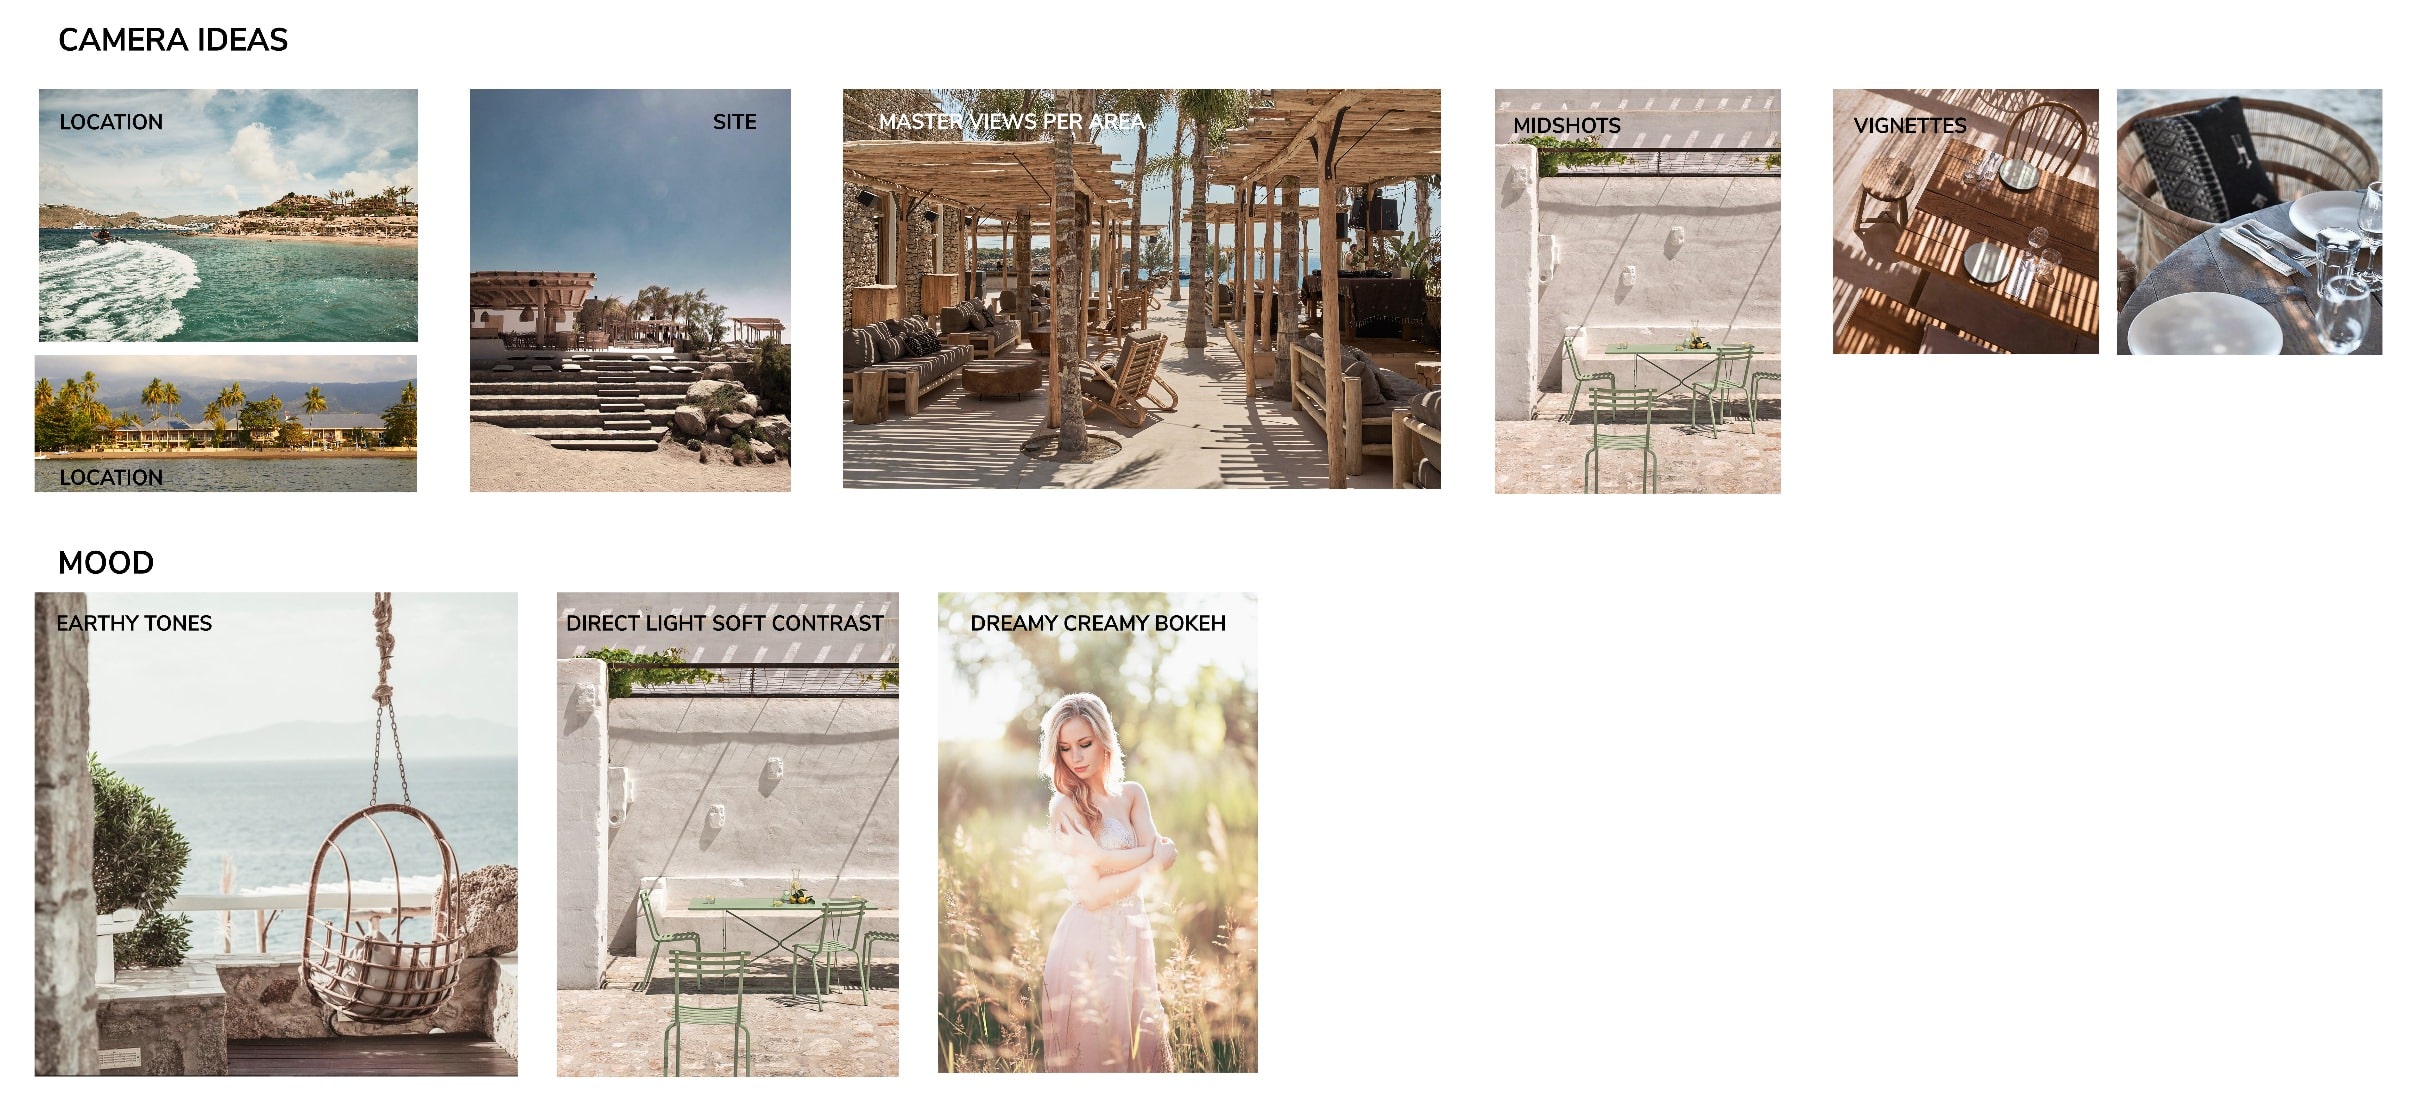
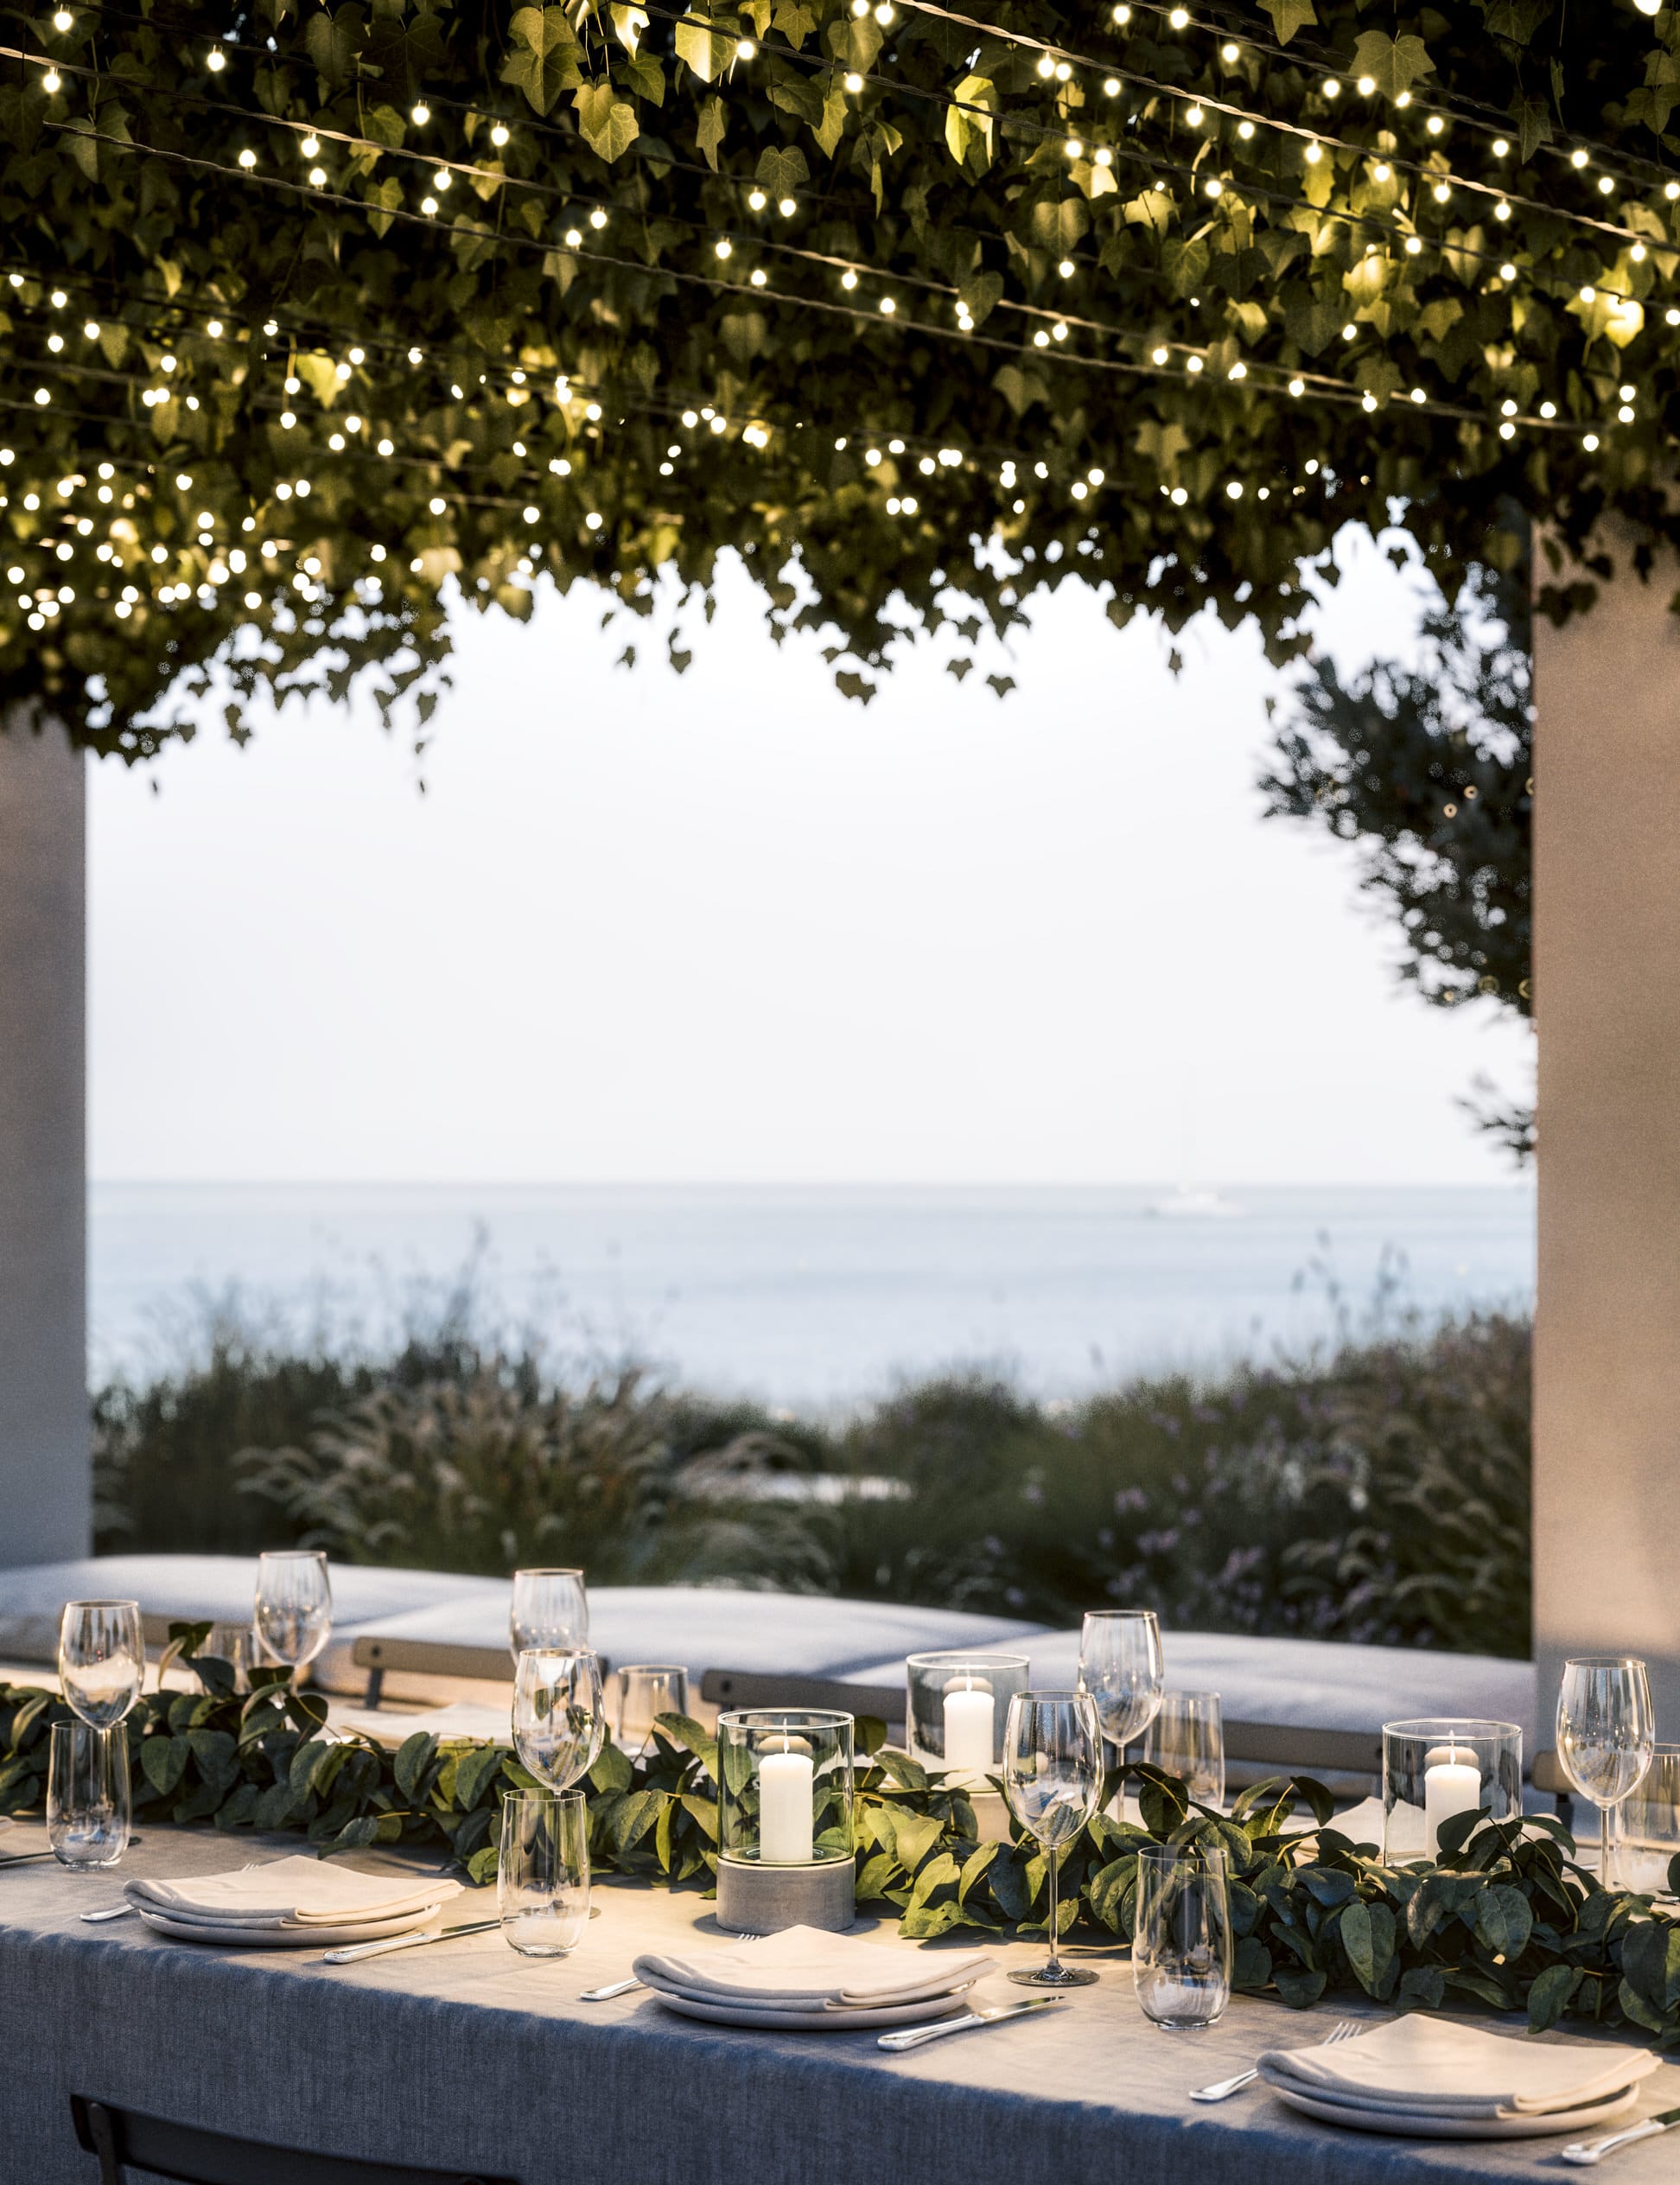
At that point, we made critical decisions regarding the variety of lighting situations we would have. Given that this was an all-day bar, we figured that sunrise and sunset moments would be something that the visitors would get to experience, so we decided to integrate that as a main atmospheric element. For the wedding space, the night atmosphere was a good match (as romantic as possible). Fewer views were prepared in typical midday light, mainly where the sun could accent the elements of the design, such as the form of the arcs, for example.
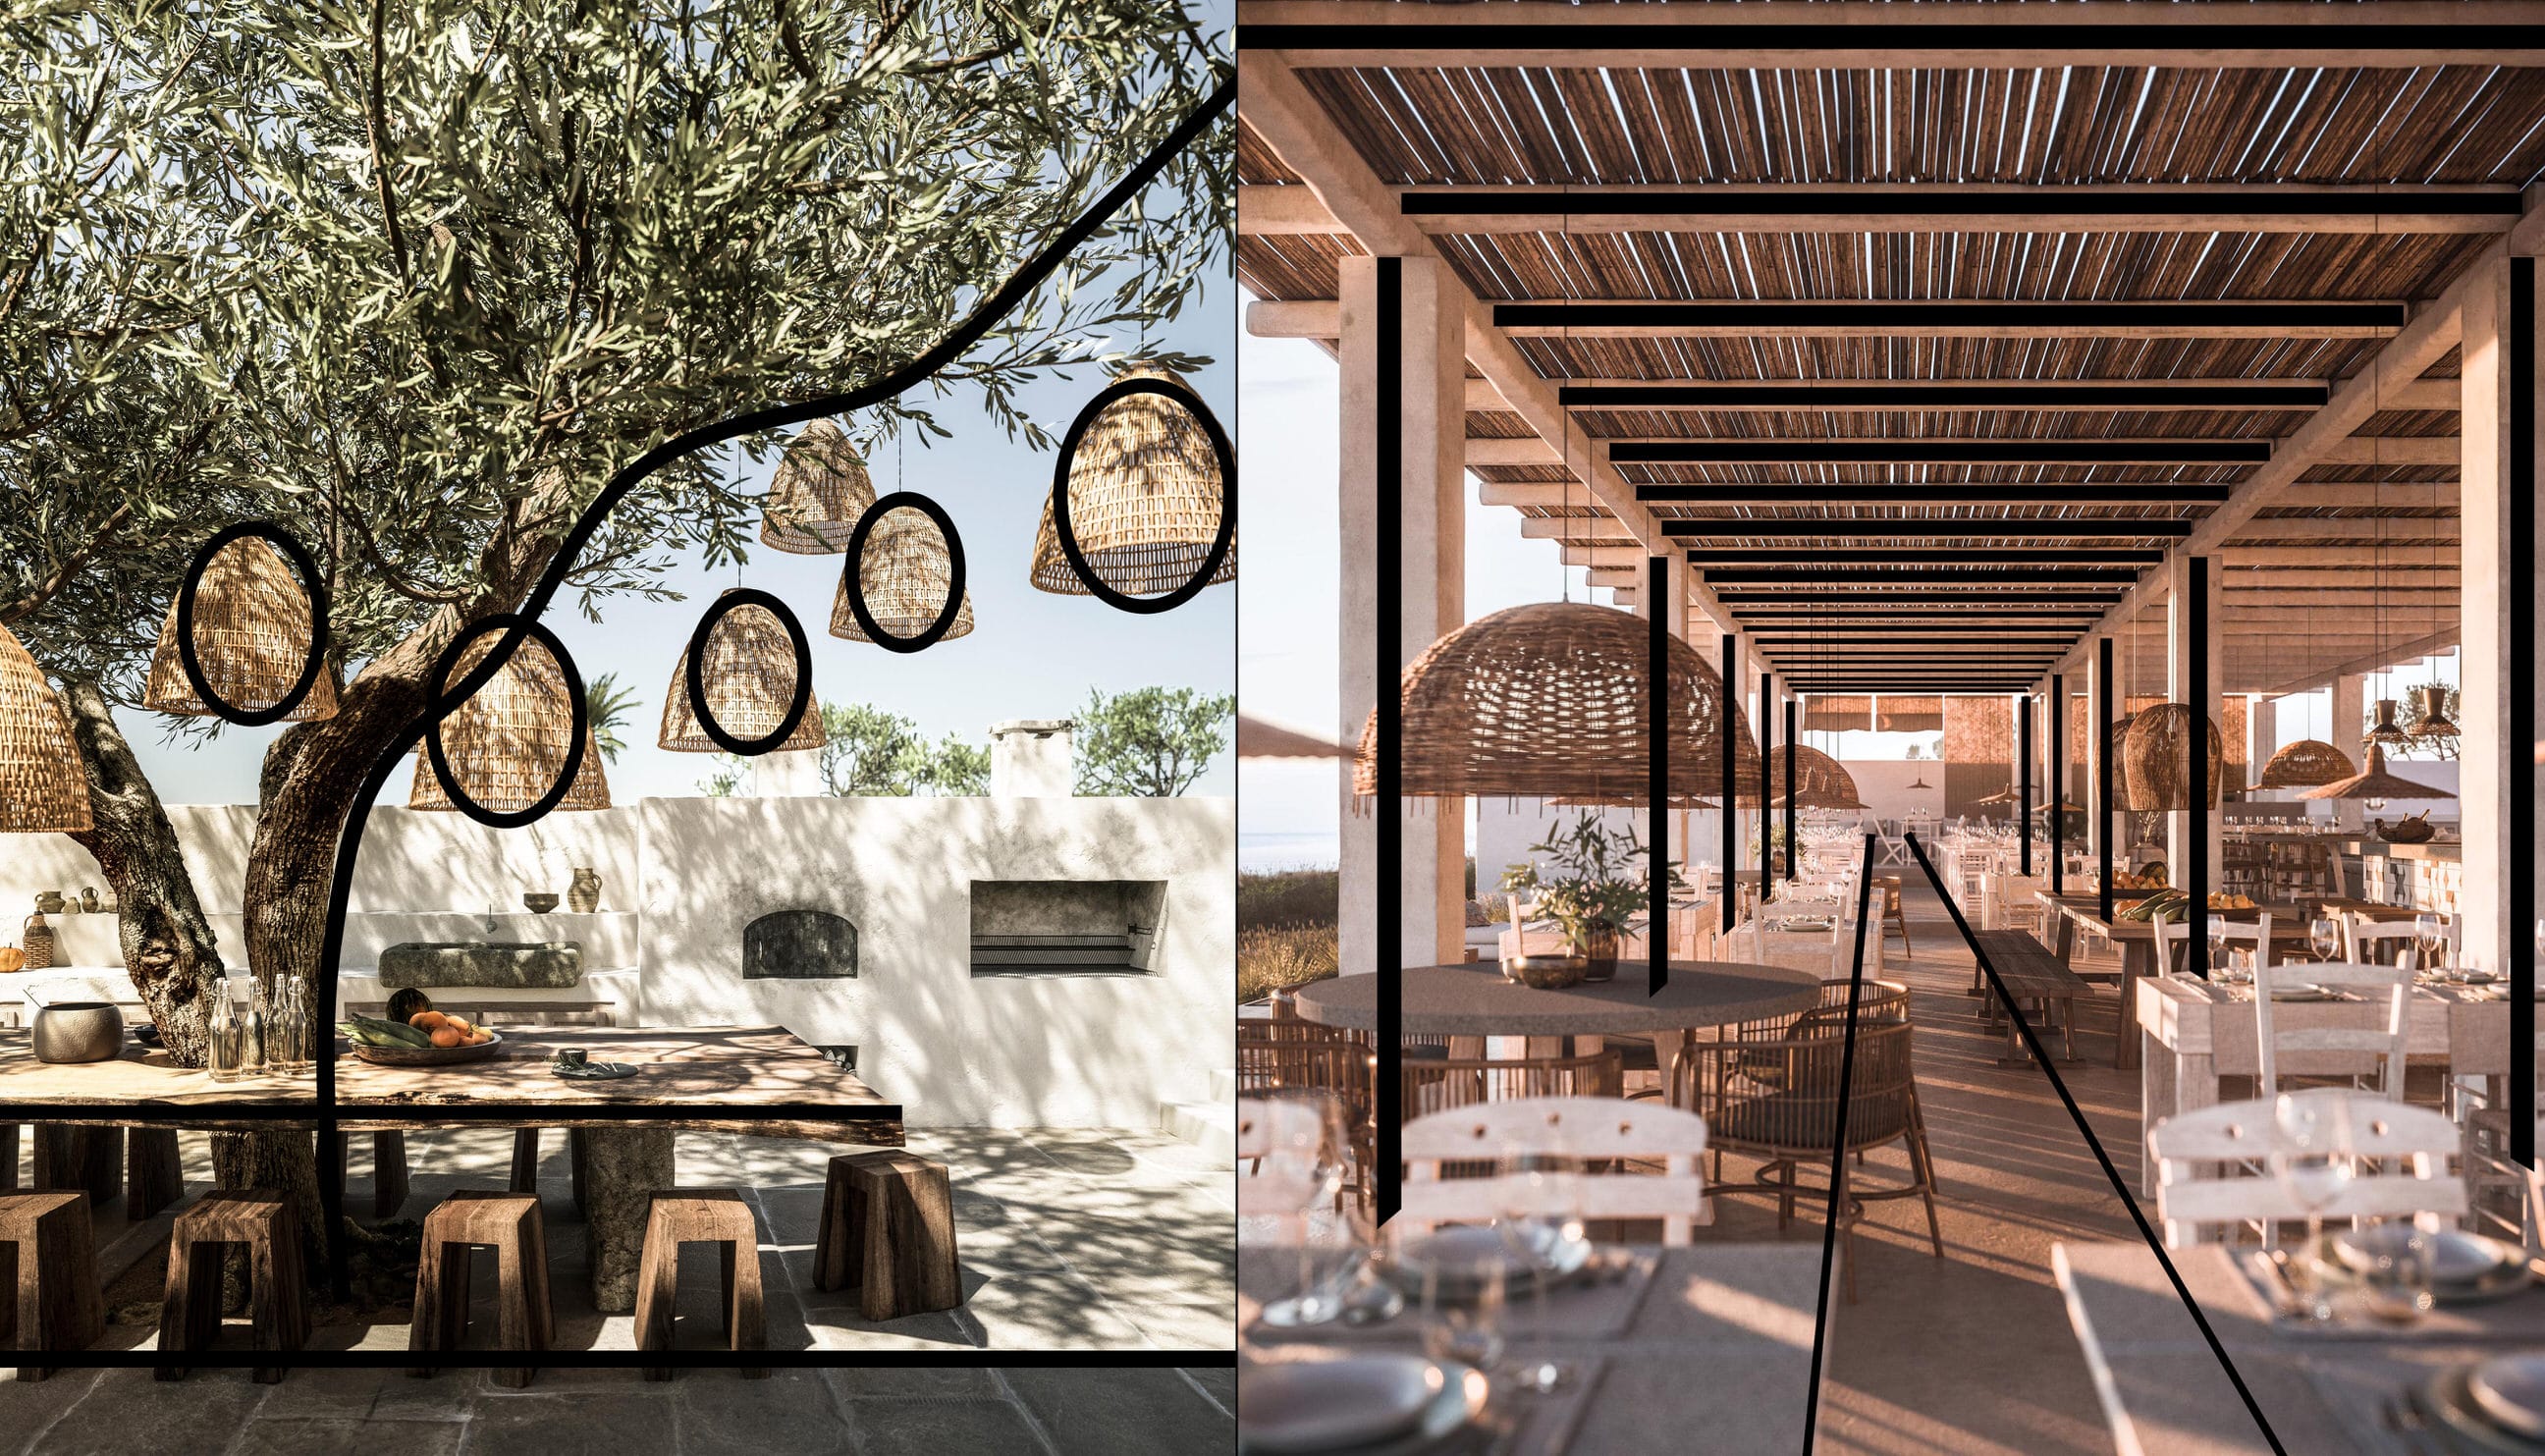
Camera Angles & Composition
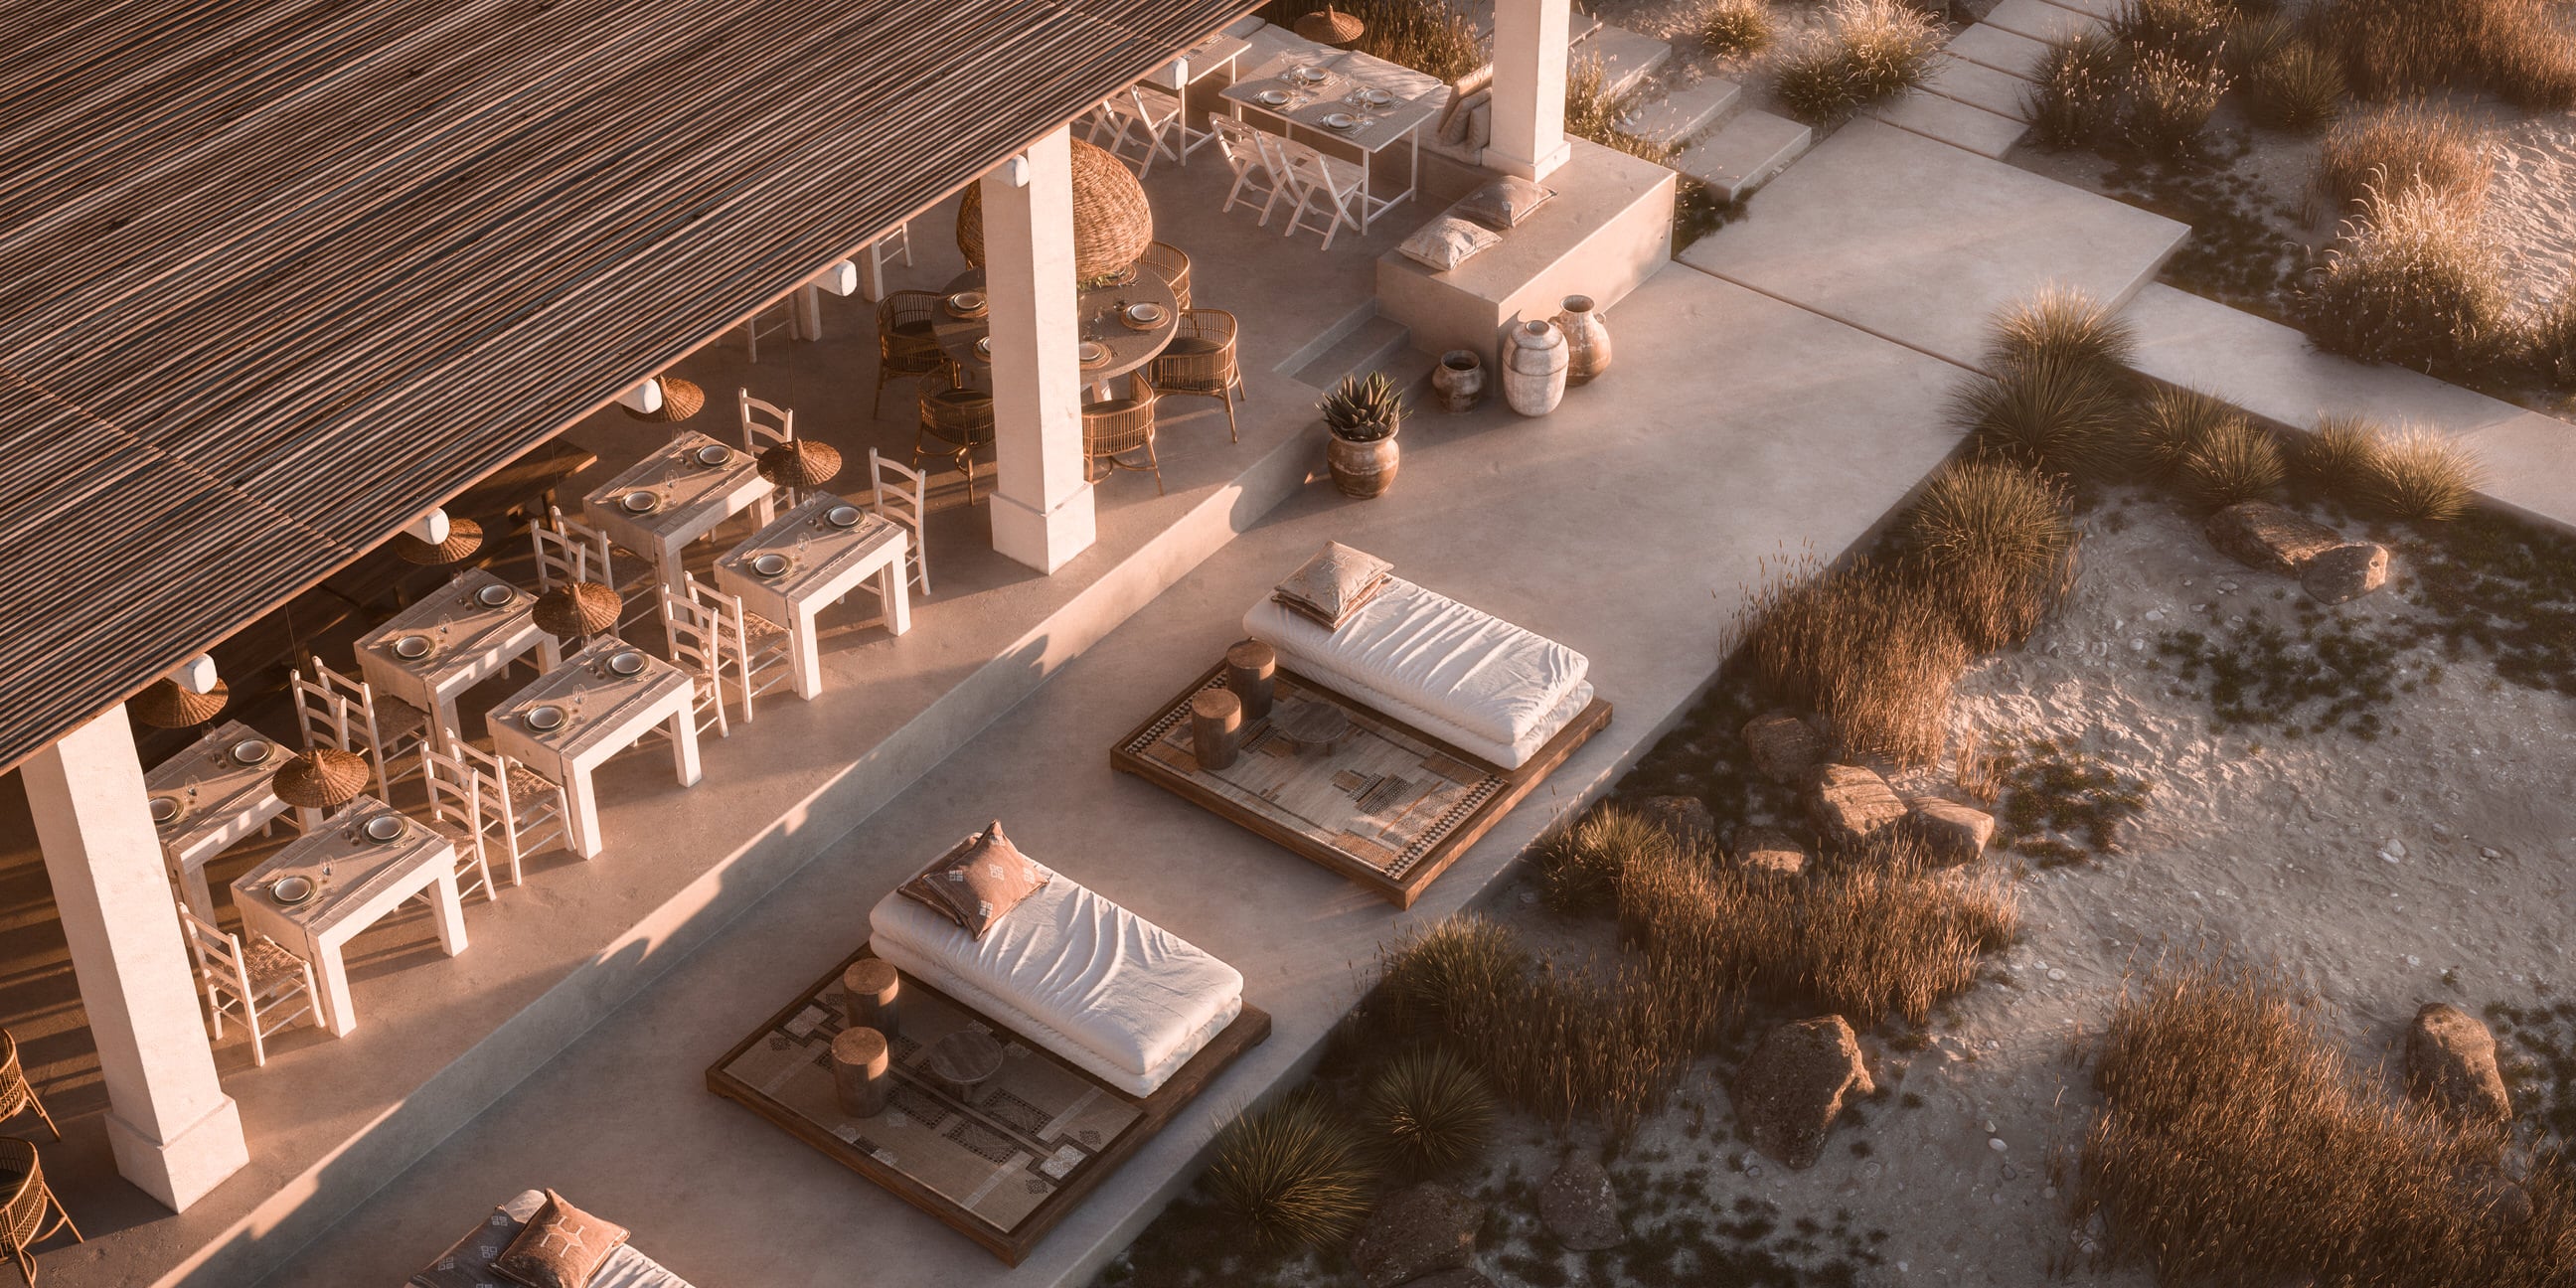
Our efforts were focused on creating a cozy atmosphere through the views, presenting the project little by little, and avoiding super wide angles.
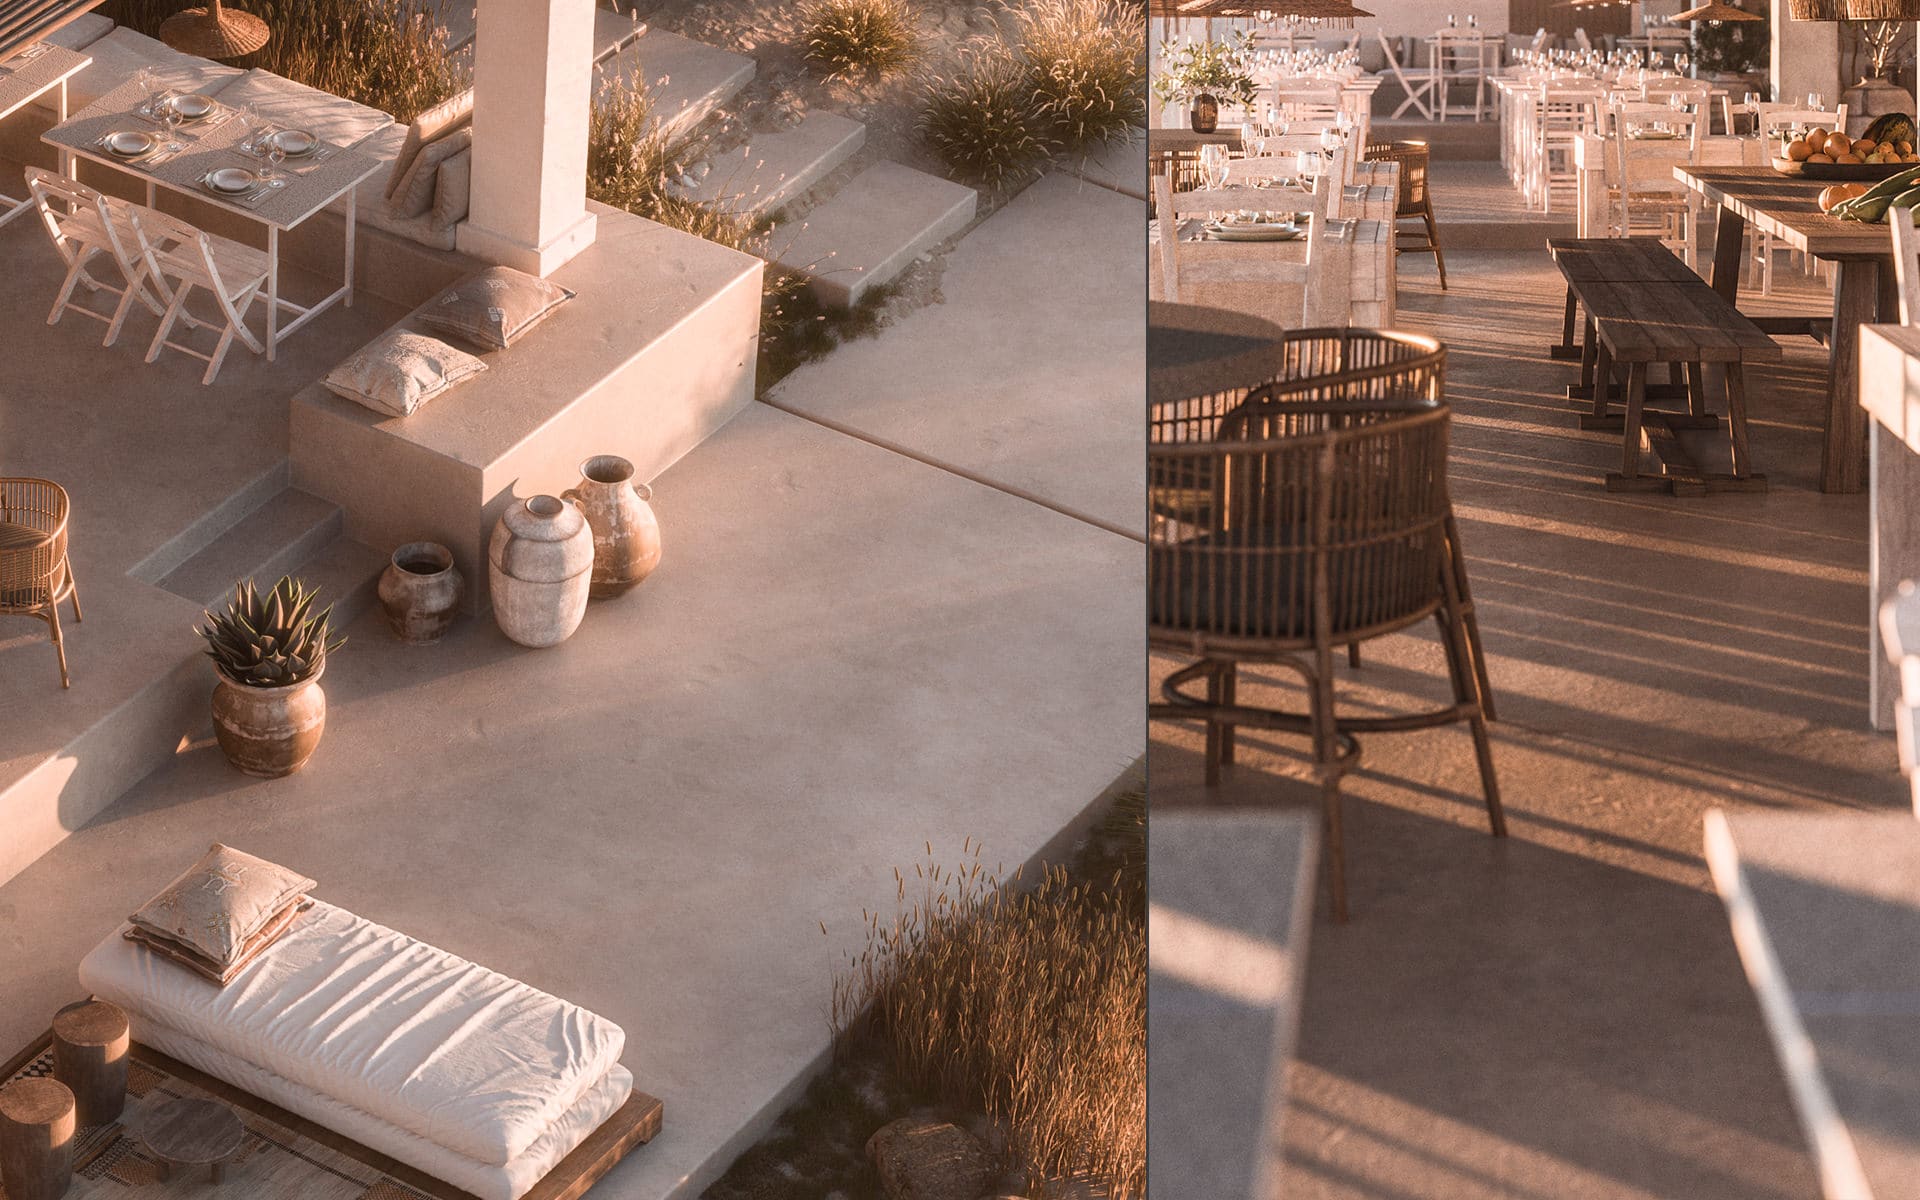
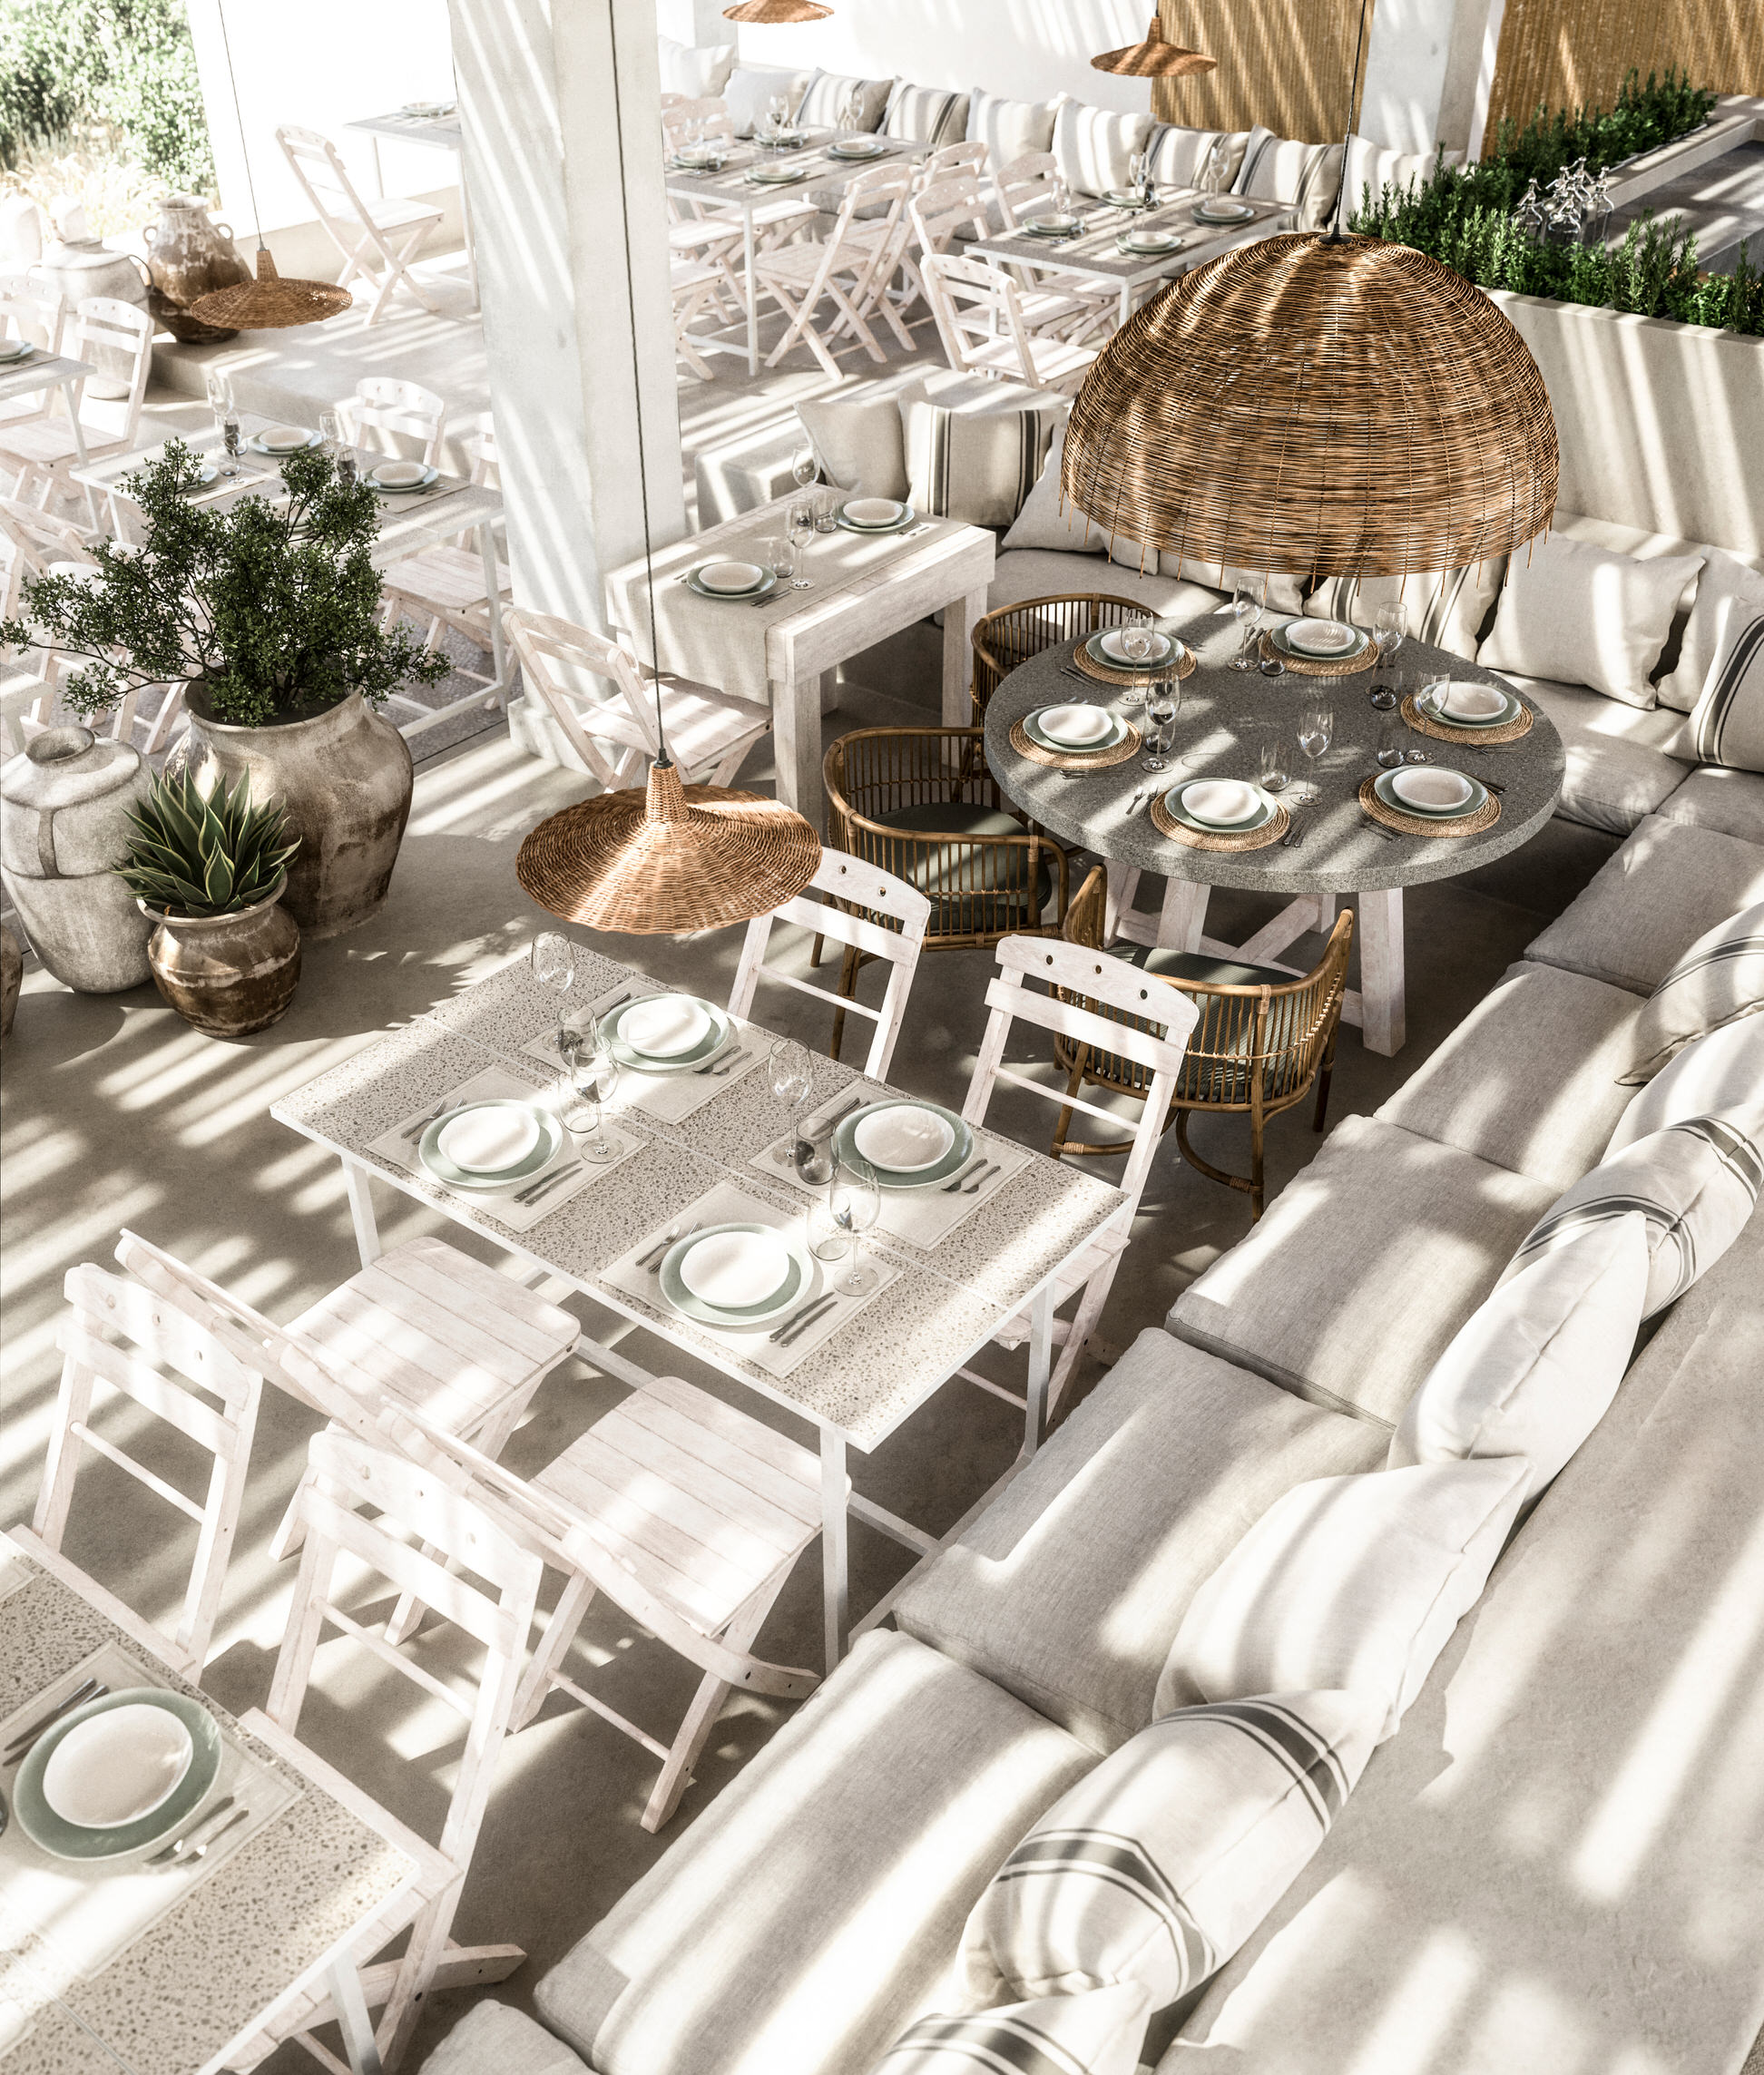
We tried to present the soft lounge seating corners, the quiet spots under arcs, the energized cooking course area, the calm wedding space, the relaxing beach sunbeds, etc.
Finding these moments was our main aim when looking for successful angles and compositions.
Stage 1 previews, first-time clients saw the proposed images
[av_masonry_gallery ids=’126019,125988,125987,125986′ items=’-1′ columns=’flexible’ paginate=’pagination’ size=’flex’ gap=’large’ overlay_fx=” container_links=’active’ id=” caption_elements=’none’ caption_styling=” caption_display=’always’ color=” custom_bg=”]The visual structure of the images was not based on strict composition rules, but rather following our “gut” feeling. Some images might seem to follow some specific rules. However, we tried not to force it and to stay natural.
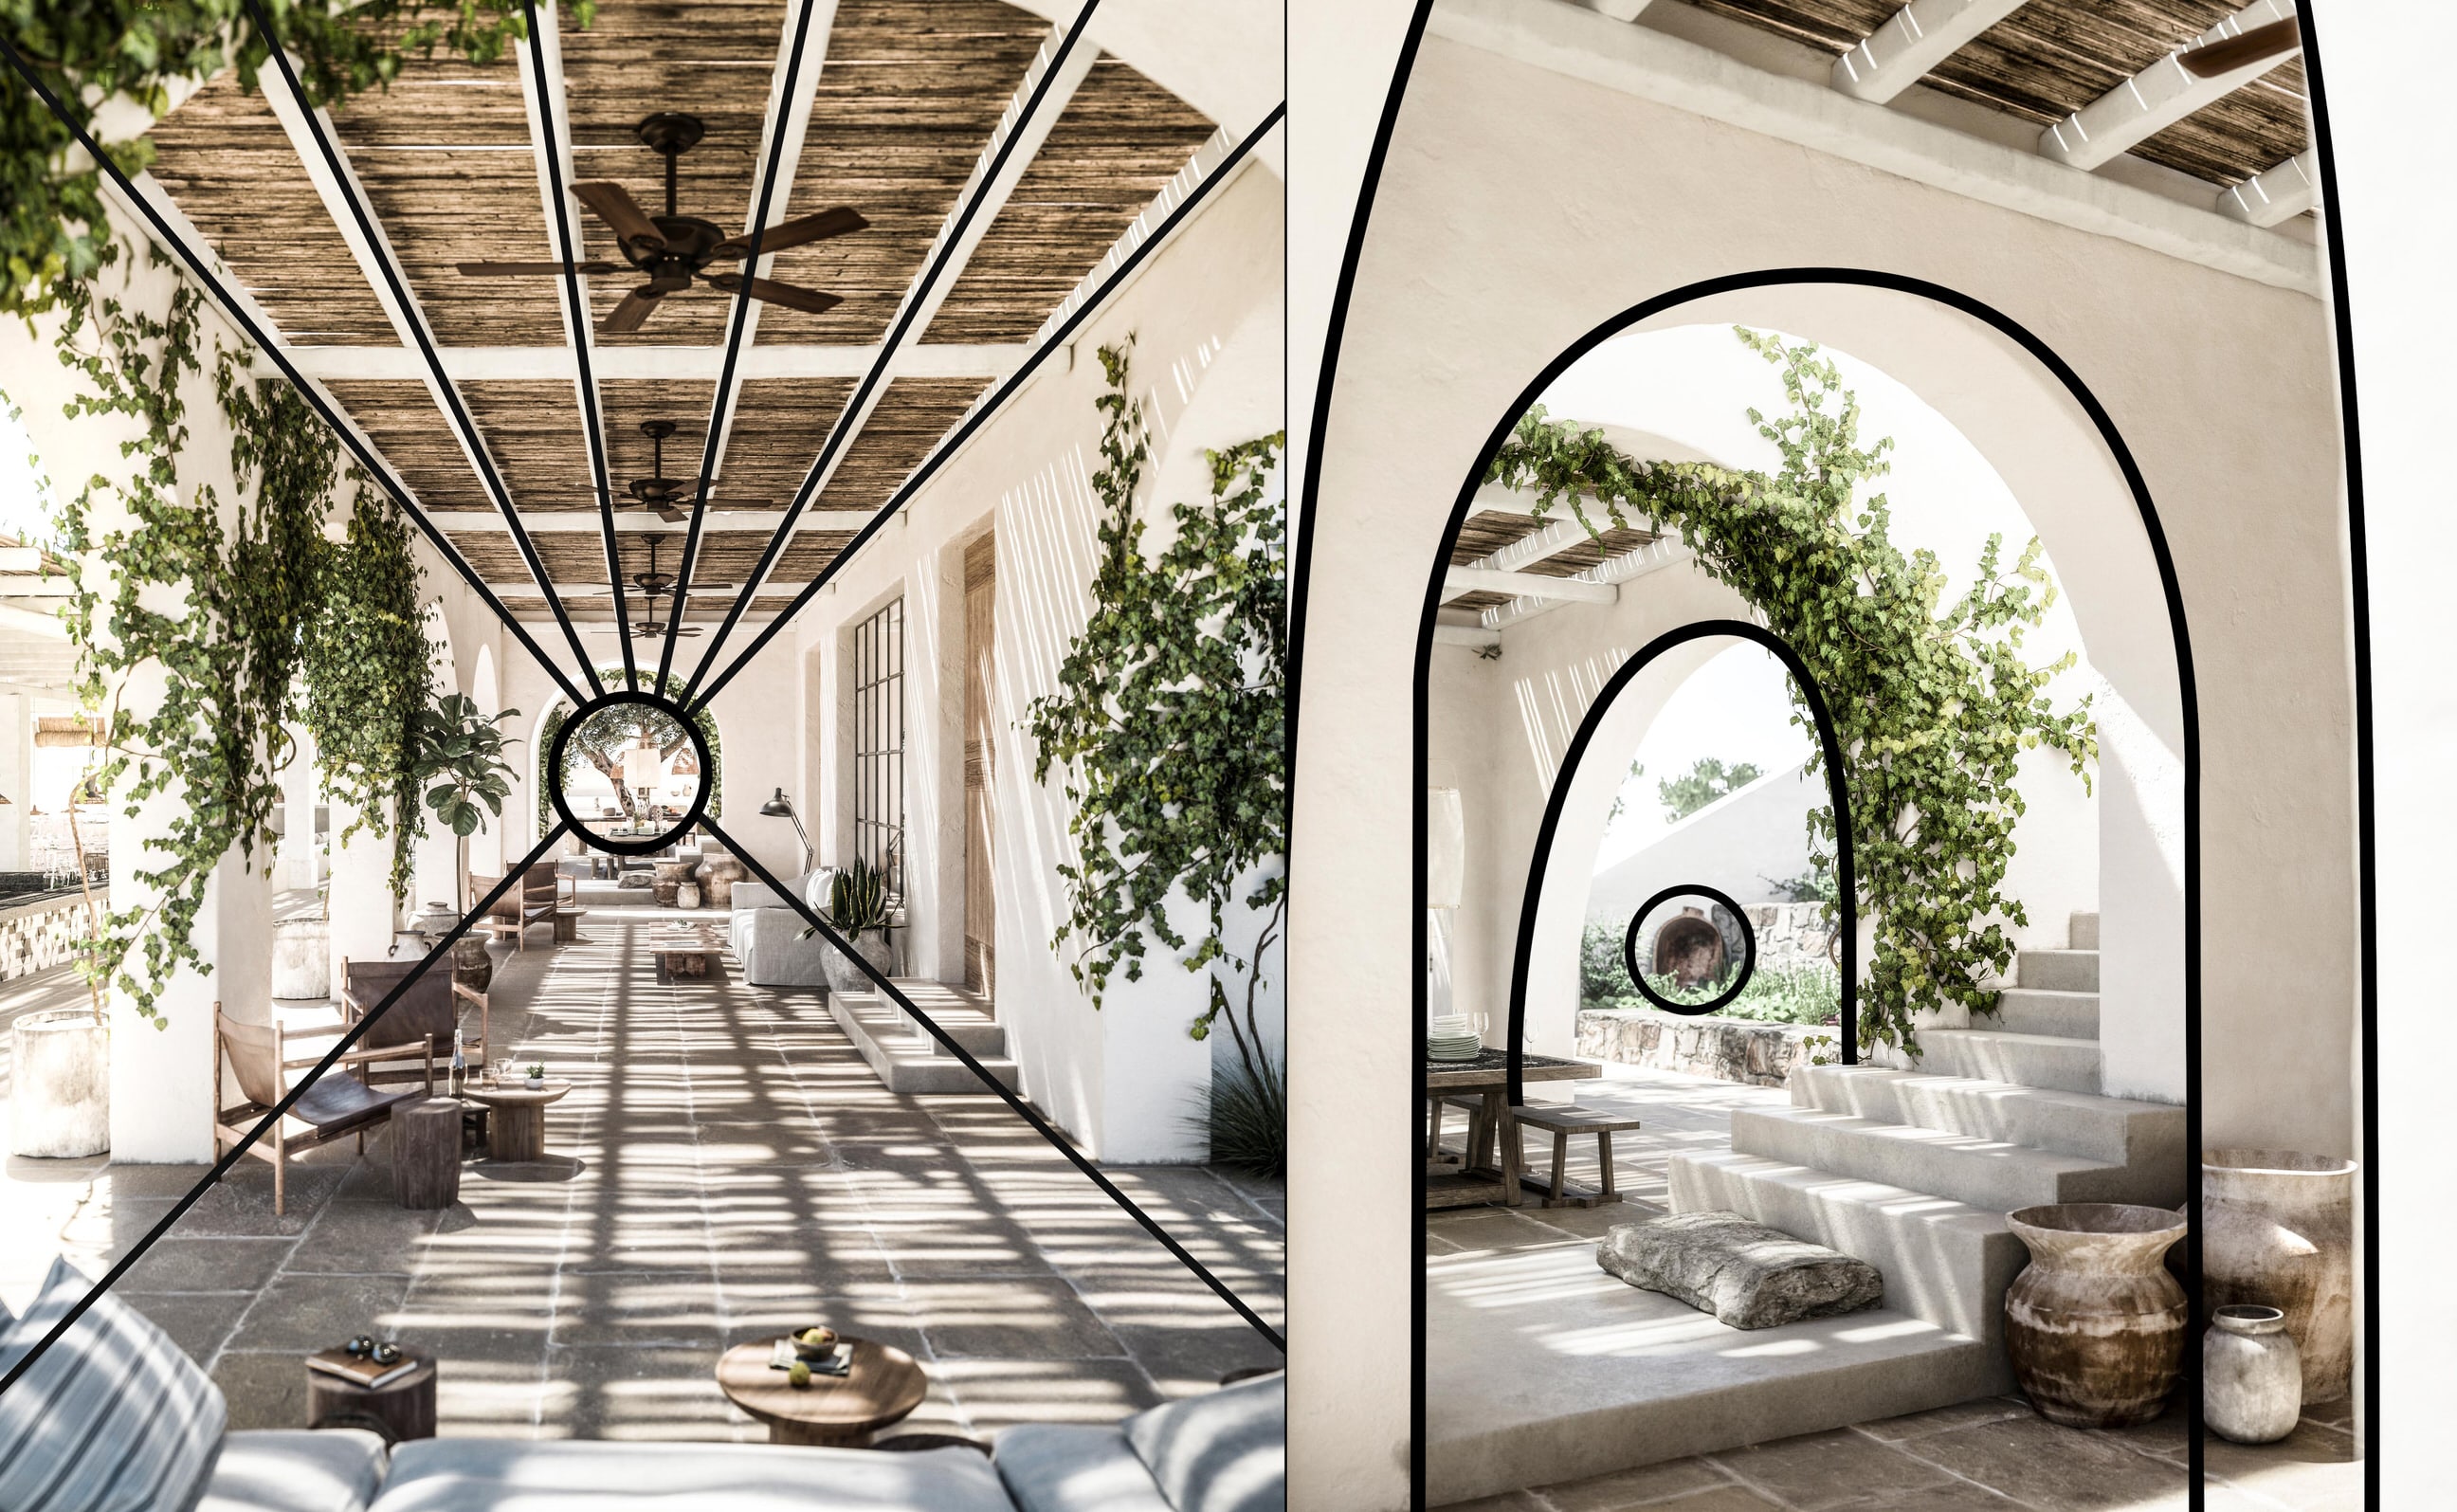
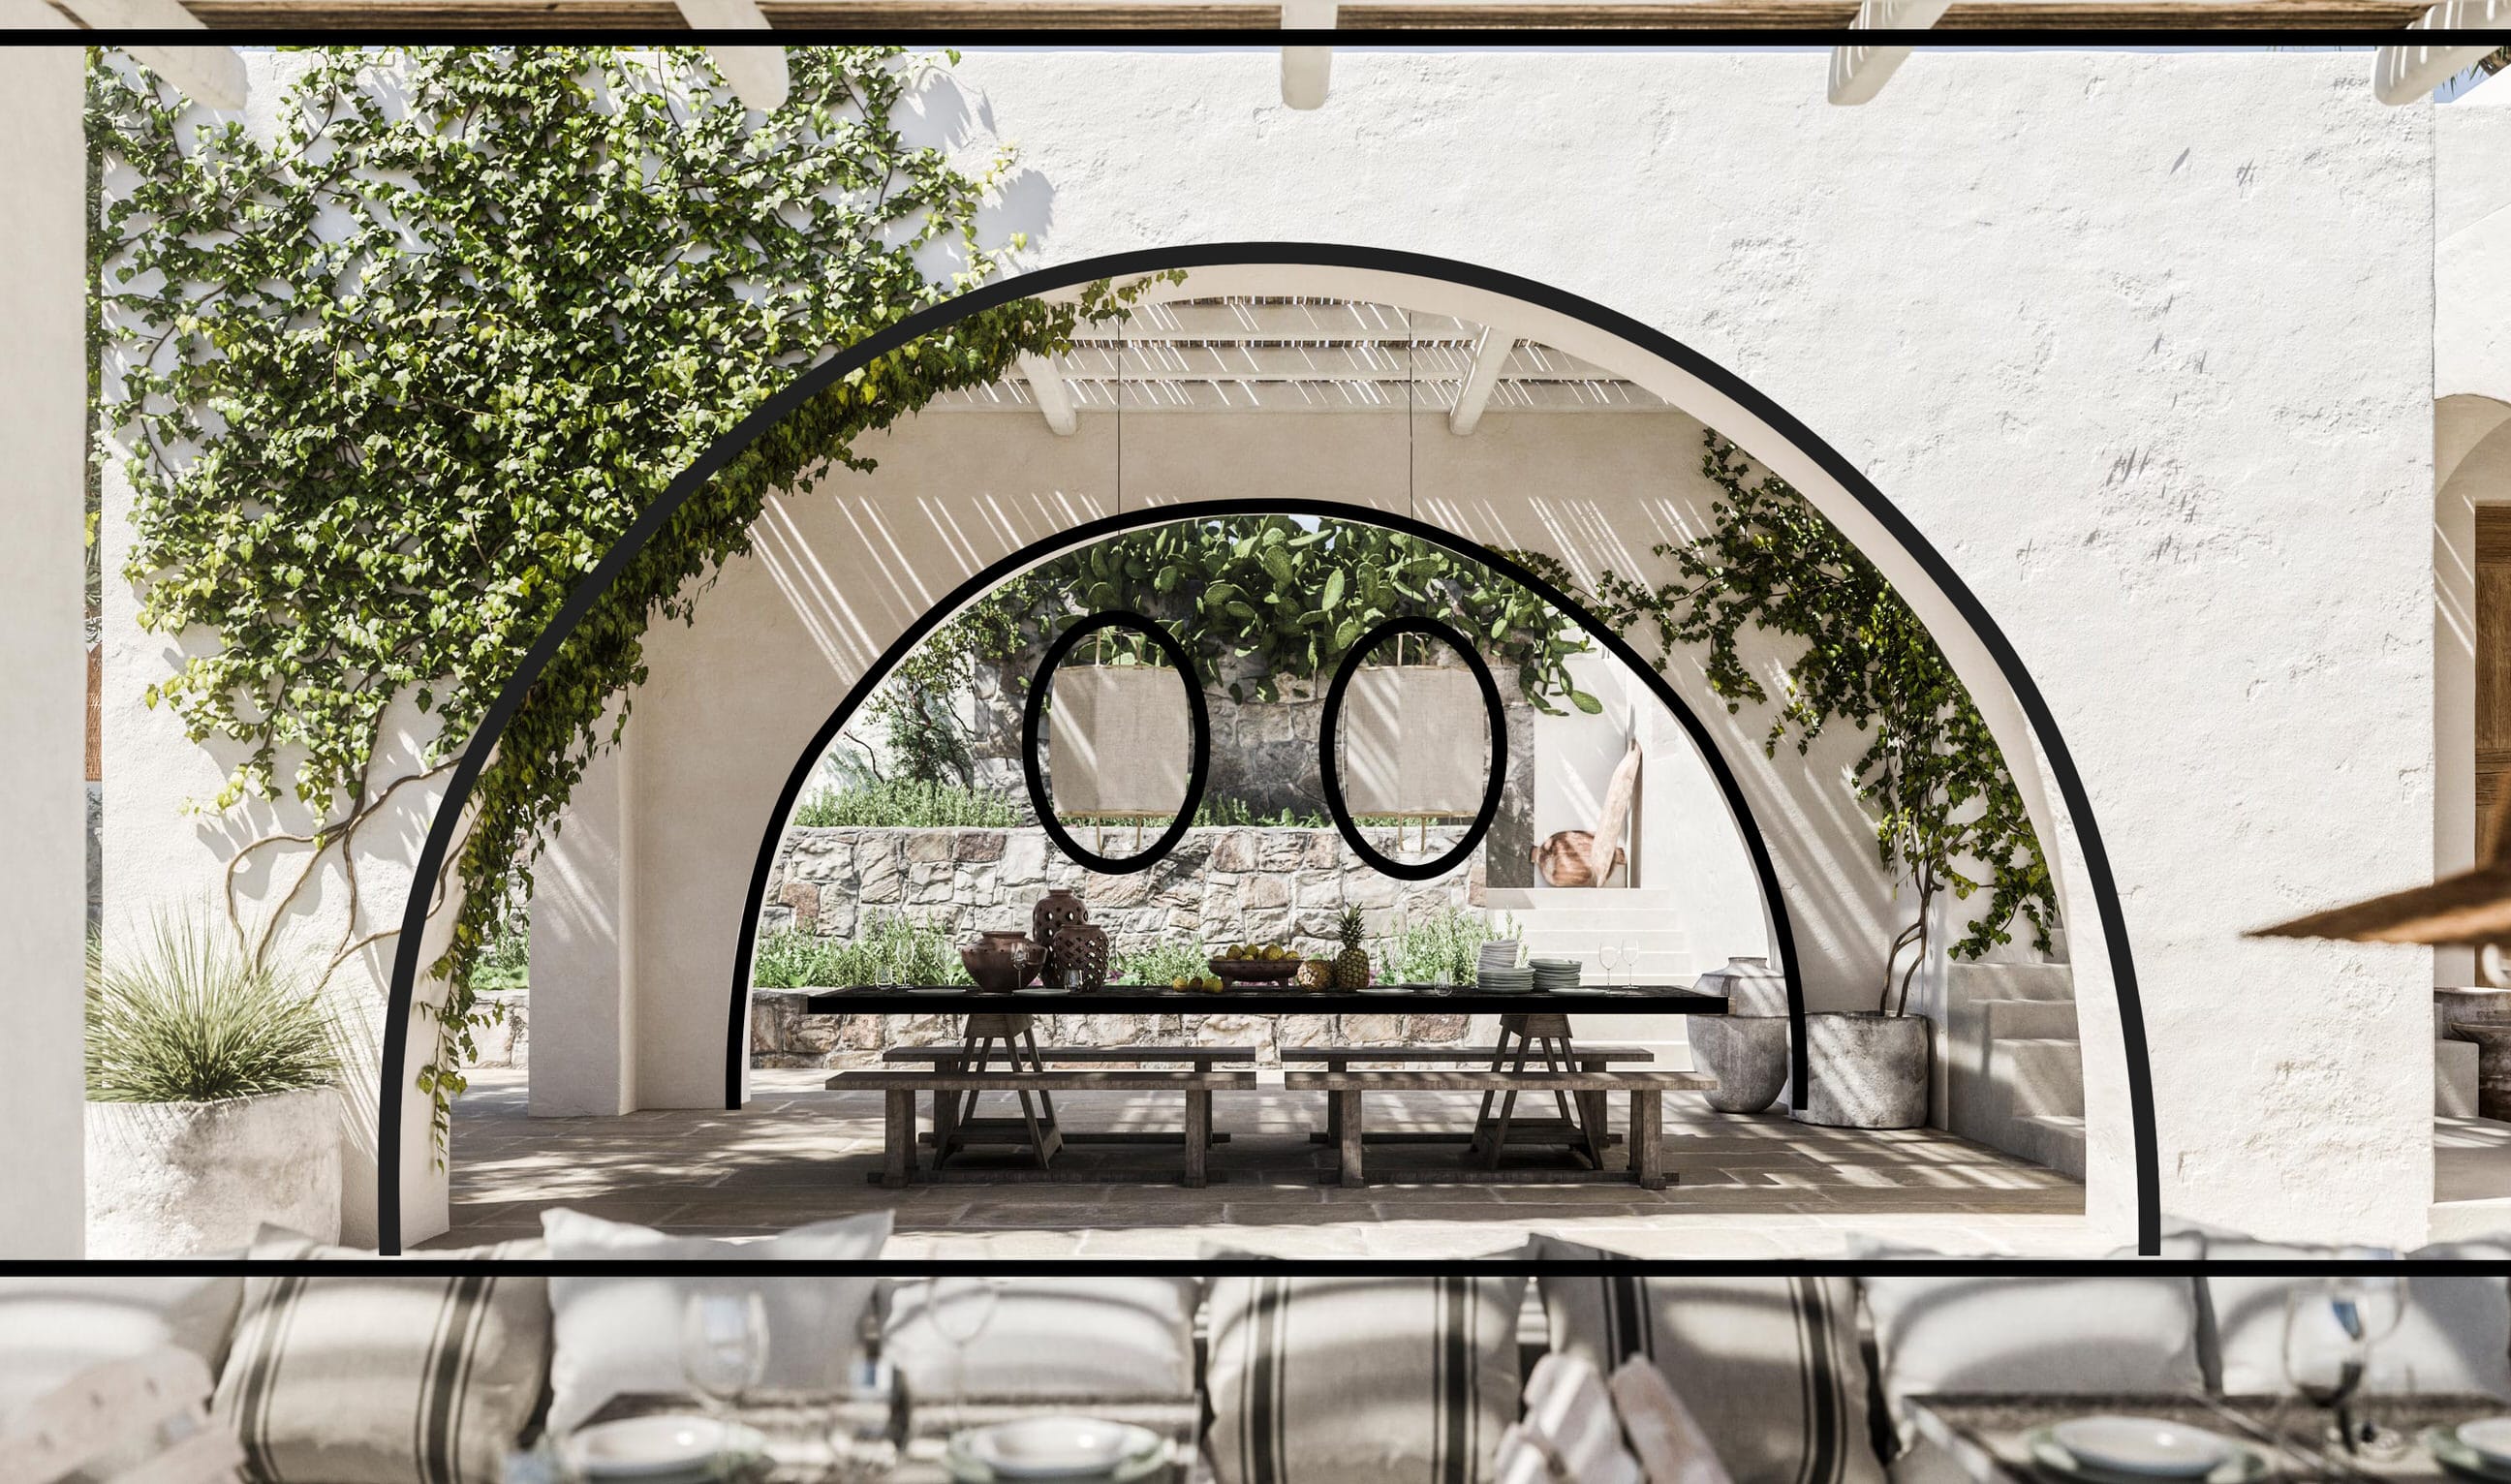
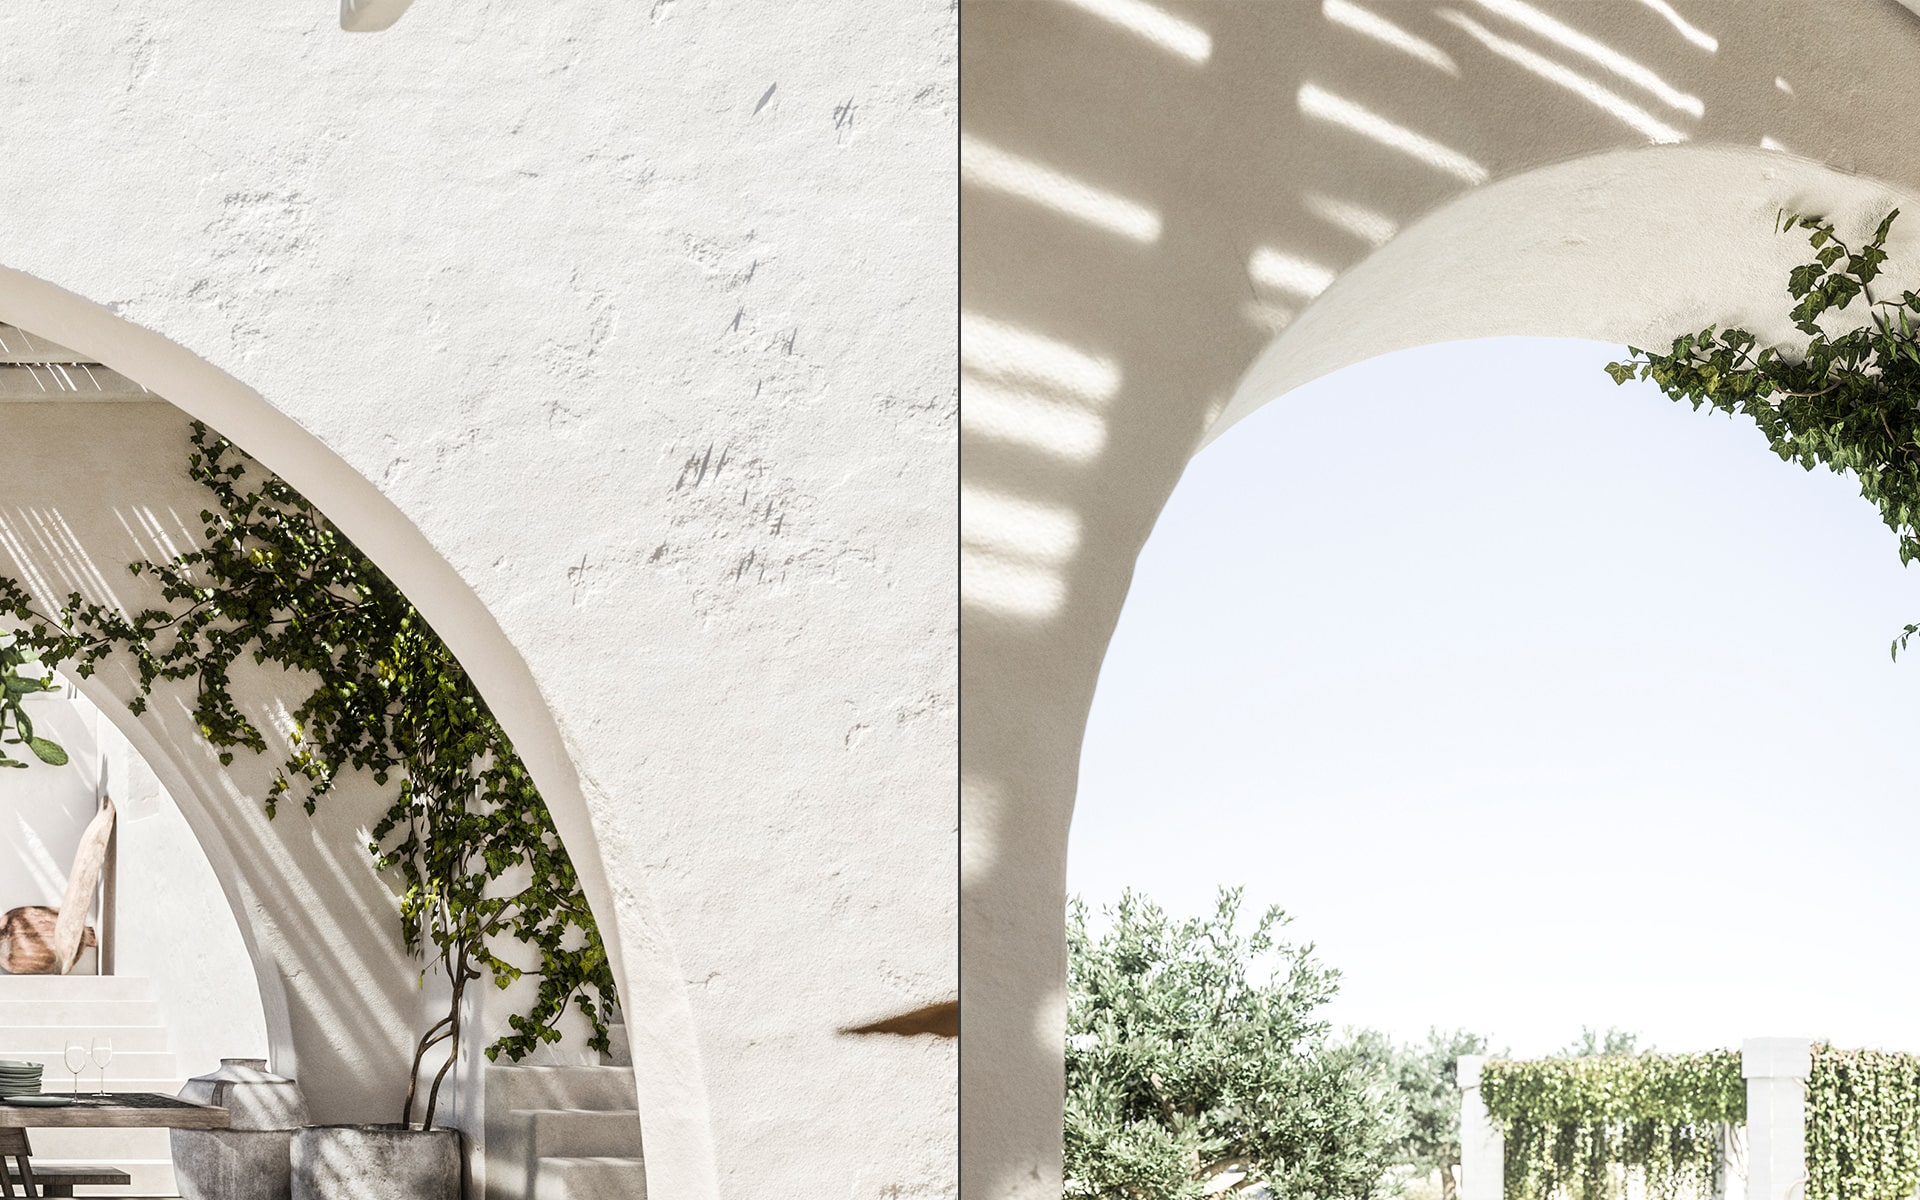
The architecture is quite clean and straightforward, so we focused on the shadow forms and frames made out of straight forward geometrical shapes. The arcs shapes were perfect for achieving this, and the many trellises and canopies helped as well.
Basic composition breakdown over some final images
After this first stage, there were virtually no comments, and because of that, we could right away jump into the finalization of the selected images. The only complication was that the client decided to move forward with 16 images instead of 4, and this made the project much more demanding in terms of curation and mainly organization.
Lighting Setup along with Post-Production
After establishing the final views, we wanted to emphasize the moods with a stronger “punch,” so we split the images into several groups and defined individual atmospheres within those.
The process was mainly finding and balancing a matching HDRi and taking the render straight to Lightroom for the final grading test.
At this stage, we wanted to be sure that the second time we will show the images to the client, they will be at least 90% what they would see in the final result. So along with the light study, we swiftly did also post-processing and grading.
Breakdown of Sea view image, base in 3D and significant additions in post
Landscaping and Dining arc views, mostly 3D and enhancing with render passes
Wedding canopy, was a combination of massive 3D, replacing background and adding/enhancing lens effects in post
For this project, we used mainly HDRI’s from 3Dcollective and a couple more from CGsource.
In eventual final composites, the process was to go from linear raw render to Photoshop for correction and overlay some render passes, adding atmosphere and finally taking it to LR for final color grading.
3d Asset Creation & Texturing
Creating all the furniture and accessories was probably the most tedious part of the project. Of course, the light setup would be the most important one, but if the models of the assets that were one of the main contributors to the style were not executed right, we would not get the desired result from the images.
So obviously there was a lot of effort put into this.
For the decoration, we used any possible sources available mainly for the decorations and accessories from Bentanji to 3dsky, to TurboSquid, some Evermotion models too.
For the furniture, most of the assets we have prepared ourselves since we wanted to follow the references very carefully, and also we wanted to add our touch to them.
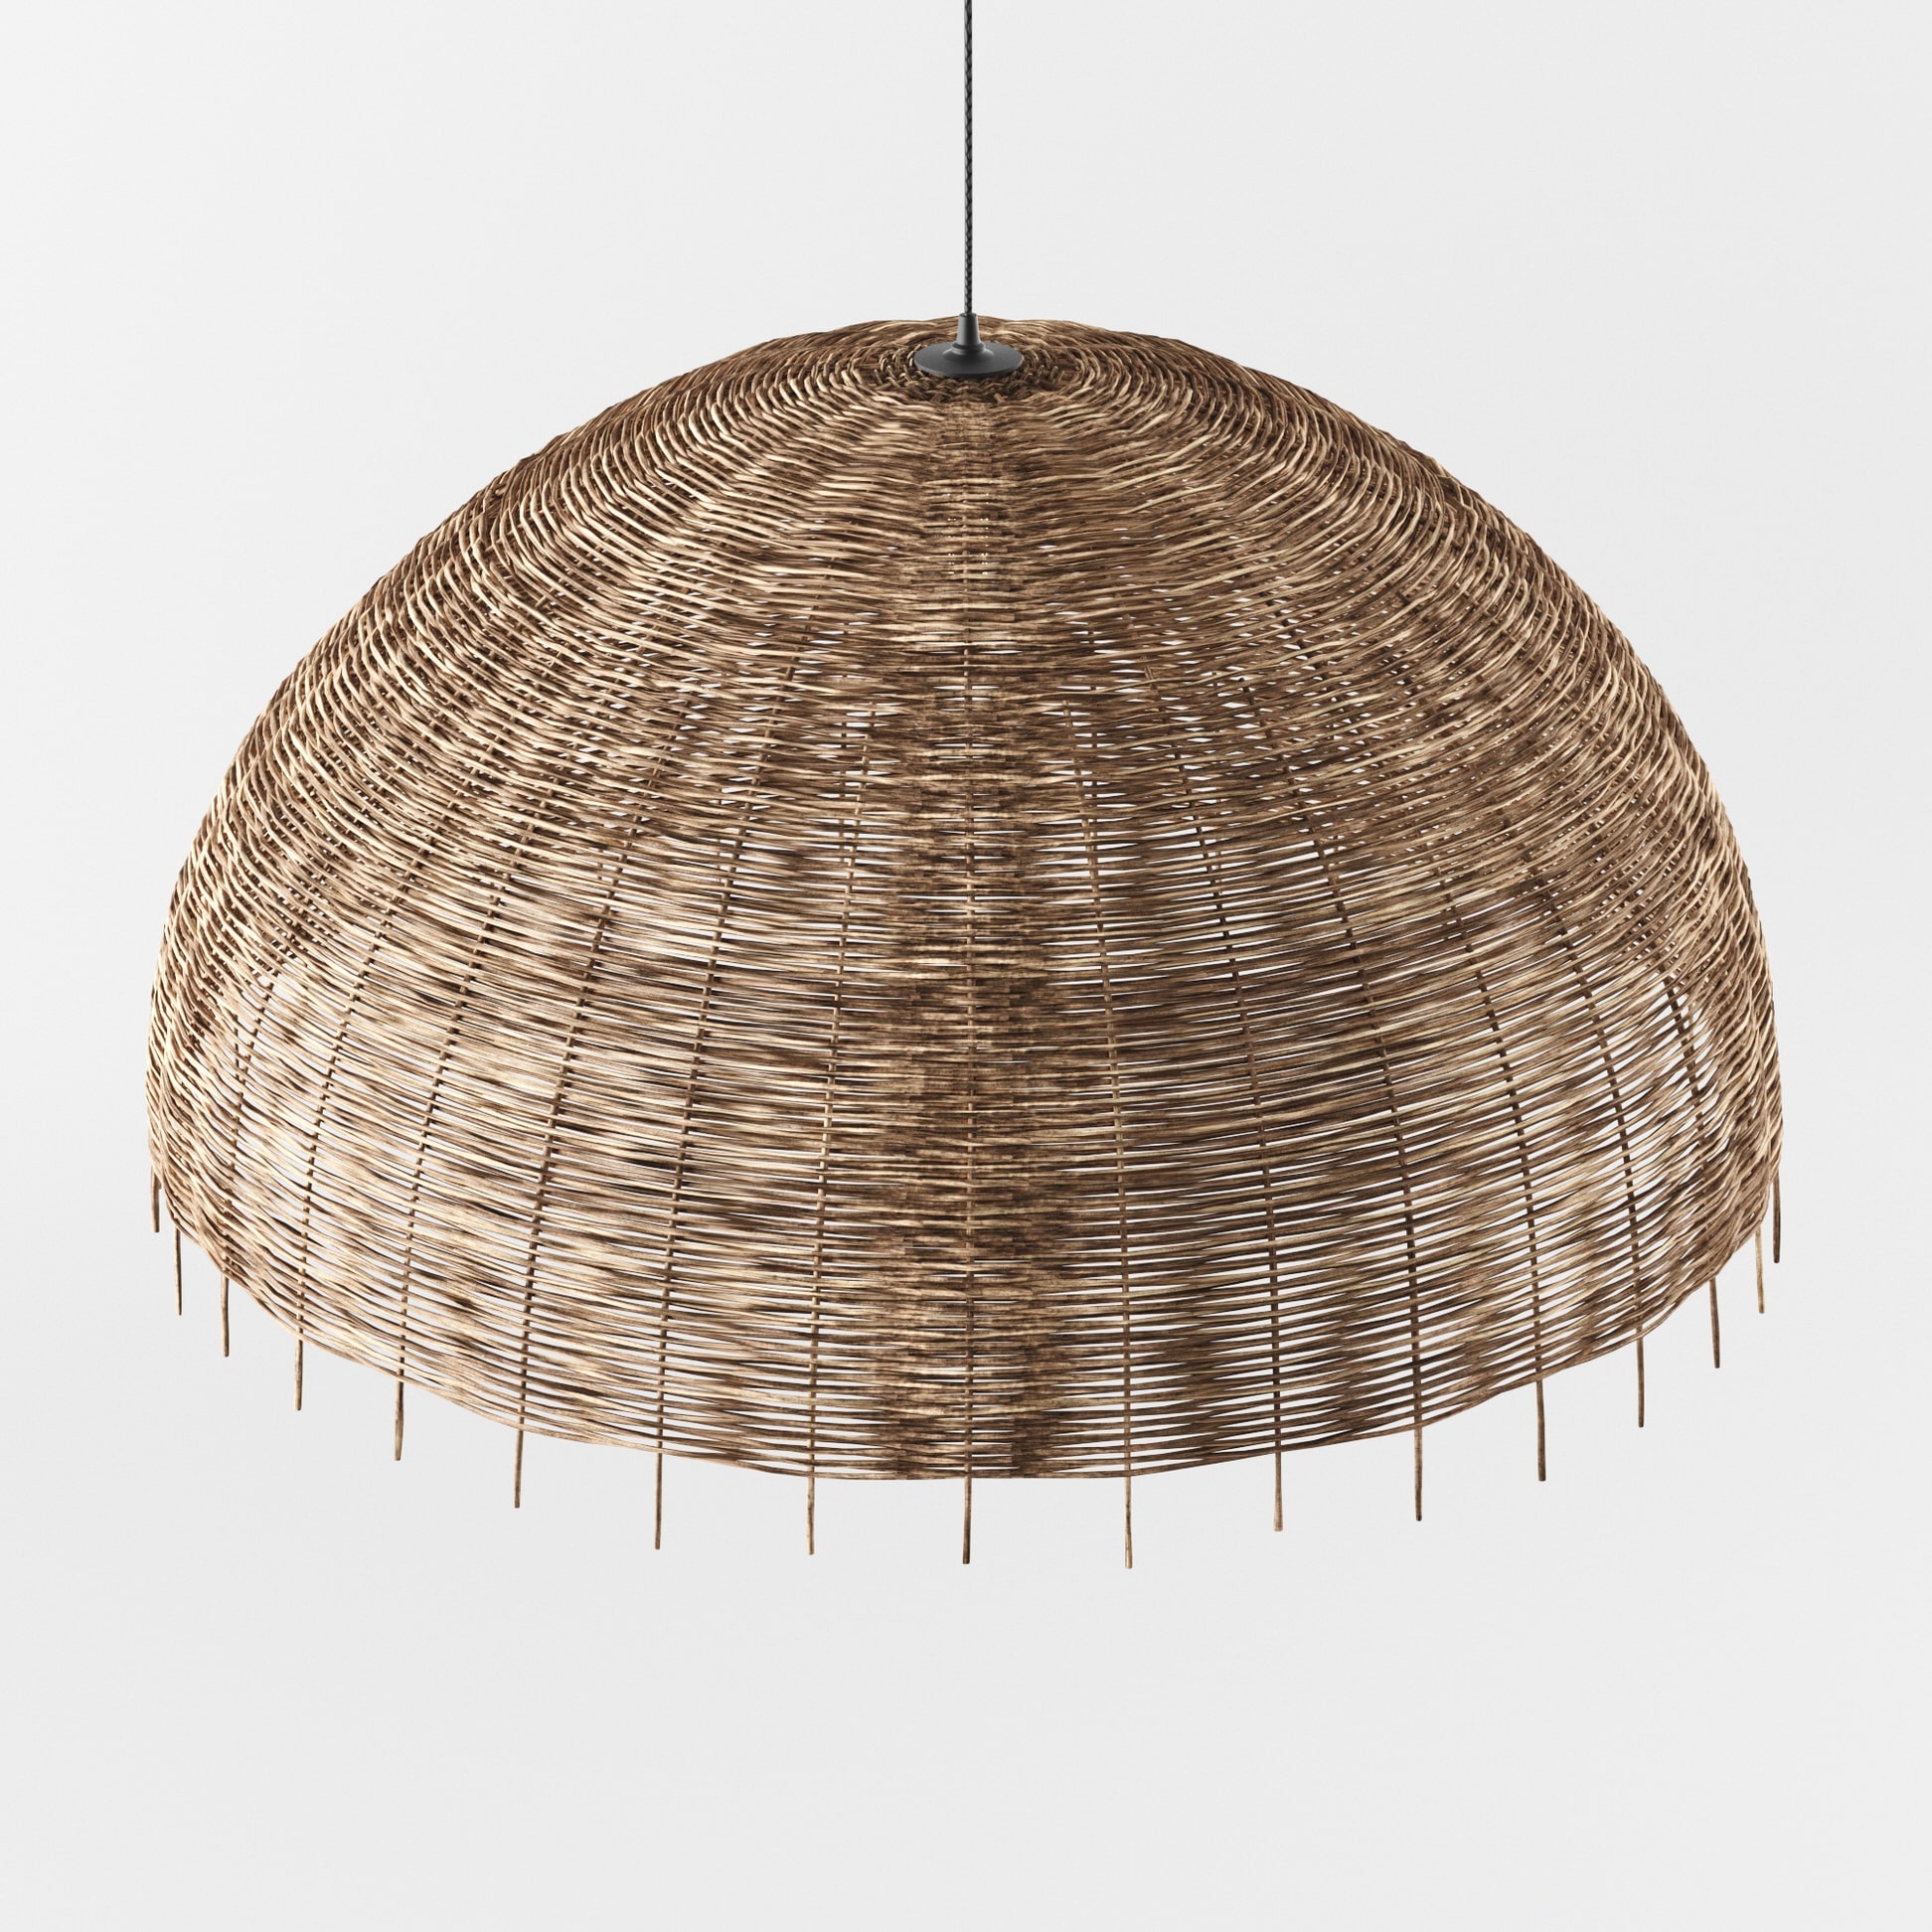
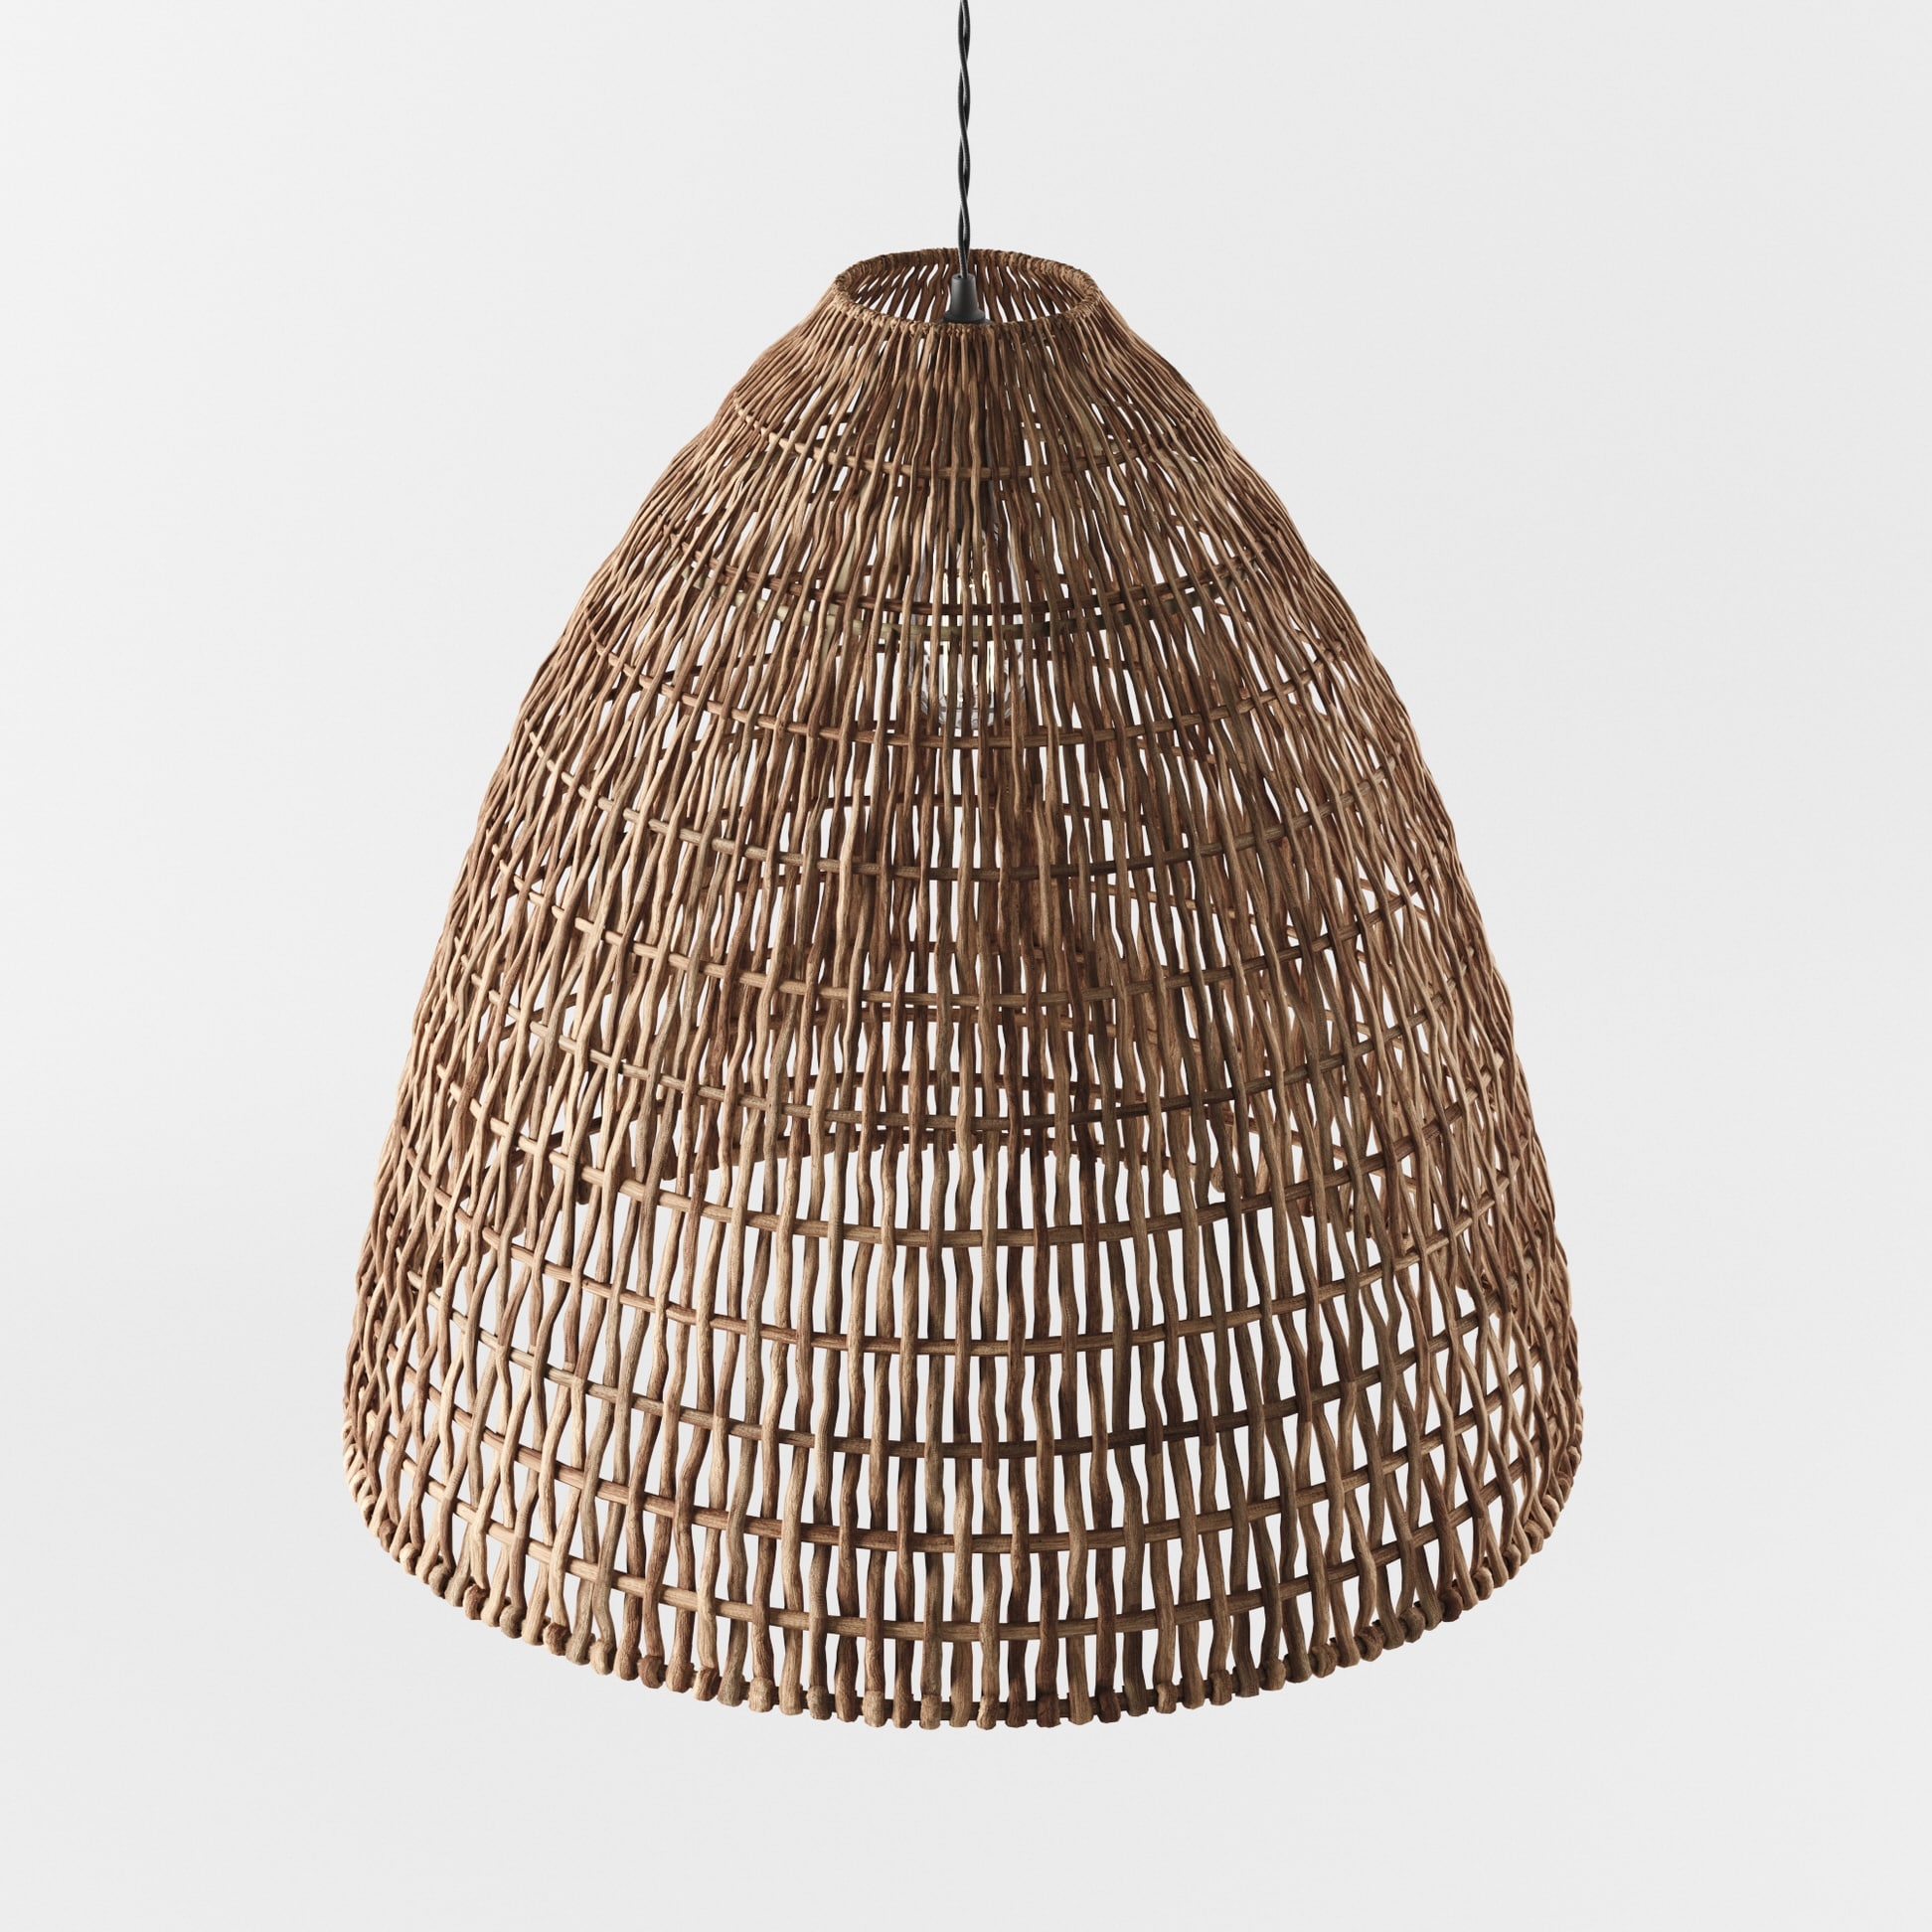
One model we find most interesting to take a closer look at is the wicker lamps. For the rest, we have some beautiful turntables.
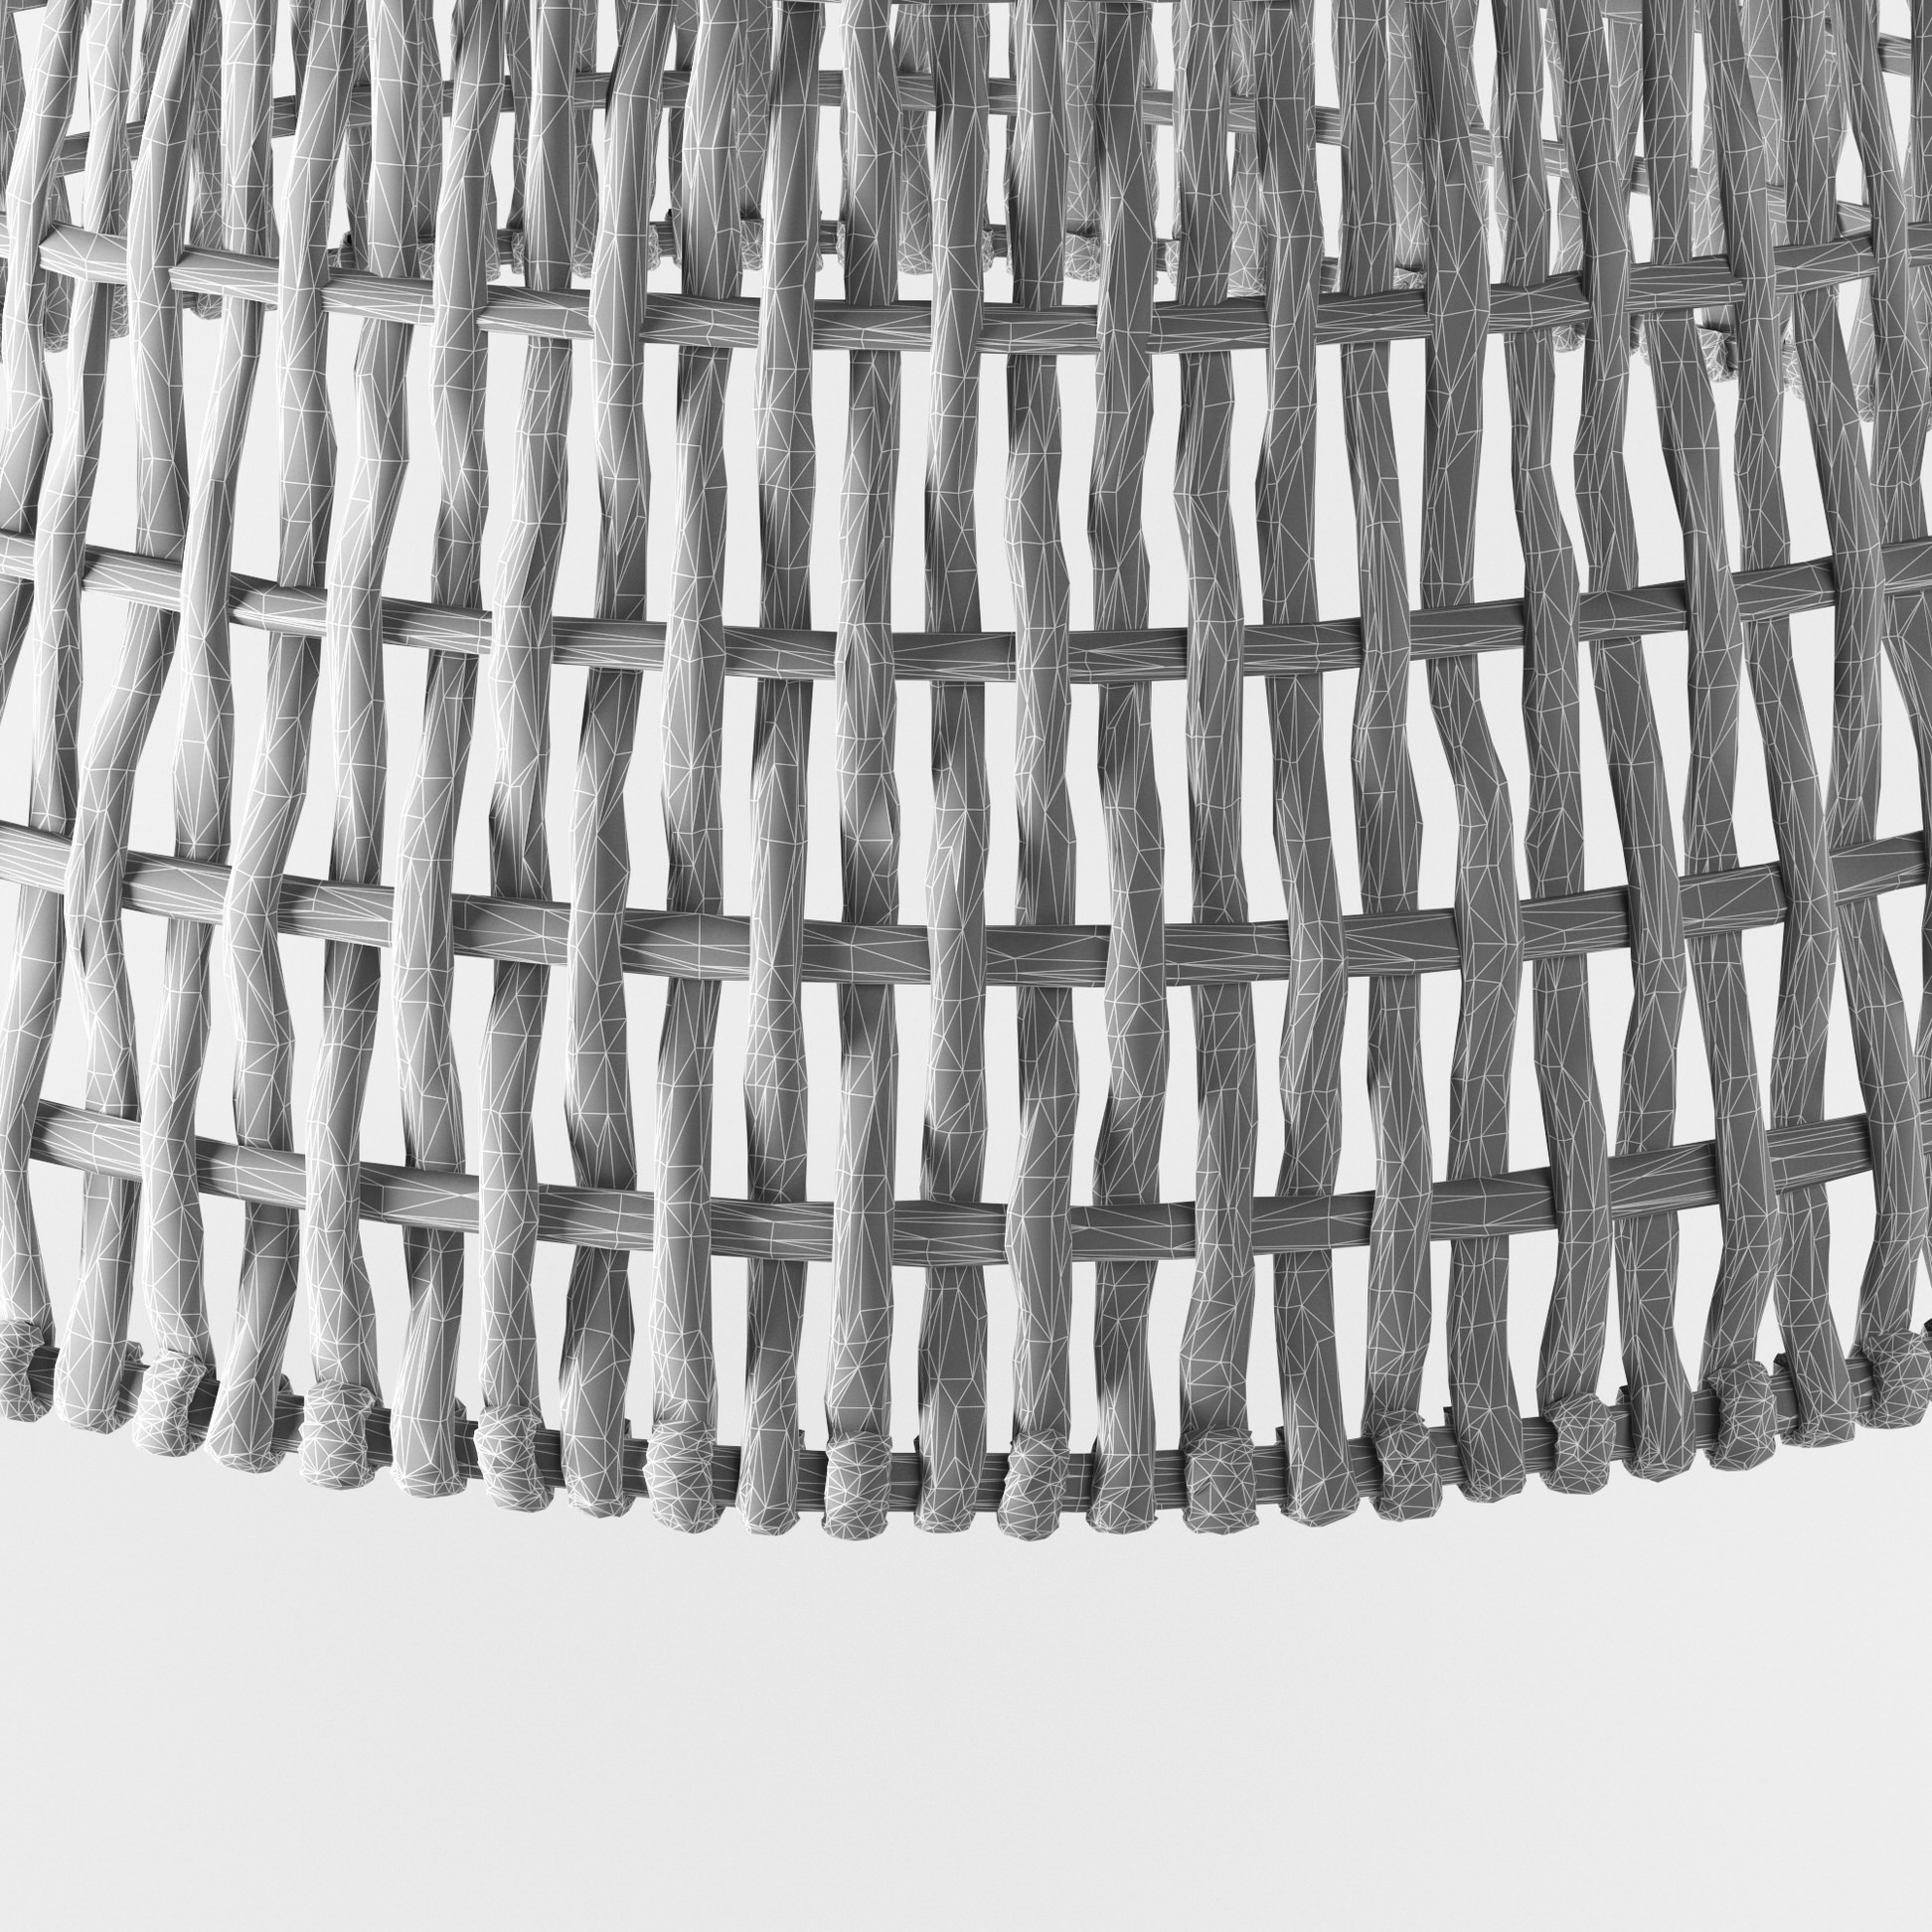
Most of these lamps were modeled by hand (by our colleague Zachos, bless his patience). After that, while texturing, we added additional noise modifiers, for a more branchy look.
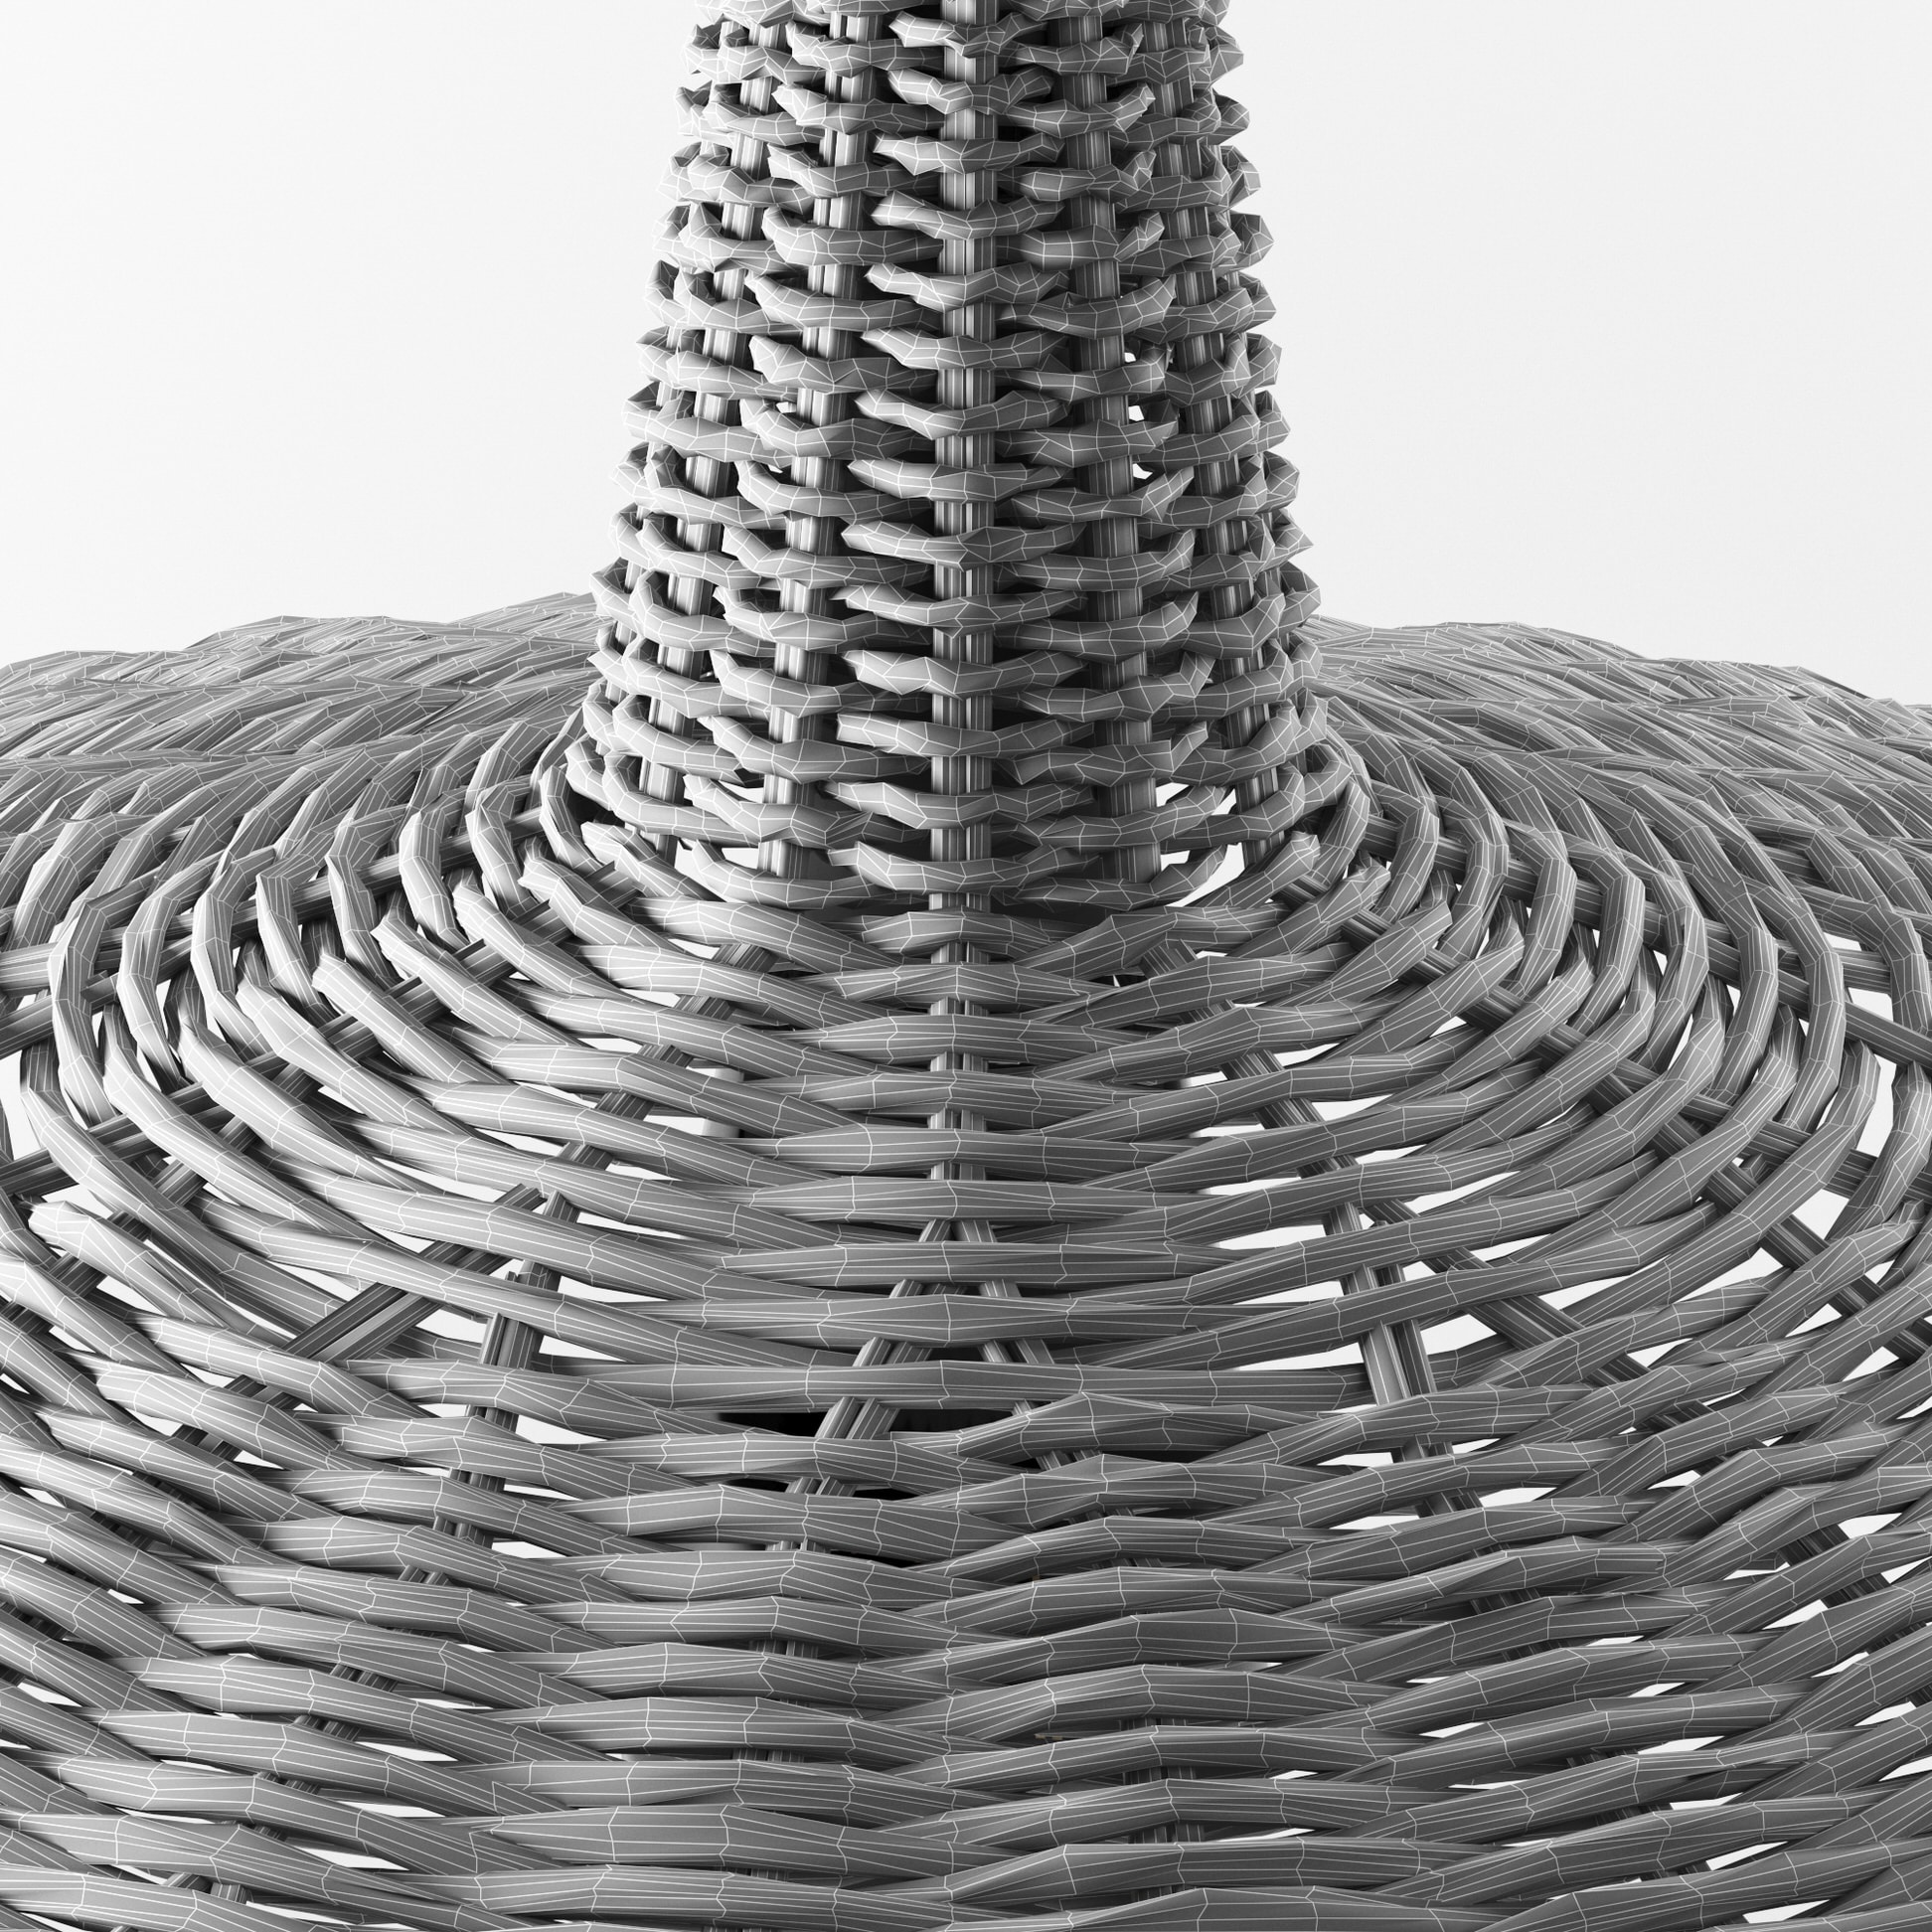
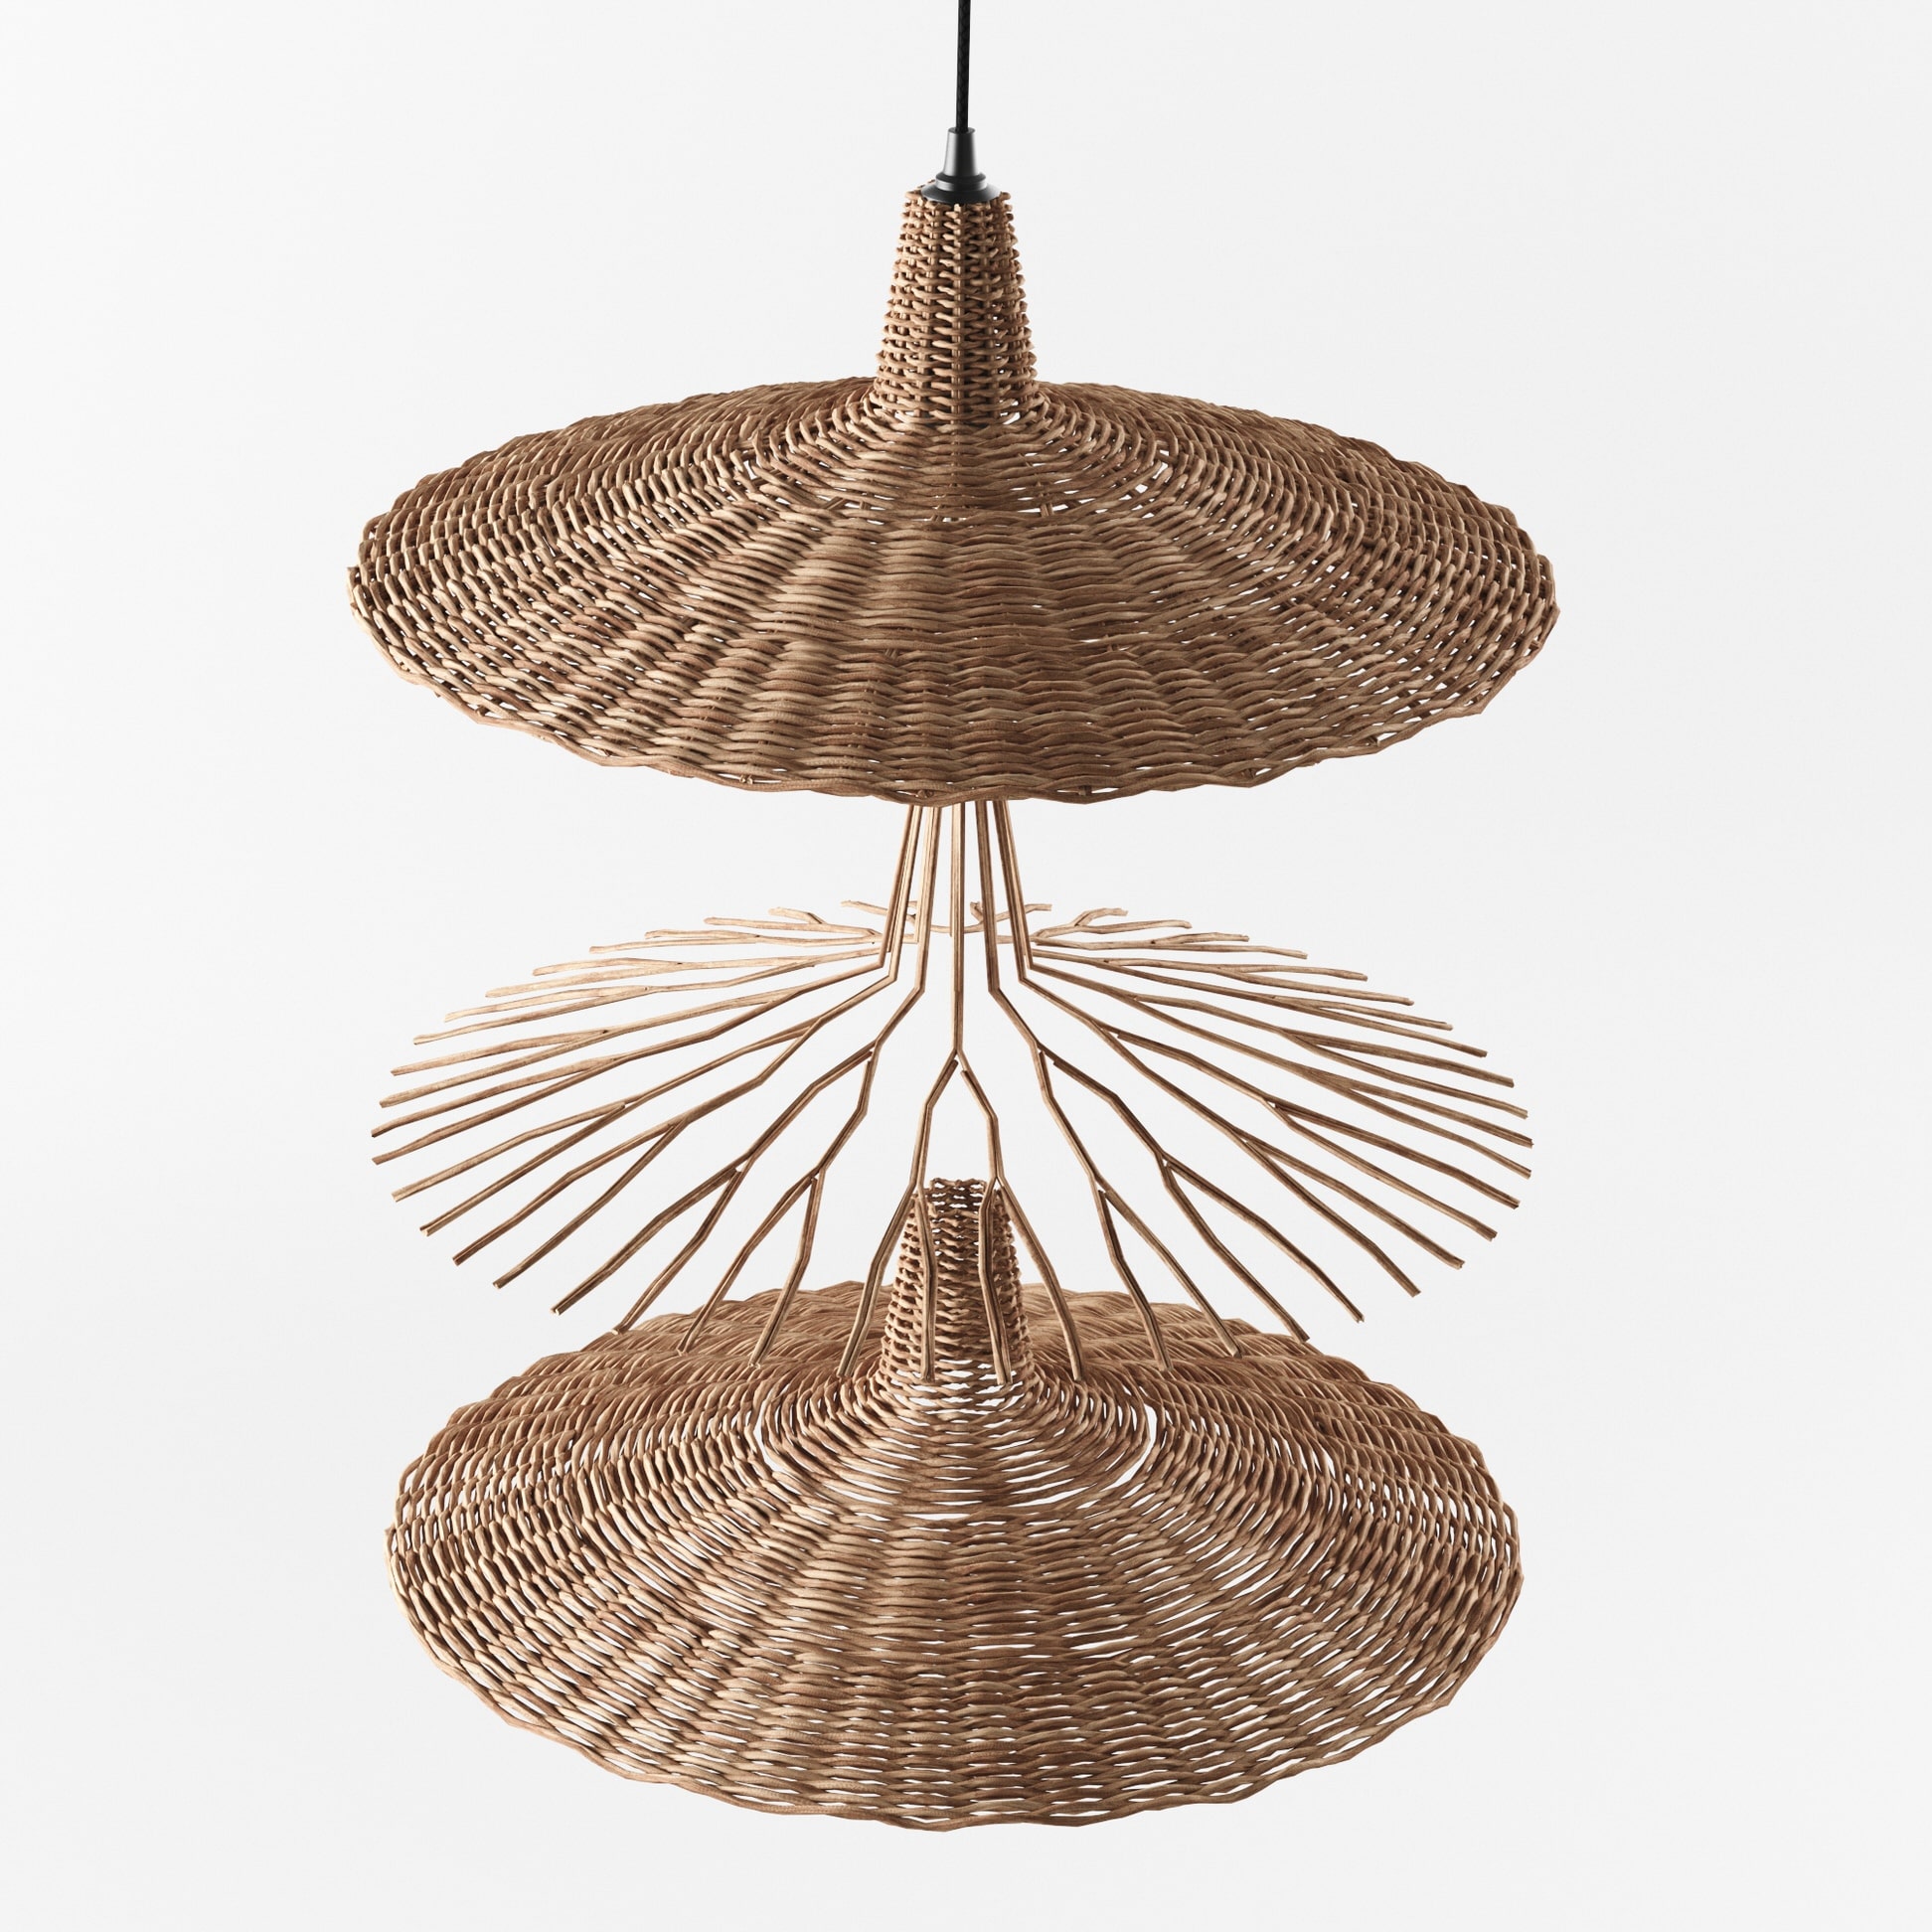
We didn’t want to lose the accuracy, and mainly we did want to have the weaving correct. It is an absolute overkill, but then we ended up with such crisp details, as you can see here.
To 3d model these properly, it was important to understand the actual weaving patterns, so we avoided the tapering effect when the radius of the lamp was getting smaller.

Another thing to mind was UVs because it would not be great to have a good model and UVs not following the topology.
In most cases, the simple generated UVs from splines were enough; in some cases, we needed rizom3D to unwrap.
Last trick was to randomize the offset of the texture to maintain as much randomness as possible, for this we used RandomUV script from M.Courses
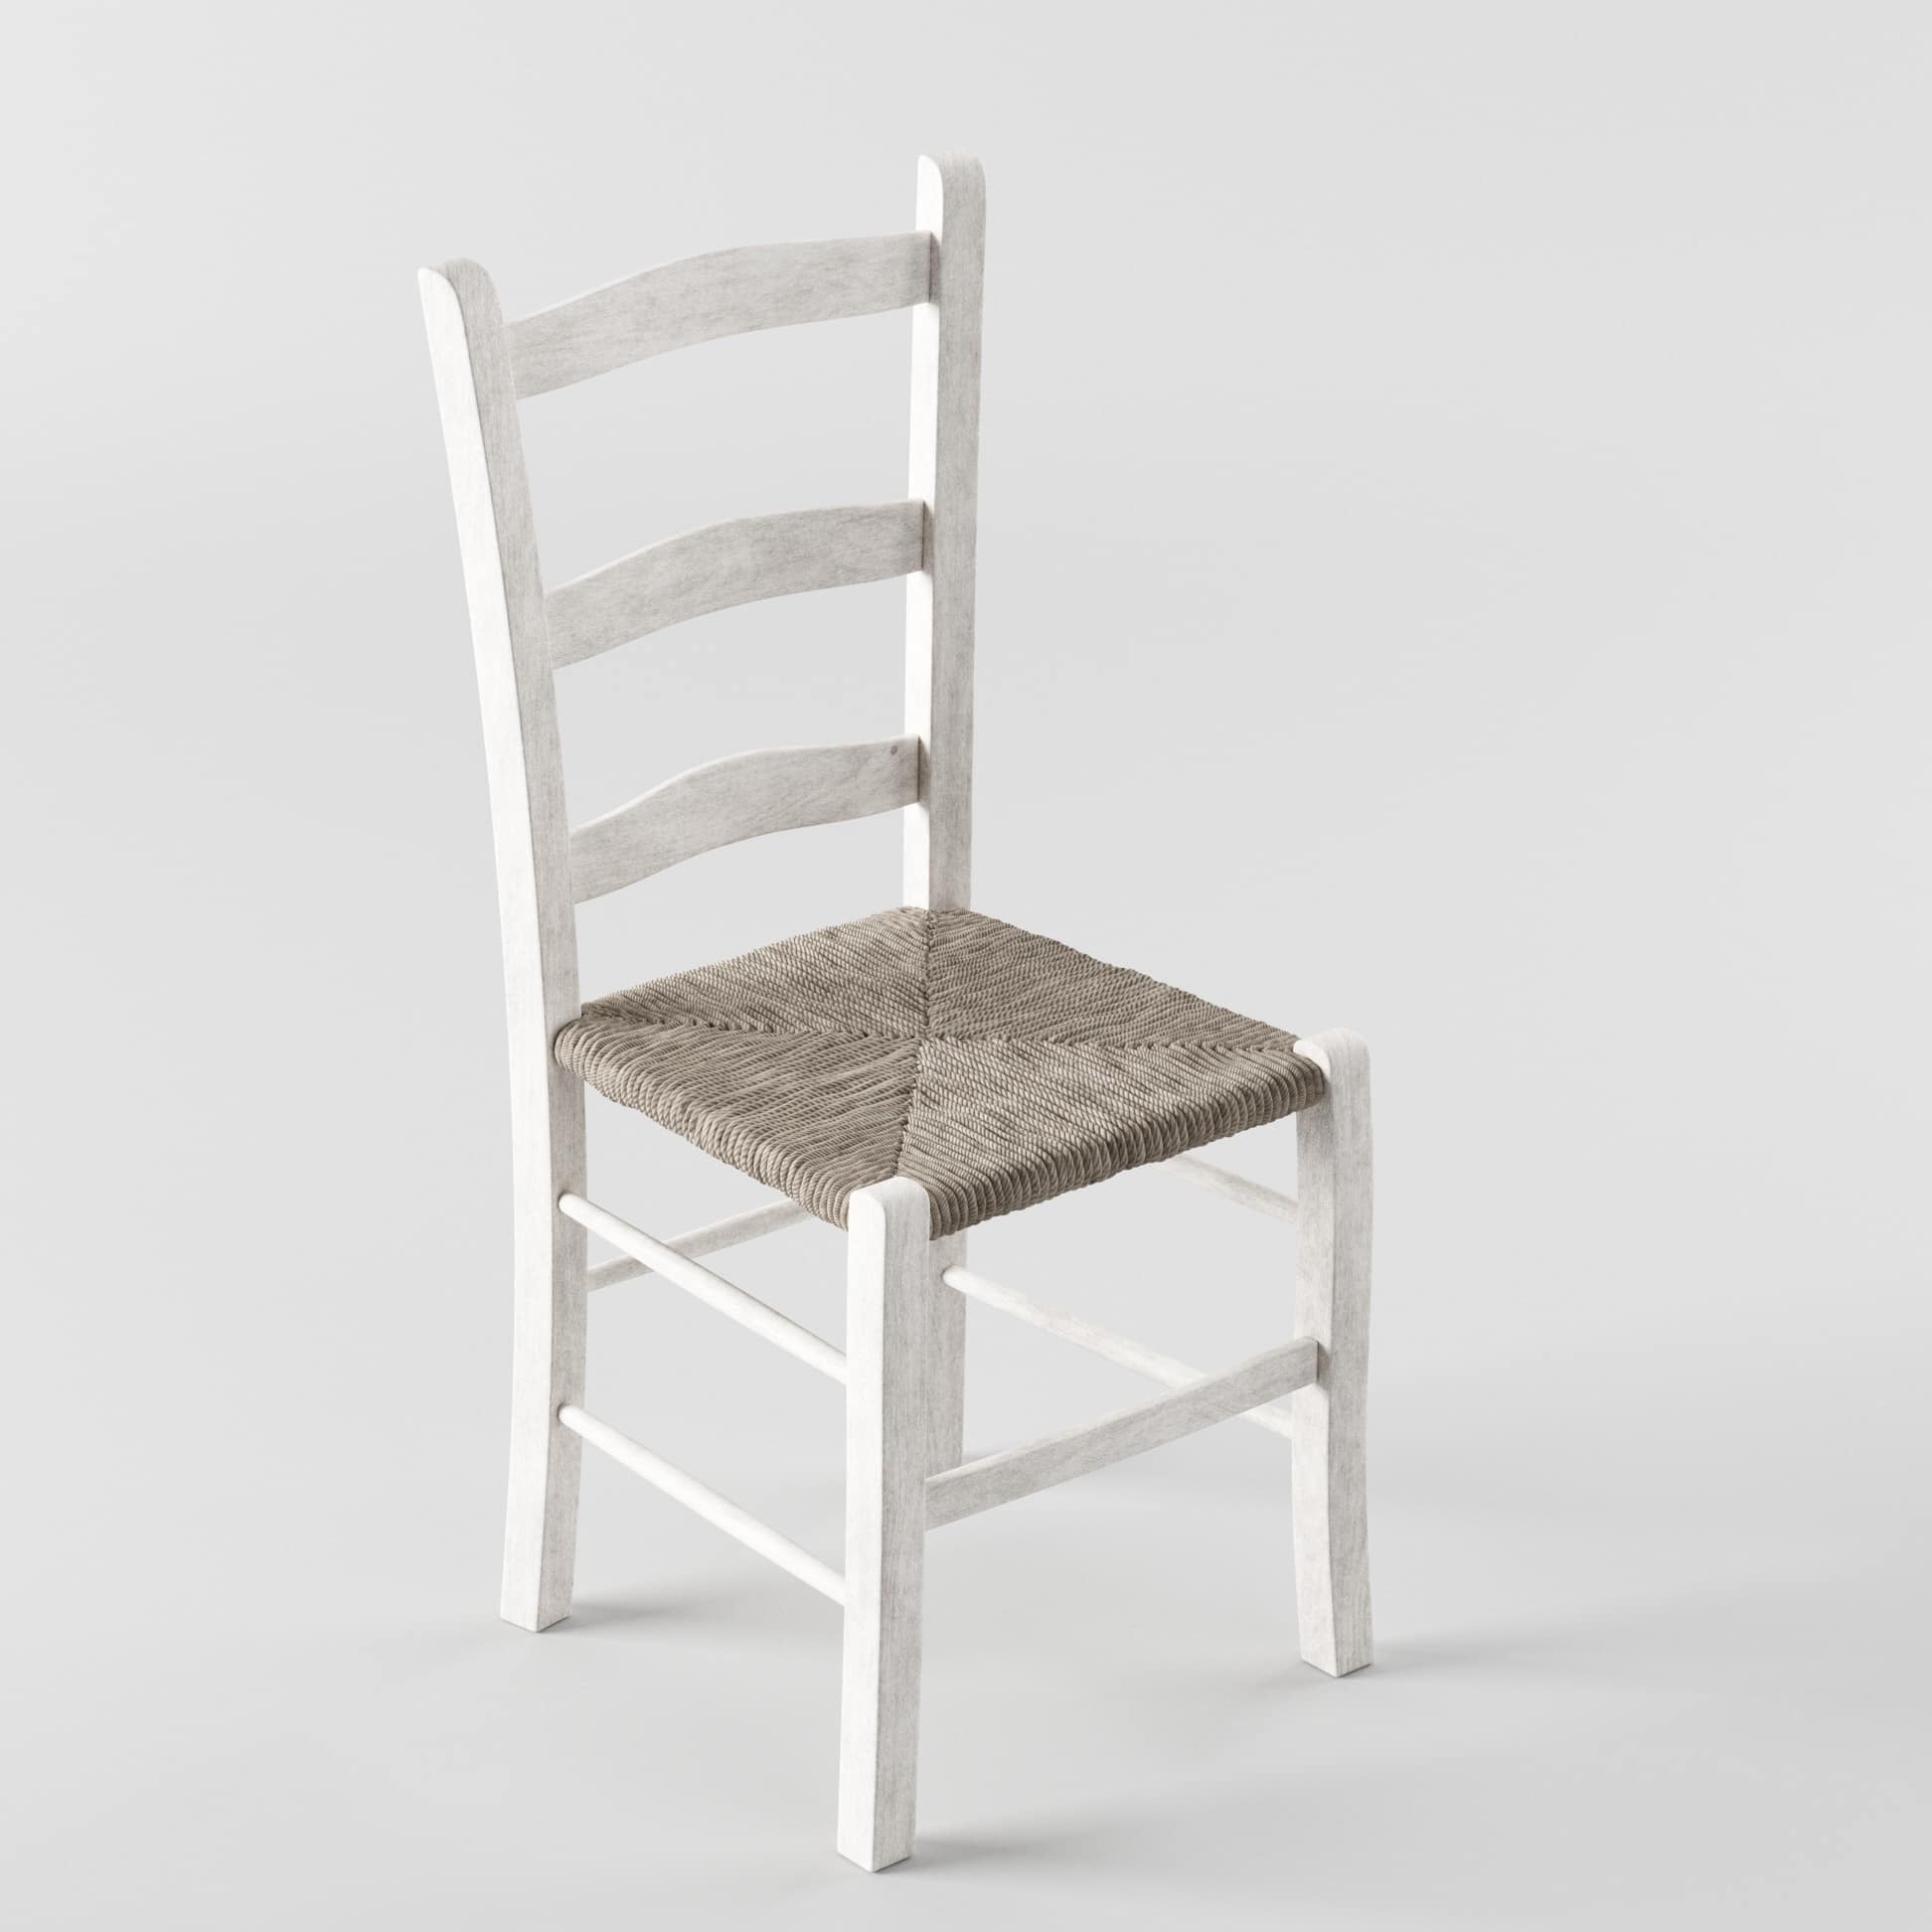
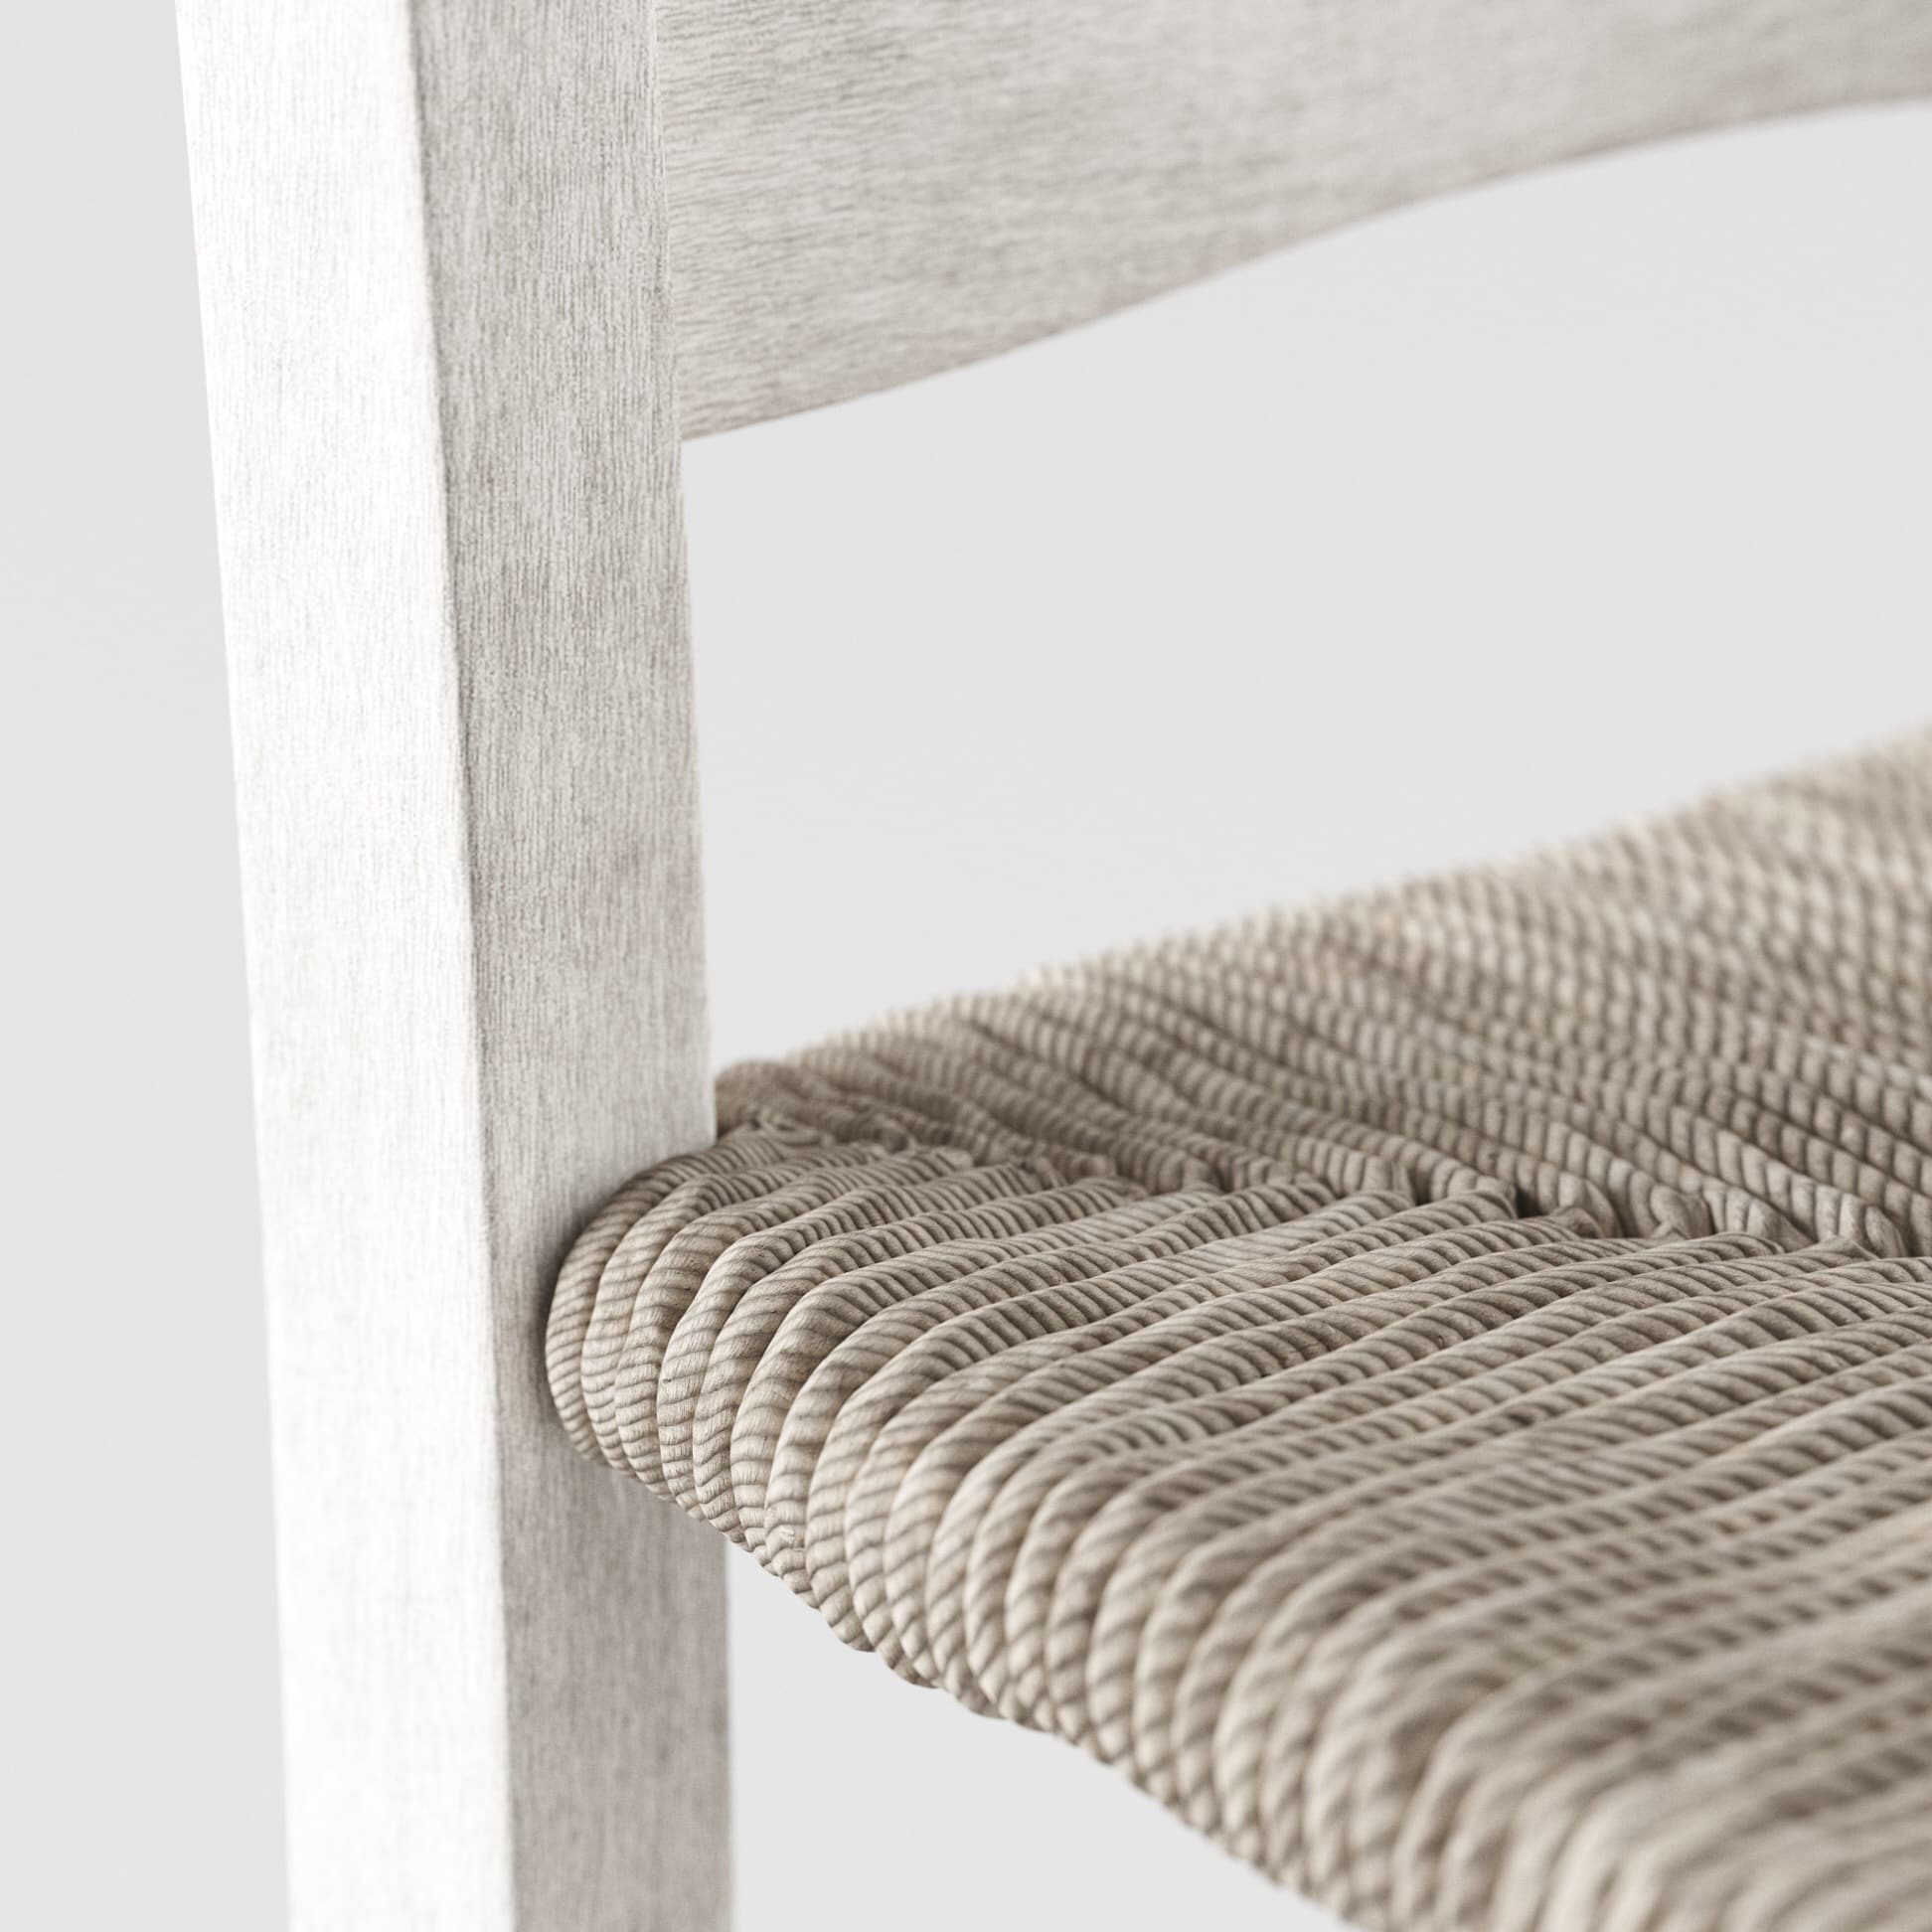
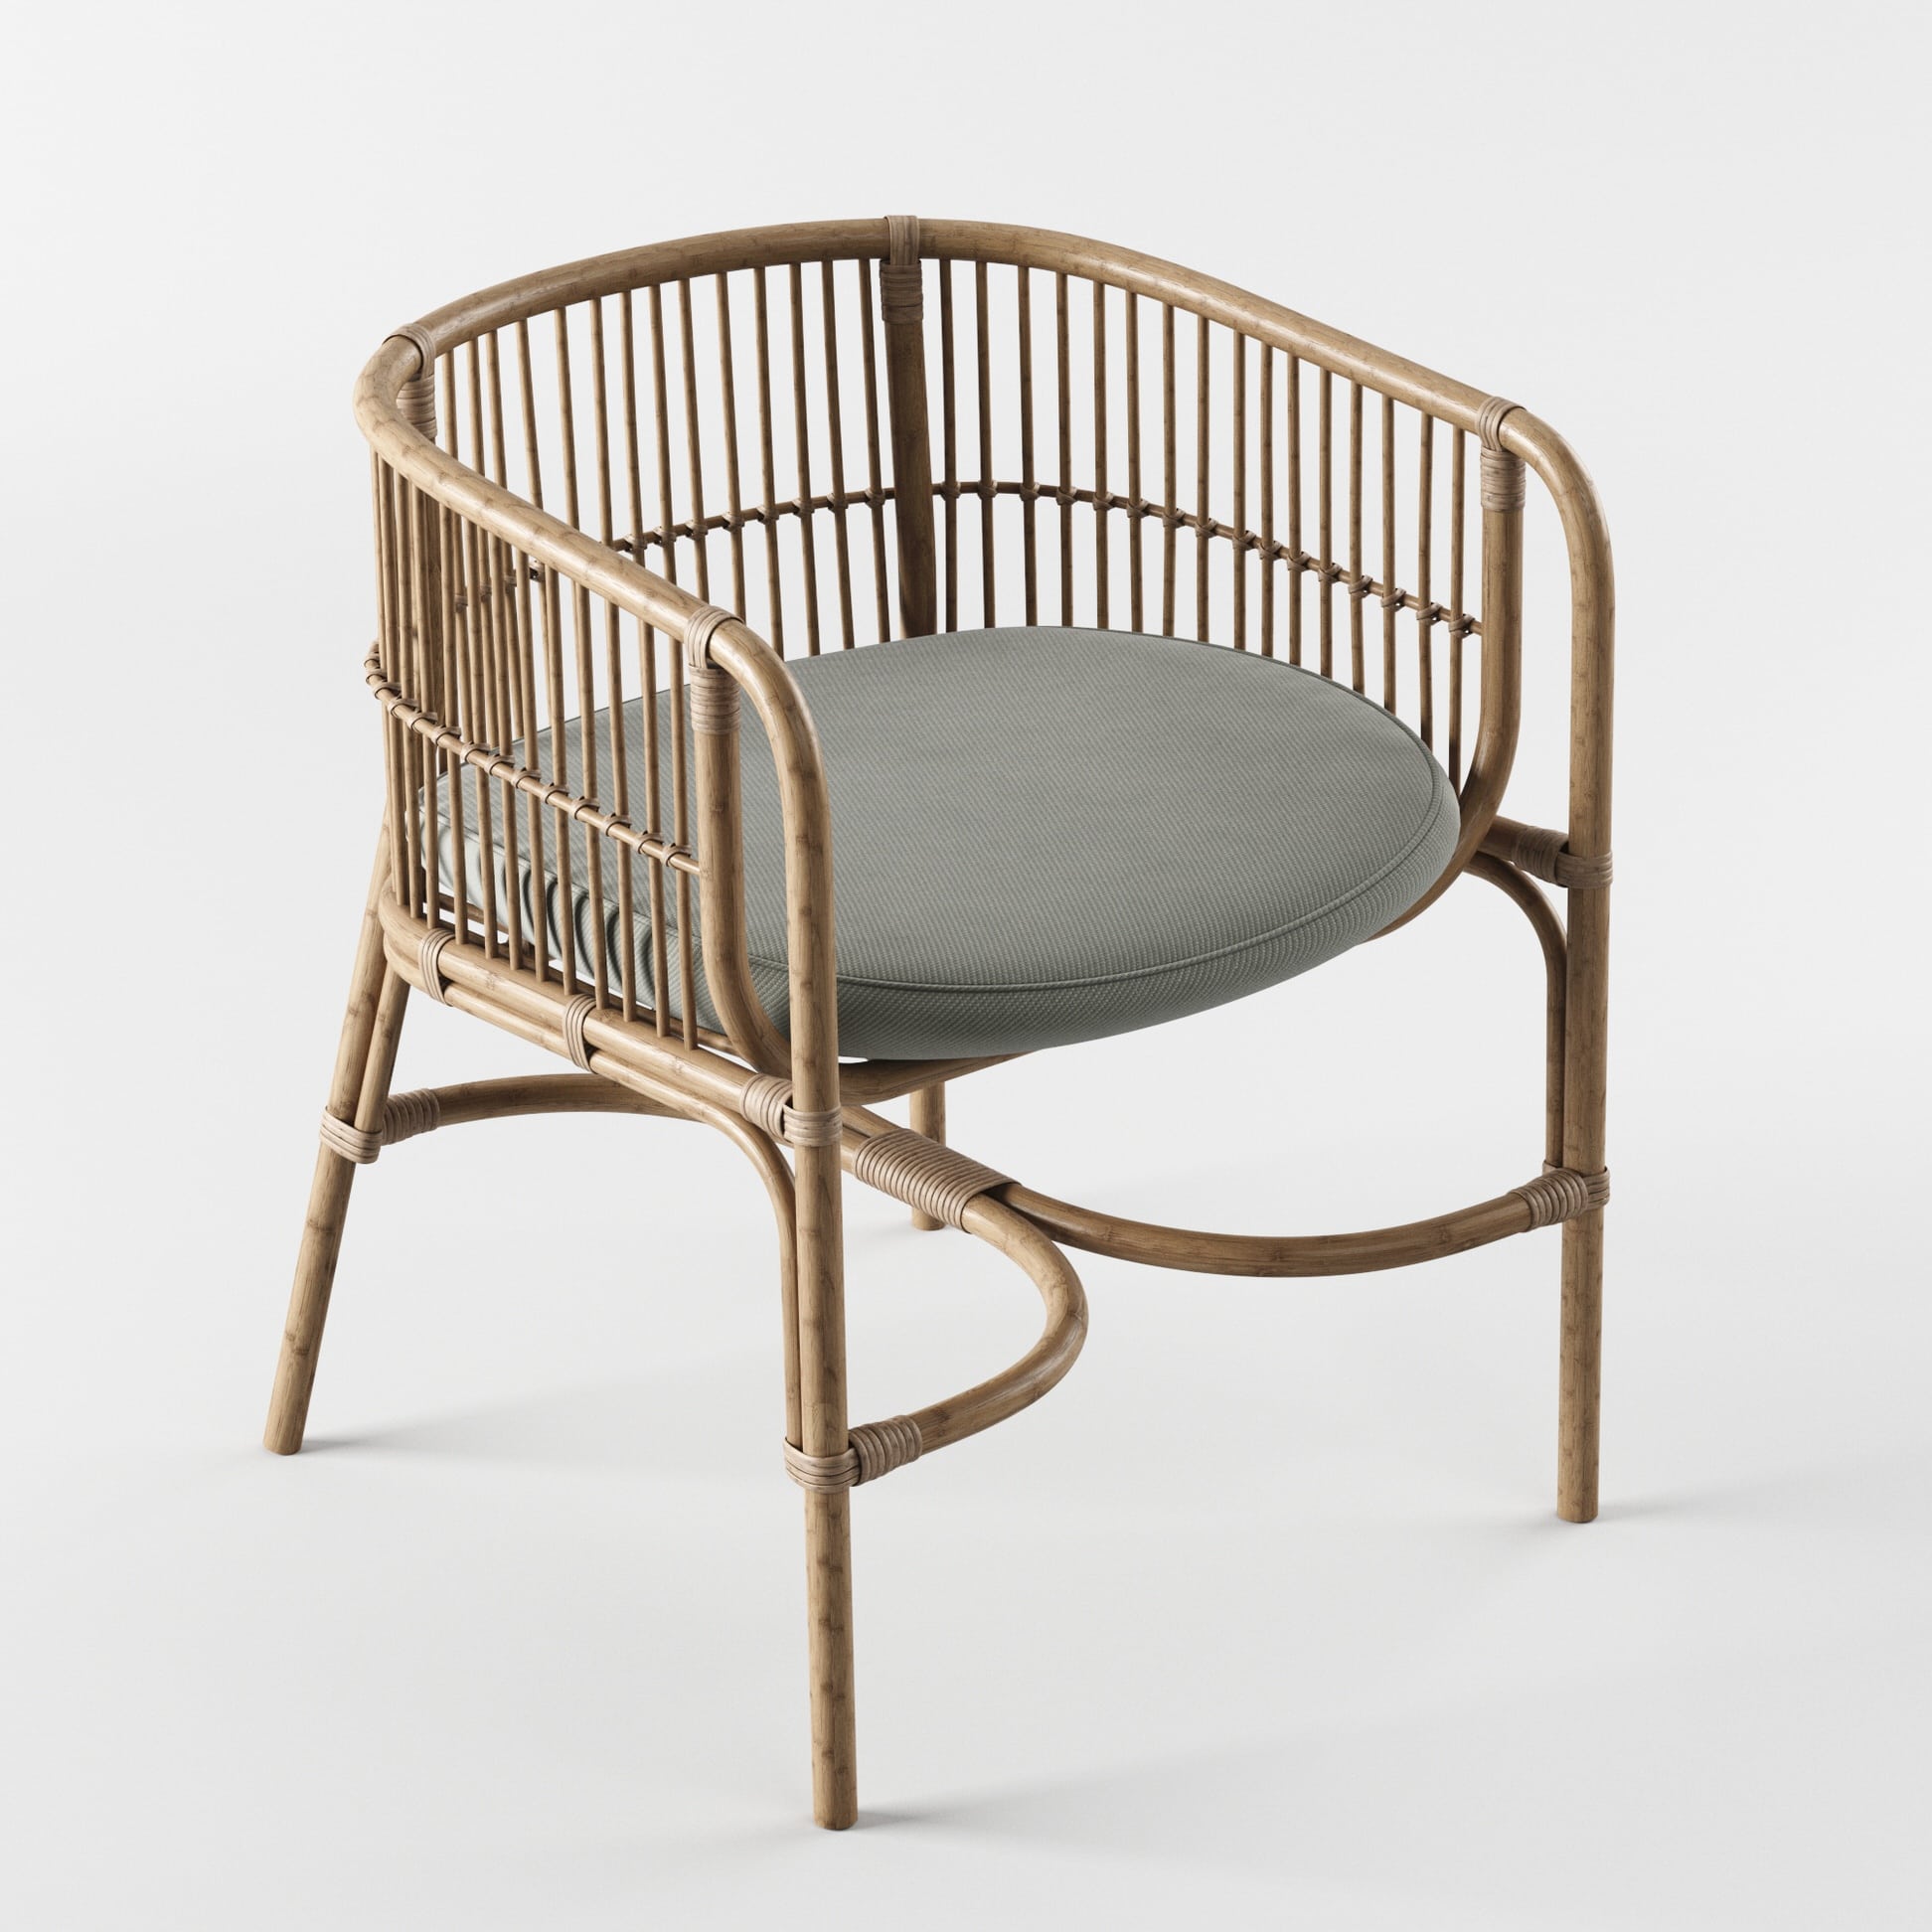
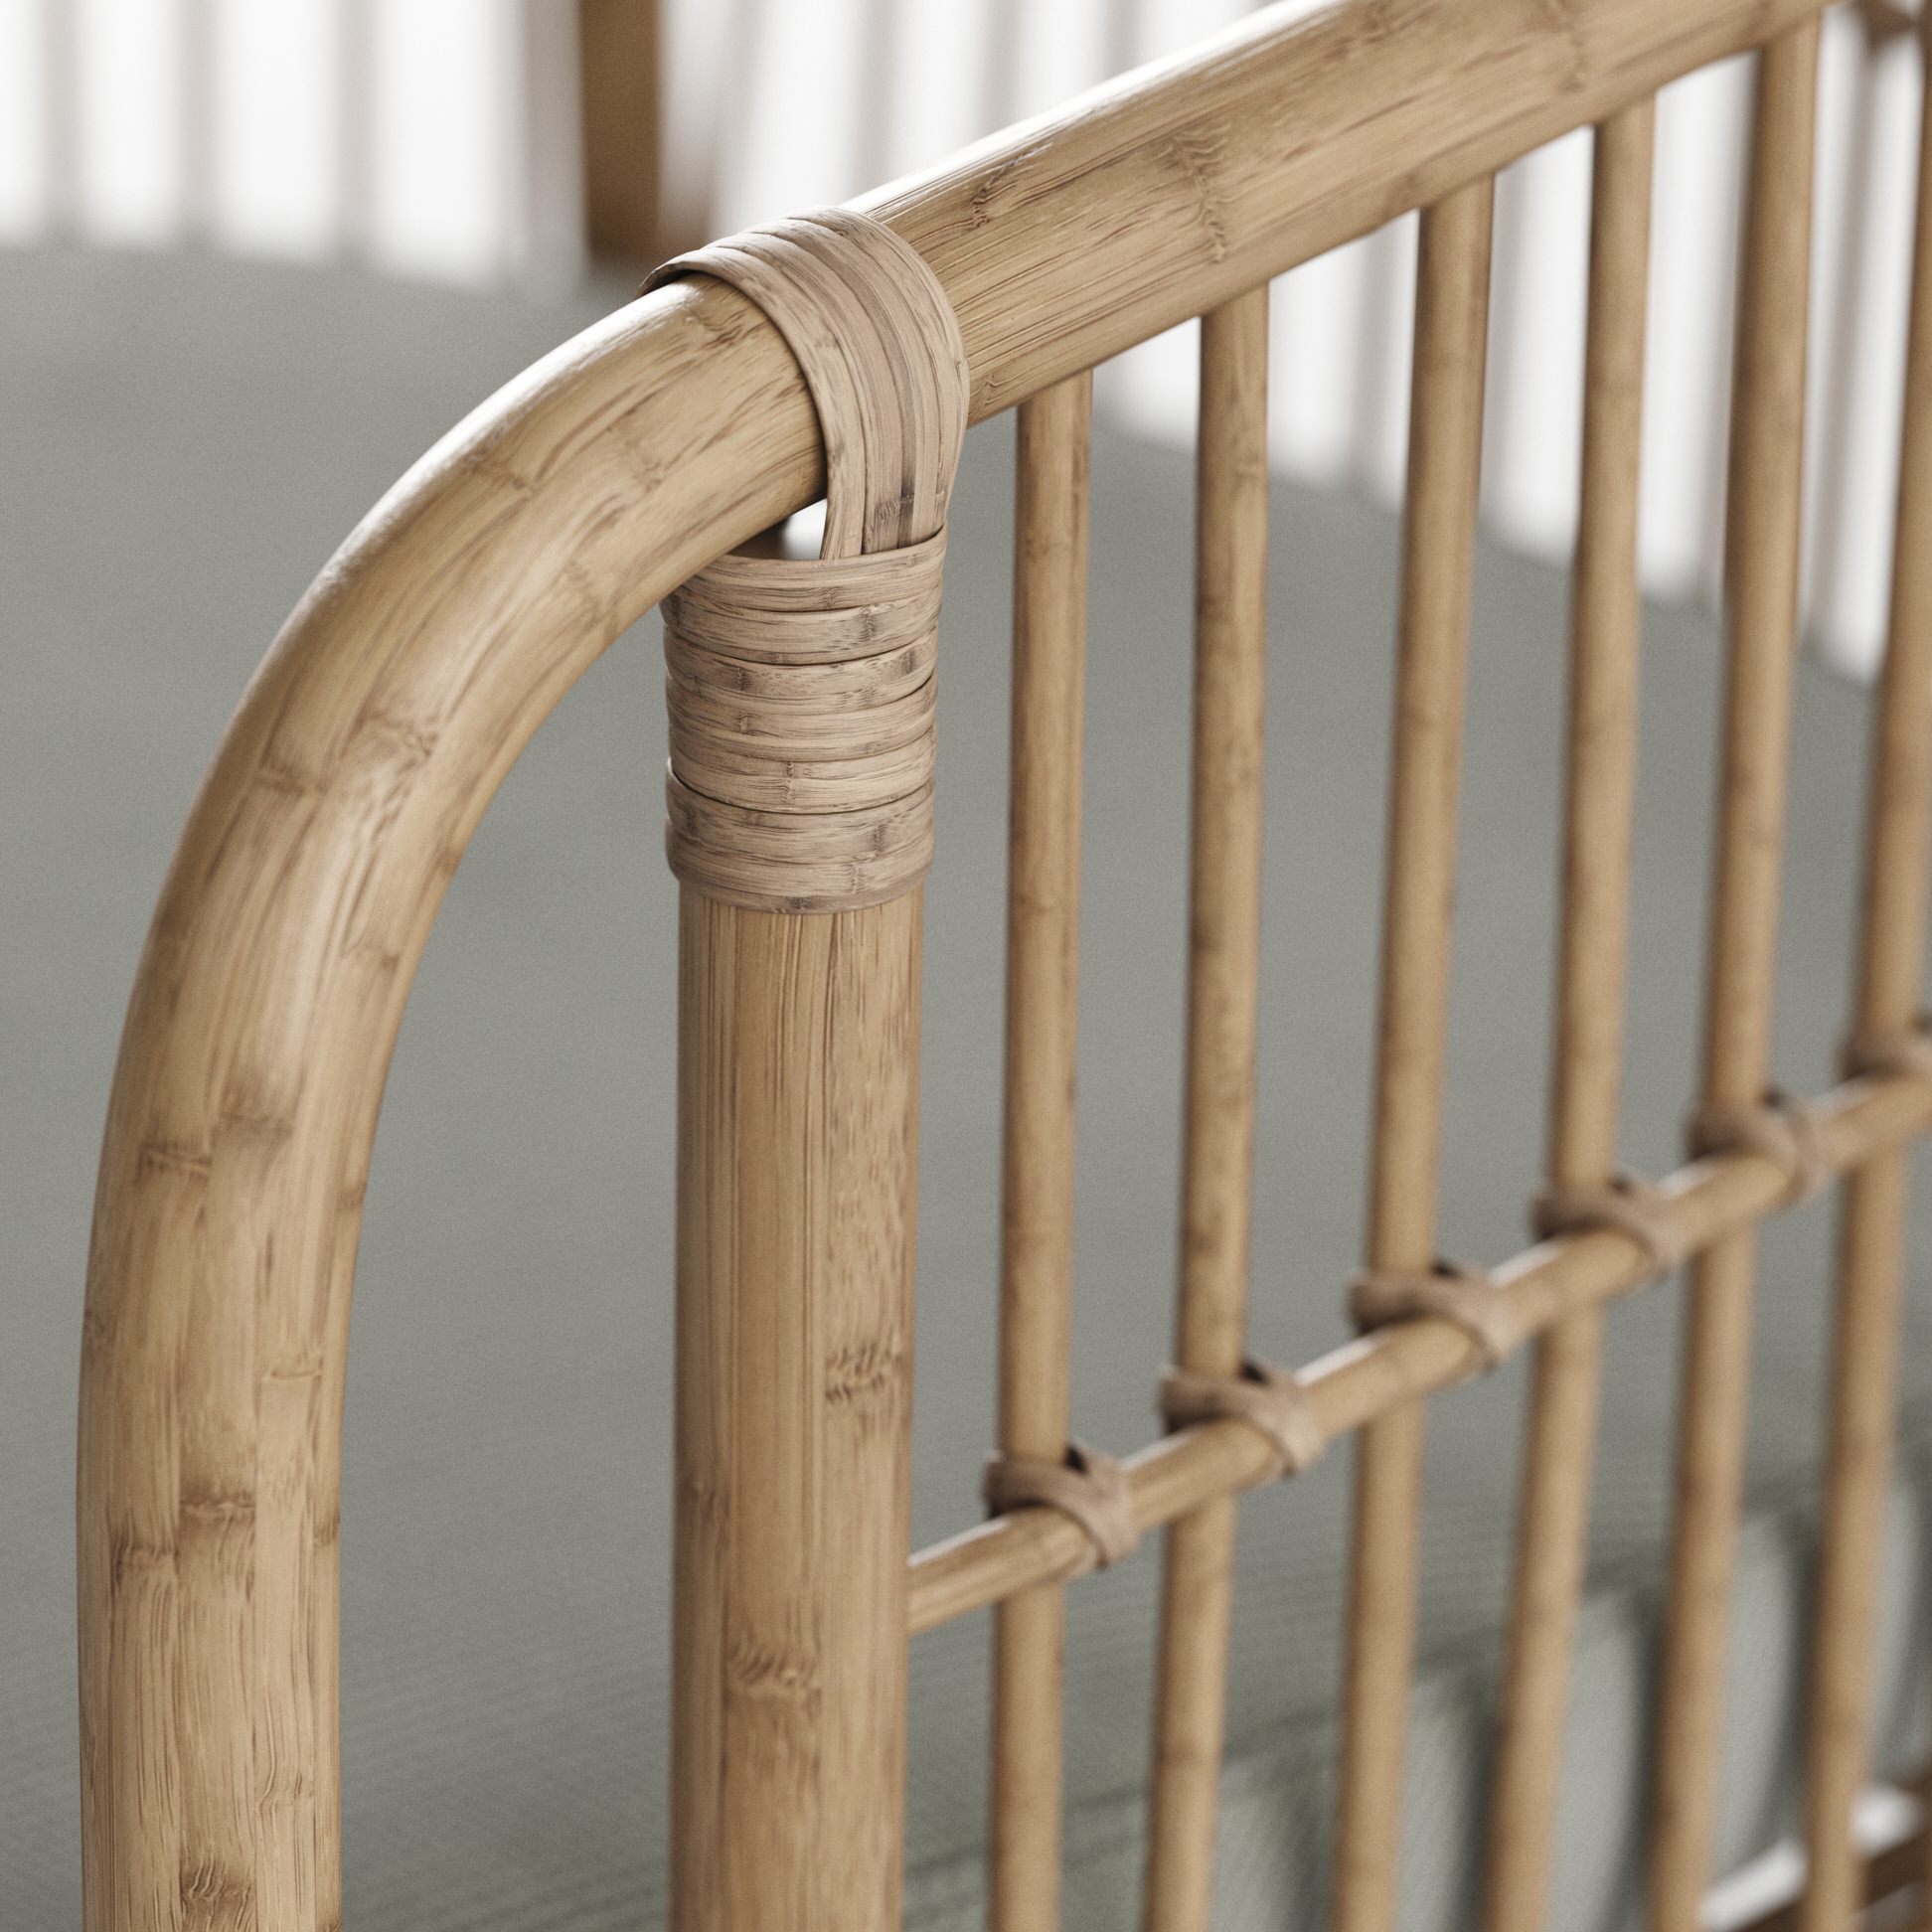
Wicker Seat Chair & Bamboo Chair
This model is pretty simple, and we achieved a desirable look through a lot of references. It was essential to maintain proper UVs, so the materials show correctly and then to focus the modeling attention to detail.
It is nothing too fancy, but spending a few more hours on getting good connections and little extra detail added to the overall result.
There were many models that we have prepared; you can see the rest in the turntables.
Landscaping & Vegetation
Here once again, we combined all the available resources we had to achieve the desired look.
We have used assets from MAXTREE, TurboSquid, and VIZPARK library. We created some custom plants and climbing vines with GrowFX. For our hero olive tree, we used a photogrammetry workflow in combination with GrowFX.
The general distribution of all the plants, grass, and rocks was done with Forest Pack. We basically “painted” the areas for each group of plants as we wanted to have better control over the positioning.
MAXTREE + Vizpark + Forest Pack grass preset (VP grass patches) and TS Olive tree with custom textures.
Custom lavender bushes with GrowFx + Megascans rocks + FP grass (VP patches)
One of the more significant assets were all the vines climbing on the arcs and walls.
This was prepared as a preset with the GrowFX plugin and then applied on various spots throughout the project. In areas where vines would grow were determined mainly from composition, and where we found that we needed more visual noise.
After all the vines were created, the GrowFX objects were collapsed and loaded as Xref back to the main scene, because they were quite heavy. The main reason for collapsing was that we needed to bake the direction modifiers, and by changing some value, we might lose the shape we liked, so it was safer to collapse them after they were finalized.
Textures for the leaves are from Art by Rens scans.
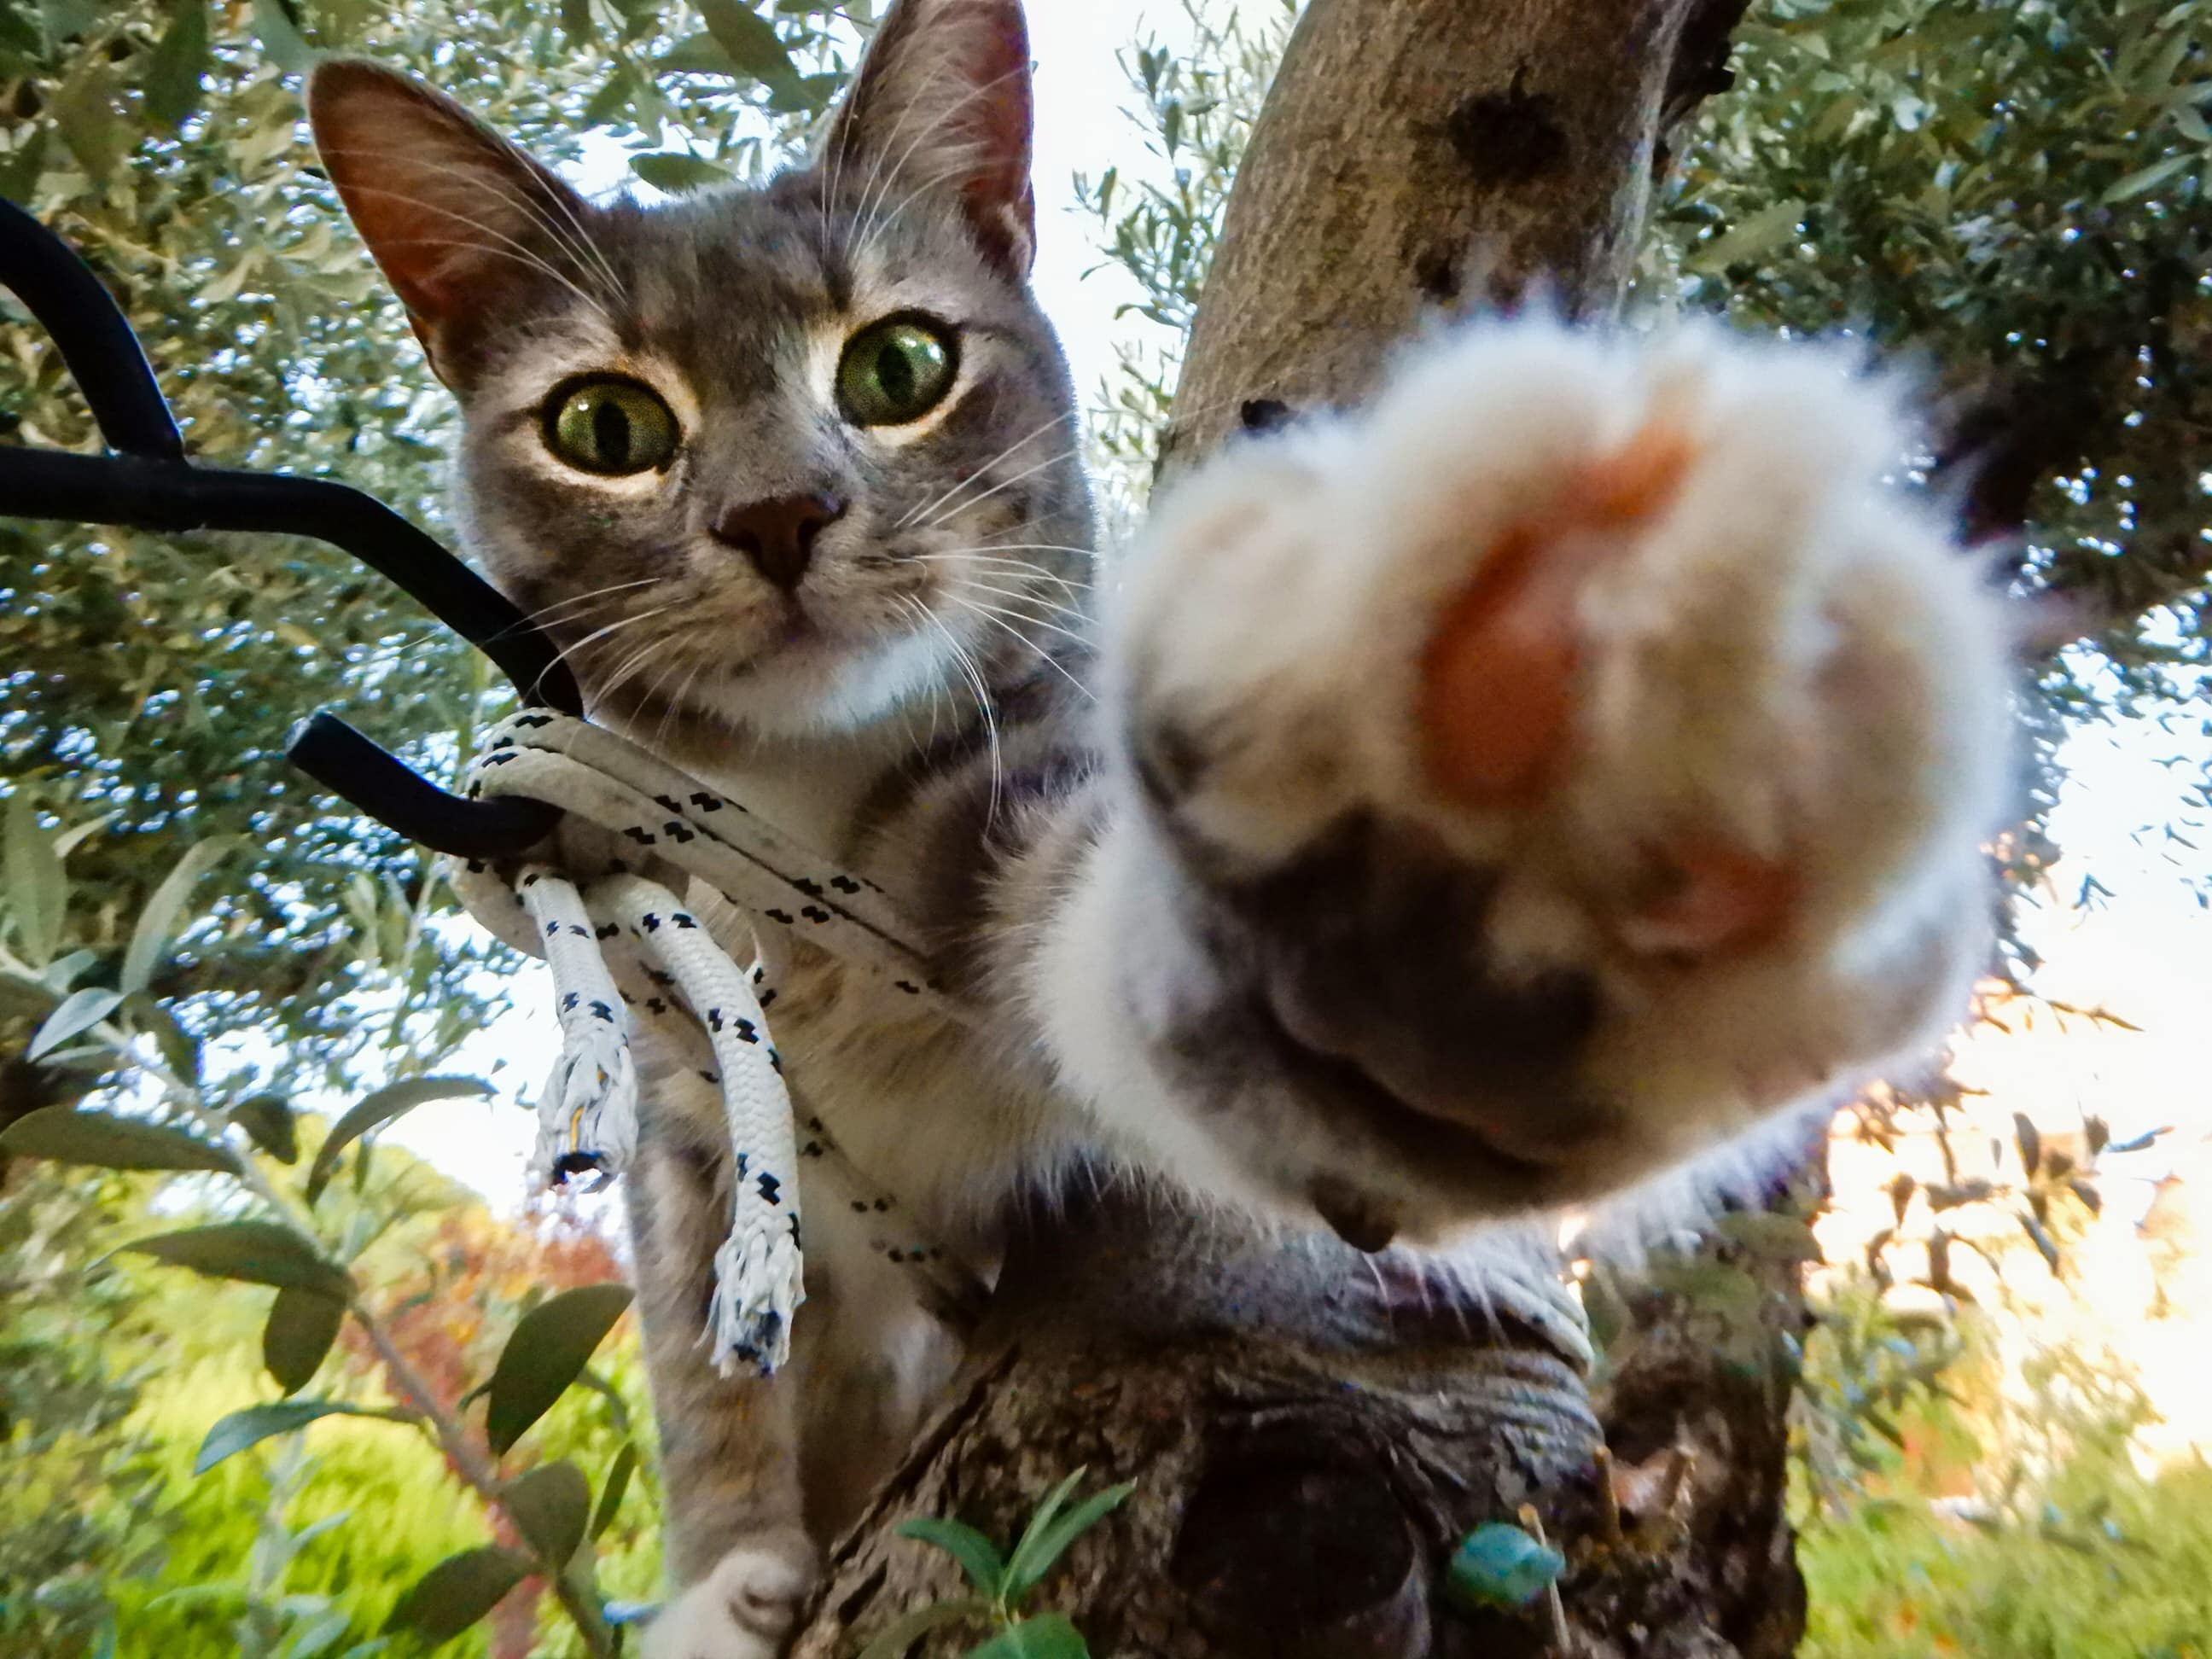
The olive tree scan was added at the very last moments of the project as we weren’t happy with any other 3d model we could find online. Finding or making a fitting cutout tree was very difficult since we wanted it to blend seamlessly with the decided light setup.
So we decided to make a very quick scan of the Olive tree trunk that would more or less match the shape we need. Fortunately enough we found one, and made very fast, “dirty” scan that eventually worked out quite well.
The scan was generated with RealityCapture software, which was pretty straight forward to use.
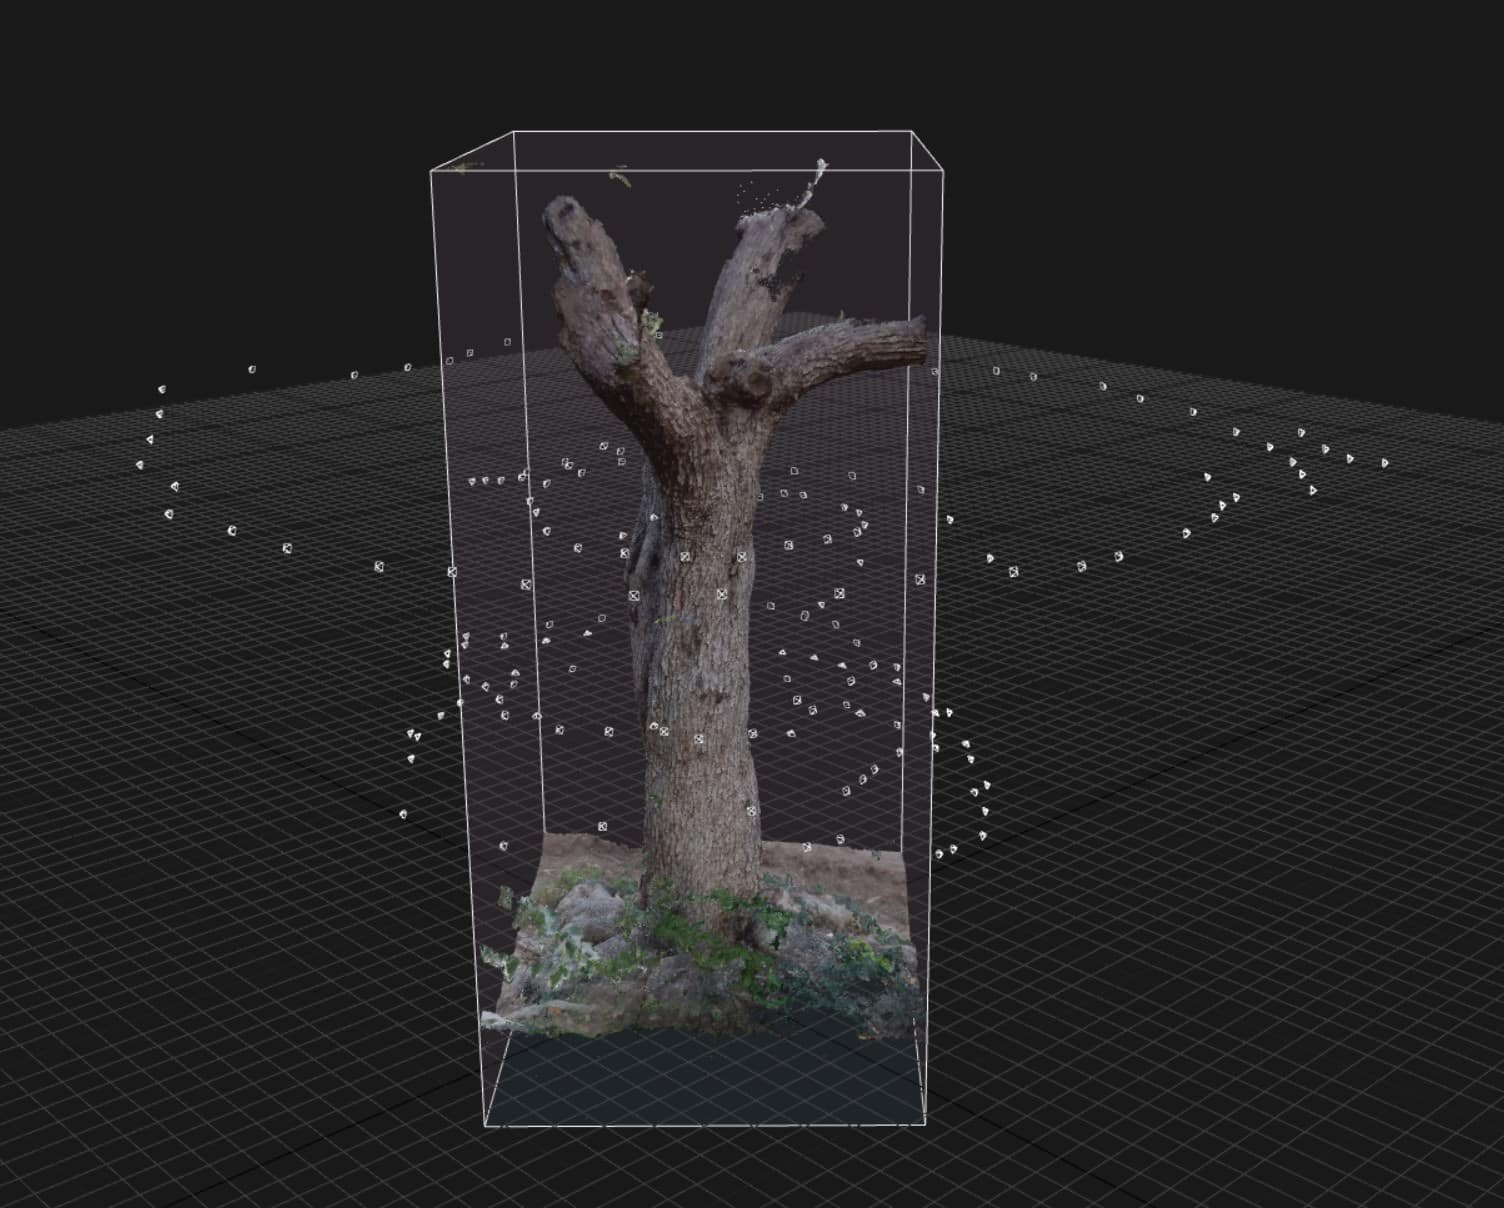
The conditions were not ideal, because scanning happened during midday basically in Athens, with a high sun casting sharp shadows. Plus, the tree was occupied by a cat! We needed only the scanned trunk for our still image, and the rest of the tree was added again with the help of GrowFX.
There, of course, were imperfections and some small broken parts in the scan, but since we were making still image, it was easy to patch up in post.
Overall Scene Management
The restaurant and landscaping were modeled in the general scene. Some assets were also modeled in place since they needed to be in relation to the primary model, like pillows, shades, canopies, etc.
All the rest of the models were prepared in a separate scene, where we have just basic setup with HDRI and backdrop. There we did the modeling for all the assets that needed extra attention. This way, we were more flexible and fast with previewing and adjusting.
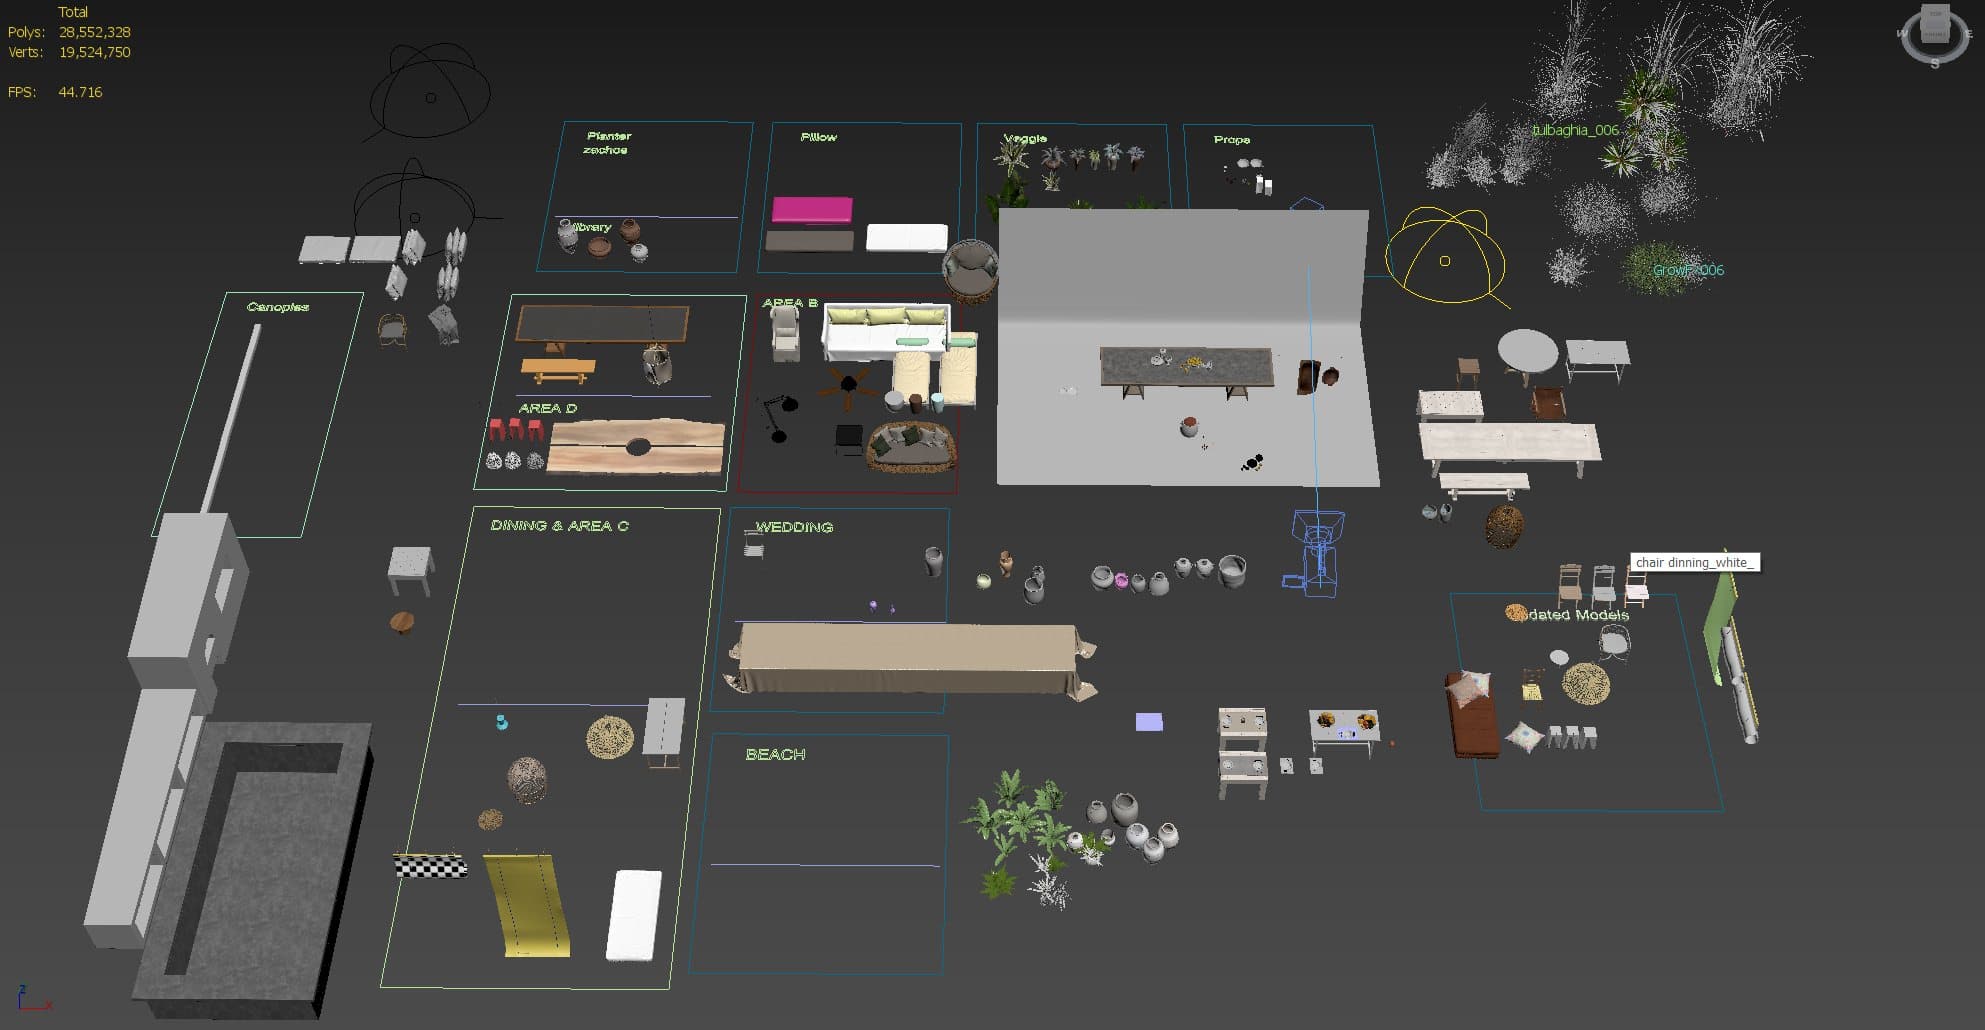
Here is the collection of most assets of the scene
The central scene became quite heavy with all the assets inside, and it became quite challenging to navigate, as well the loading time was becoming quite crazy because almost every other asset had some displacement applied.
After putting everything together in the main scene, we split it into three files based on camera angles, so we could get rid of things that were outside of the FOV.
To further lighten up the scene, some parts were merged as Xrefs, and most of the furniture and repetitive accessories were imported as VrayProxies. For this, we used the scene manager tool, Project Manager. It was very beneficial, as it organizes everything automatically. I would recommend this plugin at any time. It has very frequent updates and can handle models, materials, HDRIs, assets tracking, batching, and it is super customizable (not sponsored, just happy user).
In order to be able to add some additional randomization very quickly and have an even lighter scene, we distributed the models that were used in more significant numbers with Forest Pack’s ‘Items Editor.’
Main Materials
All of the previous steps, of course, have to be supported by excellent materials and shaders. If these would look off or standing out and not fitting the style, the images would fall apart.
The primary way to achieve this was by following real-life references to the point we were happy with the look of our materials.
Main plaster
The challenge with the plaster material was, first of all, to try to get as little repetition as possible on big surfaces and then to get raw natural-looking uneven paint.
Diffuse, normal, bump, and displacement are all from different textures, so there more different blend. Different sizes of triplanar projections also help this. Displacement is plugged to VrayDisplacmentMod modifier (plugged in mat just to see it).
Use of triplanar in displacement helps to add a “wavy” effect on the edges of the chamfered corners of the walls too. Since its triplanar there is a lot less breaking up of boundaries going on.
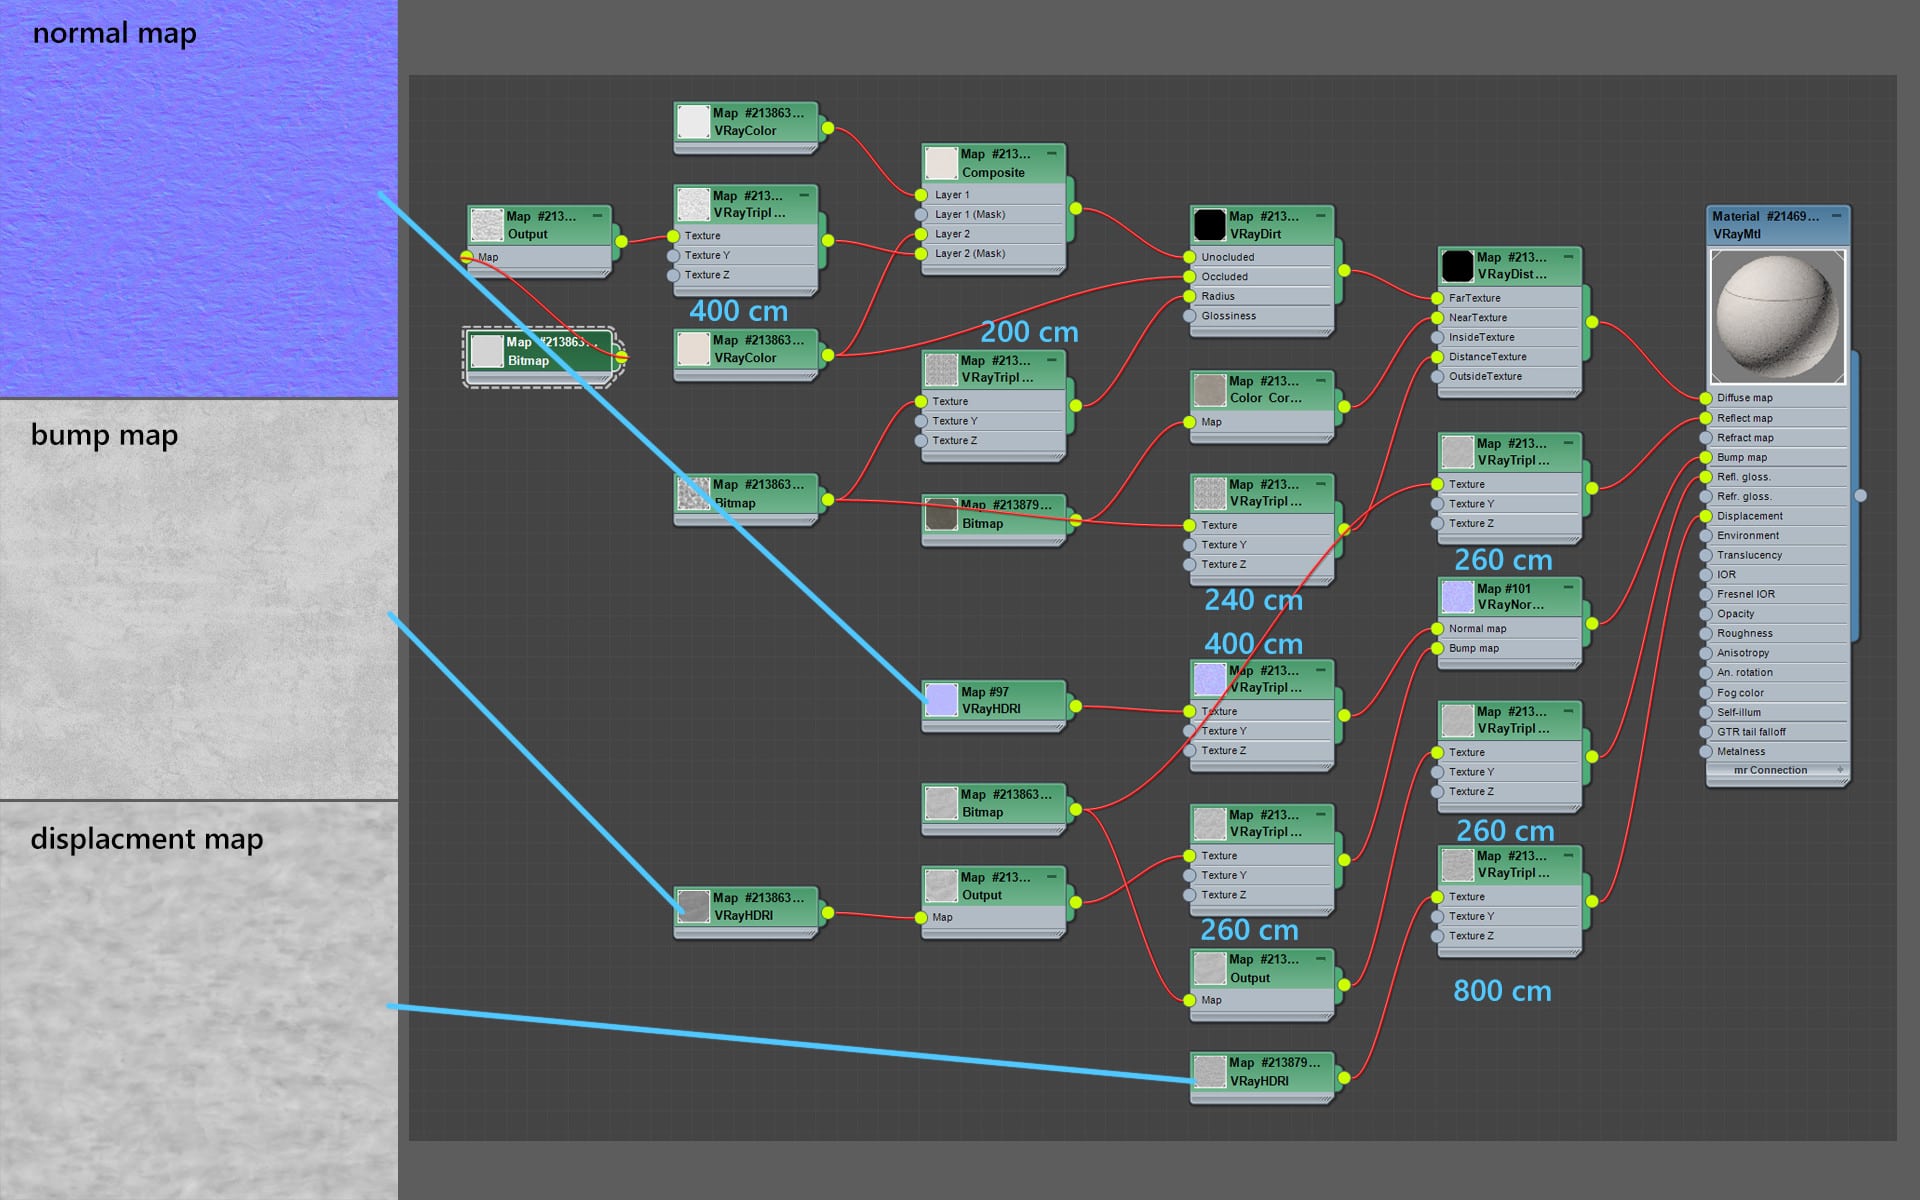
This material is a mix of textures from Textures.com, mixed with some random dirt maps.
Polished Concrete Floor
Here we overlay-ed over the main concrete texture a cavity map from a different set, again to break the repetition and add more raw feeling to the material.
The same use of triplanar and edges, no displacement needed this time.
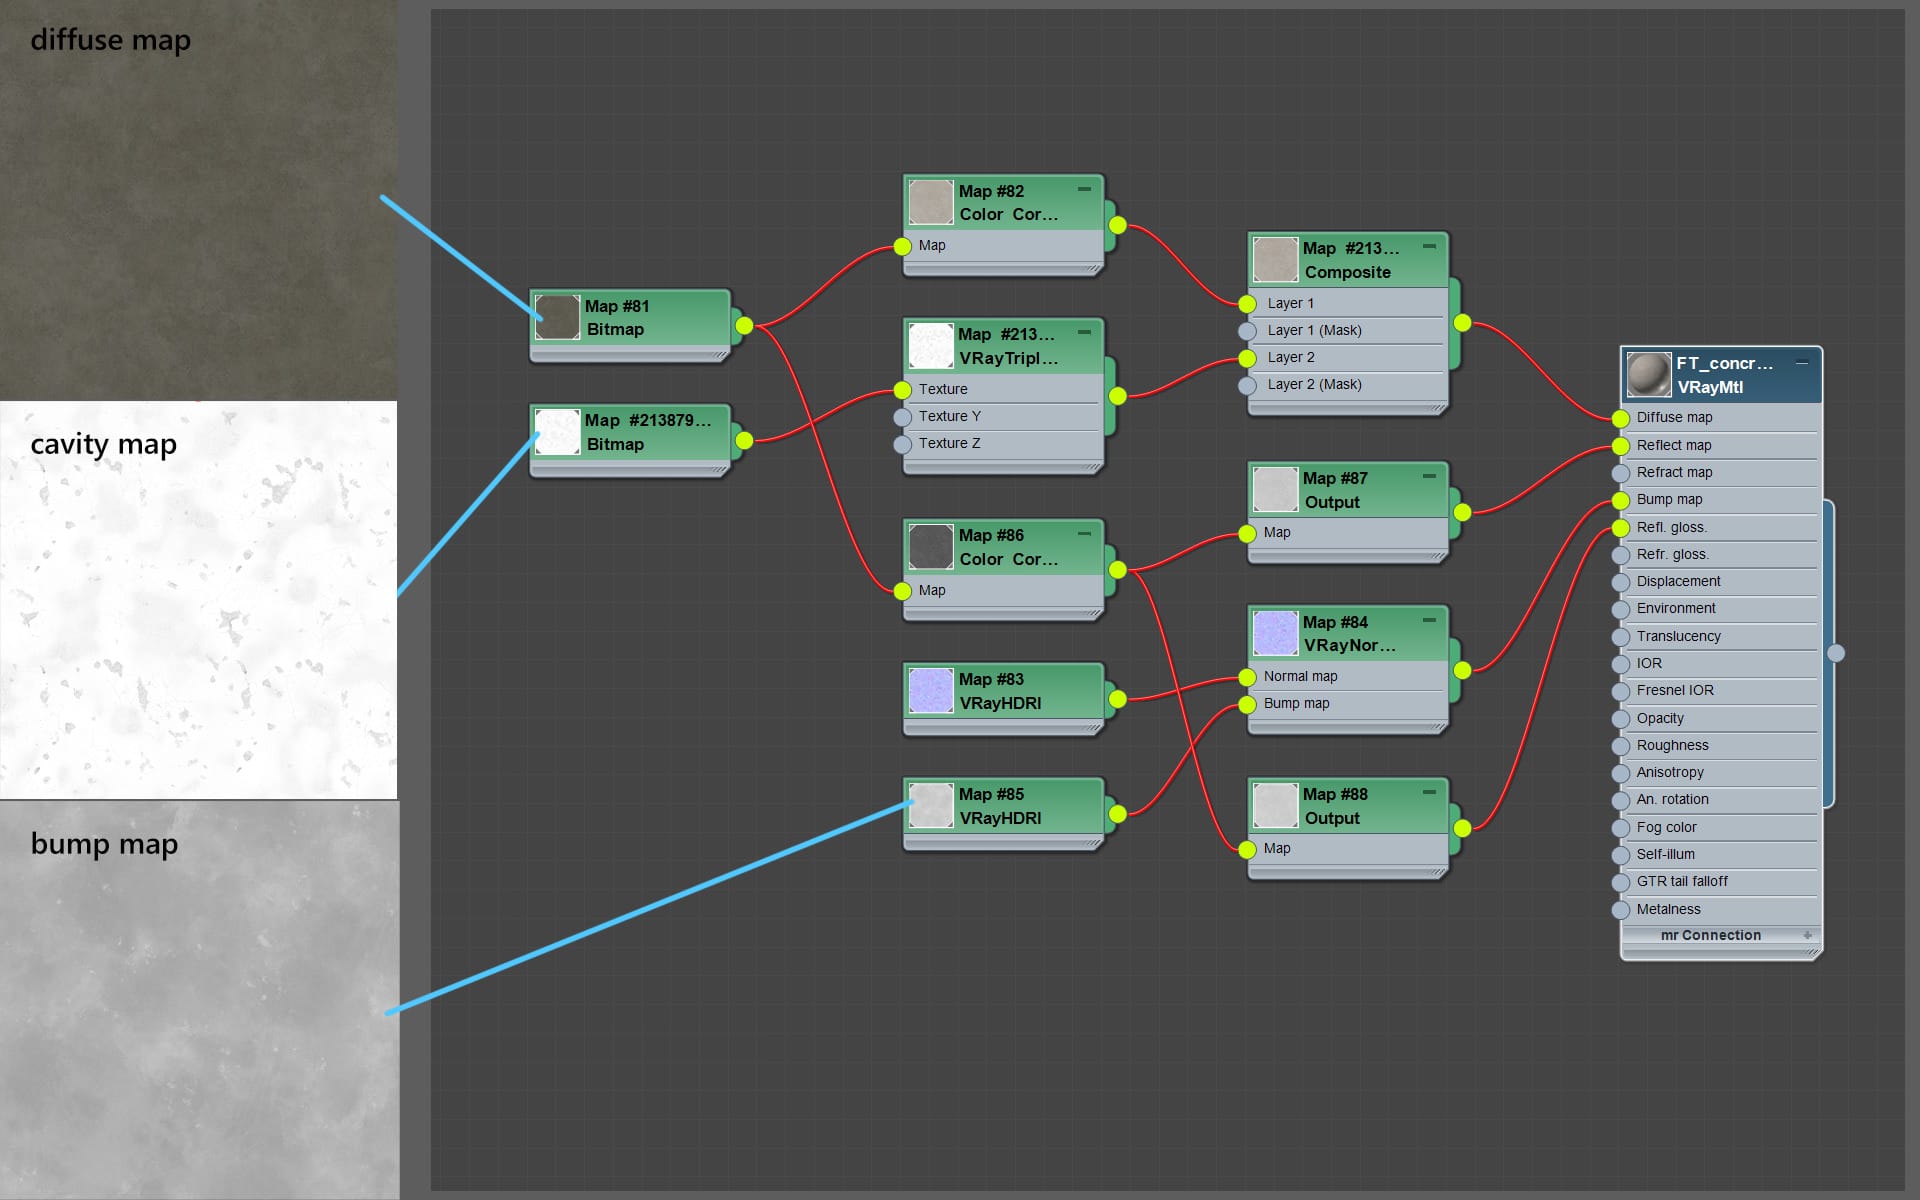
This concrete was made with texture from Textures.com as a base and with other one mixed in from Megascans.
Ground Cover Mixed with Sand
General ground cover is made out of three materials blended with VrayBlendMtl. Two of them are different sand materials that were color-matched through color-correction, and third is new pebbles and debris that is alpha masked, so we get only the extra debris on top of the sand.
For displacement, VrayDisplacementMod was applied again with a blend of all three displacements from each material. This is simply, so the displacement is corresponding with each blended material.
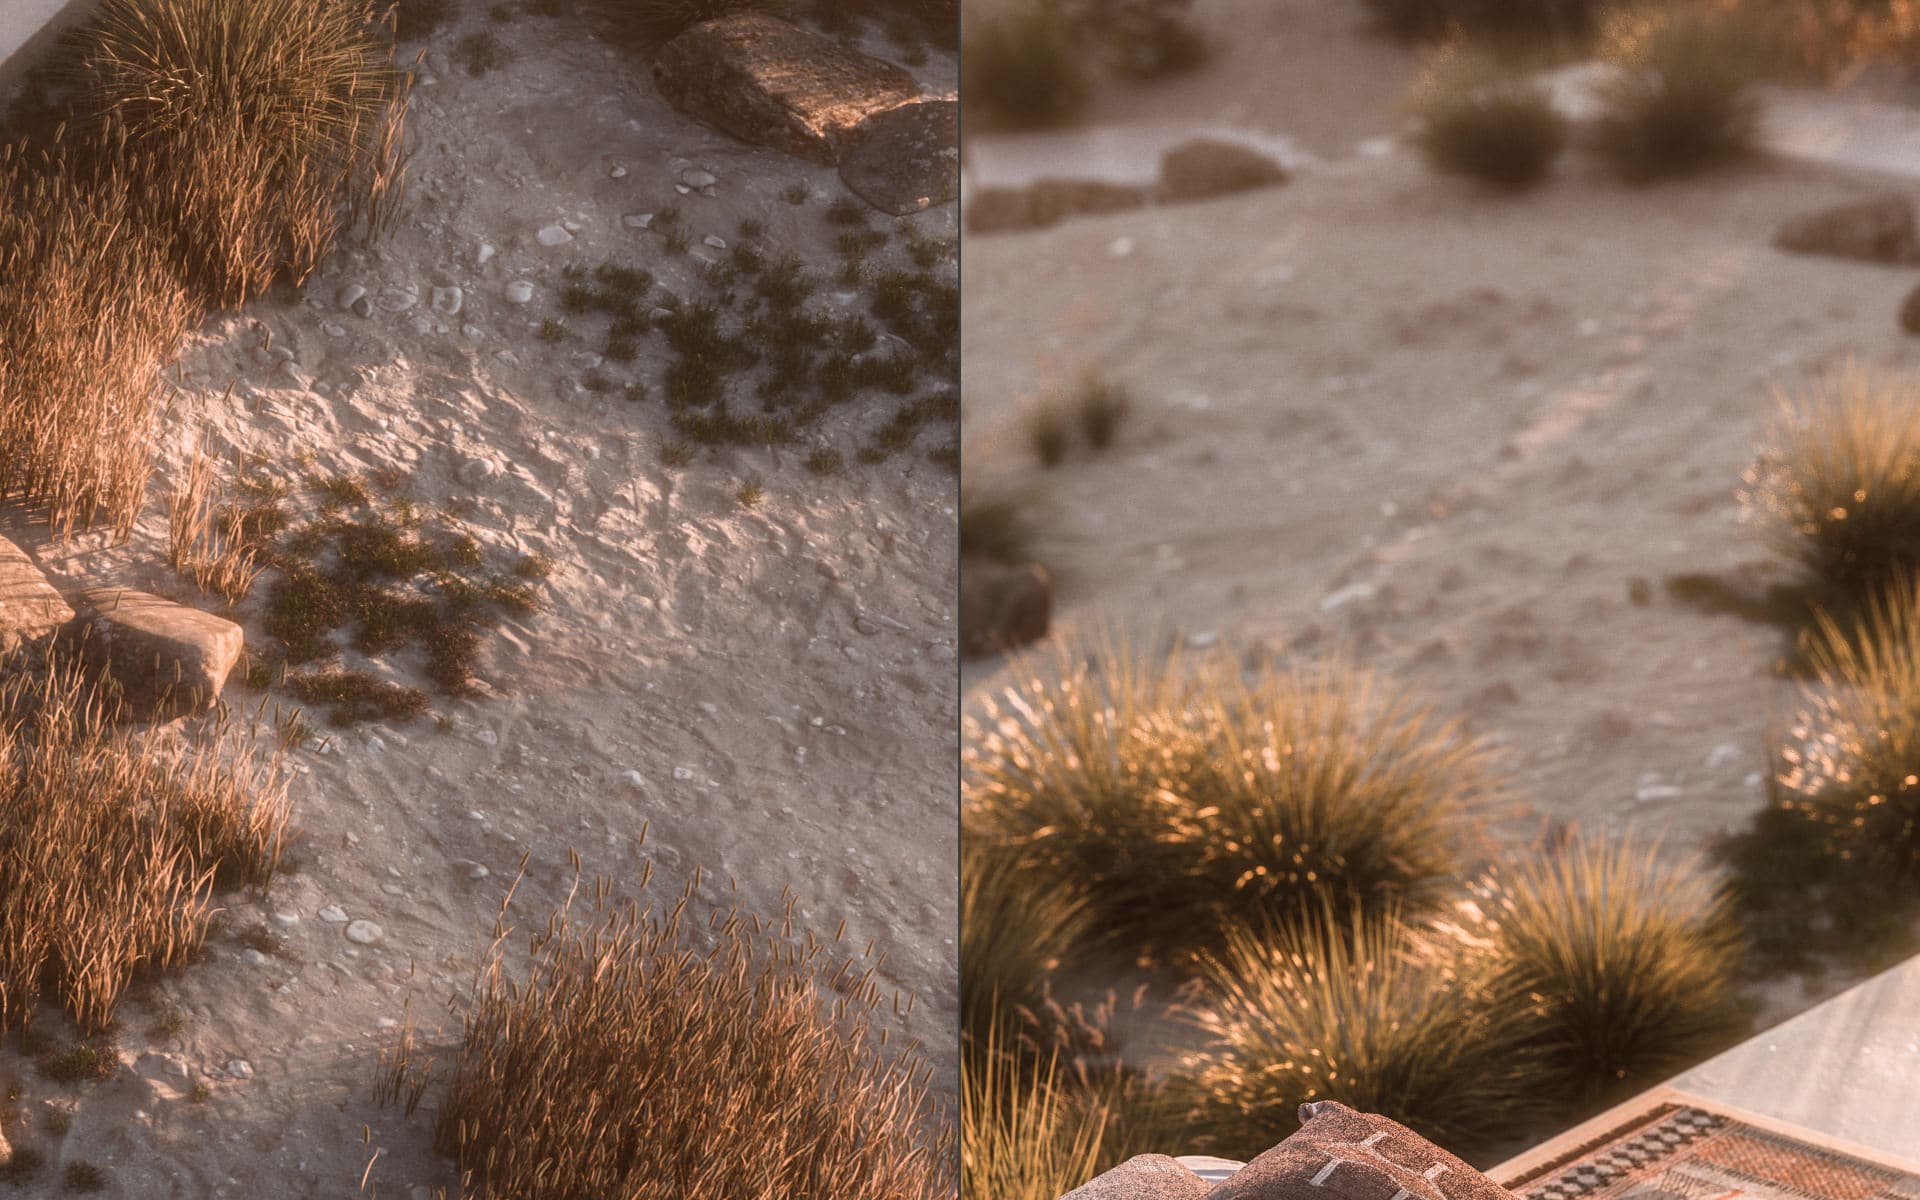
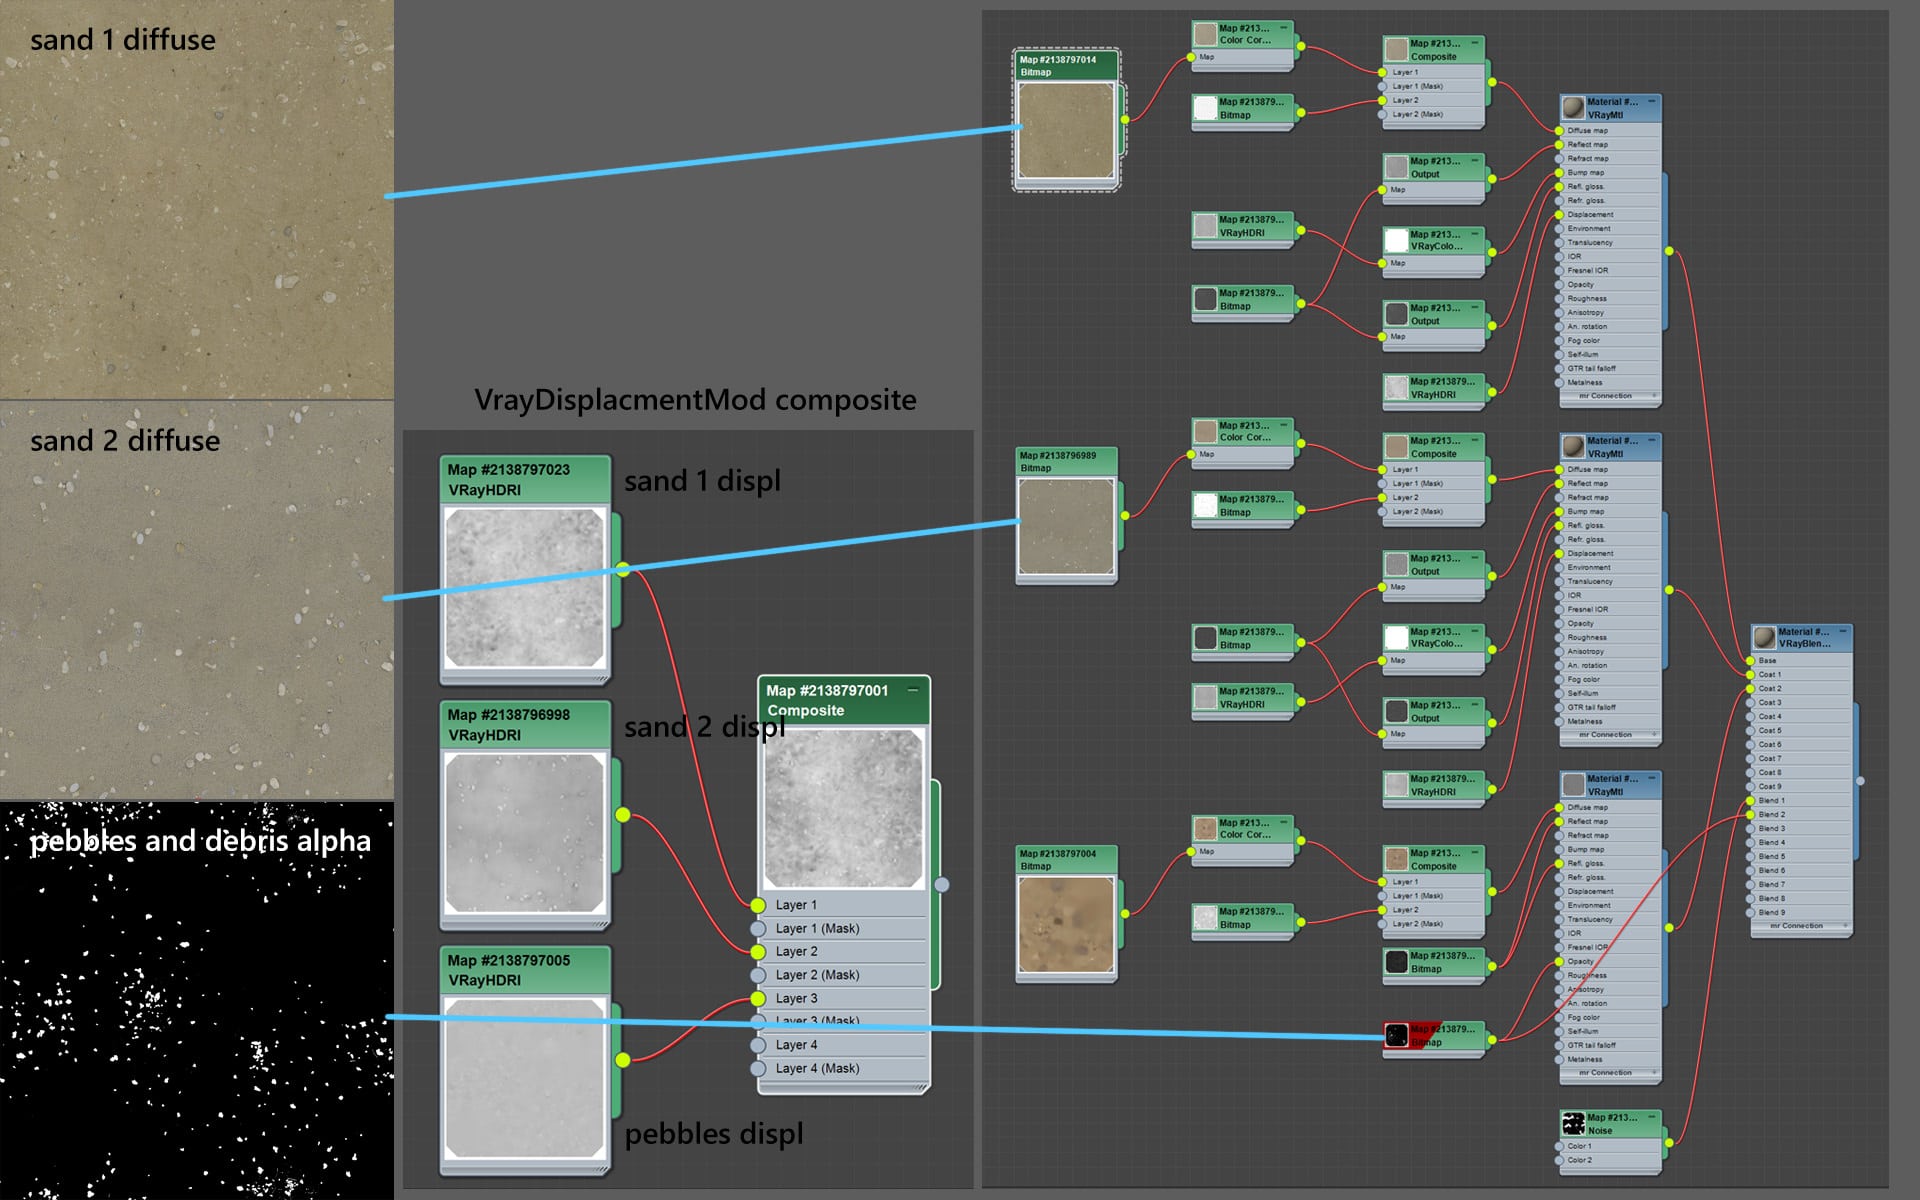
Ground cover is a mix of two textures from RD-Textures and overlaid with debris texture from Megascans.
Conclusion
Mea Terra turned out much better than we could have hoped for, even though we somehow saw the potential from the beginning. We took a much bigger bite than we could have handled, but with excellent communication, best intentions, and with much eagerness to make something that will satisfy the client, designers, and mainly us, I think we managed to handle it quite well.
“Mainly us” is mentioned because every artist is usually his worst critic. At the same time, there is nothing better that can happen, like when a commissioned project will become your thing.
Because then you can enjoy all the tests, trials, errors, new techniques, new approaches and spend a little more time until you are pleased with the result, not when you have to.
Selection of final images
This is, of course, a rare case, but I think it is a great thing to aim for this precisely. And the only way to make it more likely to happen is by taking risks and having patience.
We would not be able to do something like this 3-4 years ago, due to a lack of experience in any part of the job. But gradually, we gained enough confidence to reach out of the comfort zone and go for something crazier.
Just a piece of advice, it is contagious, and it’s hard not to try and do every single project like this.
 It was also encouraged by him, as I am a novice in this world of 3D/CG, I am not an architect nor the 3D/CG professional, and of course as a complete newbie I haven’t got any desires (until this famous Ronen’s email) to comment other people’s professional works, which are light years in front of my current 3D horizon.

