
Originally published at: https://www.ronenbekerman.com/making-of-rotterdam-office-3d-render/
Dive into the process of visualizing an office space with Walk The Room, as they take us through their steps with the making Rotterdam Office.
Hello,
Thank you for giving us the space to show one of our office interiors, we are really excited to present the project and the making of it here. At Walk the Room we would like to take the opportunity to also thank you all active forum members, whose compliments and comments inspire us to achieve even better results.
This particular office is located in the heart of a new district in Stockholm. For the design, we tried to create a place for the pioneers, innovators, and for anyone who wants to shape their future in the center of this Swedish development.
This working space is located close to a port, therefore we combined a series of classic and contemporary furniture together with a navy color palette.
However, we would like to emphasize our methods and techniques used in this project and present you with the Making of Rotterdam Office!
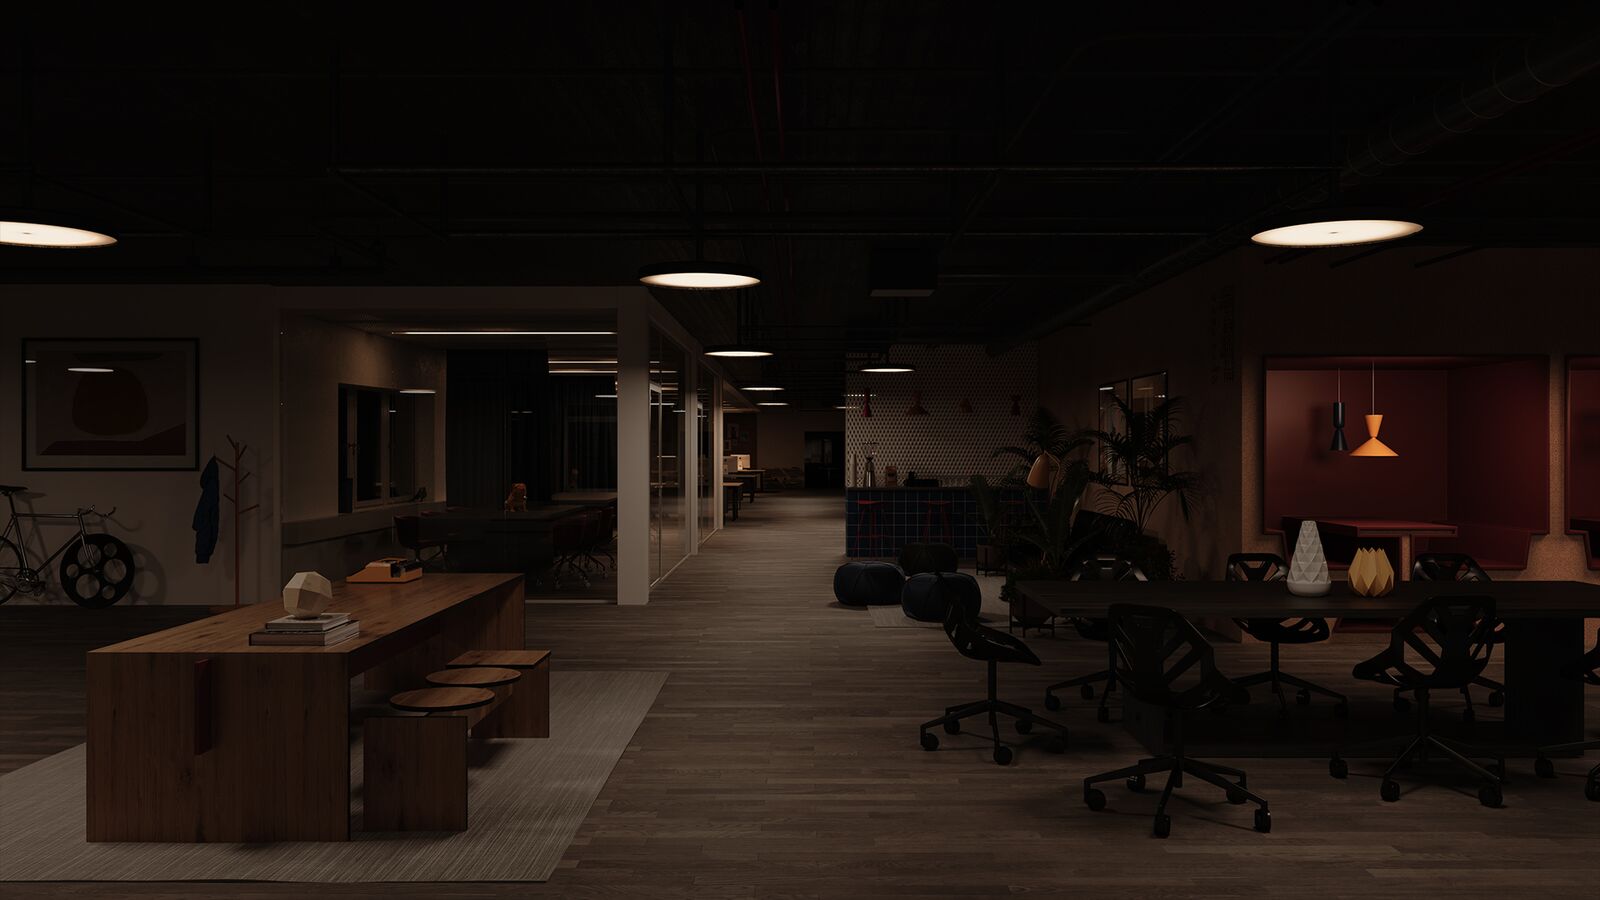
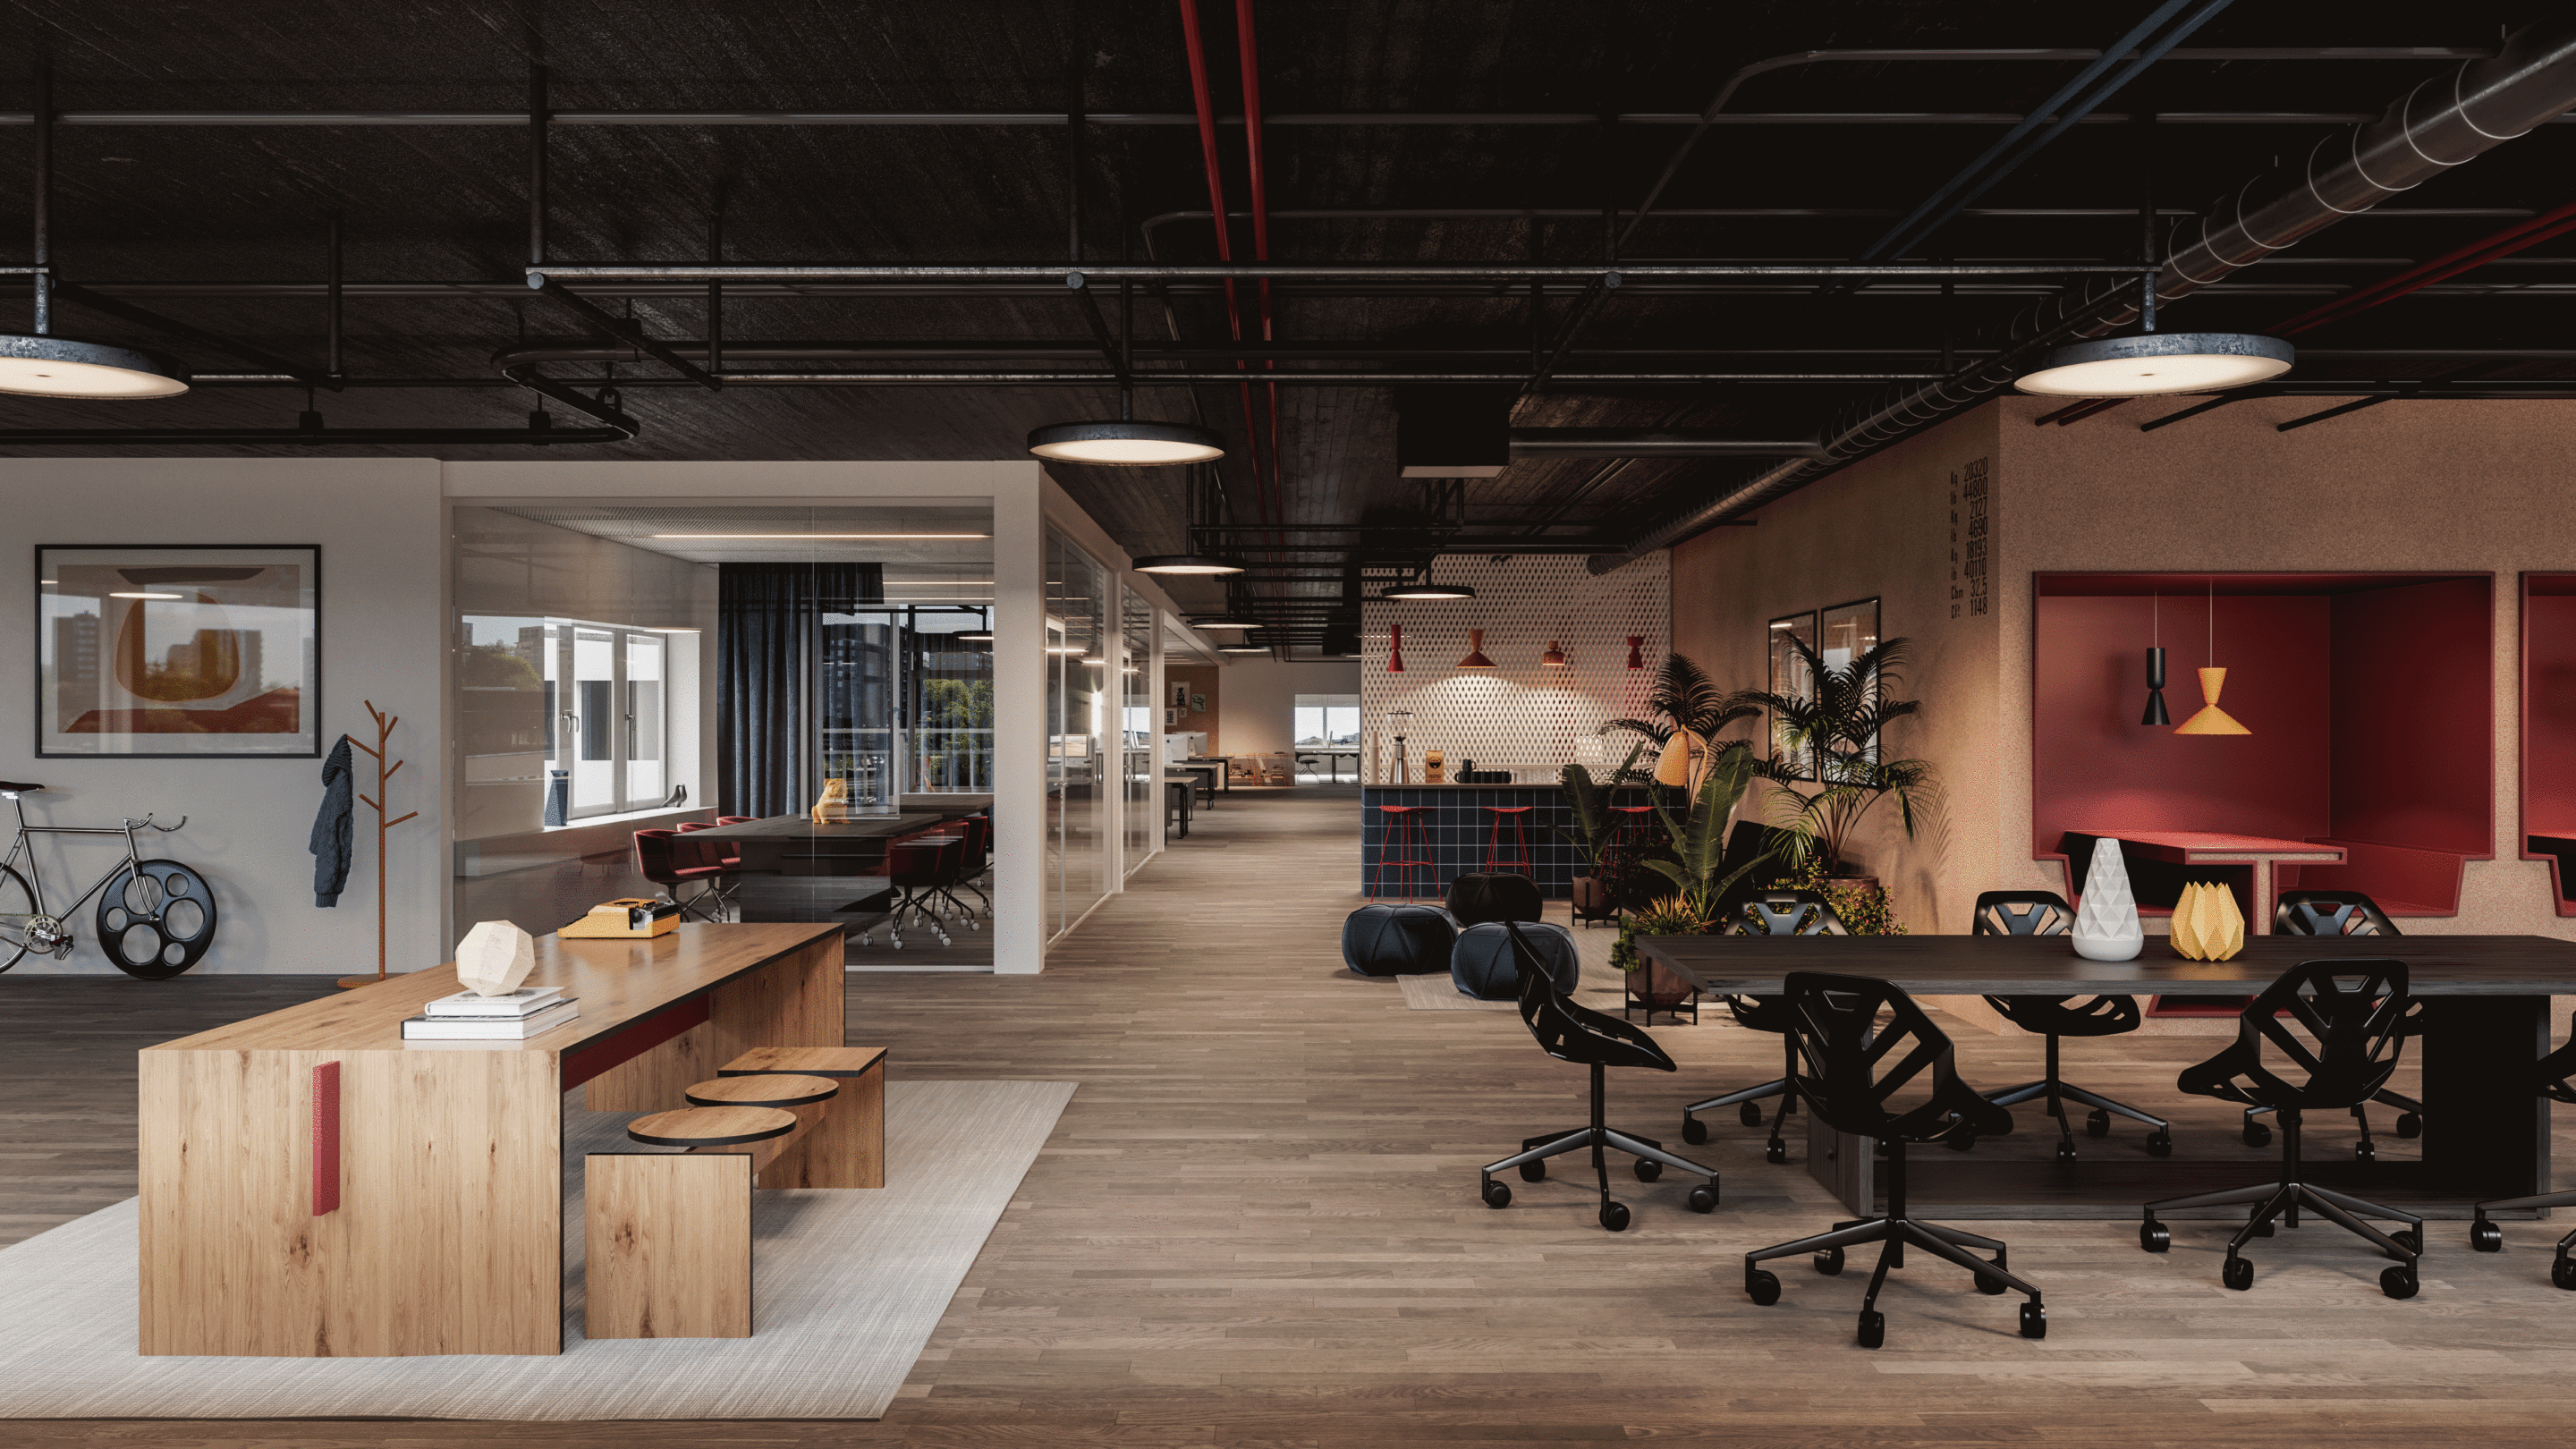
Here you can see the two main views.
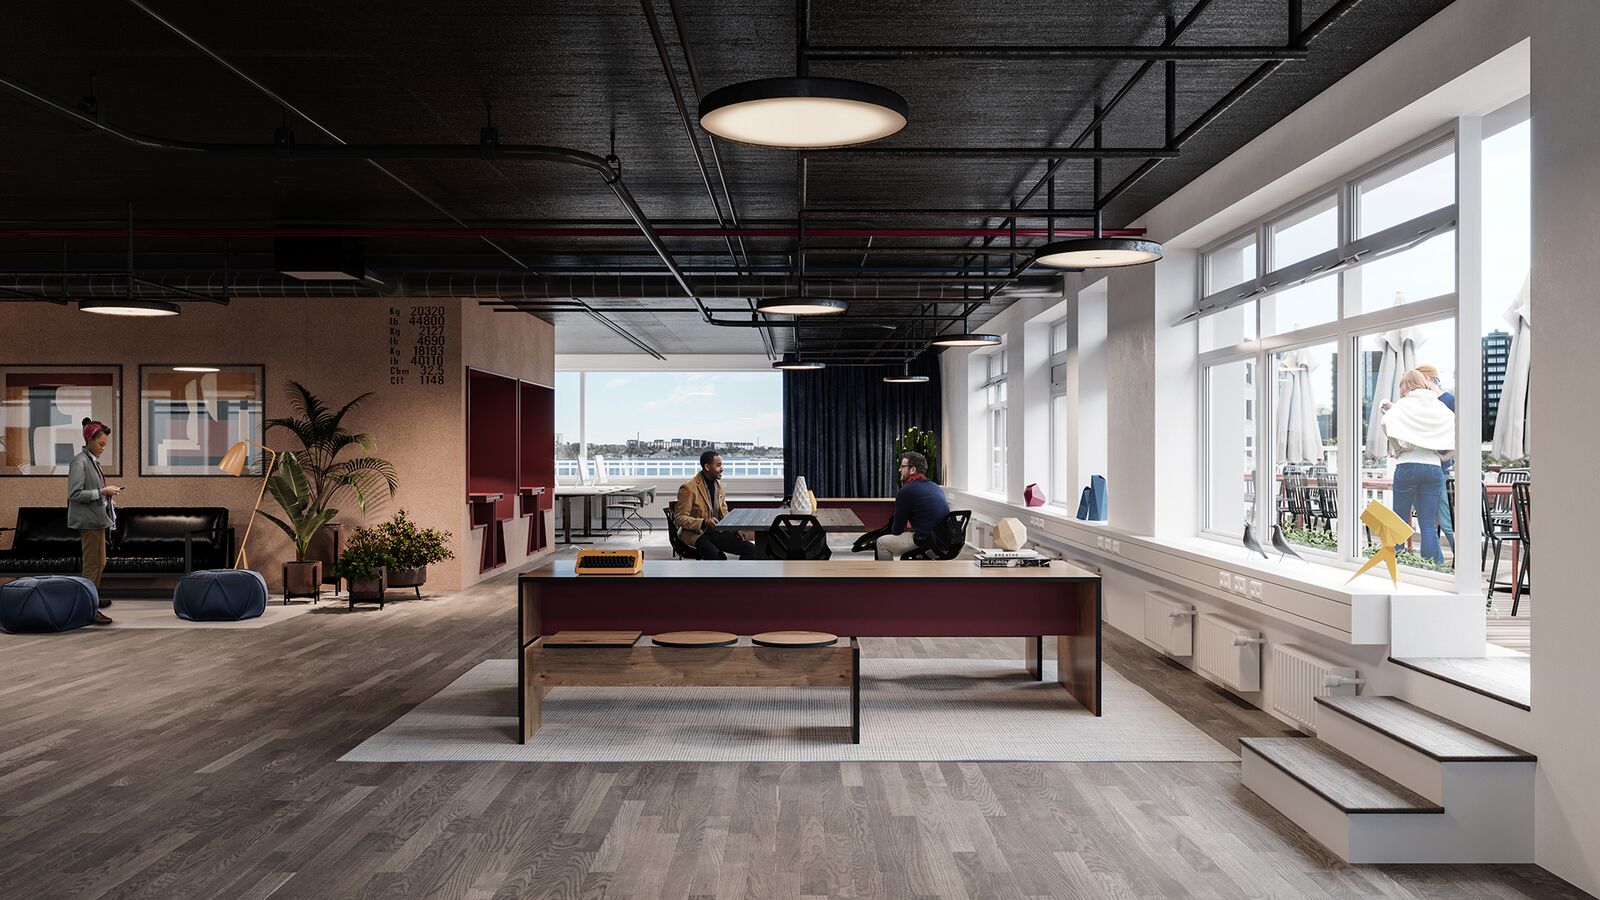
Working Area and Terrace
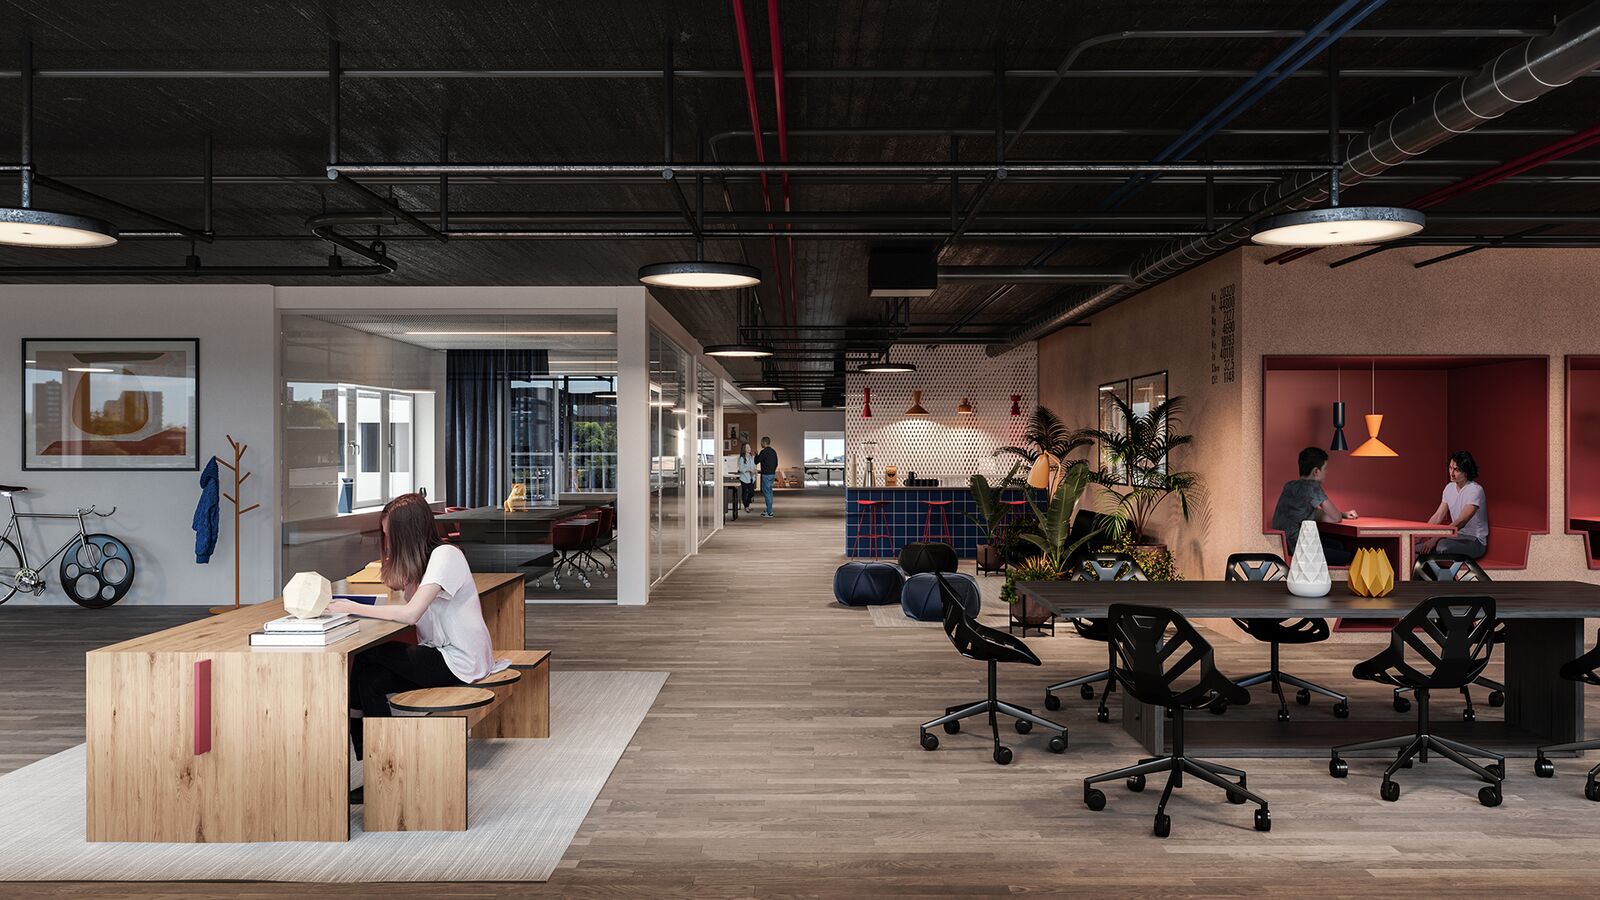
Working Area
Basic 3d Scene Setup
Here in the office, we use Corona Renderer. The settings in Corona are really straightforward. Almost everything is set as default, as you can see.
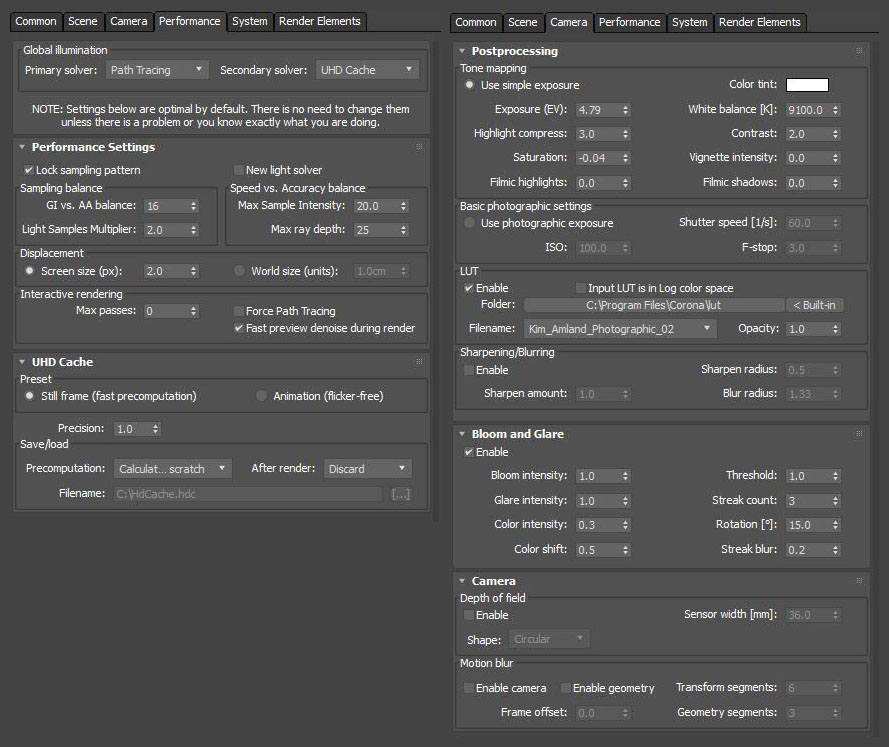
Corona Renderer – Render Settings
We decided to use the Kim_Amland_Photographic_02 LUT for this scene, we personally believe it’s a good LUT, creates a nice contrast and enhance the environmental light.
Interior Development
Our workflow in Walk the Room can be structured in 6 steps accordingly:
- Collection of materials from the client. Based on materials received we price the project and create a strict project plan for the client to follow. I.e. when they can expect the next draft and in turn when we expect feedback from them.
- An internal specification is made by an architect/project manager based on the client’s brief. Part of the specification is a mood board, which is also communicated to the client.
- Start of 3D production. We start by focusing on achieving the right feeling, the intangibles we picked up from the client’s briefing. The most critical part of any image is the composition and the mood. If it is done correctly it will reduce any ”unnecessary” comments from the client and establish trust in an early stage of the project.
- The first draft is presented to the client and feedback is collected.
- The view/s are amended according to the client’s wishes. An open dialogue with the client is key at this stage in order to help the client understand how the changes might affect the feeling of the image, both good and bad.
- The second draft is presented to the client and feedback is collected. At this stage, there should only be minor changes and the view/s are amended and delivered as FINAL/s.
In the project below you will see that we went straight to the final review, as this project was done for a client that we have been working with for many years and the trust has already been established.
This is the mood-board created by us. In this case, we got a request from the client to design some interiors related to the navy theme since the project is located in a port area.
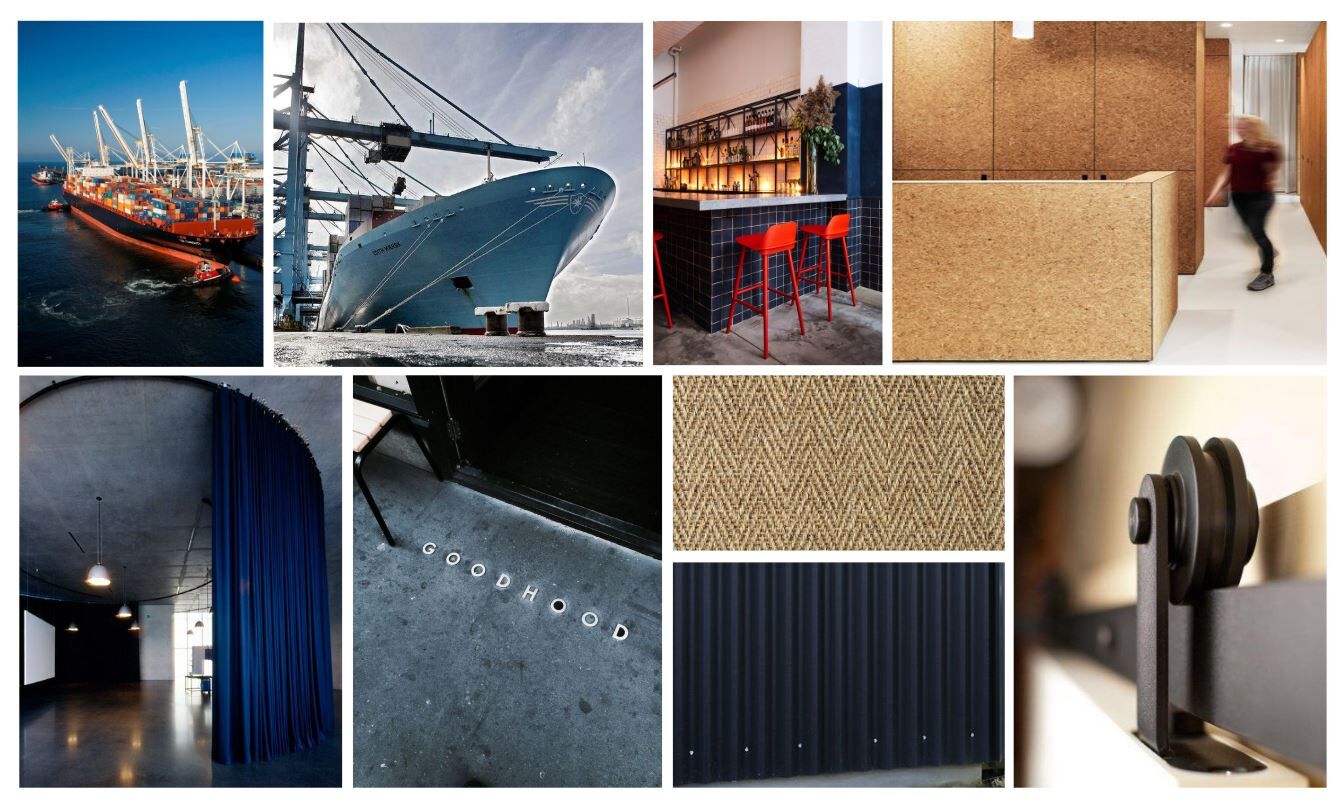
Dark blue against warm light brown and orange/red, concrete, corrugated metal, gunny/sisal, and industrial details
Modeling
For this working environment, we did not make any particular thing about the modeling.
Usually, we get some information from the client with the structure of the floor-plan in 2d, and we model the arrangement according to it.

3d Modeling
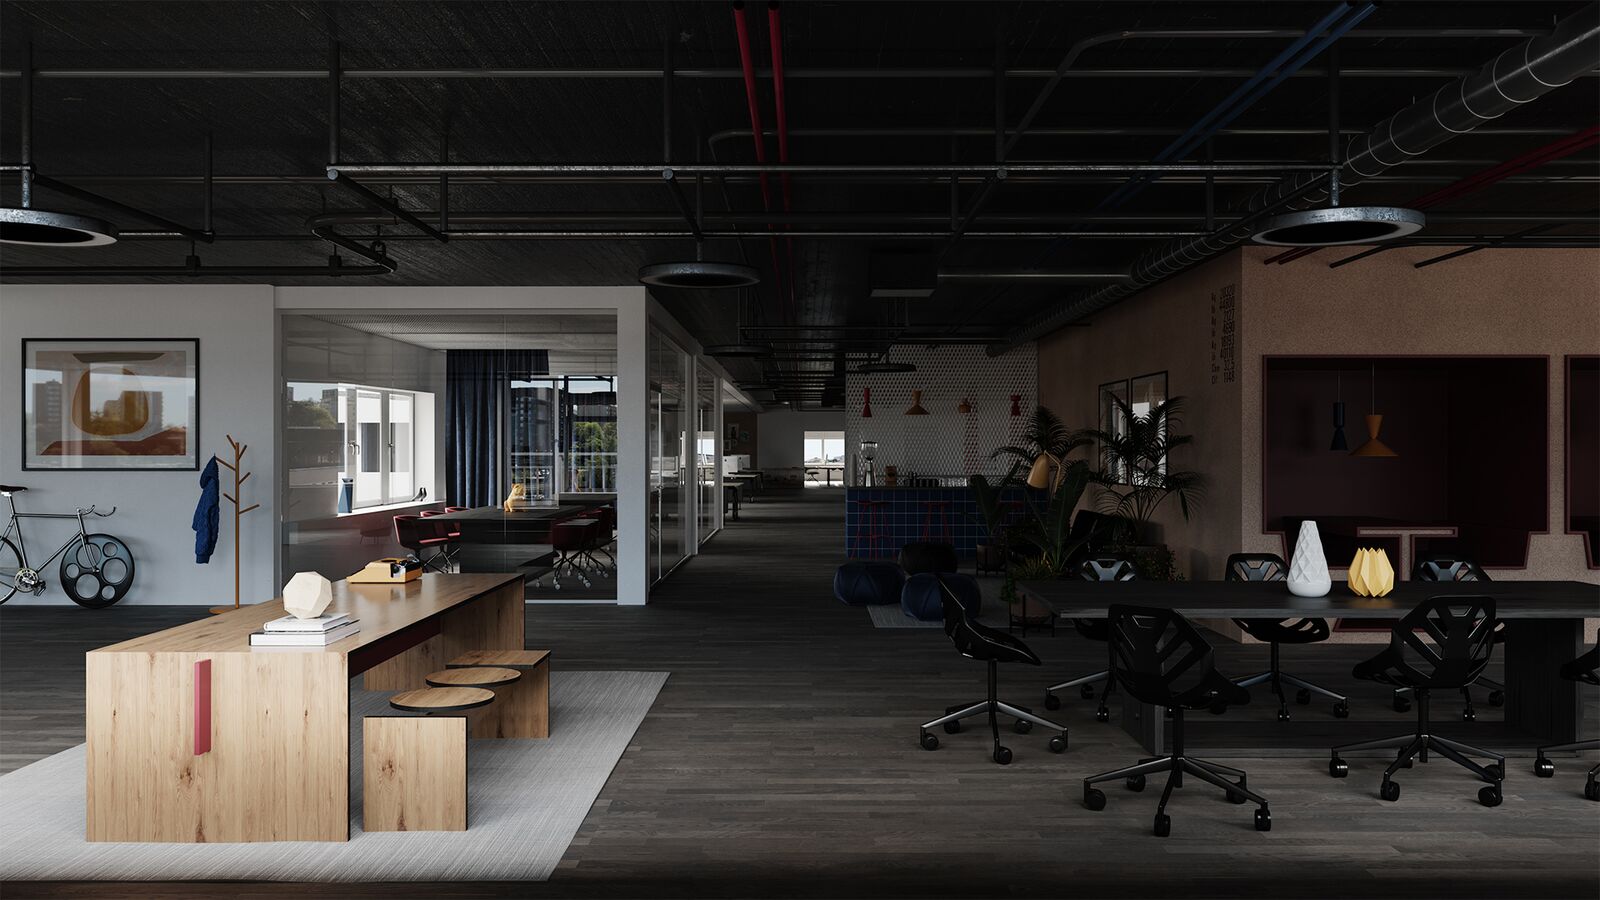
Pods, Meeting Rooms & Composition
Although, we think it is interesting to show the singular pods that we designed and created for the project in the context with the meeting rooms and the other different working areas.
Clearly, you can notice that in the first plan of the image, two working tables and in the second plan of the image we are showing the meeting rooms and pods.
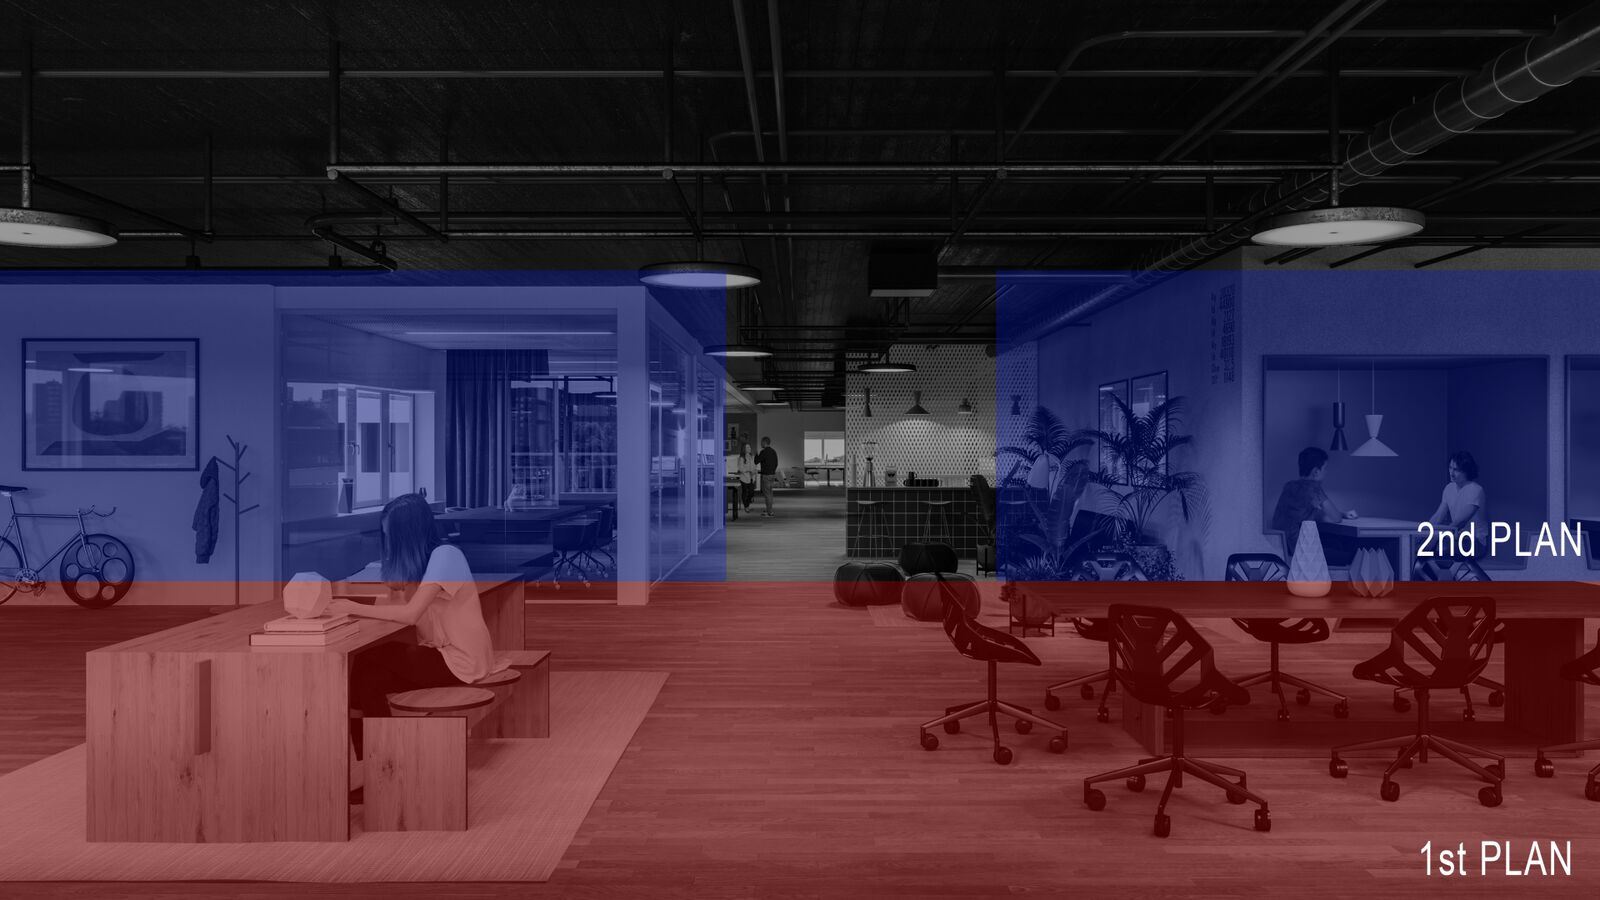
Composition Areas
Also, we disposed of the characters in strategic points, balancing the side and creating depth in the different plans of the image.
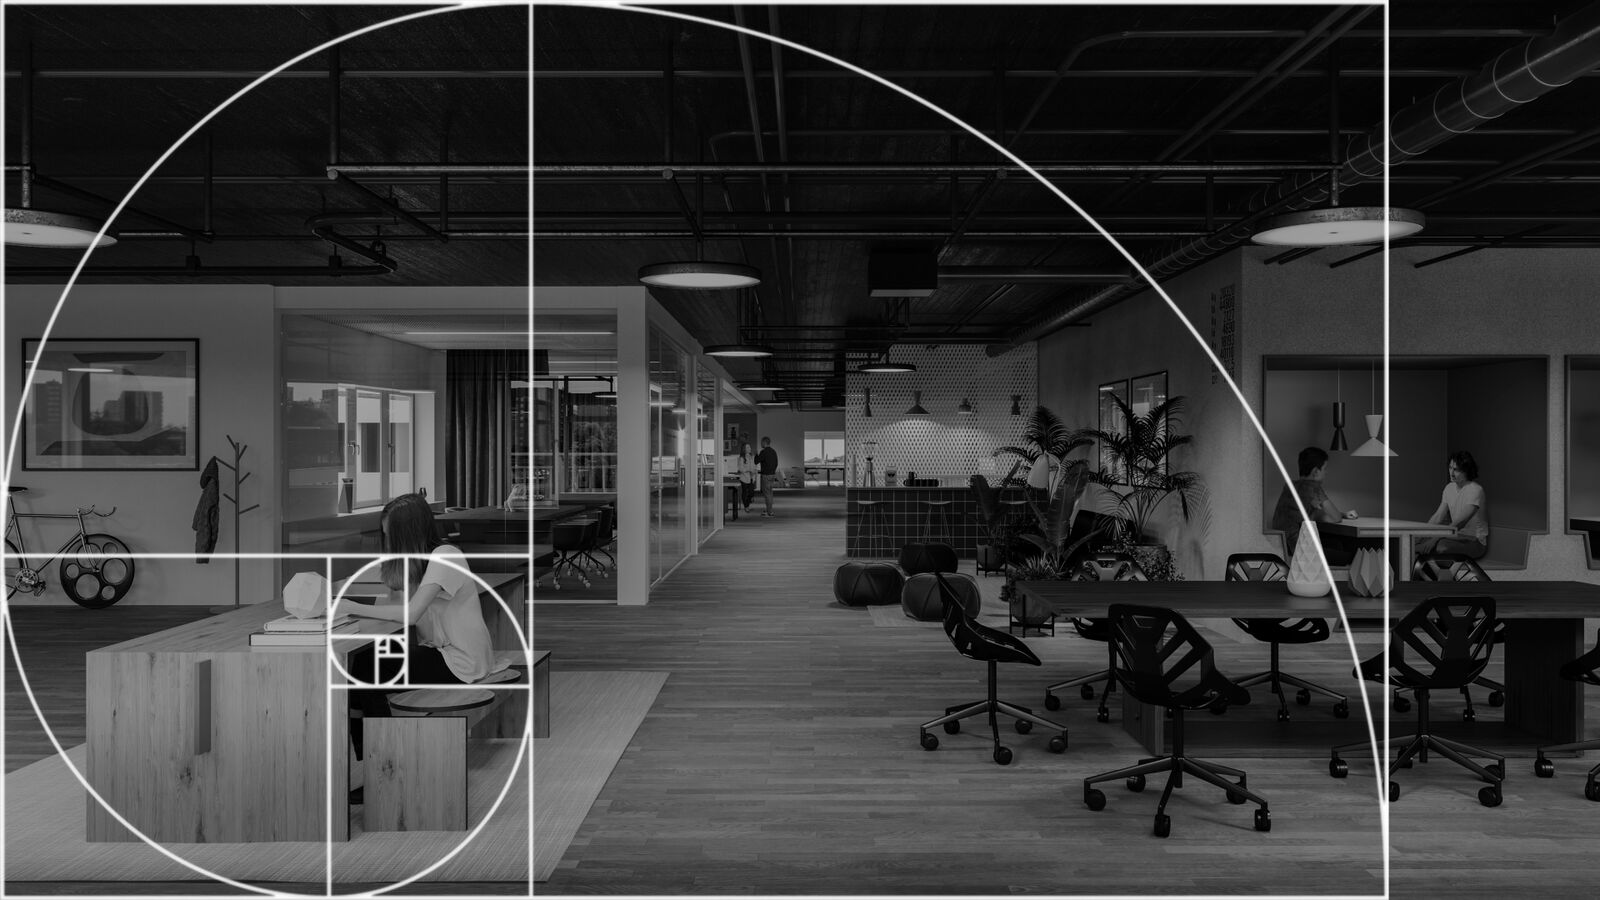
Composition Balance
Texturing and Materials
Flooring
Initially, the idea was to make the floor with the plugin floor generator that is used in a lot of projects. In contrast, when we tried with a wood texture from CG Source the result was according to the mood-board and clients needs, so luckily, we kept it.
Being honest, for this material we did not need so many maps, in the end, it was supposed to look mostly matte, this could be simplified for sure.
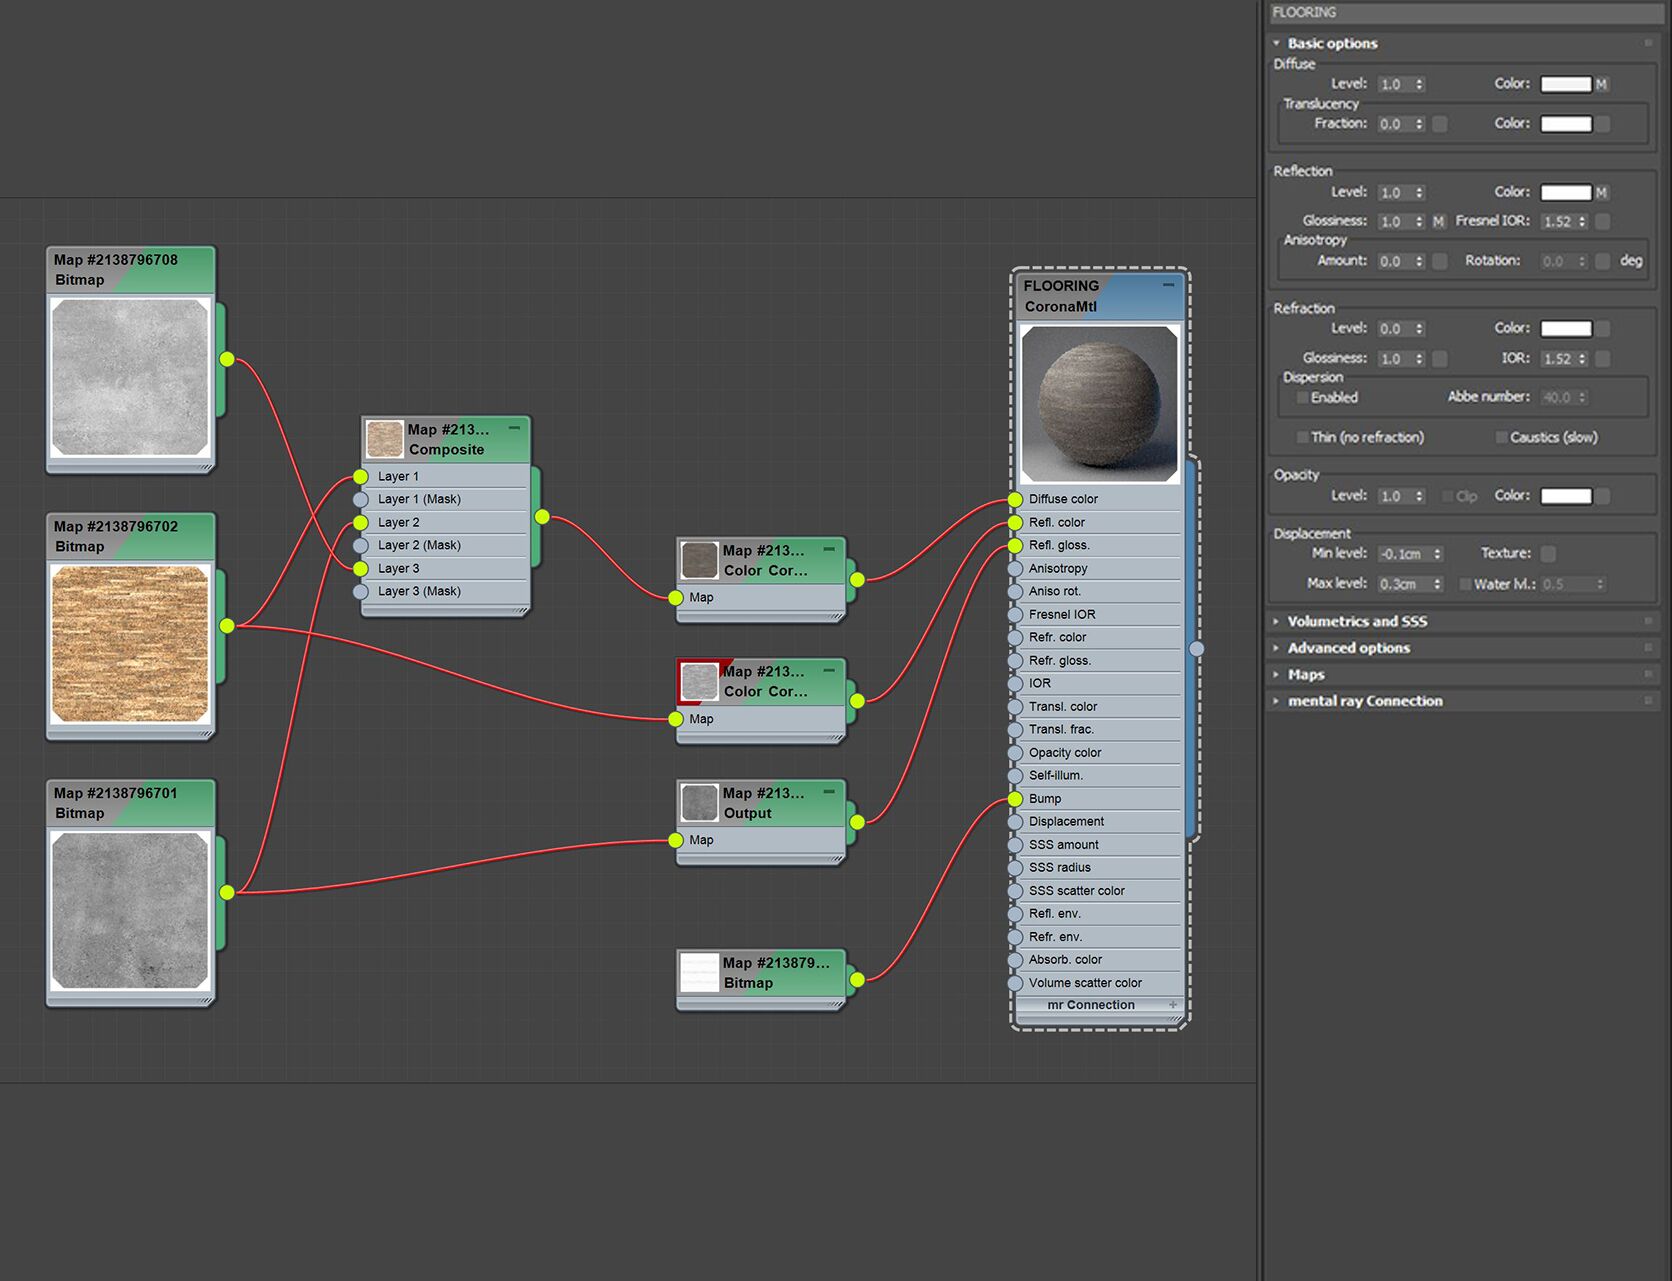
Flooring Material
Ceiling
The ceiling of the existing place is a little bit dark. We decided to use a Corona Renderer RaySwitch Material with a brighter material in the global composition slot, in this case, the scene was getting super dark without this trick.
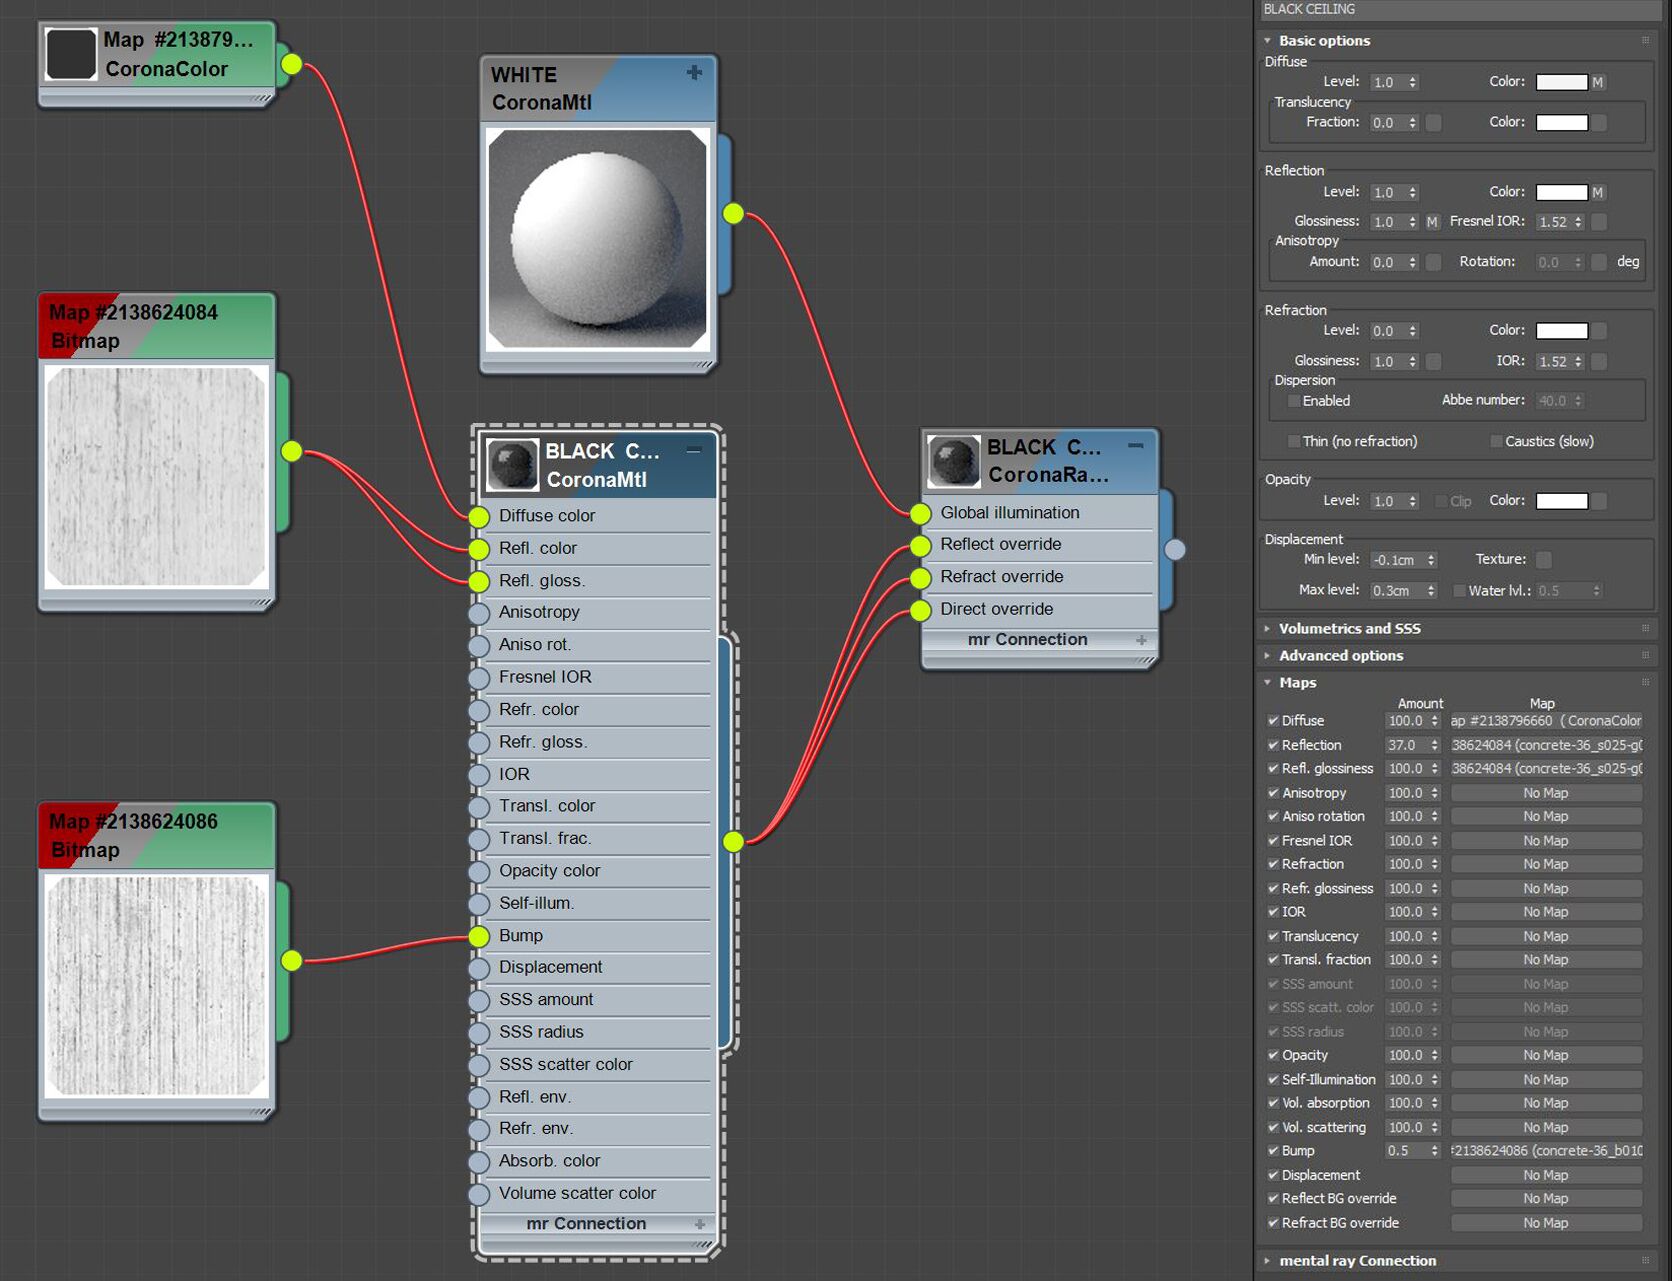
Ceiling Material
Walls
We chose a pure wall material with something really soft on the diffuse map, some slight bump and a little variation in the glossiness.
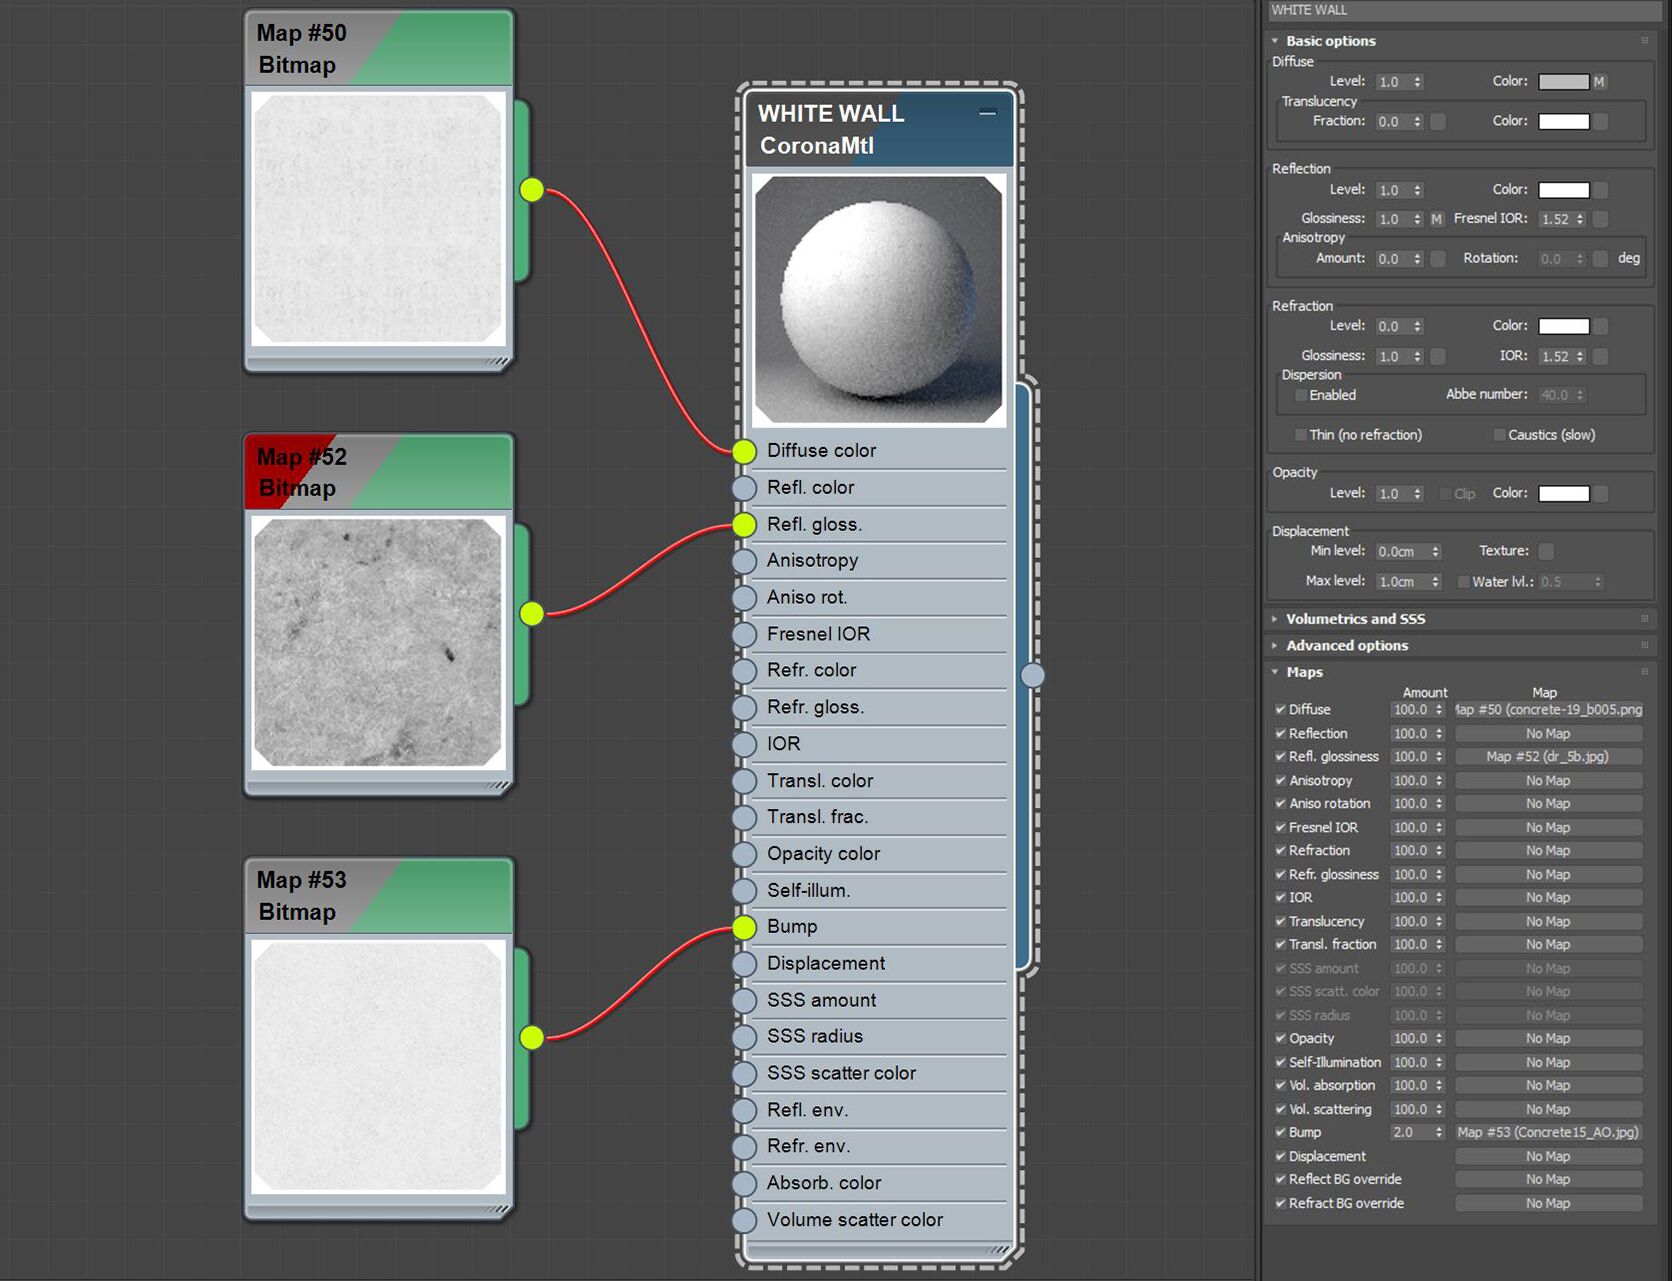
Wall Material
Flos light
For the Flos light system, we have a nice detail work with CoronaRenderer Ambient Occlusion on the material.

Flos Light Material
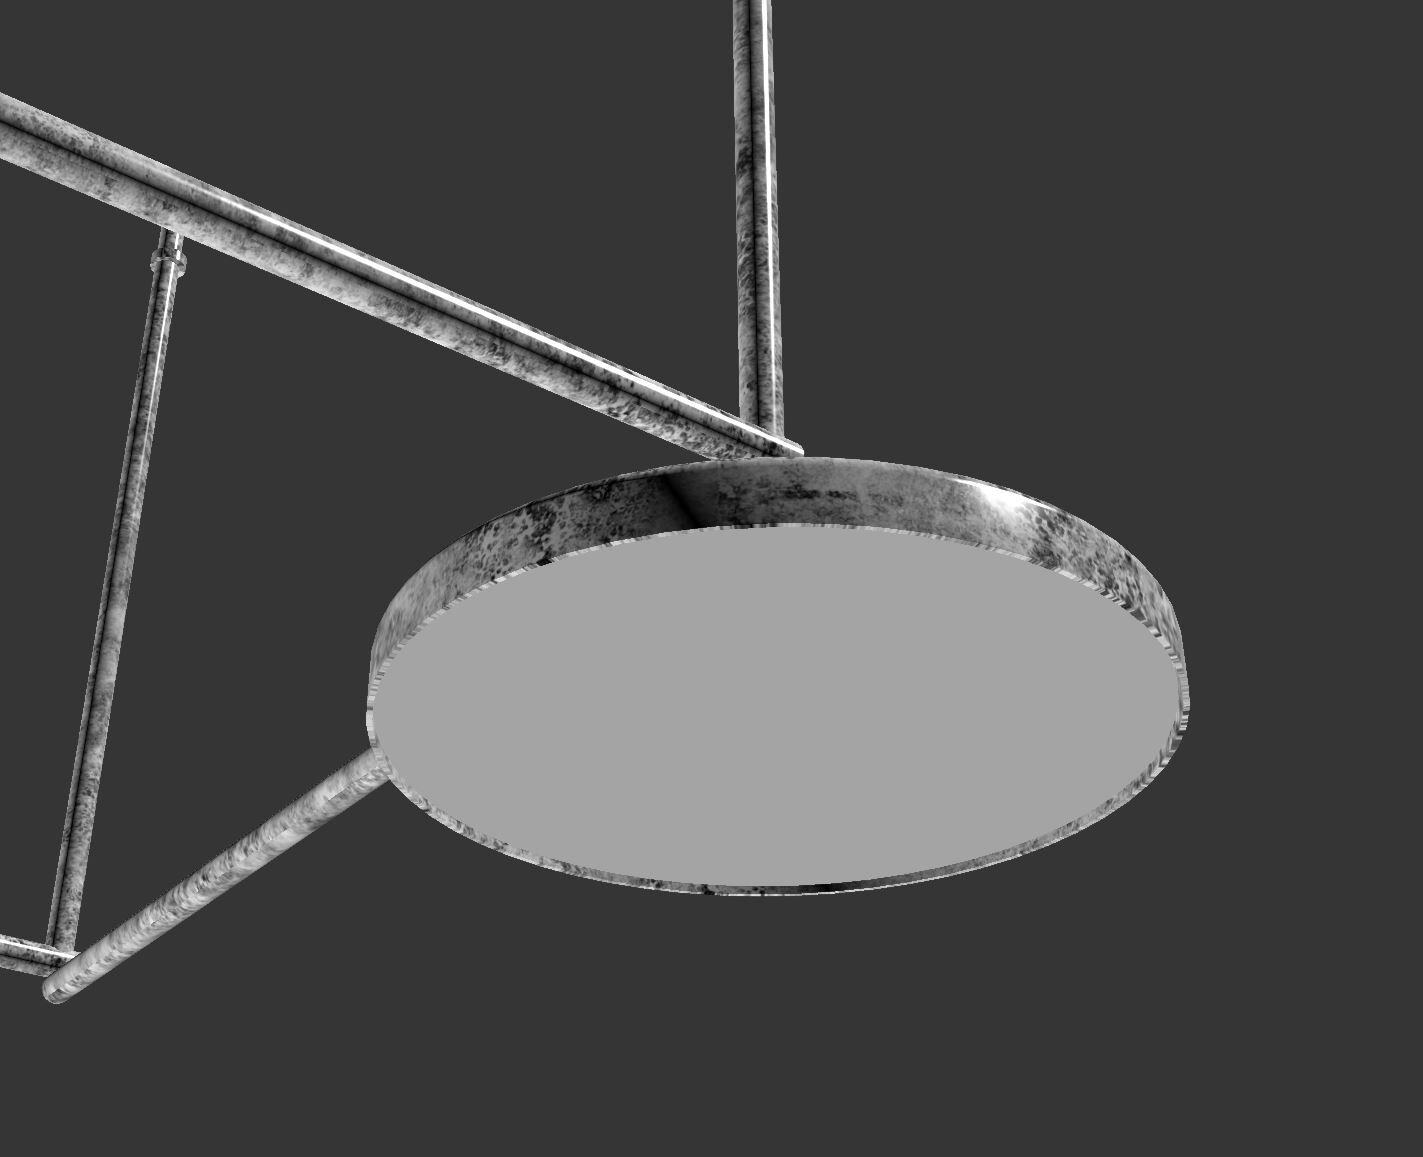
Flos Light Detail
Lighting
The light was divided into 3 groups
- Environment light.
- General artificial light.
- Spotlight.
In this way, it was better to set a good light for the scene without letting it dull or flat. In general, we think it is good to set up those 3 groups in parts. You have full control of what you are doing, like the intensity and color of the lights.
Moreover, we set the color contrast between the cold tone coming from the environment and the warm general interior light together with the spotlights.
Environment
The day-lighting was done with CG source cloudy_sun48deg_0069-01 which it’s perfect for overcast interior scenes.
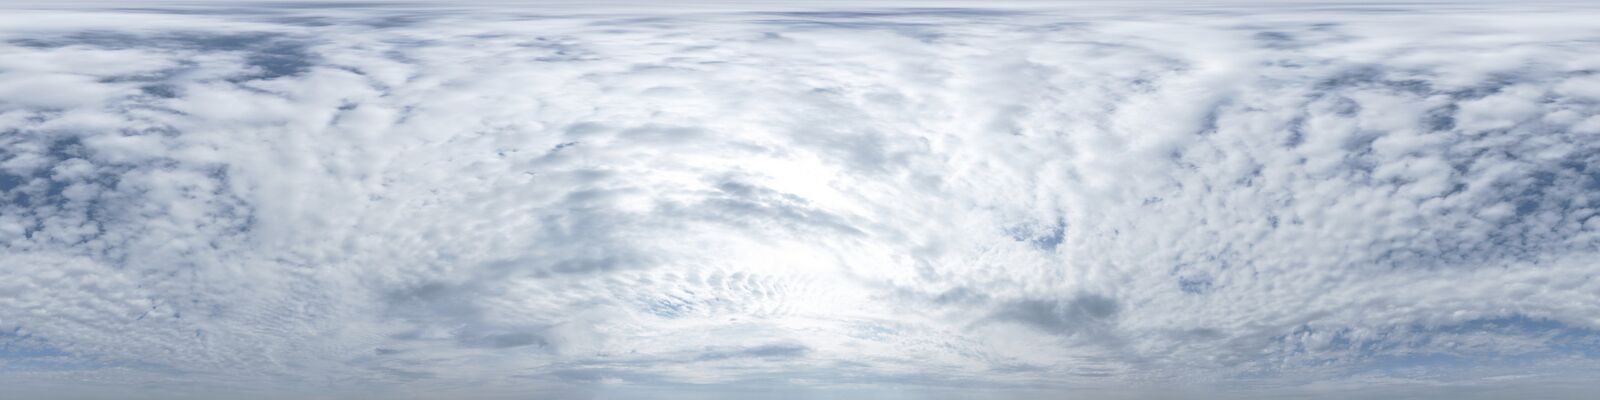
Lighting HDRI
Interior with HDRI Lighting
General light :
General Lighting
Spotlights :
Spotlights Lighting
All Lighting Result :

All Lighting Result
Rendering
The images were rendered with Corona Renderer.
It’s useful to use Corona Render LightMix in this case, because in some details shot just change some intensities and colors it’s possible to set another mood without rendering all again.
[av_masonry_gallery ids=’119288,119289′ items=’-1′ columns=’flexible’ paginate=’pagination’ size=’flex’ gap=’large’ overlay_fx=’active’ container_links=’active’ id=” caption_elements=’title’ caption_styling=” caption_display=’on-hover’ color=” custom_bg=”]As we mentioned before, we did not get any comments from the clients regarding the design or mood.
They actually said:
“Now you’ve probably surpassed yourselves, actually! GRYMMA (cool in Swedish) visualization pictures… (Can you add some people?)”
Post Production
Finally, we added some people.
In general, an important thing is to find the right 2d cutout people fitting the view perspective and lighting. After that, adjustments in the levels and color are almost always necessary.
Usually, the image is saved already in a non-linear way from the frame buffer.
Corona Renderer tools in the framebuffer are powerful, so massive changes in Photoshop are not necessarily needed. Just some color balance on the final image.
And that’s it!
Thank you for your time and interest. We really hope this information will help someone out there. For learning more about this project check the images below or visit our website.
[av_masonry_gallery ids=’119291,119292,119293,119294′ items=’-1′ columns=’flexible’ paginate=’pagination’ size=’flex’ gap=’large’ overlay_fx=” container_links=’active’ id=” caption_elements=’none’ caption_styling=” caption_display=’always’ color=” custom_bg=”]Thank you for reading and watching!