
Thanks @ronen
About your questions:
Back to the old and good 3DS Max that I’ve been using for the last 15 years 
My goal was to import the Sketchup project in 3DS Max and do all the necessary preparations for later exporting it to Unreal. By “preparations” I mean subdivide or merge meshes together to get decent surface area for each object and generate proper UVs for lightmaps.
But that specific Skecthup model that I got was too messy. Lots of geometries with missing faces, walls and floors were not precisely placed (with gaps between them) etc… So I decided to remodel the house from scratch using the dwg blueprints as basis.
That is an interesting thing to note in Unreal workflow for archviz. You can easily get away with “bad geometry” in offline renders. Mainly if you’re going to show only a small part of it. But for real-time in Unreal you want the geometries as “perfect” as possible to avoid headaches in the next steps of the workflow. UV for lightmaps, lightmass calculations, performance, real-time shadows… All of that depends on the geometry somehow.
I like to use this website to find terrain data and download the heightmaps: http://terrain.party/
For the satellite imagery I use Google Earth.
Ok, let’s talk more about that because I think it is a major flaw in UE4.
I can say that my baseline is the default UE4 values. If you place a skylight and a sunlight in your scene their default values are 1 for the sky and 3.14 for the Sun. If I’m not mistaken, Epic says that that proportion will get you physically accurate sunny daylight intensities.
But you want a sky texture in your scene so you add a dome with a sky texture or a Atmospheric Fog actor. Now that skylight value of 1 only acts as a multiplier for the intensity of whatever it is grabbing light information from. Your sky intensity now depends on the HDR texture you’re using or the settings of your Atmospheric Fog actor or color of a third party sky blueprint…
And now you need to tweak the intensity of that skylight source to get the physically correct light. But how do you do that? You could use a table like the Sunny 16 rule as basis. But for that to work you’d need a physical camera system. You have one in UE4, but if you set its exposure parameters to match the Sunny 16 table you’ll get a pitch black image because the values used in the Sun/Sky lights don’t make physical sense… You could increase them (a lot) until you start seeing something and use a real photo as basis to discover some proportion between UE4 units and Lux per example. And you can do that indeed but then you’ll start getting glitches all around (with reflection probes and auto exposure) because those other systems clearly are not prepared to work with such high light values.
The user Daedalus51 has a great post where he brilliantly discusses about that in Epic’s forum: https://forums.unrealengine.com/development-discussion/rendering/1414326-4-19-physical-lights?p=1454629#post1454629 (That guy is awesome by the way. He works at Dice and has a series in Youtube about lighting in UE4. Lots of precious information there: https://www.youtube.com/user/51Daedalus/videos)
In the end what I do is to use real photo references to eyeball the correct light intensities while keeping the sunlight and skylight values at their “normal” range in the engine.
- I start setting a Post Process volume with no effects at all (0 bloom, 0 vignette, fixed exposure…).
- I place a sunlight with a value similar to its default (something around 3.14) to make sure all the other systems will behave properly.
- I place my skylight and set a skydome with the sky material (unlit) I want.
- Sunlight position must be adjusted to match the Sun in the texture.
- I plug a multiplier parameter to the sky texture, create a material instance and tweak it in real-time until I get the light intensities the way I want. Here I use the photo references (or sometimes only guessing).
That’s with the preview lighting. After building lights things changes and another round is needed for tuning. Sometimes Post Process adjustments may be enough though.
Each change in light condition requires at least a new round of that process. If I change Sun height and sky texture it’ll not be possible to guess the new values that will result in precise lighting for the new condition. And I’m the kind of guy that is constantly playing around with light until I find something that pleases me, so I spend a lot of time with that process.
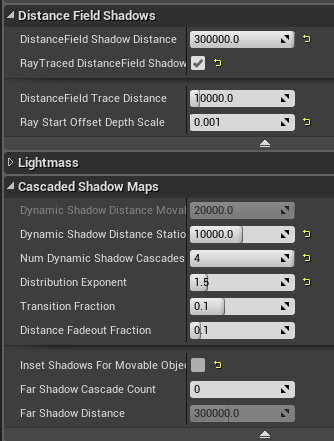
The project is huge but only the house and some elements around it are static. So I wouldn’t expect 12h of light building… My last interior project builds in 3~4h with same lightmass settings and has similar amount of static objects. That is a lot of room for optimization though. Mainly in lightmap resolution for those little meshes imported with Datasmith. Maybe I can improve that time if I can decrease the RAM usage so my system won’t use virtual memory cashing.


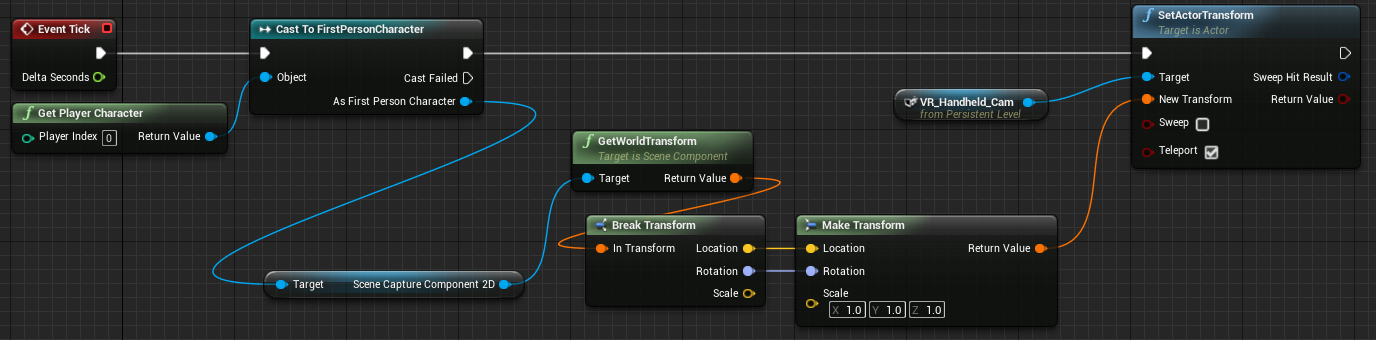
 and apply a material to it with the render target linked to the SceneCaptureComponent2D. Now you have a smartphone filming stuff in VR that you can actually see the stuff it’s capturing in VR
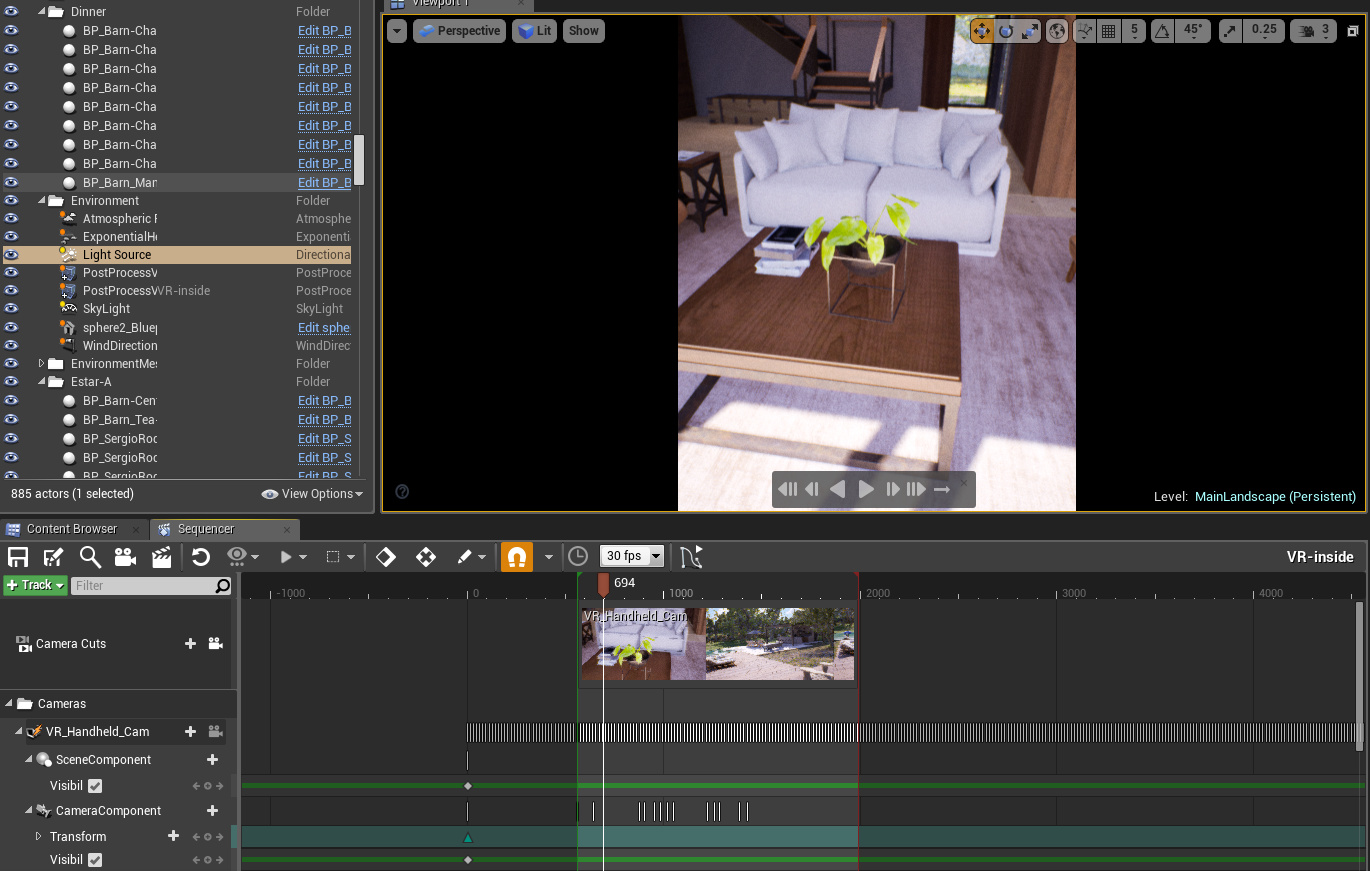


 . Each one with different focus and mood. I’ll be releasing them in the next couple of days and here is the first one. I hope you guys enjoy it